Introduction
Hasura is a cutting edge graphql engine destroying the need to build CRUD apps. Fully equipped with migrations, event queues and remote schema joins making it easy to supercharge a single graphql endpoint.
KintoHub is working to become a next-gen production-grade cloud package, enabling developers to NoOps their way into rapid releases at massive scales just like the big boys. (Netflix, Facebook, Google, etc) except 100's of engineers not required.
The Problem?
When you have two or more people working on any project together, problems arise faster than you’d think. That’s why Git, Branches, Pull Requests and more were invented. Similarly with Hasura and KintoHub, working directly with the Hasura Console or deploying only single-branch repositories on KintoHub works great for individual projects, but you would not want to do this with a team sharing the same environment as you may interrupt someone hard at work!
It’s important for developers to easily obtain a local, isolated environment to make and test changes before committing to a collaborative group environment such as dev or staging.
The goal? Let’s introduce new changes to your backend database and services with zero downtime, including when you deploy changes to your customers. In order to achieve this, it’s important to create stateless services and backward compatible services which are outside the scope of this article. But what is key for your team is to follow a simple process to achieve high uptime, less merge conflicts and dodge bugs with isolated environments.
Teams have invented many ways to manage branches for collaboration. We will be following Git Flow with a simple dev and prod environment based on a dev and master branch. To introduce changes into dev via feature, bug and hotfix branches.
Setup Git
Clone our (template)[https://github.com/kintohub/hasura-template) to your git organization/user.
(Signup)[https://beta.kintohub.com/) to KintoHub. Then click "Create KintoBlock"
Select the Create Website Block.
Connect to GitHub and grant access to all or the hasura-template repository from step (1).
Select the hasura-template repository then press Continue.
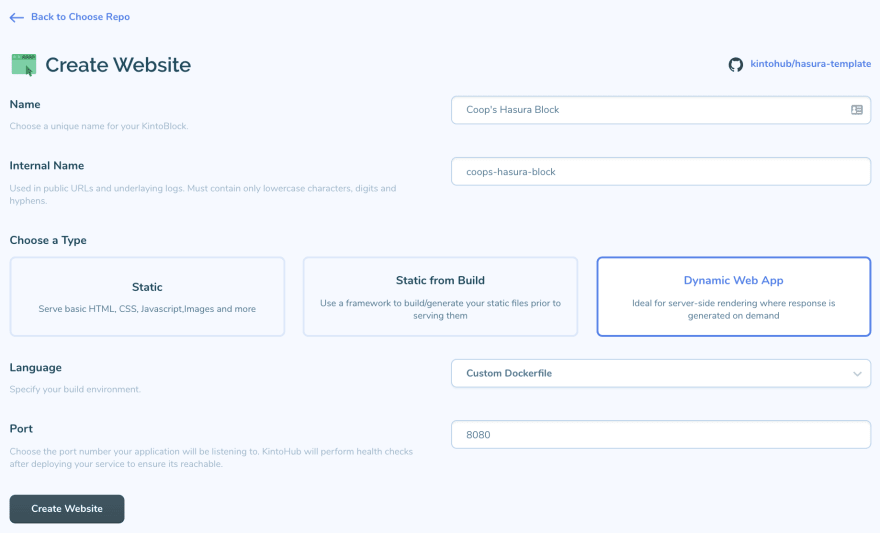
6 Enter a name for your Block and then select Dynamic Web App
- Enter the port 8080 then click Create Website
Should look like this:
Build your beast
Once you create your block a build will automatically be deployed. If curious while you wait, can check out settings at the top right or enable continuous integration under the build settings!
Deploy your beast
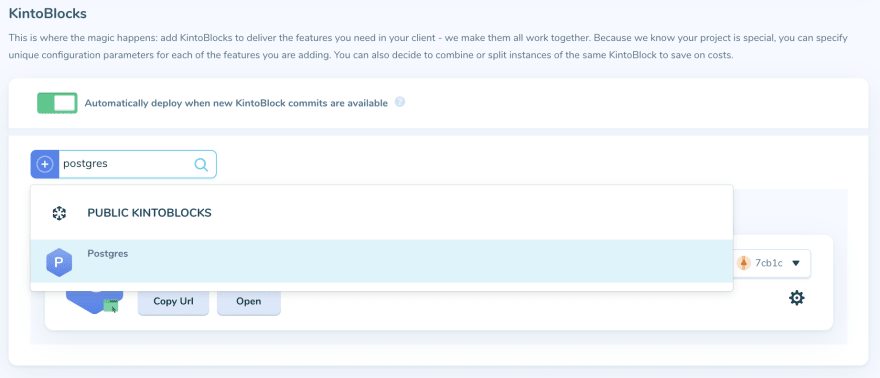
There's a nice deploy now button at the top right. Click that, set an environment name. You'll now need to add postgres to your deployment. Search for it - then add it. BOOM.
Once done, click Deploy
That's it!
Sincerely curious what the dev.to community thinks. First post, wanting to write more! Let me know!


Top comments (0)