Learn how to add an options page to your Chrome Extension
Introduction
This is a continuation of the previous article about creating a Chrome Extension using Svelte and Tailwind. This article will focus on adding an Options page to the extension.
What is a Chrome Extension?
A Chrome extension is a software program that extends the functionality of Google Chrome. It modifies the browser's behavior and adds new features.
What is a Google Extension Options Page?
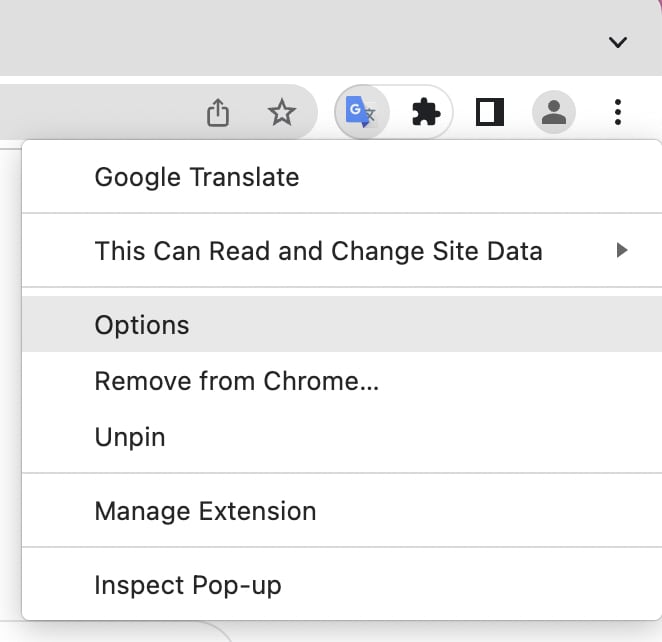
The Options Page is a page that allows users to configure the extension. It is a page that is opened when the user right-clicks on the extension icon in the toolbar; then, clicks the Options menu.
By default, the Options option is not available. We will add it in the next section.
Project setup
Clone the repo from the previous blog
The easiest way is to use degit.
npx degit codegino/svelte-tailwind-chrome-plugin#01-intro my-target-folder
Install the dependencies.
cd my-target-folder
npm install
Create the content of the options page
<!-- src/options/index.html -->
<!DOCTYPE html>
<html>
  <head>
    <meta charset="UTF-8" />
    <title>Popup</title>
  </head>
  <body>
    <div id="app"></div>
    <script type="module" src="./index.ts"></script>
  </body>
</html>
It is important to match the absolute file path with the one in the manifest file.
Create the options script
// src/options/index.ts
import '../app.css';
import Options from '../components/Options.svelte';

const target = document.getElementById('app');

async function render() {
  new Options({target});
}

document.addEventListener('DOMContentLoaded', render);
Create the Options Svelte component
NOTE: I'm using Svelte here because it was a focus of the previous blog. Do not focus too much on the content of this component because an Options page could contain anything.
This example contains a simple form that allows the user to update the count from the input field to the local storage.
// src/components/Options.svelte
<script lang="ts">
  import { onMount } from "svelte";

  let count = 0;
  let message: string = null;

  onMount(() => {
    chrome.storage.sync.get("count", (data) => {
      count = data.count;
    });
  });

  const handleSave = () => {
    chrome.storage.sync.set({ count }).then(() => {
      message = "Updated!";

      setTimeout(() => {
        message = null;
      }, 2000);
    });
  };
</script>


<div class="flex flex-col py-[3%] px-[2%] bg-blue-50 h-screen">
  <h2 class="mb-5">Options Page</h2>
  {#if message}
    <span class="font-bold text-blue-800">{message}</span>
  {/if}

  <form on:submit|preventDefault={handleSave} class="flex flex-col gap-4">
    <div class="flex items-center gap-2 w-full">
      <label for="count" class="text-lg font-bold text-gray-700">
        New Count:
      </label>
      <input
        type="number"
        id="count"
        name="count"
        class="border border-gray-300 rounded-md p-2 flex-1"
        bind:value={count}
      />
    </div>
    <i>Add other configurations here!</i>

    <button
      class="w-full bg-blue-500 text-white text-base font-bold py-2 px-4 rounded"
      type="submit"
    >
      Save
    </button>
  </form>
</div>
Update the manifest file
The manifest file contains the necessary information for the browser to load the extension. For more information, check out the Chrome Extension Manifest
Simply add the options_ui property to the manifest file.
// manifest.json
{
  "name": "Svelte Tailwind Chrome Extension",
  "description": "Sample Extension using Svelte and Tailwind",
  "version": "1.0",
  "manifest_version": 3,
  "action": {
    "default_popup": "src/popup/index.html"
  },
+  "options_ui": {
+    "page": "src/options/options.html",
+  },
  "permissions": ["storage"]
}
Build and load the extension
- Run
npm run devornpm run build - Open the chrome extension page by typing
chrome://extensionsin the address bar - Enable the developer mode
- Click on the
Load unpackedbutton - Select the
distfolder - Open the extension menu; then, click the loaded extension
Open the options in a new tab
By default, the options page is opened in a popup. We can change this behavior by adding the open_in_tab property.
// manifest.json
{
  // ...
  "options_ui": {
    "page": "src/options/options.html",
+    "open_in_tab": true
  },
  // ...
}
Now the options page will be opened in a new tab.
Repository
Check the source code here
What's next
- ✅ Sync plugin contents without reloading
- [ ] Add a content script
- [ ] Add a background script
- [ ] Add a dev tools page
- [ ] Deploying the extension


Top comments (0)