
Authentication has always been a critical aspect of web development, with user data security being paramount.
As the digital world continues to evolve, so does the need for more efficient and secure authentication methods. However, users do not necessarily want to remember secure logins for every app they use.
This is where OAuth Single Sign-On (SSO) comes into play. OAuth simplifies the user authentication process by allowing users to log in with accounts they already have with other services like Google, Facebook, or Microsoft.
In this article, we will explore how to incorporate OAuth SSO into a Next.js project with JSON Web Tokens (JWTs) and Next.js’s new app router, and later see how Clerk, an authentication service, can help simplify this and make it more secure. We will focus on GitHub SSO for simplicity, but most other OAuth providers can be implemented similarly.
Before we get started, if you ever need to look at the full source, code, the example code is on GitHub.
Set up the project
Before we start, make sure you are on Node v18+. You can check this by running node -v in a terminal.
Scaffolding
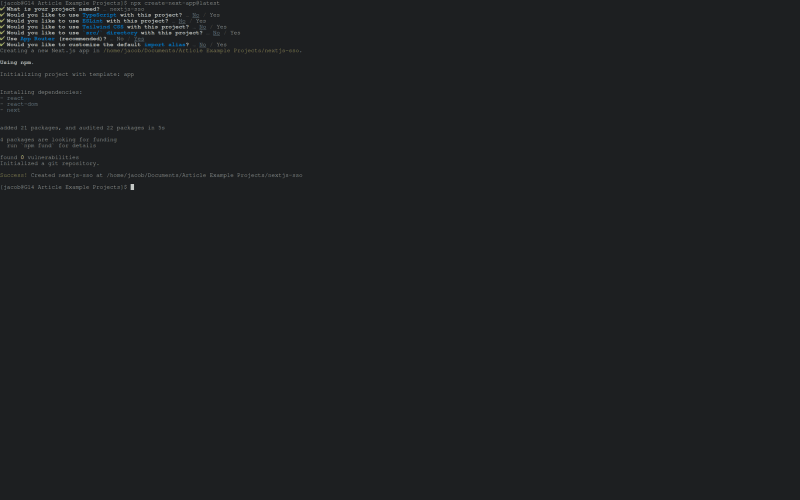
We will use create-next-app to scaffold our project. First, you will want to open a terminal in the directory you want to put the project in and run
npx create-next-app@latest
If you want to use a different package manager, use their own counterpart to npx, like pnpx. create-next-app will ask you some questions about your project. Name the project whatever you want; it doesn’t matter. For TypeScript, ESLint, Tailwind, and using /src, select no. For the app router, select yes. Finally, leave the import aliases unmodified. After, the output should look like this:
Now, open that directory in a code editor of your choice. You will need to install jsonwebtoken, which we will use for verifying JWTs.
npm i jsonwebtoken
Create a GitHub OAuth App
Next, we will need to create the OAuth app in GitHub. Go to github.com/settings/applications/new and fill out the information. Set the homepage URL to http://localhost:3000 and the callback URL to http://localhost:3000/callback (if you are running the Next.js server on a port other than 3000, you can replace 3000 with that port). You can leave device flow unchecked. Click register and you will be sent to the new application page.

Now, let’s go back to the code for a minute. Create a new file called .env.local. This is where you will store your environment variables, which are variables that specify service keys or other configuration that is specific to each deployment and are specified by writing VARIABLE_NAME=variable_value, with each variable being on one line.
In the .env.local file, create a variable named NEXT_PUBLIC_GITHUB_OAUTH_ID. This will contain your GitHub OAuth application’s id. Note that the NEXT_PUBLIC prefix tells Next.js to allow the env variable to be accessed by replacing all calls to process.env.NEXT_PUBLIC_GITHUB_OAUTH_ID with the value of the variable at build time. If you did not include this prefix, only the server would be able to access the value, which is good for secrets. With that aside, we need to get the GitHub OAuth application id, which you can find on the application dashboard you were sent to earlier. Copy it and paste it into the .env file.
We also need to get a secret, which we will put with the variable GITHUB_OAUTH_SECRET. On the dashboard, you can click “Generate a client secret” to get a new secret. Copy it and paste it in the .env file under the new variable.
Finally, we need JWT_SECRET, which should be a random password we use for encrypting JWTs. You can use a password generator for this.
That is it for set up! Remember not to give anyone any of the secrets unless you trust them, as they can be used to impersonate users and gain unauthorized access to the application.
Implement sign in
Our next step is to allow people to sign in by adding a sign in button on the homepage that links to the GitHub OAuth verification page. Open app/page.js and insert the following below the Next.js logo (You should be able to find it by looking for an <Image> with src=src="/next.svg").
<a
  href={`https://github.com/login/oauth/authorize?scope=user:email&client_id=${process.env.NEXT_PUBLIC_GITHUB_OAUTH_ID}`}
  className={buttonStyle.button}
>
  Sign in with GitHub
</a>
The link will send people to a page where they can authorize the OAuth app’s access to their account information to allow the app to verify their identity. You might notice className contains a style that does not currently exist. We will fix this next. In app, create a file named button.module.css and paste the following in.
.button {
  z-index: 2;
  margin: 10px;
  transition-duration: 0.2s;
  display: inline-block;
  font-weight: 600;
  border: 1px solid transparent;
  border-radius: 6px;
  white-space: nowrap;
  padding: 5px 16px;
  font-size: 14px;
  line-height: 20px;
  vertical-align: middle;
  cursor: pointer;
  user-select: none;
  color: #24292e;
  background-color: #fafbfc;
}

.button:hover {
  background-color: #f3f4f6;
}

.button:focus {
  outline: none;
  border: 1px solid #c0d3eb;
  box-shadow: 0 0 0 1px black;
}

.button:active {
  background-color: #edeff2;
}
This just provides some simple styling for the button. In order to use it, we need to import it in page.js. Add this line to the top of page.js.
import buttonStyle from "./button.module.css";
To get the layout correct, we also have to add this to .center in page.module.css
flex-direction: column;
Now, run npm run dev and go to http://localhost:3000. You should see this:

If you click “Sign in with GitHub,” you should be redirected to a GitHub page asking you to authorize your OAuth app. However, if you click authorize, you will get a 404 error. That is because we have not implemented a callback page yet, which we will do next.
Creating a callback
Before we start this step, a bit of explaining is required. You might have seen OAuth flows implemented differently, and this is perfectly fine. There are multiple ways to handle OAuth codes and retrieve access tokens. In this case, we are using Authorization Code Grant, which is where the OAuth provider (GitHub in this case) sends a request to the specified callback URL (which we are implementing now) with a code. Then, the server sends a request to GitHub with the code, and GitHub responds with the access token. This is generally the most secure method, but for mobile apps or SPAs, it does not always work. With that explained, we will get started on implementing the callback.
You first want to create a folder named callback in app and a file named route.js inside callback. This tells Next.js’s filesystem router that route.js should handle API requests sent to /callback. Now, paste this into route.js:
import jwt from "jsonwebtoken";
import { cookies } from "next/headers";
import { redirect } from "next/navigation";

export async function GET(req) {
  const code = new URL(req.url).searchParams.get("code");

  if (!code) {
    return new Response("No code provided", { status: 400 });
  }

  try {
    const tokenResponse = await fetch(
      "https://github.com/login/oauth/access_token",
      {
        method: "POST",
        headers: {
          accept: "application/json",
          "Content-Type": "application/json",
        },
        body: JSON.stringify({
          client_id: process.env.NEXT_PUBLIC_GITHUB_OAUTH_ID,
          client_secret: process.env.GITHUB_OAUTH_SECRET,
          code,
        }),
      }
    );

    const tokenData = await tokenResponse.json();

    const { access_token } = tokenData;

    if (!access_token) {
      return new Response("GitHub login failed", { status: 400 });
    }

    const jwtToken = jwt.sign({ access_token }, process.env.JWT_SECRET, {
      expiresIn: "1h",
    });
    cookies().set("auth", jwtToken, {
      httpOnly: true,
      secure: process.env.NODE_ENV !== "development",
      sameSite: "lax",
      maxAge: 3600, // 1 hour
      path: "/",
    });
  } catch (error) {
    console.error(error);
    return new Response("Internal server error", { status: 500 });
  }
  redirect("/dashboard");
}
We will go through this step by step. First, we import a few different things:
-
jsonwebtokenis for creating JWTs, which we use to store the userdata and allow us to verify that bad actors did not change it (we will do this later) -
cookiesfromnext/headersis for setting cookies on the client. This function is an abstraction over theSet-CookieHTTP header, hence the import location. -
redirectfromnext/navigationis for redirecting users. Similar to thecookiesfunction, this function abstracts over HTTP responses by automatically responding with an HTTP 3xx status code (read: a redirect) with theLocationheader set to the value passed.
After that, we export a new function named GET, which takes req as a parameter. This function handles all HTTP requests to /callback with the HTTP method GET, which is the method used for typical requests that do not contain a body. req contains all of the information about the request.
The next part retrieves the code from the code query parameter in the URL. You can refer to the explanation at the start of this section to learn how this is used. If there is no code, the function returns a 400 error.
Now that we have the code, we send it back to GitHub to get the access token. After getting the response, we parse the JSON body and extract the access token. If there is no access token, another error is returned.
We sign the token to allow us to store it in a cookie with confidence that it cannot change without the JWT secret. Using the signed token, we set the auth cookie for the user. The parameters we passed are very important. httpOnly makes sure JavaScript cannot access the cookie’s value, secure makes sure that when deployed in production, the cookie cannot be sent over unencrypted HTTP, and sameSite prevents the cookie from being sent to third party websites. sameSite=lax is the default in modern browsers, but it is still a good idea to make it explicit.
Finally, we redirect the user to /dashboard. If you run this code, you should end up at another 404 at /dashboard. We will create the dashboard next.
Creating a protected dashboard
Once again, we need to create a file named dashboard and a file inside it named page.js. Because this is a page rather than an API route, the naming is different. Copy the following into page.js
import { cookies } from "next/headers";
import jwt from "jsonwebtoken";
import { redirect } from "next/navigation";
import buttonStyle from "../button.module.css";

export default async function Page() {
  const auth = cookies().get("auth");
  if (!auth) {
    redirect(
      `https://github.com/login/oauth/authorize?scope=user:email&client_id=${process.env.NEXT_PUBLIC_GITHUB_OAUTH_ID}`
    );
    return;
  }
  const user = jwt.verify(auth.value, process.env.JWT_SECRET);
  const response = await fetch("https://api.github.com/user", {
    headers: {
      Authorization: `token ${user.access_token}`,
    },
    cache: "no-store",
  });
  const userdata = await response.json();
  return (
    <div>
      <h1
        style={{
          "text-align": "center",
          "margin-top": "100px",
        }}
      >
        Welcome {userdata.name} to the dashboard!
      </h1>
      <a href="/logout" className={buttonStyle.button}>
        Logout
      </a>
    </div>
  );
}
Once again, we will go through this step by step. The imports are largely the same as the callback. The only difference is the addition of ../button.module.css, which is the CSS file we created earlier for button styling.
This time, instead of a function named GET, because this is a page, we export a function named Page. Of course, because it is a default export in this case, the naming doesn’t really matter.
Next, we get the auth cookie. If no auth cookie is found, the user is not signed in, so we redirect the user to the sign in.
If there is an auth cookie, we verify the JWT contained in it. This is how we make sure the value was not tampered with. JWTs have a header, payload, and signature. The payload’s value can be accessed without the JWT secret. However, the JWT cannot be modified, as the signature is generated using the JWT secret and payload value. Therefore you need both of those to generate a valid signature. What we are doing here is both decrypting the payload and making sure the signature is valid.
Now that we have verified the JWT and extracted the payload, we use the access token in the JWT to request the user’s data from the GitHub API. The cache parameter disables Next.js’s AOT caching/static generation. Normally we would do this inside a useEffect() call, but because we are using React Server Components with Next.js, this is the idiomatic way of using fetch() (remember that this renders once on the server and does not render on the client period). We then parse the response body to get the user data.
After that, we just have some markup that renders a welcome message with the user’s name and a logout button. We use inline styles for the header because creating another CSS file just for two rules didn’t make sense. You might notice that the logout button links to /logout, which does not exist yet. We will fix that.
Tip: If you have lots of protected routes and want to avoid code repetition, you could implement the authentication as middleware or just a function imported in the relevant routes
Adding a logout route
This is pretty simple. The first thing to do is to create another route, just like what we did for /callback. Create a new folder in app called logout and a file called route.js in the new folder. Insert the following in the new file:
import { cookies } from "next/headers";
import { redirect } from "next/navigation";

export async function GET(req) {
  cookies().delete("auth");
  redirect("/");
}
As you can see, this script is pretty simple. We just intercept GET requests to /logout, delete the cookie named auth, and redirect the user to the homepage. Note that if the user tries to log in again, it might seem as if they are still signed in, as GitHub will silently send the access token and redirect the user when they click login. However, if you implement a more complete sign in solution, this will allow users to sign in to another account with a different method.
That is all! You now have a basic system for OAuth authentication. However, there are a few issues
Problems with this Implementation
While this works, there are some problems:
- There is no protection against CSRF (Cross Site Request Forgery)
- There are no refresh tokens, and access tokens can last indefinitely (this is a limitation of GitHub OAuth apps)
- GitHub is currently the only sign in method (non OAuth sign requires many more security measures due to the need to store information in a database)
- There is support if issues arise with authentication
We could solve most of these problems, but it would take a significant amount of time (this tutorial is already almost 3,000 words) and increase maintenance. However, there is a better solution: you can use a service like Clerk. Clerk is a user management platform that allows you to easily and securely implement most of the popular OAuth providers along with standard email/password sign in, magic link/passwordless, and even Metamask.
Using Clerk for Authentication
Once again, run:
npx create-next-app@latest
and select the same choices as previously (any name, everything “no” except for the app router). Then, run:
npm install @clerk/nextjs
This installs the Clerk SDK for Next.js. Now, we need to set up a Clerk app. Go to Clerk’s app creation page (create an account if you did not already) and go through the configuration. For authentication providers, you can stick to just GitHub again or add as many providers as you want. It doesn’t change the process, and you can change it later. After that, you should be redirected to a page where you see a snippet containing NEXT_PUBLIC_CLERK_PUBLISHABLE_KEY and CLERK_SECRET_KEY. Copy this and paste it into a new file named .env.local. This includes the environment variables that store your public and private Clerk keys.
To allow us to use Clerk React components in our project, we first need to insert the <ClerkProvider> component into layout.js. Replace all content in layout.js with the following:
import "./globals.css";
import { Inter } from "next/font/google";
import { ClerkProvider } from "@clerk/nextjs";
const inter = Inter({ subsets: ["latin"] });

export const metadata = {
  title: "Create Next App",
  description: "Generated by create next app",
};

export default function RootLayout({ children }) {
  return (
    <html lang="en">
      <body className={inter.className}>
        <ClerkProvider>{children}</ClerkProvider>
      </body>
    </html>
  );
}
<ClerkProvider> provides the context necessary to allow Clerk components to function properly, and due to it being layout.js, it is inserted into every page.
Next, we need to create the sign in button, just like in the first version. Open page.js in app and insert this below the Next.js logo (the image with src="/next.svg"):
{
  auth().userId ? (
    <a href="/dashboard" className={buttonStyle.button}>
      Dashboard
    </a>
  ) : (
    <SignInButton mode="modal" redirectUrl="/dashboard">
      <button className={buttonStyle.button}>Sign In</button>
    </SignInButton>
  );
}
This checks if the user is signed in. If they are, it shows a link to the dashboard, and if not, it shows a button to sign in. To make this work, you will also need to import two things at the top of the file:
import { SignInButton, auth } from "@clerk/nextjs";
import buttonStyle from "./button.module.css";
The first line contains the functions and components needed from the Clerk SDK, and the second is for the styling. You will want the same styling as in the previous version, so create a new file named button.module.css and insert this into it:
.button {
  z-index: 2;
  margin: 10px;
  transition-duration: 0.2s;
  display: inline-block;
  font-weight: 600;
  border: 1px solid transparent;
  border-radius: 6px;
  white-space: nowrap;
  padding: 5px 16px;
  font-size: 14px;
  line-height: 20px;
  vertical-align: middle;
  cursor: pointer;
  user-select: none;
  color: #24292e;
  background-color: #fafbfc;
}

.button:hover {
  background-color: #f3f4f6;
}

.button:focus {
  outline: none;
  border: 1px solid #c0d3eb;
  box-shadow: 0 0 0 1px black;
}

.button:active {
  background-color: #edeff2;
}
Then, add this to .center in page.module.css
flex-direction: column;
Now sign in should work, but we still need to implement the dashboard. First, we need to create a JavaScript file at the project root named middleware.js (make sure to put this at the project root, not /app). Paste the following in the new file:
import { authMiddleware } from "@clerk/nextjs";
export default authMiddleware();

export const config = {
    matcher: ["/((?!.*\\..*|_next).*)", "/", "/(api|trpc)(.*)"]
};
This is a basic setup for the authentication middleware. You can configure it more to exclude specific routes, but this should work in most cases.
The next step is to create a folder called dashboard and a file named page.js inside it, just like with the implementation we already made. Inside the file, paste this:
import { currentUser, RedirectToSignIn, SignOutButton } from "@clerk/nextjs";
import buttonStyle from "../button.module.css";

export default async function Page() {
  const userdata = await currentUser();
  if (!userdata) {
    return <RedirectToSignIn />;
  }
  return (
    <div>
      <h1
        style={{
          "text-align": "center",
          "margin-top": "100px",
        }}
      >
        Welcome {userdata.emailAddresses[0].emailAddress} to the dashboard!
      </h1>
      <SignOutButton>
        <button className={buttonStyle.button}>Logout</button>
      </SignOutButton>
    </div>
  );
}
We will go through this step by step.
First, we import some packages.
- We import multiple different functions and components from the Clerk SDK. The first,
currentUser(), helps us get the current user’s information. The second,RedirectToSignIn, not to be confused with the functionredirectToSignIn, which is also exported, is a component that redirects the user to a sign in page. Finally, we haveSignOutButton, which creates a button to allow the user to log out. -
buttonStyleis just CSS from ourbutton.module.cssfile, which we use for the log out button.
Next, we export a function called Page, which has been explained previously.
After that, we use currentUser() to get the user’s information. If it does not exist (meaning the user is signed out), we redirect to a sign in page using a client side redirect.
Finally, using the userdata, we return markup containing a header with the user’s email and a button to log out.
Now, sign in, the dashboard, and sign out should all work.
Easy SSO
That’s it! You now should have two implementations of OAuth authentication, one that is hand built and more limited and one that is built with Clerk and more feature rich. If you want to learn more about Clerk, check out the Clerk Docs. I hoped you learned something, and thanks for reading!

Top comments (0)