

This article is part of #AzureBacktoSchool. You'll find other helpful articles and videos in this Azure content collection. New articles are published every day from community members and cloud advocates in the month of September. Thank you Dwayne Natwick for organizing this awesome idea!
So along with going back to school, American Football returned this week and I'm ready for some Football!!! I've always been very fascinated with how teams and sports analyst use historical data to predict player performance and predict who will win the game and other player statistics. The concepts and approach here is no different than how you might use Big Data in Sales Forecasting, Predictive Repair for machinery, Inventory Demand scenarios.
This blog post will show how to start building a big data analytics platform using serverless technologies. I will show how to move data from a source to Azure Data Lakes using Azure Data Factory and then do some exploration and analysis using Azure Databricks. This will be the first in many posts I will do on Serverless Big Data Pipelines using football datasets.
Big Data Architectures
When you think about a big data analytics platform, there are typically these components:
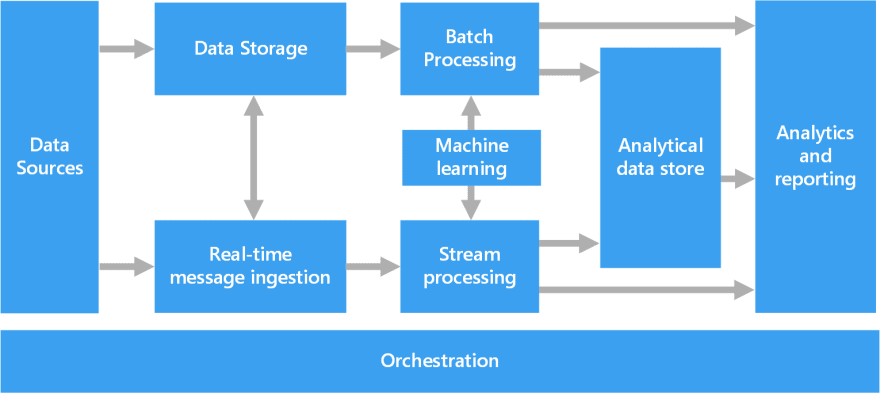
Data sources. All big data solutions start with one or more data sources. For my solution, I've identified several sources listed here. For the purposes of this blog, I'm going to play around with play by play data found here.
Data storage. Data for batch processing operations is typically stored in a distributed file store that can hold high volumes of large files in various formats. This kind of store is often called a data lake. A data lake provides a centralized store for data engineers and data scientists to explore data in it's raw state. I will be using Azure Data Lake Storage Gen 2. Azure Data Lake Storage provides fast, secure, scalable cloud storage along with hierarchical namespaces and a file access control using a combination of role based access (RBAC) and POSIX-compliant Access Control Lists (ACLs).
Orchestration. Most big data solutions consist of repeated data processing operations, encapsulated in workflows, that transform source data, move data between multiple sources and sinks, load the processed data into an analytical data store, or push the results straight to a report or dashboard. In our solution, we will be moving files from various sources exploring, cleansing, experimenting, and aggregating. For this, we will use Azure Data Factory.
Batch Processing. Big data solutions often use long-running batch jobs to filter, aggregate, and otherwise prepare the data for analysis. We'll use Azure Databricks is an Apache Spark-based analytics platform.
Analytical data store. Many big data solutions prepare data for analysis and then serve the processed data in a structured format that can be queried using analytical tools. I won't yet cover these in this blog post.
Analysis and reporting. The goal of most big data solutions is to provide insights into the data through analysis and reporting. In this you might use tools like Power BI or Azure Synapse. I also won't yet cover these in this blog post.
Getting Started
Ok, enough theory, let's actually build something!!! To get started, let's provision the following services in our Azure Portal:
Once you've got these services setup as shown below.

You'll want to go ahead and create a container in your ADLS.
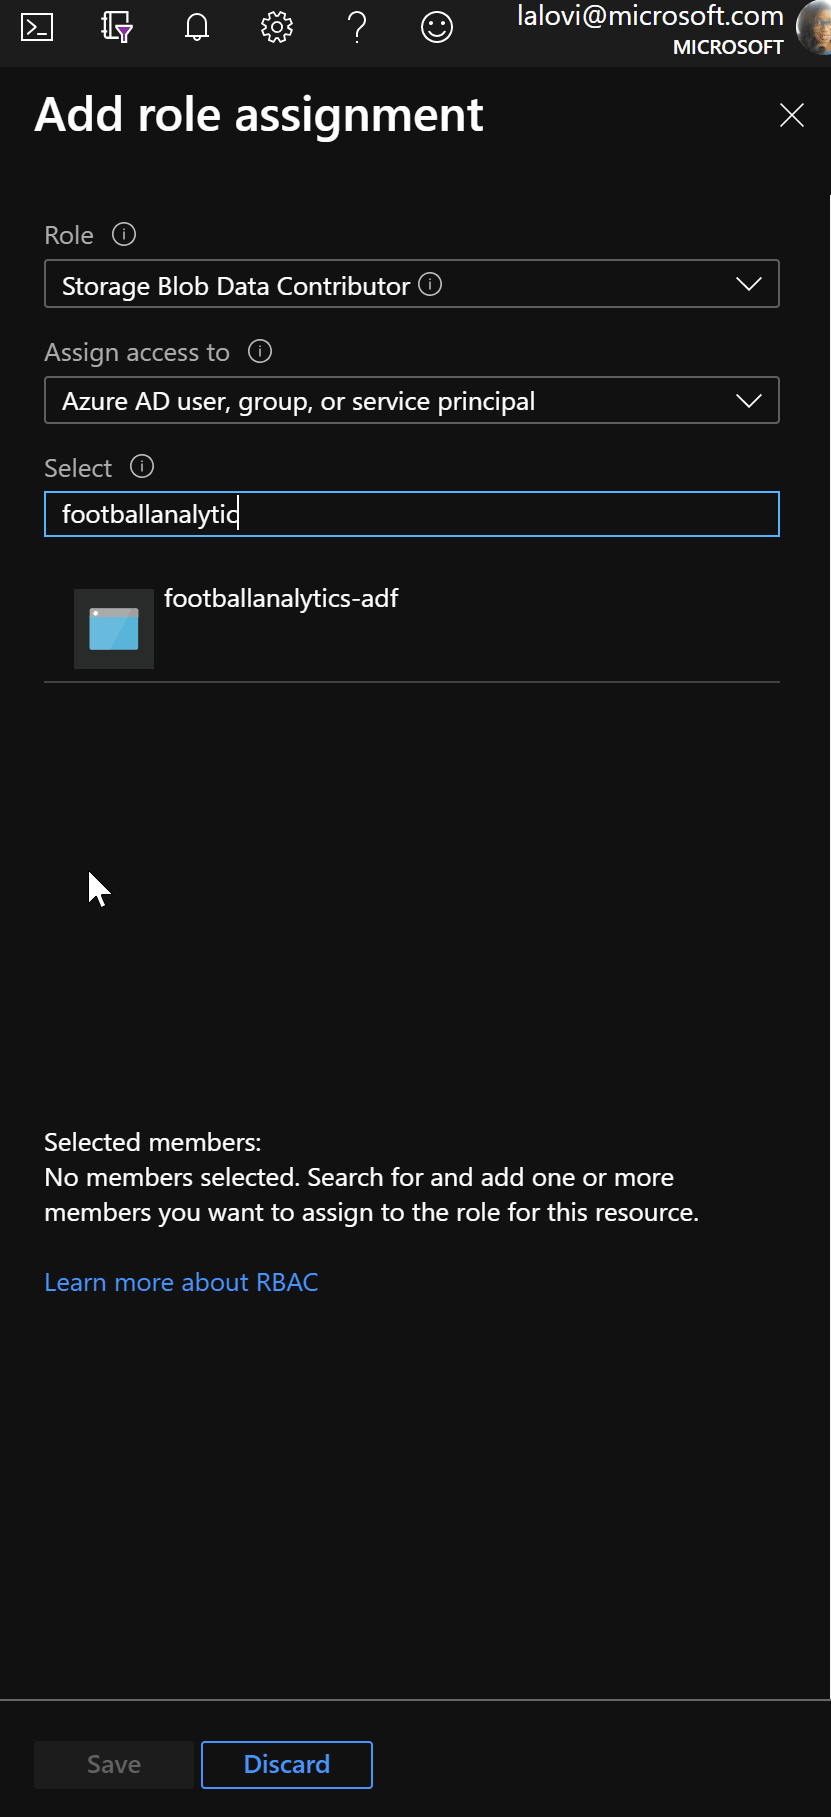
Make sure that our Azure Data Factory can access our ADLS. You'll do this by giving the Data Factory 'Storage Blob Data Contributor' rights to our ADLS using it's Managed Service Identity. Managed Service Identity is a way to give an identity to your Azure resources in Azure AD and handles cleaning up this identity automatically when the resource is deleted. A managed identity is automatically created when you create an ADF resource through the Azure Portal.
To do this, go to the ADLS and select Access Control(IAM). Click Add role assignment. Select Storage Blob Data Contributor and select the name of the Azure Data Factory resource you created:
Copying data to ADLS
Now that the resources are setup in Azure, let's create a pipeline to copy over the files you need into ADLS. Go into Azure Data Factory, click Author and Monitor. 
You'll see an authoring canvas with a lot of quick start buttons to get you started. Click on the Copy Data to launch the wizard.
Enter name for your copy pipeline and click 'Next'

Next up, you will setup our data source. In order to setup a data source, you must create a Dataset and a Linked Service. A dataset is a named view of data that simply points or references the data you want to use. Linked services are much like connection strings, which define the connection information needed for Data Factory to connect to external resources. So in setting up your data source, the dataset is the "what" and the linked service is the "how". Azure Data Factory supports over 90 data connectors.
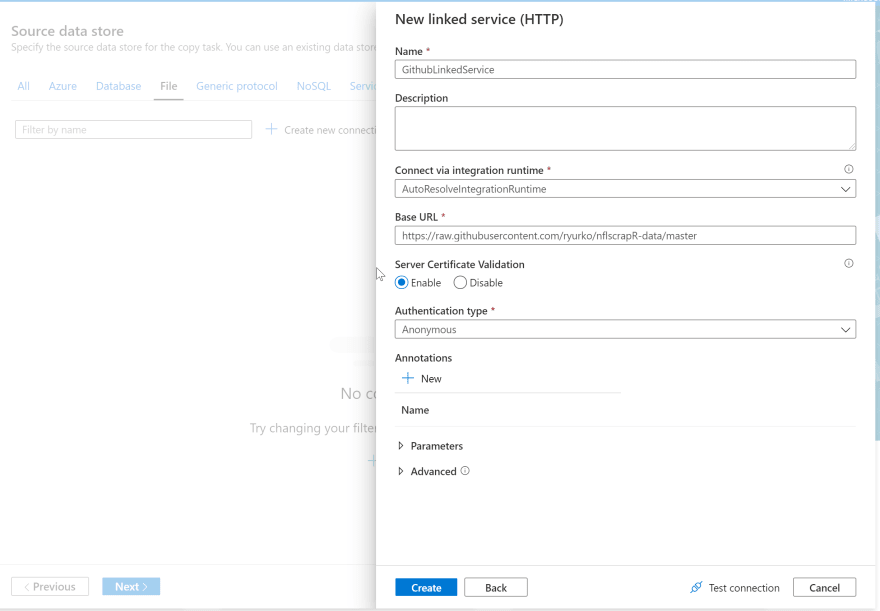
For this blog, I will start with the 2019 play-by-play data located here. Because we are using csv files located in Github, I will use the HTTP connector. To create your Http Connector Data Source, select File, and Add new Connection to create your HTTP Linked Service.
Give your Linked Service a name, and set the Base URL to 'https://raw.githubusercontent.com/ryurko/nflscrapR-data/master/'. I'm going to set this up with a Base URL because I will likely be copying several files over from this source and it will be easier to manage as my linked service. Set Authentication type to 'Annonymous' and click Create.
You should see your Linked Service created, click next to setup dataset.To setup our HTTP dataset, enter the relative url as 'play_by_play_data/regular_season/reg_pbp_2019.csv' and click Next. You should see a preview of the file like this:
 Click next.
To setup ADLS as our destination store, you will again need to create a Linked Service and Dataset. Since you are saving this file to ADLS, select category Azure and click 'Create new connection'. Select Azure Data Lake Storage Gen2 and click Continue.
Give your linked service a name, change authentication to Managed Identity, select the ADLS storage you created.

Enter the output folder and destination file name.

Click through to summary to show our copy pipeline setup.
Finally deploy and run the pipeline.
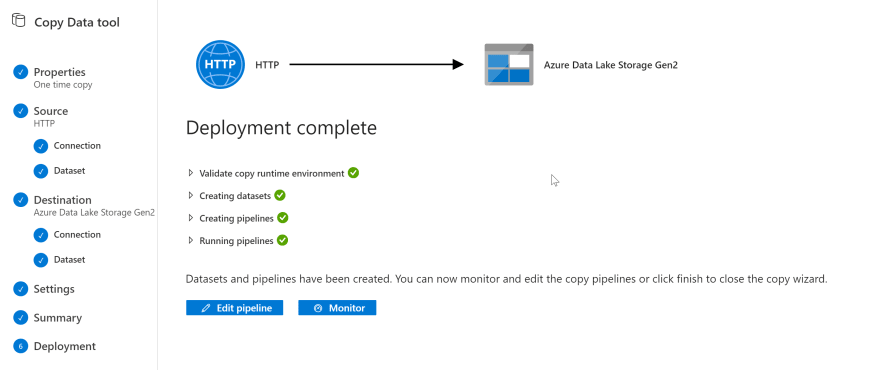
To verify that our file has been properly copied over, you can open Storage Explorer, go to our Storage container and confirm file is there.

Data Exploration

So now that I have some files in my Data Lake, let's start exploring. Typically you will want to explore the data, start building out data definitions, removing any unnecessary columns, and cleansing. To start exploration, I will use Azure Databricks.
There are three ways of accessing Azure Data Lake Storage Gen2:
- Mount an Azure Data Lake Storage Gen2 filesystem to DBFS using a service principal and OAuth 2.0.
- Use a service principal directly.
- Use the Azure Data Lake Storage Gen2 storage account access key directly.
For production systems, I would highly recommend going with option 1., but since we are just starting out, let's pick option 3.
To get started, launch the Azure Databricks resource you created above. Create a blank notebook. In the first cell, you will connect to our ADLS context:
spark.conf.set(
"fs.azure.account.key.<storage account name>.dfs.core.windows.net",
  "<storage account key>"
)
Now that we've connected to our storage, we'll want to test out our connection by listing all the files in the directory. We will use the Filesystem utilities in Databricks for this:
dbutils.fs.ls("abfss://<container name>@<storage account name>.dfs.core.windows.net")
When you Run all, you will see the list command shows our .csv files copied over.

Now that the files are mounted, load them into a dataframe. A dataframe is a just a table similar to SQL table or even an Excel datasheet that you will perform operations like selecting, filtering, grouping, and joining. The only difference is that it exists in memory only. To do this write the following code in our cell:
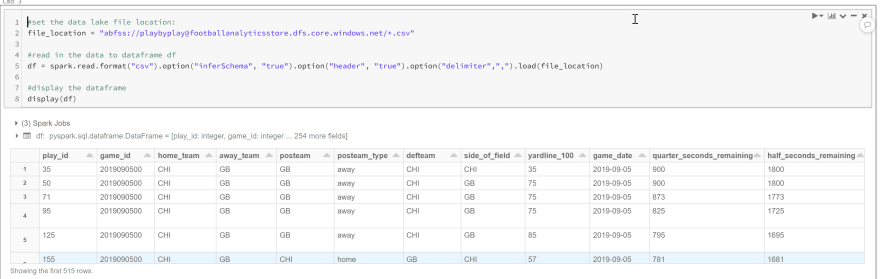
#set the data lake file location:
file_location = "abfss://<container name>@<storage name>.dfs.core.windows.net/*.csv"

#read in the data to dataframe df
df = spark.read.format("csv").option("inferSchema", "true").option("header", "true").option("delimiter",",").load(file_location)

#display the dataframe
display(df)
Notice I've done a couple of things. I've set the file location to *.csv. This will actually read all of our play-by-play csv files instead of just one. I've also set "inferSchema" to true which and "header" to true. Run all again, and you should see all of the rows in the file loaded into the dataframe:
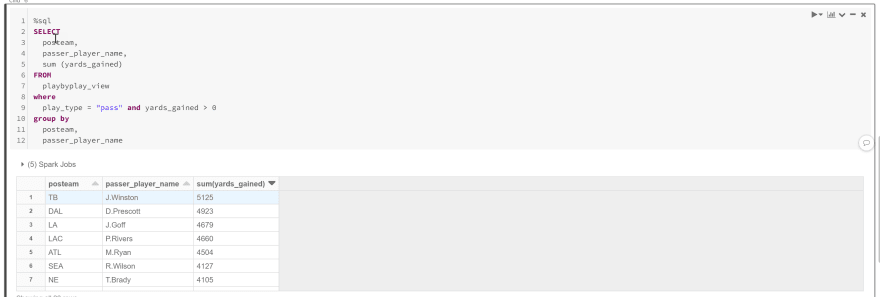
Now at long last, let's start doing some data exploration with some queries. To start, let's say that I want to see total passing yards by team and player. In a new cell, I'll put the following code:
%sql
SELECT
  posteam,
  passer_player_name,
  sum (yards_gained)
FROM
  playbyplay_view
where
  play_type = "pass" and yards_gained > 0
group by
  posteam,
  passer_player_name
I used the magic %sql command so I can now write queries against my dataframe using normal SQL statements. When I run this command, I see the following
Great!!! I'm now setup to do more exploration of this data and figure out key data that I want to further analyze and aggregate into permanent data store.

Oldest comments (0)