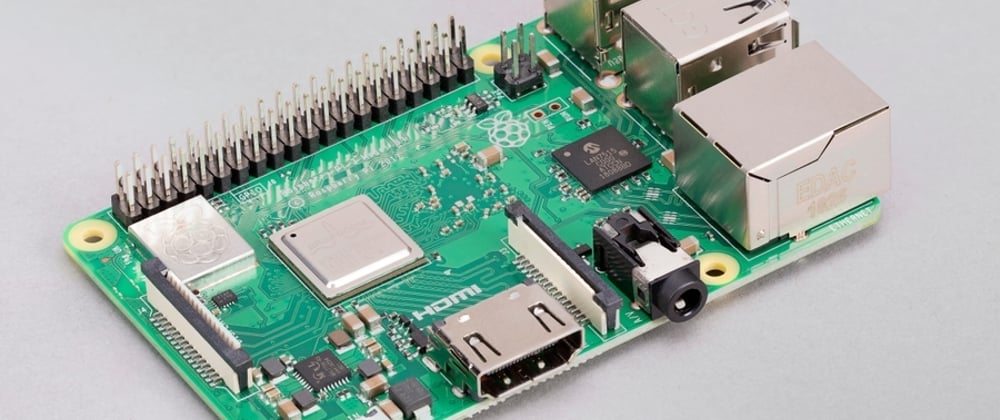
What is Raspberry Pi?
Raspberry Pi is an open-source, single-board computing device that was developed by the Raspberry Pi Foundation to educate people about computation. The initial version of raspberry pi was released in 2012. Then after different configurations, they were able to release a lot of versions of the raspberry pi. The latest raspberry pi version is Raspberry Pi 4 Model B, which was released in 2020.
Raspberry pi has a CPU (Central Processing Unit), RAM (Random Access Memory), and GPU (Graphical Processing Unit) in a single chip (System on Chip-SOC) done by ©Broadcom, and the entire system powered using USB power (5V/2.5A). At the same time, some models of the raspberry pi have in-built Wi-Fi, Bluetooth as well. Since this board does not include any display devices, there is/are HDMI and DSI (optional) for connecting external display/s. There can have USB ports, Gigabyte ethernet ports as well. As the main storage of all those raspberry pi's, it uses a micro-SD card (OS and all other data stores there).
Setup raspberry pi for work
Pre-requirements (hardware)
- Raspberry Pi device.
- A power supply that capable of providing a 5V 2.5A supply, with a USB cable.
- Micro – SD card with the size of at least 16GB and card reader.
- Keyboard and Mouse (optional).
- Monitor and related cables (optional).
Pre-requirements (software)
- Raspberry pi operating system image file.
- Etcher, an image writing tool.
- SD card formatter tool.
- IP scan tool (Angry IP Scanner).
- SSH client (putty) (optional).
Let's get started
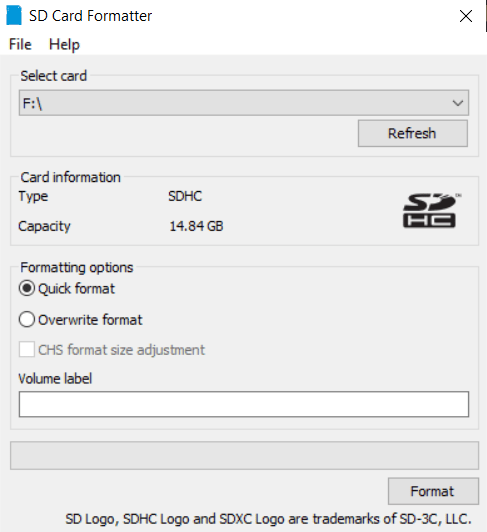
- First, we must format the SD card using the SD card formatter tool. Once you open it after the installation, can select the SD card from the top drop-down menu. Under formatting options, select quick format and click format. At the end of the process, the tool will pop up format complete message.
- Now we need to download the raspberry pi official disk image to install on the SD card. For that go to the link below and download the image as your need. Operating system images – Raspberry Pi
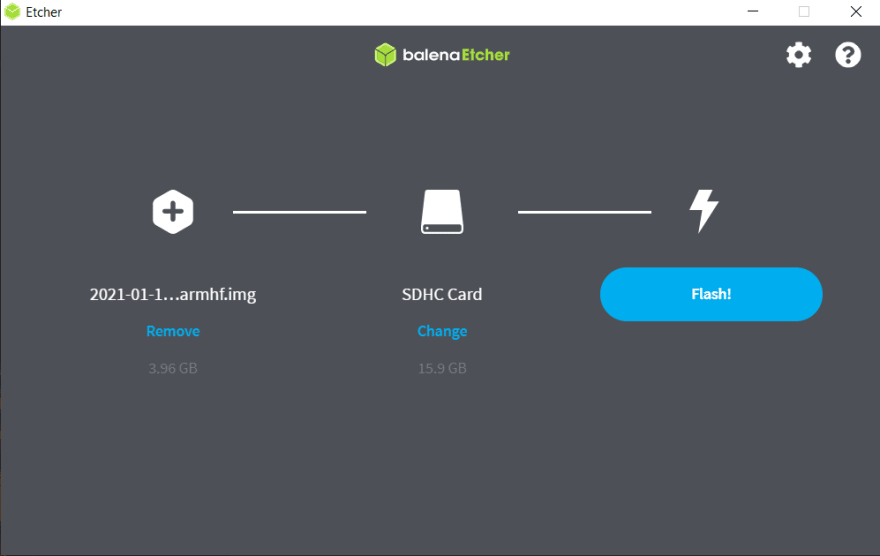
- Now open the Etcher tool to burn the raspberry pi image to the SD card. Once you open the Etcher, you must select both disk image and SD card. Then click the flash button to start burning. It may take several times, based on your SD card writing speed. If validation is also enabled, more time consumes by the tool to complete the operation.
- To enable SSH, go to file explorer and select boot disk (this is a partition created after you flash the operating system) from there. Go into it and create a file called ssh without any extension.

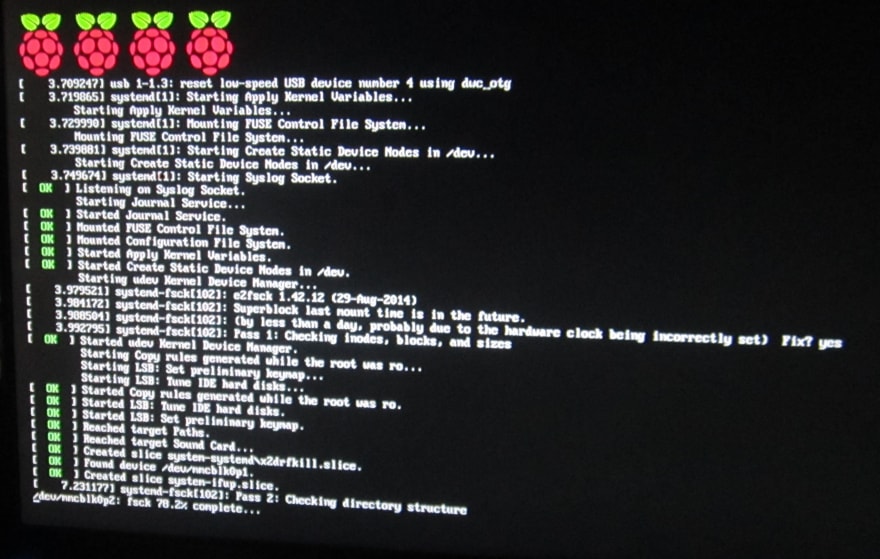
- Now, the initial setup process is complete. Eject the SD card from the computer and insert it into the raspberry pi. Connect all other peripheral devices as you need. Make sure to connect raspberry pi to your home network, to access raspberry pi via SSH.
- If you connect, display to the raspberry pi, you can see the system will boot up and came to the desktop screen. Now you can use the raspberry pi as a desktop computer. But if you are going to access it via terminal, follow the rest of the steps for that.
- To access raspberry pi via SSH, need to know the ip address of raspberry pi. For that you have to connect the PC to the same network raspberry pi is connected to. Then check the PC IP address using the below commands.
ipconfig/all --> in windows operating system
ifconfig --> in Linux flavored operating system
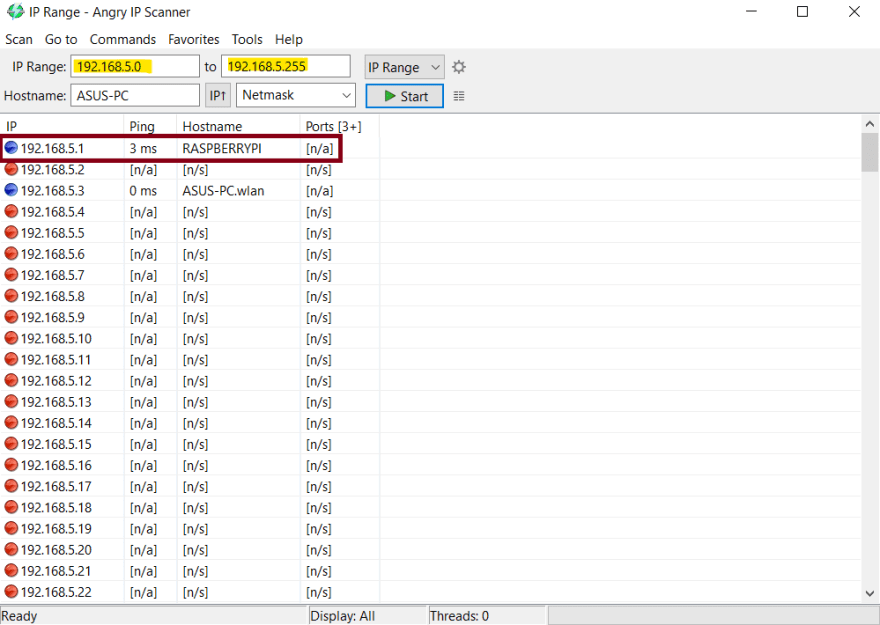
Then open the IP scan tool and add the ip range accordingly. (For example in my case, ip address for the wifi adapter is 192.168.5.3. So I apply the range for the ip scan tool as 192.168.5.0 – 192.168.5.255.) Then click the start button to scan. At the end of the scan, you will be able to find the raspberry pi ip address.
- Now with the ip address, you can go for the SSH client and add the ip address for the hostname. Then click the Open button to access the SSH terminal with the default username
piand default passwordraspberry.
 Alternatively, if you do not have ssh client, go to terminal/ command prompt and type the below command.
ssh pi@<raspberry pi ip address>
Example: ssh pi@192.168.5.1
Then press enter, now the terminal/command prompt will ask you the password. Enter it as raspberry. Now as previously you can access the raspberry pi terminal via SSH.

Note:
- Important to know is, you are accessing the raspberry pi terminal via SSH with the default username and password. So make sure to change the default password using the
passwdcommand.
- Go through all of the steps very carefully and if raspberry pi does not boot properly check your power source.
Conclusion
This blog post discussed how we initially set up raspberry pi for working. If you have a monitor, then there has a way to set up raspberry pi, as well as if you like to access raspberry pi using SSH, that also explained in this blog post.


Top comments (2)
Nice document Chathura. After all still we are facing issue with power LED blinking red. And not display on monitor.
Nice hands-on intro to RPI. Anyone interested in the history of RPI can visit devopedia.org/raspberry-pi