
Hey, Developers
Welcome back to the new article on Blitz.js Series. In this article, we'll learn to deploy our Blitz.js application to Vercel.
So, let's start.
Build App
In this tutorial, we'll deploy the blitz.js app that we've already built. In the previous articles of blitz.js. You can read those articles from here.
- Part 1: https://dev.to/chapagainashik/blitz-js-the-fullstack-react-framework-2kag
- Part 2: https://dev.to/chapagainashik/blitz-js-the-fullstack-react-framework-part-2-4697
- Part 3: https://dev.to/chapagainashik/blitz-js-the-fullstack-react-framework-part-3-4nk5
For deploying, we have to create a production build of our Blitz app and test whether some errors occur or not. For this run the following command.
yarn build
If you guys are following me along, then you guys will get the following error.

To get rid of this error, you can add {/* @ts-ignore */} just above the line where this error occurred.
// app/pages/projects/[projectId]/tasks/index.tsx
...
        {tasks.map((task) => (
          <li key={task.id}>
            {/* @ts-ignore */}
            <CustomLink href={Routes.ShowTaskPage({ projectId, taskId: task.id })}>
              <a>{task.name}</a>
            </CustomLink>
          </li>
        ))}
...
Once again run yarn build, now, you'll get another error.

For this, you have to add // @ts-ignore just above the line where this error occurred.
// app/pages/projects/[projectId]/edit.tsx
        <ProjectForm
          submitText="Update Project"
          // TODO use a zod schema for form validation
          //  - Tip: extract mutation's schema into a shared `validations.ts` file and
          //         then import and use it here
          // schema={UpdateProject}
          initialValues={project}
          onSubmit={async (values) => {
            try {
              const updated = await updateProjectMutation({
                id: project.id,
                ...values,
              })
              // @ts-ignore
              await setQueryData(updated)
              router.push(Routes.ShowProjectPage({ projectId: updated.id }))
            } catch (error) {
              console.error(error)
              return {
                [FORM_ERROR]: error.toString(),
              }
            }
          }}
        />
Now, all the errors have been resolved, now you can run yarn build. Now, it'll work. Then you can write the command yarn start to serve the production build in localhost.
Database
Since Vercel is a serverless platform, it doesn't provide a database to the user. So, we have to host our database separately.
For this project, I'll be using the Supabase Postgres database.
To use the Supabase Postgres database, go to https://supabase.io and create your account.
Then in the Supabase Dashboard create a new organization and create a new project.
%[https://youtu.be/dBOSUER_5T4?list=TLGGNnD3VLhx5_MyNDA4MjAyMQ]
While creating a project, select a nearby location to
Washington DCbecause, by default, Vercel apps are deployed to the Washington DC server.
After your Supabase Project is ready, Go to Settings -> Database and copy the connection string. And add open .env.local and .env.test.local and replace DB_URL value with Connection string, replace [YOUR-PASSWORD] with a password, you added while creating a project.
And replace provider = "sqlite" with provider = "postgres" in db/schema.prisma.
// .env.local

DATABASE_URL="postgres://postgres:[YOUR-PASSWORD]@db.ntmdsyxmousbonsypexq.supabase.co:5432/postgres"
// db/schema.prisma

datasource db {
  provider = "postgres"
  url      = env("DATABASE_URL")
}
Once you have added this, now delete the migrations. `db/migrations.
And run:
blitz prisma migrate dev
With this command, we have also created tables in the database.
Now, if you go to app.supabase.io and click on your project and click on Table Editor. Now you can see that tables have been created.

Now, once again run yarn build and yarn start and test whether your app works fine or not.
If it is working, then let's get to another step.
Push to GitHub
We're going to push our code to the GitHub Repo, because when deploying to Vercel, if we connect our GitHub repo, then Vercel will automatically deploy our code, whenever we push a new commit.
But before, creating a repo and pushing it, we have to make a few changes. Whenever we push a commit, blitz run tests (using husky). Since we're not working with tests in this tutorial, so, we have to tell husky not to run tests before pushing.
For that, go to .husky/pre-push and comment npm run test
`
!/bin/sh
. "$(dirname "$0")/_/husky.sh"
npx tsc
npm run lint
npm run test
`
Go to https://github.com and log in to your account and create a new repo.
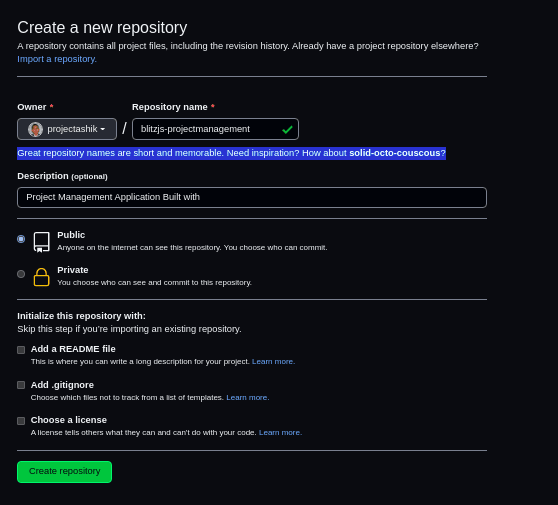
After the repo is created follow the instructions given by GitHub to push our local repo to GitHub.
or run the following command in the root folder of your project.
git add .

git commit -m "Created Blitz.js app"

git branch -M main

git remote add origin [YOUR_REPO_URL]

git push -u origin main
Now, our code is on GitHub.
GitHub Link: https://github.com/projectashik/blitzjs-projectmanagement
Deploy to Vercel
I am assuming that you already have a Vercel account.
To deploy to Vercel, go to https://vercel.com and click on New project.

Click import in your recently pushed Repo. (You might have to connect your Github account first)

If you guys have a team or want to create a team, you can do so, for now, I'll skip.

Then in the Configure Project section, give a name for your project.
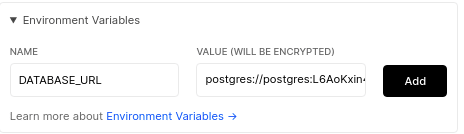
And add DATABASE_URL and set the SESSION_SECRET_KEY variable to a random string of 32 characters in `Environment Variables.
Protip: You can create random 32 characters string by the following command:
node -e "console.log(crypto.randomBytes(32).toString('hex'))"

Then click on deploy.
Now it'll deploy our application.
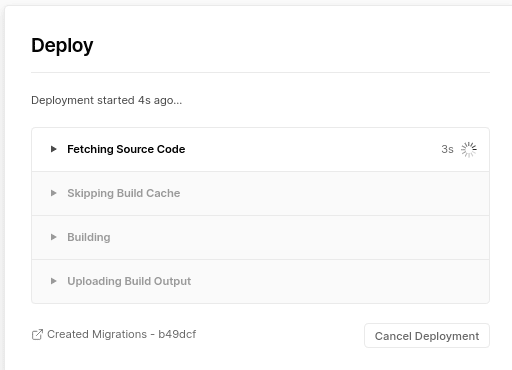
Now, our application is live:
https://blitzjs-projectmanagement.vercel.app/
This is much for these guys, Hope you like this article. Please, comment down your feedback for my work, and also if you faced any problem, comment down.

Top comments (0)