
In the previous post, I showcased 10 NetBeans IDE tools to accelerate the software development process. One of them is Debugging. I attempted to solely use GDB in the terminal for application debugging. However, it was challenging to find the exact line of the code I was debugging and determine which function to debug. This made the process extremely slow. With this tool, it is easier to visualize variables and identify the specific line where issues occur in the code. In this post, I will provide a step-by-step guide to configuring Apache AGE in NetBeans to utilize the debugging tool.
1. Prerequisites
For this tutorial, I used the following resources:
- Ubuntu 22.04 LTS;
- NetBeans 18;
- Apache AGE 1.3.0;
- PostgreSQL 13.
If you don't have Apache AGE and/or PostgreSQL installed yet, you can follow these guides to install from the source code according to your operating system:
- PostgreSQL with Apache AGE installation on Windows with WSL;
- Installing Apache AGE with Docker on Windows;
- PostgreSQL with Apache AGE installation on Ubuntu;
- Easy Installation of PostgreSQL, AGE & Age-viewer on Mac.
2. C/C++ Environment Setup
By default, when creating a C++ project, NetBeans offers the following options:

To configure full support for C/C++ projects, we need to add a plugin. In the top toolbar, go to Tools > Plugins. Then, select the Settings tab and check the option NetBeans 8.2 Plugin Portal:

Next, select Available Plugins tab and click Check for Newest button. The option for C/C++ should appear. Check this option and click on the Install button. A new window will open. To proceed with the installation, click Next and accept the terms and license agreements. You will also see a selection button next to the word Plugins. This button indicates all the features that come with the installation. Finally, click on Install to complete the process.

The installation may take a few minutes to complete. Another pop-up window may appear at the end, asking for confirmation. Click on Continue, and the installation will finish successfully.
To configure the debugging and compilation tools, go to the top toolbar and select Tools > Options, then click on the C/C++ tab. In the Build Tools section, make sure that the directories for the tools are correctly specified:

3. Importing Projects in NetBeans
After installing the plugin, you will notice that new options have appeared for creating C/C++ projects. Go to File > New Project > C/C++ and select option C/C++ Project with Existing Sources. Next, I will explain how to create projects for the source code of PostgreSQL and Apache AGE.
3.1. PostgreSQL
Select the directory of the PostgreSQL repository. You can leave the options marked as default and only change the Select Configuration Mode to Custom.

NetBeans will automatically find the PostgreSQL configuration file. Keep the option Pre-Build selected, and then we can configure the compilation flags. In the Arguments section, set CC=${IDE_CC} to configure the compiler to the directory specified in the last step of the previous section. A very important step is to define the flags for debugging and installation. Set CFLAGS="-g3 -O0" --enable-cassert --enable-debug for debugging, and --prefix pointing to the installation directory of PostgreSQL. In my case, it is --prefix=/usr/local/postgresql/13.0.

In the next step, specify the working directory, the commands used for clean and build, and whether you want these commands executed as soon as the configuration is finished. Keep the option Clean and Build After Finish selected. The working directory should be the directory of the PostgreSQL source code. Use ${MAKE} to configure the make command to the directory set in the last step of Section 2.

The next step is to select the directories where the relevant source code for the project is. Since we are only working with PostgreSQL, you can leave the options as default.

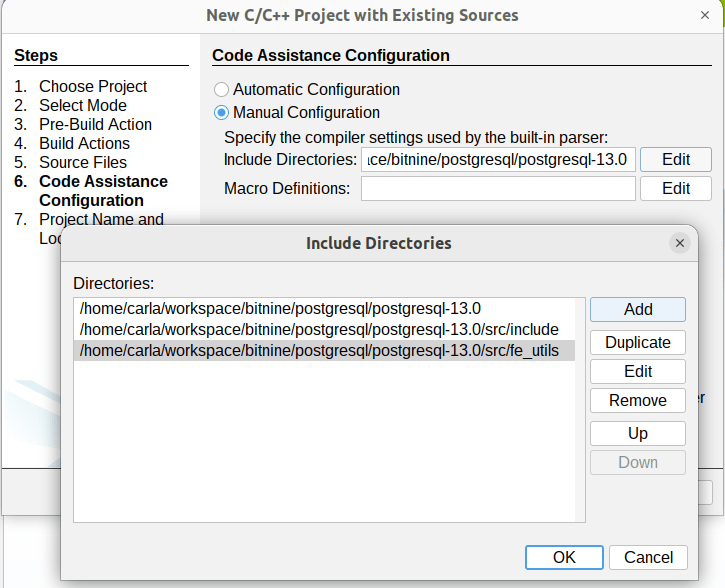
Next, we select the directories to include. Choose the option Manual Configuration and click Edit in the Include Directories field. Click Add to add a new folder and browse for the directories /src/include and /src/fe_utils within the PostgreSQL source code directory.
Finally, let's define a name for the project and the directory where it will be saved. To avoid mixing the project with the PostgreSQL Git directory, I created a separate directory called netbeans-projects.

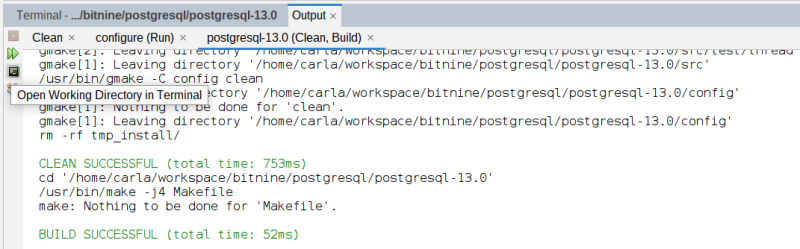
Click on Finish, and if you have selected the option to Clean and Build after Finish, you will see in the integrated terminal that the command will compile the source code and return the following message, indicating that PostgreSQL has been successfully compiled.

You can complete the installation through the integrated terminal by accessing the working directory. Click the Output tab and select the option on the left, Open Working Directory in Terminal. Then, run the command make install to finalize the installation.
At the end of the installation, the terminal will return the message Installation complete.
3.2. Apache AGE
Apache AGE follows the step-by-step process for configuring PostgreSQL. Therefore, I will only explain the different settings from the previous walkthrough.
After creating a new project and selecting the Apache AGE source code directory in the Pre-Build option, export the environment variable CFLAGS="-g3 -O0" to enable debugging.

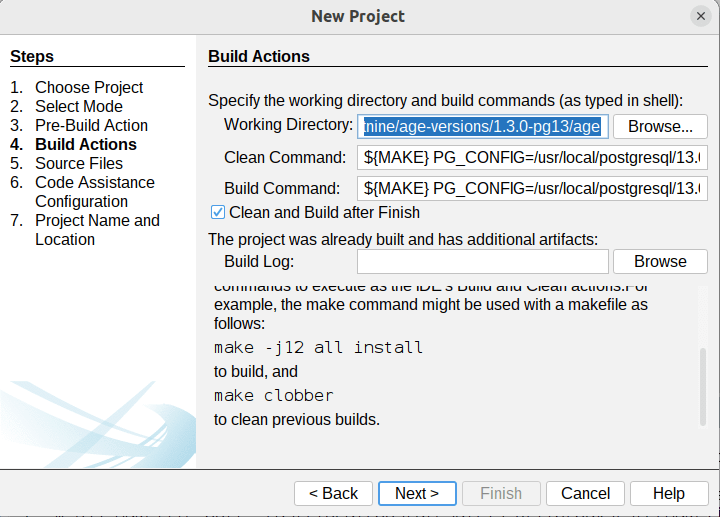
Next, in the Build Actions option, configure the Clean Command as ${MAKE} PG_CONFIG=/usr/local/postgresql/13.0/bin/pg_config distclean and the Build Command as ${MAKE} PG_CONFIG=/usr/local/postgresql/13.0/bin/pg_config install. Note that the PG_CONFIG variable will point to the pg_config file in the PostgreSQL installation directory.
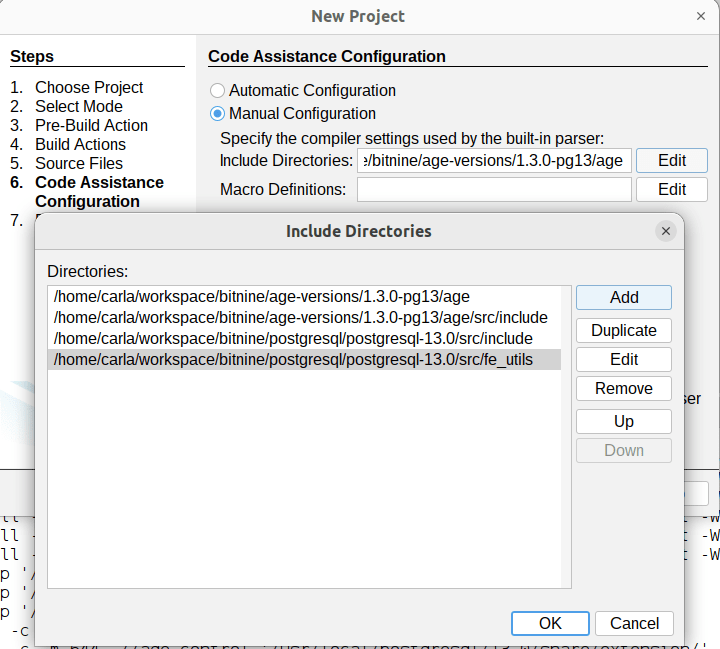
Skipping to the Code Assistance Configuration step, add the src/include folder inside the age source code directory, as well as the directories /src/include and /src/fe_utils from PostgreSQL. This will help prevent error suggestions when opening a code file in the IDE.
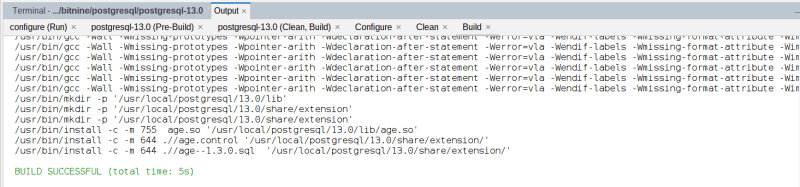
Continue with the remaining configurations following the step-by-step process for PostgreSQL. In the end, if you have selected the option to Clean and Build after Finish, you will see in the integrated terminal that the command will compile the source code and return the following message, indicating that AGE has been successfully compiled and installed.
4. Conclusion
In this tutorial, I have provided a step-by-step guide on how to configure a NetBeans project to debug the Apache AGE source code. If you found this helpful, don't miss the next tutorial, where I will walk you through the process of debugging.
5. Contribute to Apache AGE
Apache AGE website: https://age.apache.org/
Apache AGE Github: https://github.com/apache/age
6. References
This tutorial was based on the article Working with Eclipse, available at https://wiki.postgresql.org/wiki/Working_with_Eclipse.

Top comments (0)