It’s official (well, according to the gospel that is Stack Overflow): Svelte is the world’s favorite web development framework. According to a snapshot of over 80,000 devs carried out in May, this relatively new user interface tool is now more popular than established behemoths like React.js, Django and Vue.js. Programmers love its open-source convenience, its code-efficiency and its super-smart compilation, which generates an optimised JavaScript code based on your manual submissions. The fact that it’s free is a lovely little bonus, too.
We haven’t yet written an integration post about Svelte, and it seemed about time. So in this article you’re going to learn how to build a simple yet powerful app using the Svelte framework, and we’ll show you how to integrate Bugfender with the Svelte app to log and track the application events.
TL;DR
In this article we will cover the following:
- What is Svelte and how do I get started?
- How do I build a complete application using Svelte?
- How do I integrate Bugfender APIs with the application?
Just a quick note: if at any point in time you want to access the code, you can find it on my GitHub: https://github.com/atapas/hobbyland.
You can also find the demo of the app here: https://hobbyland.vercel.app/
What are we building today?
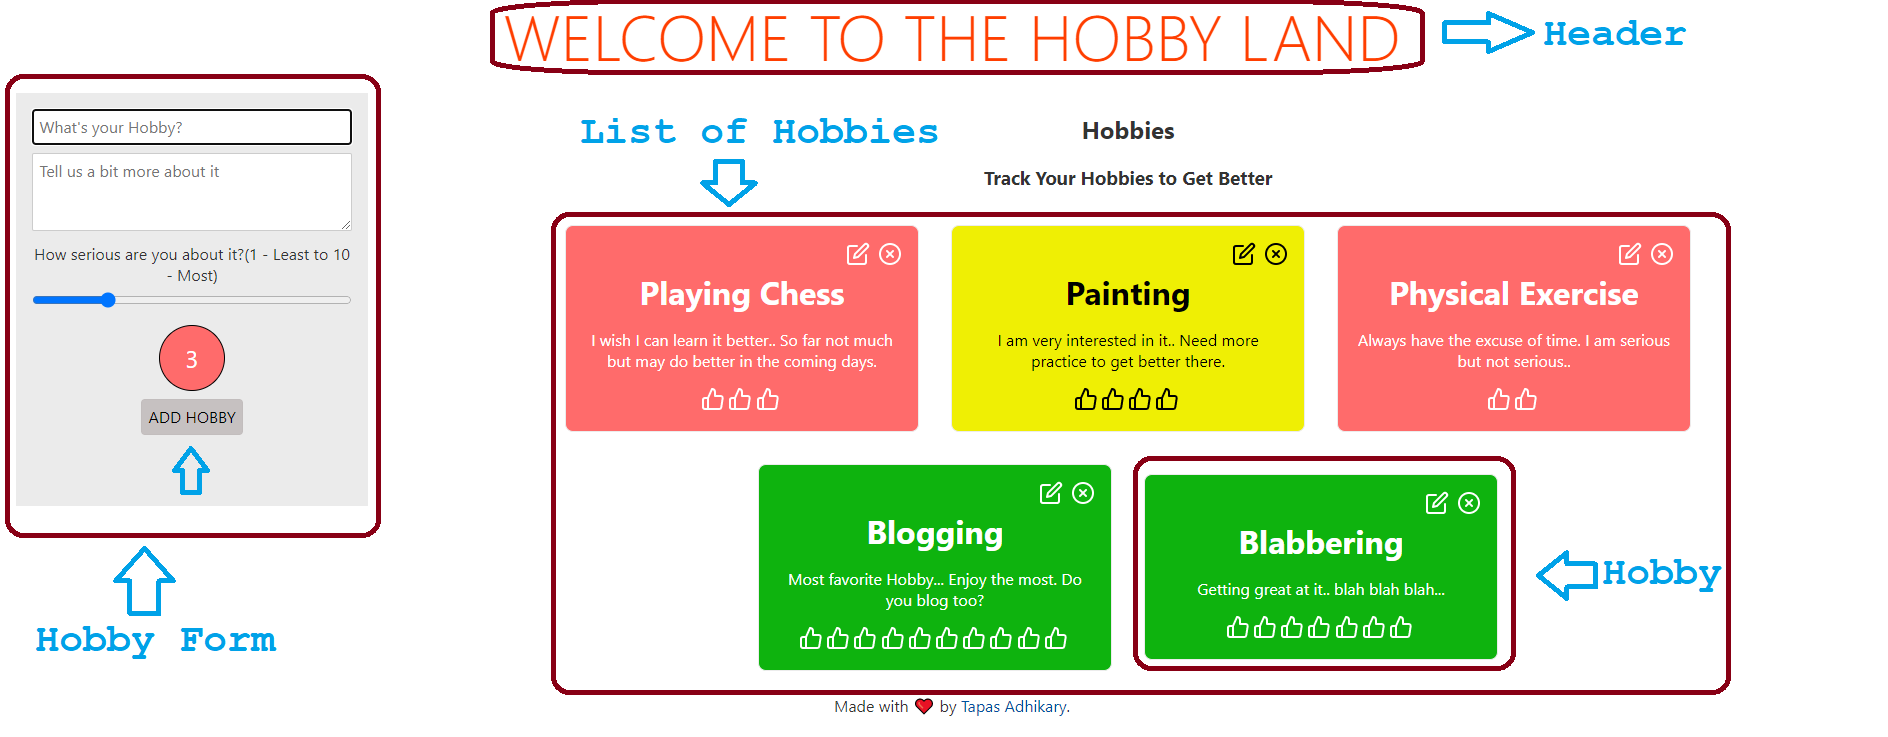
We will build an application called HobbyLand. The app will allow users to list their hobbies and give each one a score based on their proficiency. The lower the score, the more attention they need to give to it. If a hobby has a high score, they’re already smashing it!
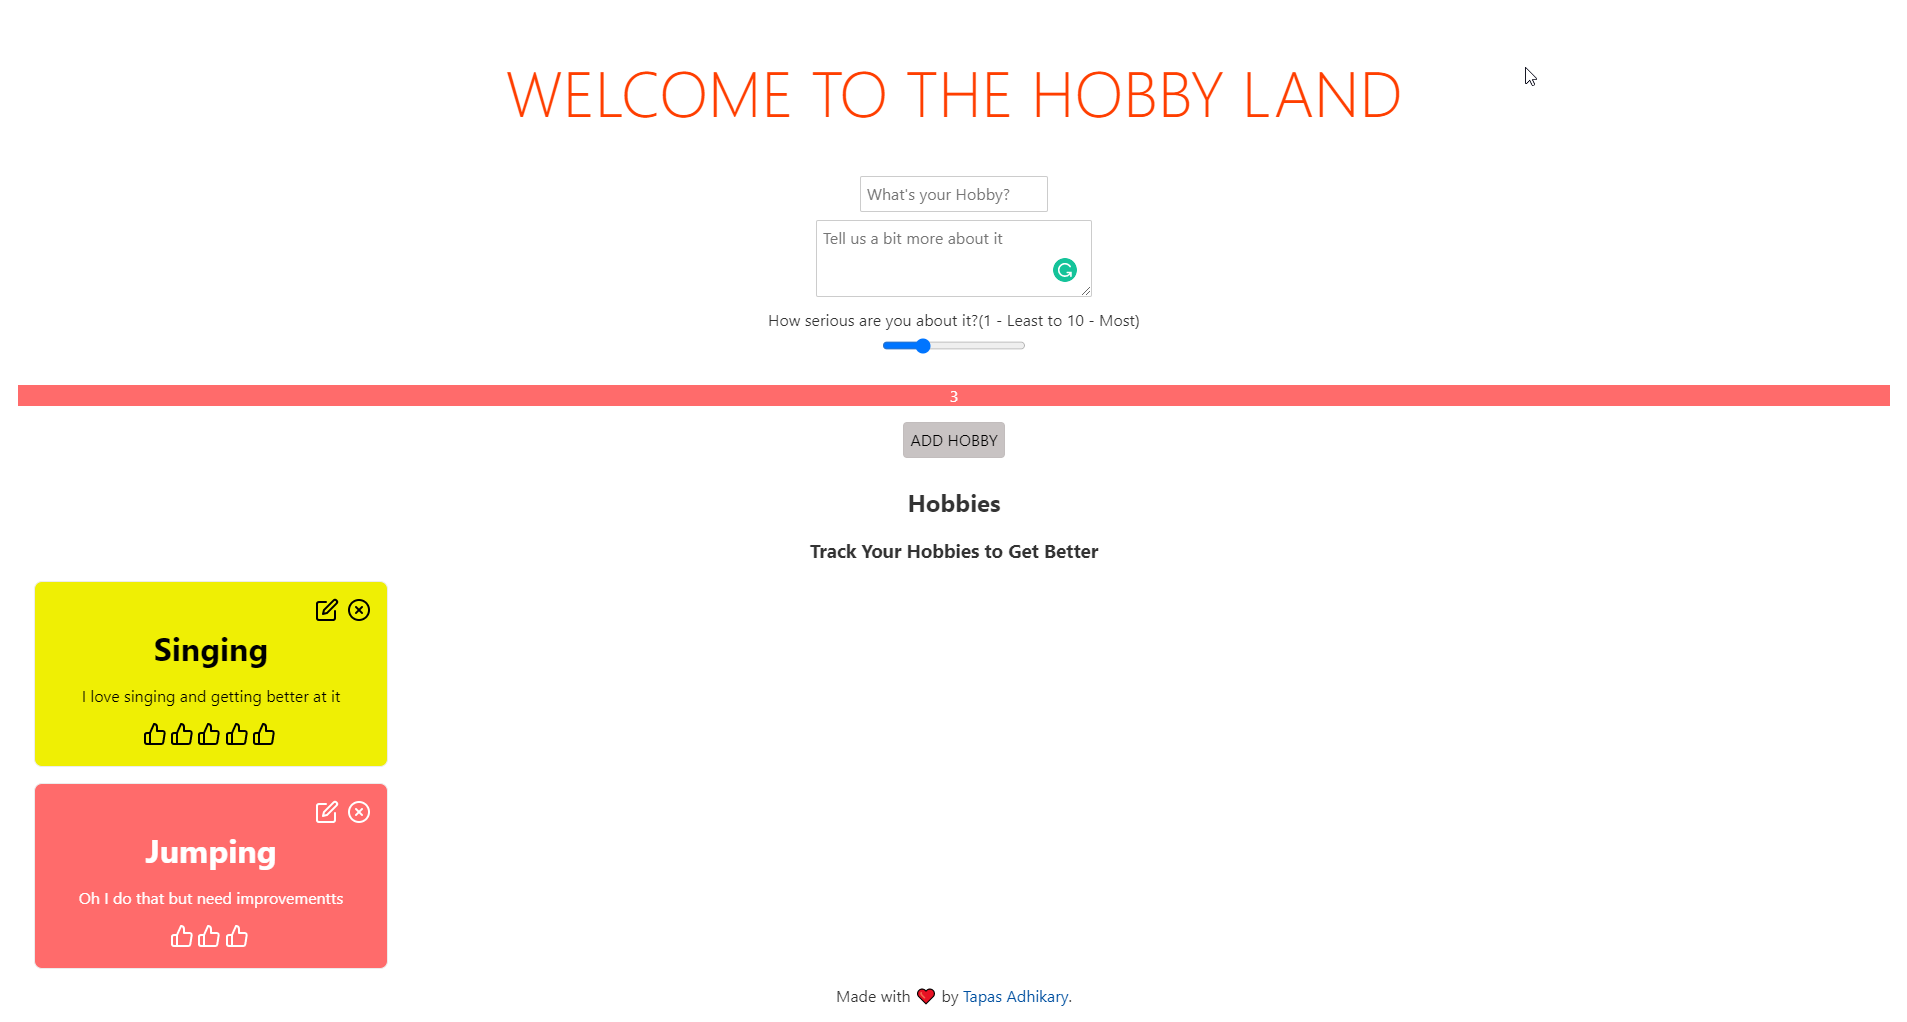
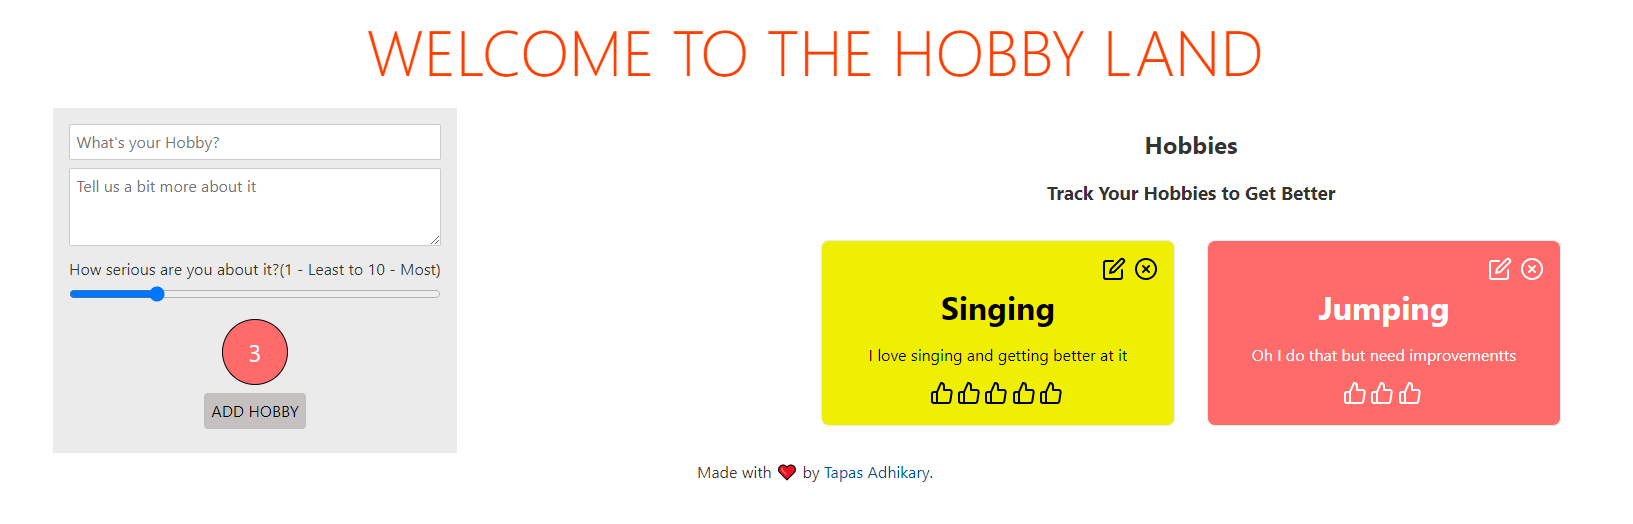
At the end of the article, the HobbyLand app will look like this:

Then, we will integrate Bugfender using the SDK to log events like creating, editing and deleting a hobby to the Bugfender console.
What are the benefits of using Svelte?
When it comes to building web applications, Svelte has broken the mold. Unlike React and Vue, Svelte shifts lots of the framework-level heavy lifting to the build phase of the application. So your application doesn’t need to perform many of its core computations at run time, and you get a seriously high-performance app!
The current generation of web frameworks uses the concept of Virtual DOM to build high-performance applications. Svelte goes one stage further by writing code that surgically updates the DOM on your application’s state change. It is far more powerful (and has a far bigger impact on performance) than diffing the DOM and reconciling on every state change.
With Svelte, you:
- Write less code.
- Don’t have the Virtual DOM.
- Can write pure Reactive applications.
- Don’t need any extra state management libraries as dependencies.
If you want to see more reasons why Svelte rocks, please check out this blog post.
Install and set up the HobbyLand project
We will use degit, a project scaffolding tool, to create the application’s skeleton code using Svelte. To get started, all you need to do is open a command prompt and use the following command:
npx degit sveltejs/template hobbyland-bugfender
This will create a basic Svelte application code structure under the directory ‘hobbyland-bugfender’. Please browse to this directory and use the following command to install the required dependencies.
npm install # or yarn install
It may take a while to install the dependencies. Once you’re done, use the following command to run the skeleton app locally:
npm run dev # or yarn dev
Now you should see the message in your command prompt confirming the application is ready, and it is running locally on [<https://localhost:5000>](<https://localhost:5000>) by default.
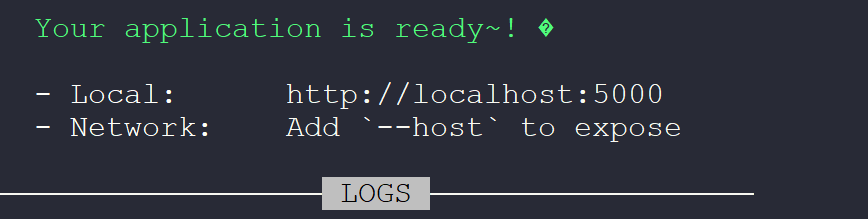
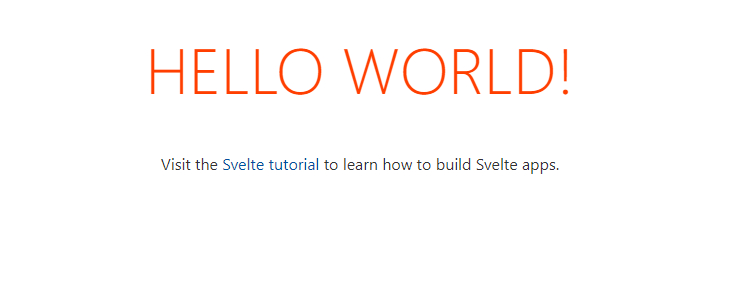
Now try to access the app on that URL. You will see the following message from your Svelte app:
Understanding a Svelte project structure
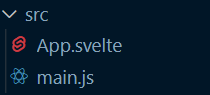
Before we start writing the Svelte project structure and components, we need to understand them. To gain the knowledge we need, we will create components and write our code under the src directory, and create a Svelte component using the .svelte extension.
In the skeleton project we have created, you should have an existing component called App.svelte and an entry point to the app called main.js.
A Svelte component contains everything required for it to work. Inside the component, you must have the markups (HTML), look-and-feel (CSS), and your logic (JavaScript). Please open the App.svelte file. You should see all three sections as:
<script>
    export let name;
</script>

<main>
    <h1>Hello {name}!</h1>
    <p>Visit the <a href="https://svelte.dev/tutorial">Svelte tutorial</a> to learn how to build Svelte apps.</p>
</main>

<style>
    main {
        text-align: center;
        padding: 1em;
        max-width: 240px;
        margin: 0 auto;
    }

    h1 {
        color: #ff3e00;
        text-transform: uppercase;
        font-size: 4em;
        font-weight: 100;
    }

    @media (min-width: 640px) {
        main {
            max-width: none;
        }
    }
</style>
The JavaScript code will go inside the <script></script> tags, while the CSS section will go inside the <style></style> tags. The remaining part of the file may contain the HTML structure of the component.
Now, let’s take a closer look at the <script> part of the App.svelte file:
<script>
    export let name;
</script>
Here you see a variable name with the let keyword, but you’ll also notice the export keyword in front of it. The App component is declaring a property (props as we call it) publicly to set its value from the outside. This means that any other components using the App can set a value to the name property.
Now open the main.js file. Here you can see we are using the App component and passing the name props with a value, world.
new App({
    target: document.body,
    props: {
        name: 'world'
    }
});
This enables components to pass data between each other other inside a Svelte application. Now, armed with this understanding, let’s start building the HobbyLand app.
App design and requirements
At the most basic level, the HobbyLand app will have the following components:
- A header.
- A hobby form to assist the creation and editing of each activity.
- A component to list all the hobbies.
- Individual hobby entries displaying the hobby id, name, description and rating.
As requirements:
- We want to save the hobbies into the browser called localstorage, and we will use a library called feather icons to import and use a few icons in our app.
- We will create a reusable component for each of the Hobby cards.
- We will create a reusable component for the button.
- The
App.sveltewill include both the hobby form and hobby listing. We can still split them into separate components, but for the sake of simplicity we will go ahead with this design for now.
Please install feather icons as a dependency:
npm install svelte-feather-icons #or yarn add svelte-feather-icons
Also, each of the hobbies requires a unique identifier. We can use the shortid library to generate a random, unique id for each of the hobbies. Let’s install that as well:
npm install shortid #or yarn add shortid
Create a Reusable Button Component
Create a file called Button.svelte under the src folder with the following content:
<script>
    export let negative;
    export let isDisabled;
</script>
<style>
    button{
          cursor: pointer;
          border-radius: 0.25rem;
          text-transform: uppercase;
    }
    .default {
        background-color: #0064c8e0;
        color: #FFF;
        border: 1px solid #0064c8e0 ;
    }
    .negative {
        background-color: #6c7074e0;
        color: #FFF;
        border: 1px solid #6c7074e0 ;
    }
    .disabled {
        background-color: #c1bcbce4;
        color: #000000;
        border: 1px solid #c1bcbce4 ;
        cursor: default;
    }

  </style>

  <button class="{negative ? 'negative' : 'default'} {isDisabled ? 'disabled' : ''}" on:click disabled={isDisabled}>
      <slot/>
  </button>
We are creating a button component with two properties, negative and isDisabled. We have declared them inside the <script></script> tags with the export keyword. When the button is used to negate an action like cancel or close, we should pass the value of the negative props as true. Similarly, to disable the button (no click and other handlers allowed), we should pass the value true for the isDisabled property.
Now, we have defined the look of the button inside the <style></style>tags. But finally there is the HTML issue of defining the button tag. The <slot/> tag tells the Svelte engine that this button component can accept children (like other HTML tags or another svelte component).
Create a reusable hobby card
Next, we want to create the reusable hobby cards to use in the list which sits inside the App.svelte component. A hobby card contains the following information:
- Edit and delete icons for each hobby.
- A hobby name.
- A hobby description.
- Several thumbs-up icons for rating.
- Background color to indicate progress towards a particular hobby.
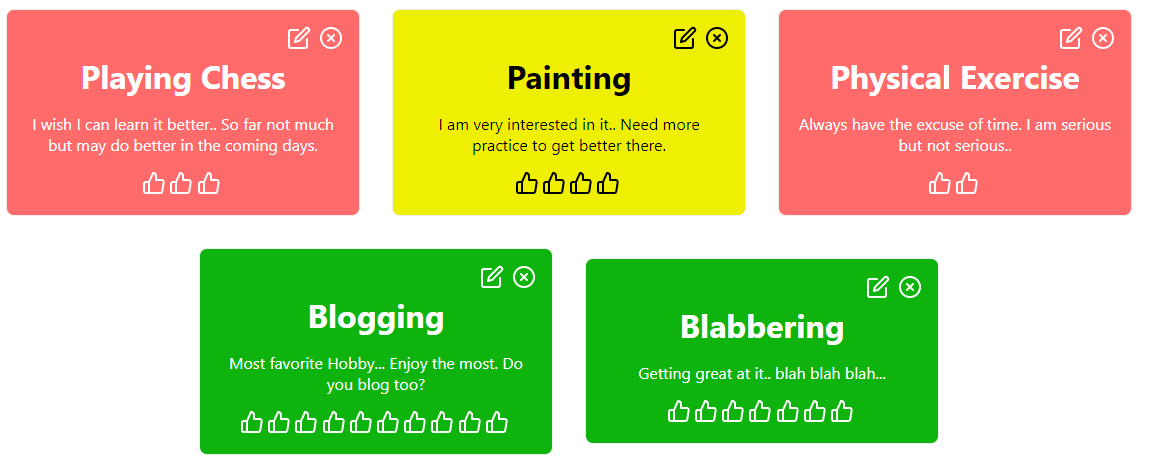
The compilation below shows a list of five hobby cards, with various values.
We start creating a new file entitled Hobby.svelte under the src directory with the following content:
<script>
    import { EditIcon, XCircleIcon, ThumbsUpIcon } from 'svelte-feather-icons';
    export let hobby = {
        id: '',
        name: '',
        description: '',
        weight: '',
        look: {
            background: '',
            color: ''
        }
    }
    export let deleteHobby;
    export let editMode;
</script>

<div class="hobby" style="background-color: {hobby.look.background}; color: {hobby.look.color};">
    <div class="actions">
        <span on:click={editMode}><EditIcon size="24" /></span>
        <span on:click={deleteHobby}><XCircleIcon size="24" /></span>
    </div>
    <span hidden>{hobby.id}</span>
    <h3><b>{hobby.name}</b></h3>
    <p>{hobby.description}</p>
    <div>
        {#each new Array(hobby.weight) as index}
            <span class="weight"><ThumbsUpIcon size="24" /></span>
        {/each}
    </div>
</div>

<style>
    h3 {
      margin: 0;
      padding: 0;
            font-size: 2em;
            font-weight: 100;
      }
    .hobby {
        padding: 1rem;
        margin: 1rem;
        border: 1px solid #ececec;
        border-radius: .5rem;
        width: 20rem;
        display: flex;
        flex-direction: column;
        justify-content: center;
    }
    .actions {
        justify-content: flex-end;
        display: flex;
    }
    .actions span {
        padding: 0 0 0 .5rem;
        cursor: pointer;
    }
    .weight {
        margin-right: 0.2rem;
    }
</style>
In this component:
- We first import a few icons for the edit, delete and thumbs-up functions.
- Then we define the hobby model structure with name, description, weight (rating), look (background color), and an id. The model is a traditional JavaScript object, with empty values. Notice the
exportkeyword at the front of the object. This means we will populate the object’s value from elsewhere; in our case, it will be from theApp.sveltecomponent. - Next we define two more props,
deleteHobbyandeditMode. These are two functions that we will call from the App component to delete a hobby and set the card in the edit mode. - After that, we define the HTML structure of the hobby card.
- Finally, the style section defines the look of the component.
Create a storage utility
We want to persist the hobby data into the browser’s local storage. So first, let’s create a utility file to write to the local storage and read from it. To do this, you need to create a file named storage.js under the src directory with the following content:
const saveToLS = (key, value) => {

    if (typeof(Storage) !== "undefined") {
        localStorage.setItem(key, JSON.stringify(value));
    }
}

const readFromLS = (key) => {

    if (typeof(Storage) !== "undefined") {
        return localStorage.getItem(key);
    }
}

export { saveToLS, readFromLS };
Now, let’s bring it all together in the app component
Now we will use all these components and utilities inside the App component to create the final app. To kick things off, let’s start modifying the App.svelte file.
Open the file and import the following code under the script section:
<script>
    import { onMount } from 'svelte';
    import Hobby from './Hobby.svelte';
    import Button from './Button.svelte';
    import { saveToLS, readFromLS } from './storage';
    import { generate } from 'shortid';
</script>
Here we have imported all the components and utilities created so far. We have also imported the generate() method from the shortid to create unique ids. Please notice the we have added the onMount import from the svelte library so we can do some action when the component loads.
Next, let’s define the variables, the functions required for the component to work. First, you need to create these variables under the script section, below the imports.
<script>
// --- imports as before ---
let id;
let name = '';
let weight = 3;
let description = '';
let hobbies = JSON.parse(readFromLS('hobbies')) || [];
let isEditMode = false;

let elmToFocus;
onMount(function() {
        elmToFocus.focus();
});
</script>
Here we declare the private variables like the id, name and description of the hobbies. We identify the stored hobbies in the local storage and assign them to a variable; meanwhile, we set the element to focus when the component loads. The element to focus on is the textbox that creates a hobby. We will take a look at that in a while.
Next, let’s create useful methods to toggle between the options to create, edit, delete, and retrieve hobbies. Please create these functions inside the script tag:
<script>
// --- imports as before ---
// --- private variables as before ---

// Define the look of a Hobby based on the weight/rating
const getHobbyLook = (weight) => {
        let background = '#ff6b6b';
        let color = '#FFFFFF';
        if (weight > 3 && weight <= 6) {
            background = '#efef04';
            color = '#000';
        } else if (weight > 6) {
            background = '#0eb30e';
            color = '#FFFFFF';
        }
        return {background: background, color: color};
}

// Method to add a hobby
const addHobby = () => {
        const look = getHobbyLook(weight);

        if (isEditMode) {
            editHobby(id, name, weight, description, look);

        } else {
            const hobby = {
                id: generate(),
                name : name,
                weight : weight,
                description: description,
                look: look
            };
            hobbies = hobbies.concat(hobby);
            resetAndSave(hobbies);
        }
}

// Method to delete a hobby
const deleteHobby = id => {
        console.log('hobby to delete', id);
        //find hobby by name
        let index = hobbies.findIndex(hobby => hobby.id === id);
        //remove hobby
        hobbies.splice(index, 1);
        hobbies = [...hobbies];
        console.log('hobbies after delete', JSON.stringify(hobbies));
        resetAndSave(hobbies);
};

// Method to edit a hobby
const editHobby = (id, newName, newWeight, newDescription, newLook) => {
        console.log('hobby to edit', name);
        //find hobby by name
        let index = hobbies.findIndex(hobby => hobby.id === id);
        //edit hobby
        hobbies[index].name = newName;
        hobbies[index].weight = newWeight;
        hobbies[index].description = newDescription;
        hobbies[index].look = newLook;
        hobbies = [...hobbies];
        console.log('hobbies after edit', hobbies);
        resetAndSave(hobbies);
};

// Set the edit mode
const editMode = (hobbyId) => {
        console.log('hobby to edit', name);
        //find hobby by name
        let hobby = hobbies.find(hobby => hobby.id === hobbyId);
        id = hobby.id;
        name = hobby.name;
        weight = hobby.weight;
        description = hobby.description;
        isEditMode = true;
}

// Method to reset the hobby form
const reset = () => {
        id = '';
        name = '';
        weight = 3;
        description = '';
        isEditMode = false;
}

// Method to reset and save
const resetAndSave = hobbies => {
        reset();
        saveToLS('hobbies', hobbies);
}
</script>
Up next, let’s define the HTML structure. To do this, use the following structure after the script tag:
<main>
    <h1>Welcome to the Hobby Land</h1>
    <div class="container">
        <div class="hobby-form">
            <div>
                <label for="name"></label>
                <input type="text" id="name" bind:value={name} placeholder="What's your Hobby?" bind:this={elmToFocus} />
            </div>
            <div>
                <label for="description"></label>
                <textarea rows="3" cols="35" id="description" bind:value ={description} placeholder="Tell us a bit more about it"/>
            </div>
            <div class="weight-div">
                <label for="weight">How serious are you about it?(1 - Least to 10 - Most)</label>
                <input type="range" min="1" max="10" id="weight" bind:value={weight} />
                <p style="background-color: {getHobbyLook(weight).background}; color: {getHobbyLook(weight).color};">{weight}</p>
            </div>
            {#if isEditMode}
                <Button on:click={reset} negative={true}>Cancel</Button>
                <Button on:click={addHobby}>Edit Hobby</Button>
            {:else}
                <Button on:click={addHobby} isDisabled={name.trim().length === 0}>Add Hobby</Button>
            {/if}
        </div>
        <div>
            <h2>Hobbies</h2>
            <h3>Track Your Hobbies to Get Better</h3>
            <div class="hobby-list">
                {#if hobbies.length === 0}
                    <p class="no-hobby">
                        No Hobbies? Oh dear, please add one to track.
                    </p>
                {:else}
                    {#each hobbies as hobby}
                        <Hobby
                            hobby={hobby}
                            deleteHobby={() => deleteHobby(hobby.id)}
                            editMode = {() => editMode(hobby.id)} />
                    {/each}
                {/if}
            </div>
        </div>
    </div>
    <footer>
        <p>Made with ❤️ by <a href="<https://twitter.com/tapasadhikary>">Tapas Adhikary</a>.</p>
    </footer>
</main>
A few things need to happen here.
- First, we create a heading.
- Then we create a hobby form with the text field to provide hobby name, a text area for the description, and a slider to provide the weight of each hobby on a scale of 1 to 10.
- There are two buttons. One is to reset the form any time. The other button is to add/edit a hobby based on the mode setting.
- Then, we have a list of hobbies created using the
Hobbycard component.
If you run the application, you will find it fully working, but it still lacks the desired look and feel.
Let’s fix the problem. Please copy and paste the following styles inside the <style></style> tags by replacing the existing styles:
main {
        text-align: center;
        padding: 1em;
        margin: 0;
    }
    h1 {
        color: #ff3e00;
        text-transform: uppercase;
        font-size: 4em;
        font-weight: 100;
        margin: 0;
    }
    p {
        margin: 0.5rem;
    }
    textarea {
        width: 100%;
    }
    .container {
        display: flex;
        justify-content: space-around;
        margin: 1rem auto auto auto;
    }
    @media screen and (max-width: 720px) {
        .container {
            flex-direction: column;
        }
    }
    .hobby-form {
        padding: 1rem;
        background-color: #ebebeb;
        max-height: 381px;
        min-width: 320px;
    }
    .hobby-list {
        display: flex;
        flex-direction: row;
        flex-wrap: wrap;
        align-content: center;
        justify-content: center;
        align-items: center;
    }
    .no-hobby {
        padding: 1em;
        border: 1px solid;
        border-radius: 4px;
        background-color: #ebebeb;
    }
    .weight-div {
        display: flex;
        flex-direction: column;
        align-content: center;
        justify-content: center;
        align-items: center;
    }
    .weight-div p {
        width: 2rem;
        height: 2rem;
        border: 1px solid #000;
        border-radius: 35px;
        padding: 1rem;
        font-size: 1.5rem;
    }
    input[type="range"] {
        padding: 0;
        margin-top: 0.4em;
        width: 100%;
    }
    input[type="text"] {
        width: 100%;
    }
    @media (min-width: 640px) {
        main {
            max-width: none;
        }
    }
Save your changes and refresh the app. Bingo!!! You got it,
Now try creating, editing and deleting a few more hobbies. You should have it working completely.
Integrate Bugfender to log activities
Bugfender is a remote logging service that allows users to collect logs for everything in the application. It is straightforward to integrate Bugfender with a JavaScript-based framework like Svelte and get started. There are SDKs available to integrate with mobile apps as well.
To kick things off, create an account with Bugfender. Once logged in, you can create a Bugfender application for web apps using the Web SDK option. You can follow this step-by-step guide to create a Bugfender application, and you will find an API key ready for you. Please keep it safe.
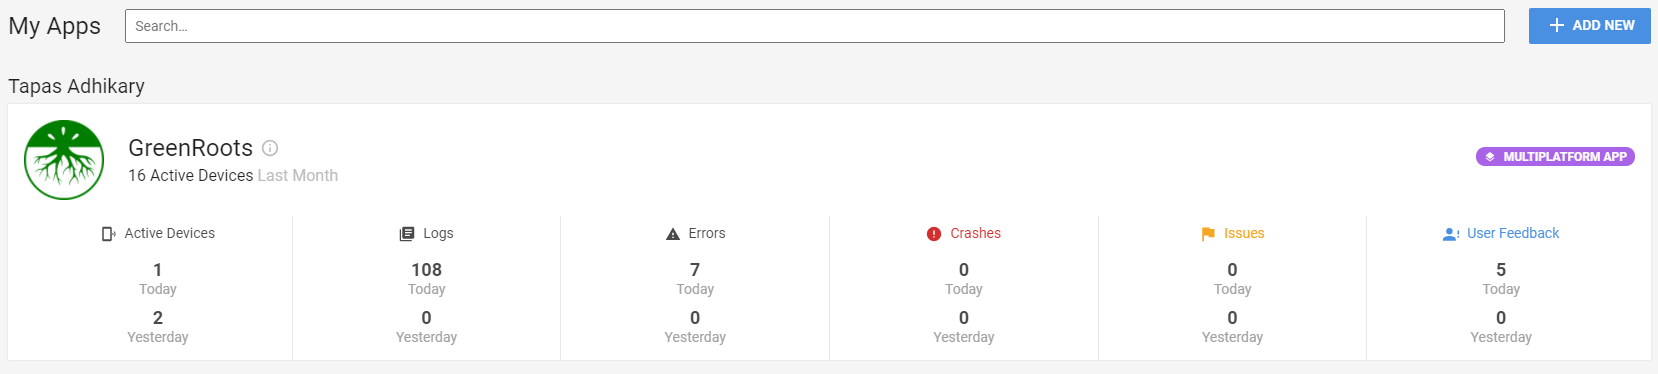
Once you have created your app, the Bugfender dashboard will enable you to keep track of logs, issues, feedback, and crashes. This is how my dashboard looks:
Install the Bugfender SDK
Open a command prompt and the root of the project folder and use this command to install the Bugfender SDK:
npm i @bugfender/sdk #Or yarn add @bugfender/sdk
Add Bugfender Logs
Open the App.svelte file and import the Bugfender SDK along with other imports required by your app inside the script tag.
<script>
    import { Bugfender } from '@bugfender/sdk';

  // --- other existing imports ---
</script>
Then initialize the BugFender service by calling the init method. We pass the API key to this method. To do this, place the following code after the imports.
Bugfender.init({
    appKey: '<REPLACE_YOUR_API_KEY_HERE>'
});
Now you can start adding logs of different levels (info, warn, error, etc) in your application code. Here is an example in which we add a normal info log using the addHobby method:
Bugfender.log(`Added a hobby with id ${hobby.id}, and name ${hobby.name}`);
Similarly, you can add deleteHobby and editHobby methods as well. Now, as you start adding, editing, or deleting Hobbies from your app, it will log the relevant details to the Bugfender app. You can view them from the Bugfender dashboard.
Here are a few examples:


Importantly, we can also capture other browser event logs:
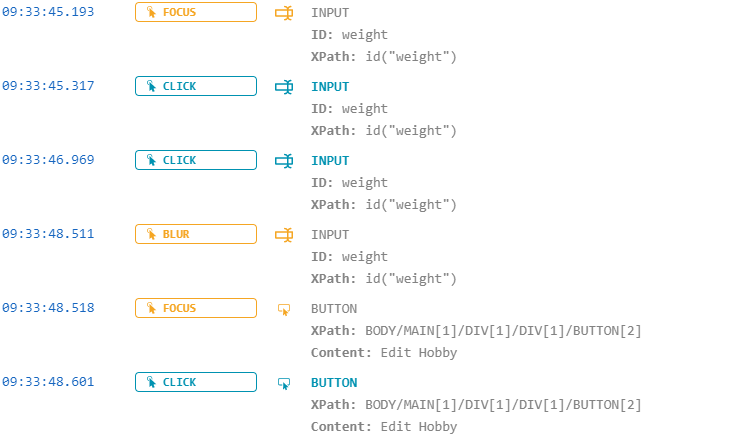
If there are warnings or errors, that gets logged automatically!

Bugfender – Advanced API Usages
The Bugfender SDK provides APIs for many advanced usages, like:
- sendIssue – To send an issue with the title and details to the Bugfender log server.
Bugfender.sendIssue('Issue title', 'Description of the issue');
- sendLog – To send logs with tags so that you can filter the log accordingly.
Bugfender.sendLog({ tag: 'tag1', text: 'this is my log' });
- sendUserFeedback – You can send user feedback using this API and see all the user feedback under the
Feedbacksection of the Bugfender Dashboard.
Bugfender.sendUserFeedback('Love the App!', 'You are doing a great job with it.')
- As an additional option, we can also use the
getUserFeedback()method to create a modal user interface for collecting feedback.
Bugfender.getUserFeedback().then((result) => {
    if (result.isSent) {
// User sent the feedback// `result.feedbackURL` contains the Bugfender feedback URL} else {
// User closed the modal without sending the feedback}
});
Where to go from here
That’s all for now. Thanks for reading! I hope you found the article insightful. Please start exploring Svelte if you are new to it. As a next step, you can connect this HobbyLand app to a database and add more hobbies!
We’d also like to invite you to explore Bugfender and find out more about its other use cases.
Here are a few links you may find helpful:
- Learn Svelte
- Bugfender Web SDK
- GitHub repository of the HobbyLand app. Please feel free to star/fork/contribute.
Bugfender is a tool that helps you find errors in your production apps. We strongly believe in sharing knowledge, and that’s why we create articles like this one. If you liked it, help us continue creating content by sharing this article or signing up on the Bugfender site.

Latest comments (0)