
In the last post we covered "local" development. In the spirit of continuous integration, we want to be able to have team members integrate their work. If you remember, the violations we had from running the inspec-gcp-cis-benchmark profile, we've got some work to do! We will do that using Kitchen-Terraform and run the workflow in GitHub Actions. In this post, we will cover Kitchen-Terraform.
Project Setup
The directory structure is essential when using Kitchen-Terraform. My current structure looks like this:

Fixtures
You'll need to have a fixtures directory.

This directory is where your Terraform root modules will live or in Kitchen-Terraform language, "test fixtures." It will call the child module, the module we are developing. That language aligns with the module documentation, so in our case, the child module is in the root of the repository, and it's the module we are publishing through GitHub for reuse. In this example, we only have one root module or test fixture we are testing against. There could and most likely will be more if we can't cover multiple test scenarios in a single fixture. I also have a shared directory for common code across numerous test fixtures if needed.
Integration
The integration directory will hold your profile with the Chef Inspec DSL controls you want to run against a test fixture.

For this post, we will focus only on the cis_benchmark.rb and the inspec.yml files. Since Google did all the heavy lifting for us by writing the controls for the specific benchmarks we are testing for, 3.1 Networking and 4.4 VMS, we can add them very quickly. First, you add the repository you depend on:
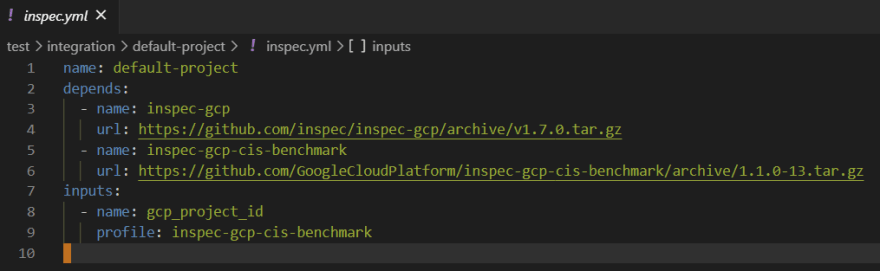
NOTE: The input gcp_project_id is what the inspec-gcp-cis-benchmark profile expects in order to know what project to run the tests against. Kitchen-Terraform can do attribute and Terraform output mapping. I'll touch on why that's important when we look at the kitchen.yml file.
Then to call a specific control, we add it into the cis_benchmark.rb like so:

kitchen.yml
The last thing we need to do is tell Kitchen-Terraform what to do! We do this by creating a kitchen.yml file:

You can read the documentation about the kitchen.yml if you want to know more. However, I do want to touch on a couple of things.
Lines three and four are a way you can pass -var="foo=bar" to Terraform from inside Kitchen-Terraform. In this example, I'm using the billing ID as a secret in GitHub. We can talk about that a bit more when we set up the workflow in GitHub Actions.
The other thing is the lines twenty-four and twenty-five. This has to do with the attribute and Terraform output mapping I talked about earlier. I took me a bit of learning out loud to get this squared away, but with some help, I was able to get it. To make a long story short, this is how I mapped my Terraform output of project_id to the attribute needed to run the inspec-gcp-cis-benchmark profile.
Running Kitchen-Terraform
Now we can run kitchen converge and see what we have:

This is going to do all kinds of work for you. It will verify the Terraform client version, initialize the Terraform working directory as well as create and switch to a workspace:

It will also validate the Terraform configuration files and finally run the Terraform apply:
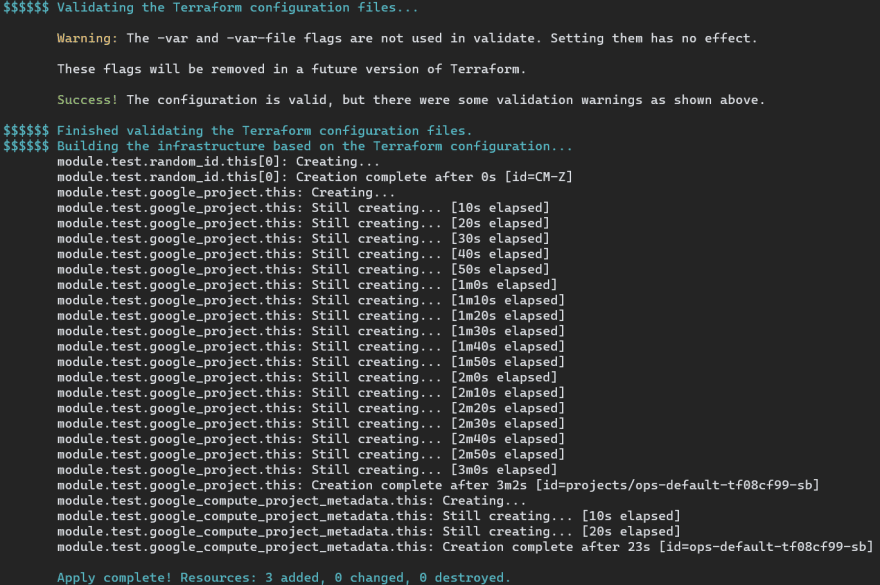
Next, we can run the tests using kitchen verify and see the results:

Finally, we can destroy the infrastructure using kitchen destroy. You could also do all of the above in one command by running kitchen test.
In the next post, I will talk about running the testing workflow through GitHub Actions!


Top comments (0)