Summary: In this article, I am going to explain how to build a React web page using Ruby on Rails for backend and MongoDB for database.
TLDR: Github repository link: https://github.com/bravemaster619/rails-react
Decoupled structure has many great advantages. Frontend developers don’t need to know what framework and database they are using in backend, as long as they have a decent API documentation.
Backend developers can solely focus on performance and can build a more stable, reliable and bug-free framework. They will get errors only from backend, not from templates! What if the project got bigger and you need to optimize backend for better performace? The backend team can work on API v2 while the website is still live. Once the new API is completed, just change api url from v1 to v2 will do the work! The same thing can be said for frontend optimization and layout changes.
Full stack developers can benefit from decoupled structure, too. Clients often give you designs and flow diagrams and order you to build them from scratch. You can start building frontend pages with mockup data. Once you get to know the main flow and details of the project, it will be much more easier to design database and framework.
In this article, I will show you how to build a decoupled web app using React and Ruby on Rails. I chose MongoDB for database because NoSQL databases are so good for projects with flexible data structures.
Prerequisites:
- Latest Ruby and Ruby on Rails
- Latest MongoDB Community Edition
- Latest Node.js LTS version
1. Build a Ruby on Rails Framework
Create a directory named rails-react
$ mkdir rails-react
$ cd rails-react
Create a new Rails app named backend
$ rails new backend --api --skip-active-record
apiswitch will optimize and remove middlewares and resources from our Rails app. (To find out more, refer to this link: Using Rails for API-only Applications)
skip-active-recordswitch removes ActiveRecord dependency because we won’t need that. We will be using mongoid (Click here for official Mongoid Manual).
Install gem dependencies
Add the following lines before group :development to Gemfile:
# mongoid for MongoDB
gem 'mongoid', '~> 7.0.5'

# cors policy
gem 'rack-cors'
mongoid is the official ODM for MongoDB in Ruby. rack-cors makes cross-origin ajax request possible in our project. Since backend and frontend may run in different port, we need to set cors policy in our Rails app.
Next, we are going to install dependencies:
$ bundle install
Configuration for rack-cors
Add the following lines to config/application.rb:
config.middleware.insert_before 0, Rack::Cors do
  allow do
    origins '*'
    resource '*', headers: :any, methods: [:get, :post, :options]
  end
end
It allows Rails app to allow requests from any origins with any methods.
Configuration for mongoid
Run the following command in shell:
$ cd bin
$ rails g mongoid:config
It will create a file mongoid.yml in config directory. You can set a database name, hosts and other options for MongoDB. Default database name is backend_development and the database host is localhost:27017.
Create model and controller
Let’s create a user model. It will have only two fields: name and email.
To make things easier, we will use scaffold, rather than creating a model and a controller individually.
$ rails generate scaffold User name:string email:string
Scaffold will generate migration, model, controller, test suite and routes for a given structure.
After everything is set, you can use the following shell command to run a test server:
$ rails server
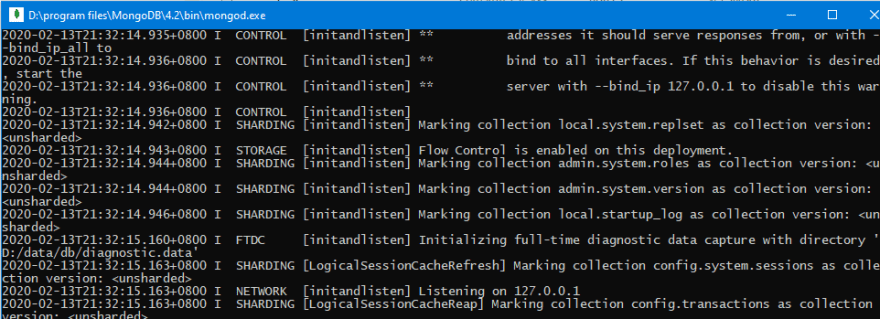
Note: Don’t forget to run mongod before initializing a test server.
2. Build a React App
Now you can start building a React app for frontend.
In our project root directory rails-react, run the following command:
$ npx create-react-app frontend
Install node modules
After installing is done, let’s add react-bootstrap for responsibility and smart looks:
$ cd frontend
$ npm i react-bootstrap bootstrap
Add react-toastify for alerts in our app:
npm i react-toastify
Since the frontend has to send AJAX requests to Rails API, we need Axioss:
$ npm i axios
Create a file named config.js in src directory and add the following code:
export const API_HOST = 'http://localhost:3000'
App.js
Modify App.js like the following:
import React from 'react';
import './App.css';
import 'bootstrap/dist/css/bootstrap.min.css';
import 'react-toastify/dist/ReactToastify.css';
import Root from "./components/Root"
import {ToastContainer} from "react-toastify";
const App = () => (
    <>
        <Root />
        <ToastContainer/>
    </>
)
export default App
Root.jsx
In directory src, create a new directory named components and make a new file Root.jsx. Cut and paste the following code:
import React from "react"
import Axios from "axios"
import { alertService } from '../services/alert'
import SubscribeForm from "./SubscribeForm"
import UserTable from "./UserTable"
import { API_HOST } from "../config"

class Root extends React.Component {

    constructor(props) {
        super(props)
        this.state = {
            name: '',
            email: '',
            sendingRequest: false,
            subscription: false,
        }
        this.changeName = this.changeName.bind(this)
        this.changeEmail = this.changeEmail.bind(this)
        this.subscribe = this.subscribe.bind(this)
    }

    changeName(e) {
        let name = e.target.value
        this.setState({name})
    }

    changeEmail(e) {
        let email = e.target.value
        this.setState({email})
    }

    subscribe() {
        this.setState({
            sendingRequest: true
        })
        if (!this.state.name) {
            return alertService.showError('Please input name!')
        }
        if (!this.state.email) {
            return alertService.showError('Please input email!')
        }
        Axios.post(`${API_HOST}/users`, {
            name: this.state.name,
            email: this.state.email,
        }).then(res => {
            if (res.data && res.data._id) {
                this.setState({
                    subscription: true
                })
            } else {
                alertService.showError('Subscription failed!')
            }
        }).finally(() => {
            this.setState({
                sendingRequest: false
            })
        })

    }

    render() {
        return (
            <div className="container">
                {this.state.subscription ? (
                    <UserTable
                        subscription={this.state.subscription}
                    />
                ) : (
                    <SubscribeForm
                        name={this.state.name}
                        email={this.state.email}
                        changeName={this.changeName}
                        changeEmail={this.changeEmail}
                        subscribe={this.subscribe}
                        sendingRequest={this.state.sendingRequest}
                    />
                )}
            </div>
        )
    }

}

export default Root
alert.jsx
In src directory, create a new directory called services. Then create a new file alert.jsx. Cut and paste the following code:
import React from 'react';
import { toast } from 'react-toastify'

class AlertService {
    showSuccess(title, content = '') {
        toast.success(<div dangerouslySetInnerHTML={{ __html : title + '<br/>' + content }}></div>);
    }

    showError(title, content = '') {
        toast.error(<div dangerouslySetInnerHTML={{ __html : title + '<br/>' + content }}></div>);
    }
}

export const alertService = new AlertService();
SubscribeForm.jsx
In components directory, create a new file SubscribeForm.jsx:
import React from "react"

class SubscribeForm extends React.Component {

    constructor(props) {
        super(props)
    }

    render() {
        return (
            <div className="row mt-5 justify-content-center">
                <div className="col-12 col-lg-6 border border-1 p-4">
                    <form className="">
                        <div className="form-group">
                            <label className="col-form-label">Name</label>
                            <input
                                className="form-control"
                                type="text"
                                placeholder="Please input your name"
                                value={this.props.name}
                                onChange={this.props.changeName}/>
                        </div>
                        <div className="form-group">
                            <label className="col-form-label">Email</label>
                            <input
                                className="form-control"
                                type="text"
                                placeholder="Please input your email"
                                value={this.props.email}
                                onChange={this.props.changeEmail}/>
                        </div>
                        <hr className="my-4"/>
                        <div className="form-group text-right">
                            {this.props.sendingRequest ? (
                                <button type="button" className="btn btn-primary" disabled>Sending Request...</button>
                            ) : (
                                <button type="button" onClick={this.props.subscribe}
                                        className="btn btn-primary">Subscribe</button>
                            )}
                        </div>
                    </form>
                </div>
            </div>
        )
    }

}

export default SubscribeForm
UserTable.jsx
In components directory, create a new file UserTable.jsx:
import React from "react"
import { alertService } from '../services/alert'
import Axios from "axios"
import { API_HOST } from "../config"
class UserTable extends React.Component {

    constructor(props) {
        super(props)
        this.state={
            loading: true,
            users: []
        }
    }

    componentDidMount() {
        Axios.get(`${API_HOST}/users`).then(res => {
            this.setState({
                users: res.data
            })
        }).catch(e => {
            alertService.showError('Cannot get user data...')
        }).finally(() => {
            this.setState({
                loading: false
            })
        })
    }

    render() {
        return (
            <div className="row mt-5 justify-content-center">
                <div className="col-12 col-lg-8">
                    <table className="table table-hover table-striped">
                        <thead>
                            <tr>
                                <th>No</th>
                                <th>Name</th>
                                <th>Email</th>
                            </tr>
                        </thead>
                        <tbody>
                        {this.state.loading ? (
                            <tr><td>Loading...</td></tr>
                        ) : (
                            <>
                                {this.state.users.map((user, index) => {
                                    return (
                                        <tr key={index}>
                                            <thd>{index+1}</thd>
                                            <td>{user.name}</td>
                                            <td>{user.email}</td>
                                        </tr>
                                    )
                                })}
                                {!this.state.users.length && (
                                    <tr><td>Loading...</td></tr>
                                )}
                            </>
                        )}
                        </tbody>
                    </table>
                </div>
            </div>
        )
    }

}

export default UserTable
3. Let’s check it out!
First of all, ensure that MongoDB is up and running.
Next, run Rails server for backend:
$ cd bin
$ rails server

And then run React app:
$ npm run start

Unfortunately, port 3000 is default port for both Rails and React. You can set a different port for Rails using -p switch or modify package.json to run React app on a diffrent port. But simply you can say Y to let our React run on port 3001.
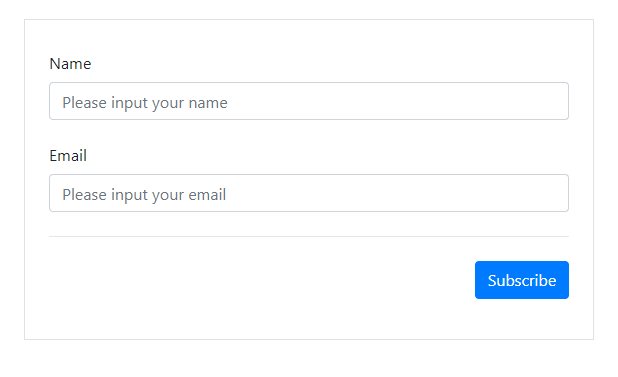
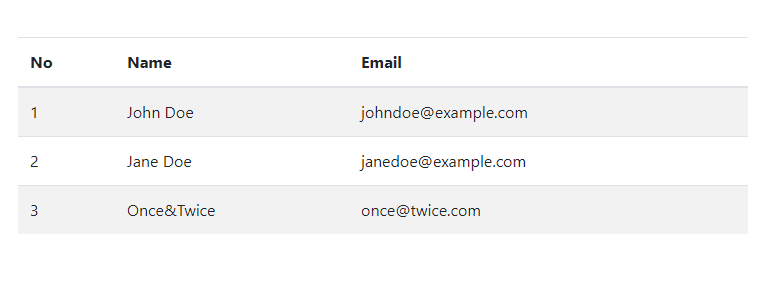
When you fill the form and click Subscribe button, the page will show you a table of all subscribed users.
4. How does this work?
When a user input name and email and click “Subscribe”, Axios will send a POST request to Rails server.
Axios.post(`${API_HOST}/users`, {
    name: this.state.name,
    email: this.state.email,
})
Since we created User model by scaffold, REST Api routes for user are already set in Rails server - in config/routes.rb:
Rails.application.routes.draw do
  resources :users
end
POST requests are handled in users#create:
# POST /users
def create
  @user = User.new(user_params)

  if @user.save
    render json: @user, status: :created, location: @user
  else
    render json: @user.errors, status: :unprocessable_entity
  end
end
Since our Rails App works as API, the users_controller will respond with JSON instead of rendering erb files.
Axios will receive the JSON result and check if there is BSONObjectId to see the user is created successfully.
Axios.post(`${API_HOST}/users`, {
    name: this.state.name,
    email: this.state.email,
}).then(res => {
    if (res.data && res.data._id) {
        this.setState({
            subscription: true
        })
    } else {
        alertService.showError('Subscription failed!')
    }
})
If the user is successfully created, it will update subscription state as true. Then the Root component will render UserTable component.
After UserTable component is mounted, it sends GET request to API, which will return JSON Array of all users stored in MongoDB:
componentDidMount() {
    Axios.get(`${API_HOST}/users`).then(res => {
      this.setState({
        users: res.data
      })
    }).catch(e => {
        alertService.showError('Cannot get user data...')
    }).finally(() => {
        this.setState({
          loading: false
        })
    })
}
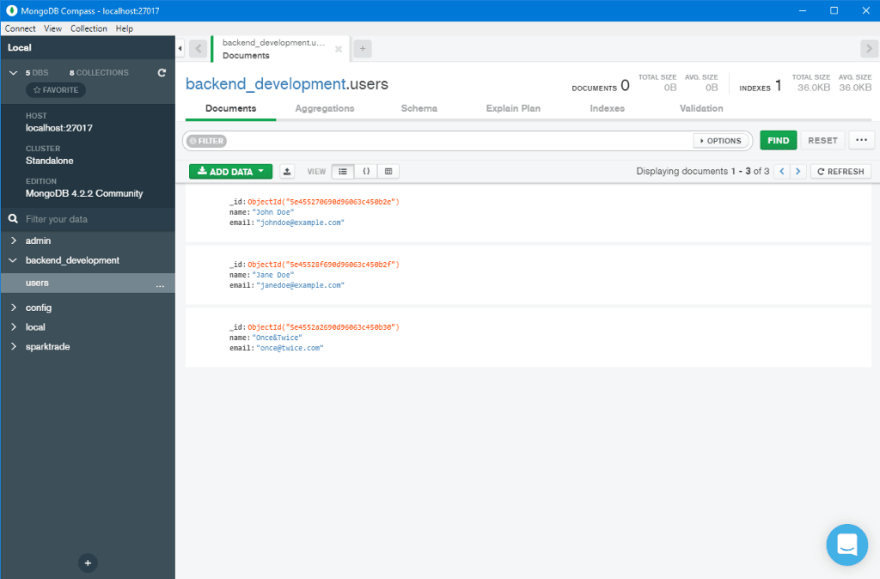
If the result is successful, it will update users state and show all users stored in database:

Here is an image of MongoDB Compass showing stored users:
Useful Links
- You can see and download the working repository here: https://github.com/bravemaster619/rails-react
- In my next article, I will show you how to convert this web app into PWA and show web push notifications.

Oldest comments (1)
Very usefull. Thank you so much.