
Written by Yomi Eluwande✏️
Gatsby is a free and open-source framework based on React that helps developers build blazing-fast websites and apps. It allows you to build apps using modern web technologies with no headaches at all.
Gatsby also comes shipped with features like server-side rendering and the ability to generate static progressive web apps (PWAs). You get code and data splitting out-of-the-box. Gatsby loads only the critical HTML, CSS, data, and JavaScript so your site loads as fast as possible.
TypeScript is a superset of JavaScript which primarily provides optional static typing, classes, and interfaces. TypeScript lets you catch bugs early thereby making you a more efficient developer, while at the same time leveraging the already existing JavaScript community.
In this article, we’ll take one of the starter Gatsby projects and turn it into a TypeScript app.
How to set up a Gatsby app
To set up the Gatsby app, you’ll first need to install the Gatsby CLI.
The Gatsby CLI tool lets you quickly create new Gatsby-powered sites and run commands for developing Gatsby sites. It can be installed globally by running the command below.
yarn global add gatsby-cli
Once that’s done, the next step would be to create a Gatsby site. As mentioned above, we’ll be using the Gatsby CLI tool to create your first Gatsby site and we’ll be grabbing one of the starter projects to start with – the Gatsby blog starter.
The starter ships with the main Gatsby configuration files you might need to get up and running and also uses GraphQL to fetch the data for the blog.
gatsby new my-blog-starter https://github.com/gatsbyjs/gatsby-starter-blog
The command above pulls all the files needed for the blog into a folder and then installs all the required dependencies for the app to work. You can navigate into your new site’s directory and start it up to see if everything works as expected. Run the following commands in your terminal.
cd my-blog-starter
yarn develop
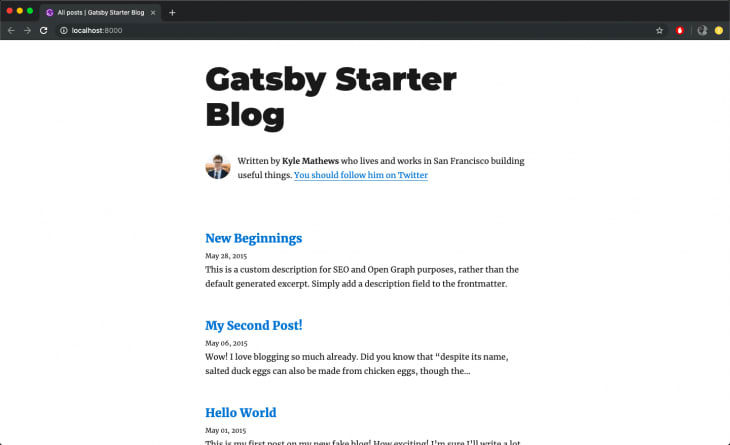
Once the yarn develop command is completed, you can open up a new tab in your browser and navigate to http://localhost:8000 to see the Gatsby app in action.
Gatsby and GraphQL
In case you didn’t know what GraphQL is, GraphQL is a query language that allows you to pull data into your website. It’s the interface that Gatsby uses for managing site data.
You can find out more about GraphQL here.
Before we see how Gatsby easily incorporates GraphQL, let’s take a look at some of the files and folders that ships with Gatsby and what they do.
-
/src: This directory will contain all of the code related to what you will see on the front-end of your site (what you see in the browser) such as your site header or a page template. -
.prettierrc: This is a configuration file for Prettier. Prettier is a tool to help keep the formatting of your code consistent. -
gatsby-browser.js: This file is where Gatsby expects to find any usage of the Gatsby browser APIs (if any). These allow customization/extension of default Gatsby settings affecting the browser. -
gatsby-config.js: This is the main configuration file for a Gatsby site. This is where you can specify information about your site (metadata) like the site title and description, which Gatsby plugins you’d like to include, etc. -
gatsby-node.js: This file is where Gatsby expects to find any usage of the Gatsby Node APIs (if any). These allow customization/extension of default Gatsby settings affecting pieces of the site build process. -
gatsby-ssr.js: This file is where Gatsby expects to find any usage of the Gatsby server-side rendering APIs (if any). These allow customization of default Gatsby settings affecting server-side rendering.
Although I should mention that Gatsby also supports other methods of fetching data i.e you don’t have to use GraphQL. You can use the createPages API to pull unstructured data into Gatsby pages directly, rather than through the GraphQL data layer.
So how does Gatsby fetch data from GraphQL? We can do that by using two methods: Page Query and Static Query.
Page query
Querying data in pages with GraphQL can be done by using Gatsby’s graphql tag.
In the gatsby-config file, at the top of the file (lines 2-10), there’s a bit where information about the site is declared, specifically the siteMetadata object.
siteMetadata: {
  title: `Gatsby Starter Blog`,
  author: `Kyle Mathews`,
  description: `A starter blog demonstrating what Gatsby can do.`,
  siteUrl: `https://gatsby-starter-blog-demo.netlify.com/`,
  social: {
    twitter: `kylemathews`,
  },
},
We’re going to see how to fetch the data above in a component using GraphQL.
The 404.js file in src/pages folder is an example of how to use page queries to fetch data using GraphQL. If you scroll down to the bottom of the file (lines 24-32), you should see a snippet similar to the one below.
export const pageQuery = graphql`
  query {
    site {
      siteMetadata {
        title
      }
    }
  }
`
The code snippet above is a GraphQL query and we are fetching the site’s siteMetadata info, specifically, the title of the file.
The data retrieved from the query above can then be used in the render function of the component as seen below in the same file.
const { data } = this.props
const siteTitle = data.site.siteMetadata.title
StaticQuery
Querying data in Gatsby using StaticQuery can be done by using StaticQuery, a new API that allows components to retrieve data via GraphQL query. In addition to using StaticQuery, we’ll also use the hooks version of StaticQuery called useStaticQuery.
An example of a component using StaticQuery is the seo.js file located in the src/components folder.
import { useStaticQuery, graphql } from "gatsby"

// ...

function SEO({ description, lang, meta, title }) {
  const { site } = useStaticQuery(
    graphql`
      query {
        site {
          siteMetadata {
            title
            description
            author
          }
        }
      }
    `
  )

  // ...
}
As you can see in the code block above, we first import the useStaticQuery method from gatsby. The useStaticQuery method allows your React components to retrieve data via a GraphQL query that will be parsed, evaluated, and injected into the component.
The GraphQL query above queries for the site title, description, and author from the gatsby-config.js file.
How to integrate TypeScript into a Gatsby app
To integrate TypeScript into the Gatsby app, we’ll need to install some dependencies.
yarn add gatsby-plugin-typescript
yarn add typescript --dev
gatsby-plugin-typescript is the Gatsby plugin required to be able to change all .js files to .tsx files. It’s responsible for type checking and transpiling TypeScript code.
Once the dependencies are installed, we can add gatsby-plugin-typescript to the gatsby-config.js file (lines 69 – 71).
gatsby-plugin-offline,
gatsby-plugin-react-helmet,
gatsby-plugin-typescript,
Next, add tslint.json and tsconfig.json to the root directory of the codebase. tslint.json contains the set of rules that will help with linting TypeScript files and tsconfig.json contains the set of rules that help determine the behavior of TypeScript in the project.
// tslint.json
{
  "extends": ["tslint-react"],
  "rules": {
    "prettier": true,
    "jsx-no-multiline-js": false,
    "jsx-no-lambda": false,
    "import-name": false,
    "no-boolean-literal-compare": false
  }
}
// tsconfig.json
{
  "compilerOptions": {
    "module": "commonjs",
    "target": "esnext",
    "jsx": "preserve",
    "lib": ["dom", "esnext"],
    "strict": true,
    "noEmit": true,
    "isolatedModules": true,
    "esModuleInterop": true,
    "noUnusedLocals": false,
    "allowJs": true
  },
  "exclude": ["node_modules", "public", ".cache"]
}
One more thing to do would be to add a script to the package.json file that we can use to carry out type checking across the whole codebase.
"scripts": {
    // ...
    "type-check": "tsc --noEmit"
  }
We can now go about renaming the necessary .js files to .tsx files. In addition to renaming the files, we’d also be converting the React components from class components to functional components.
bio.js
Let’s start with the bio.js file. Rename the file or simply just change the extension so that it’s now src/components/bio.tsx.
layout.js
Next up is the layout.js file. Change the extension to .tsx and then open the file and edit with the code snippet below.
import React from "react"
import { Link } from "gatsby"

import { rhythm, scale } from "../utils/typography"

interface Props {
  location: Location
  title: string
  children?: any
}

const Layout = ({ location, title, children }: Props) => {
  const rootPath = `${__PATH_PREFIX__}/`
  let header

  if (location.pathname === rootPath) {
    header = (
      <h1
        style={{
          ...scale(1.5),
          marginBottom: rhythm(1.5),
          marginTop: 0,
        }}
      >
        <Link
          style={{
            boxShadow: `none`,
            textDecoration: `none`,
            color: `inherit`,
          }}
          to={`/`}
        >
          {title}
        </Link>
      </h1>
    )
  } else {
    header = (
      <h3
        style={{
          fontFamily: `Montserrat, sans-serif`,
          marginTop: 0,
        }}
      >
        <Link
          style={{
            boxShadow: `none`,
            textDecoration: `none`,
            color: `inherit`,
          }}
          to={`/`}
        >
          {title}
        </Link>
      </h3>
    )
  }

  return (
    <div
      style={{
        marginLeft: `auto`,
        marginRight: `auto`,
        maxWidth: rhythm(24),
        padding: `${rhythm(1.5)} ${rhythm(3 / 4)}`,
      }}
    >
      <header>{header}</header>
      <main>{children}</main>
      <footer>
        © {new Date().getFullYear()}, Built with
        {` `}
        <a href="https://www.gatsbyjs.org">Gatsby</a>
      </footer>
    </div>
  )
}

export default Layout
In the code block above, the class component was converted into a functional component and an interface was created for the component’s props.
Interfaces in TypeScript help to shape the specifications of an entity. It usually contains the name of all the properties along with their types.
seo.js
Next up is the seo.js file. Change the extension to .tsx and then open the file and edit with the code snippet below.
/**
 * SEO component that queries for data with
 *  Gatsby's useStaticQuery React hook
 *
 * See: https://www.gatsbyjs.org/docs/use-static-query/
 */

import React from "react"
import Helmet from "react-helmet"
import { useStaticQuery, graphql } from "gatsby"

interface Props {
  description?: string
  lang?: string
  meta?: []
  title: string
}

const SEO = ({ description, lang, meta, title }: Props) => {
  const { site } = useStaticQuery(
    graphql`
      query {
        site {
          siteMetadata {
            title
            description
            author
          }
        }
      }
    `
  )

  const metaDescription = description || site.siteMetadata.description

  return (
    <Helmet
      htmlAttributes={{
        lang,
      }}
      title={title}
      titleTemplate={`%s | ${site.siteMetadata.title}`}
      meta={[
        {
          name: `description`,
          content: metaDescription,
        },
        {
          property: `og:title`,
          content: title,
        },
        {
          property: `og:description`,
          content: metaDescription,
        },
        {
          property: `og:type`,
          content: `website`,
        },
        {
          name: `twitter:card`,
          content: `summary`,
        },
        {
          name: `twitter:creator`,
          content: site.siteMetadata.author,
        },
        {
          name: `twitter:title`,
          content: title,
        },
        {
          name: `twitter:description`,
          content: metaDescription,
        },
      ].concat(meta || [])}
    />
  )
}

export default SEO
As it was done in the layout.tsx file, we’ve also defined an Interface here for the component’s props.
404.js
Next up is the 404.js file. Navigate to the src/pages folder, change the extension to .tsx and then open the file and edit with the code snippet below.
import React from "react"
import { graphql } from "gatsby"

import Layout from "../components/layout"
import SEO from "../components/seo"

interface Props {
  data: {
    site: {
      siteMetadata: {
        title: string
      }
    }
  }
}

const NotFoundPage = ({ data }: Props) => {
  const siteTitle = data.site.siteMetadata.title

  return (
    <Layout location={window.location} title={siteTitle}>
      <SEO title="404: Not Found" />
      <h1>Not Found</h1>
      <p>You just hit a route that doesn't exist... the sadness.</p>
    </Layout>
  )
}

export default NotFoundPage

export const pageQuery = graphql`
  query {
    site {
      siteMetadata {
        title
      }
    }
  }
`
In the code block above, an Interface was defined for the component’s prop and the class component was converted to a functional component.
index.js
Next up is the index.js file. Change the extension to .tsx and then open the file and edit with the code snippet below.
import React from "react"
import { Link, graphql } from "gatsby"

import Bio from "../components/bio"
import Layout from "../components/layout"
import SEO from "../components/seo"
import { rhythm } from "../utils/typography"

interface Props {
  data: {
    allMarkdownRemark: any
    site: {
      siteMetadata: {
        title: string
      }
    }
  }
}

const BlogIndex = ({ data }: Props) => {
  const siteTitle = data.site.siteMetadata.title
  const posts = data.allMarkdownRemark.edges

  return (
    <Layout location={window.location} title={siteTitle}>
      <SEO title="All posts" />
      <Bio />
      {posts.map(({ node }) => {
        const title = node.frontmatter.title || node.fields.slug
        return (
          <div key={node.fields.slug}>
            <h3
              style={{
                marginBottom: rhythm(1 / 4),
              }}
            >
              <Link style={{ boxShadow: `none` }} to={node.fields.slug}>
                {title}
              </Link>
            </h3>
            <small>{node.frontmatter.date}</small>
            <p
              dangerouslySetInnerHTML={{
                __html: node.frontmatter.description || node.excerpt,
              }}
            />
          </div>
        )
      })}
    </Layout>
  )
}

export default BlogIndex

export const pageQuery = graphql`
  query {
    site {
      siteMetadata {
        title
      }
    }
    allMarkdownRemark(sort: { fields: [frontmatter___date], order: DESC }) {
      edges {
        node {
          excerpt
          fields {
            slug
          }
          frontmatter {
            date(formatString: "MMMM DD, YYYY")
            title
            description
          }
        }
      }
    }
  }
`
As seen in previous code blocks, an Interface was defined for the component’s prop and the class component is now a functional component.
blog-post.js
For the blog-post.js file in src/components, we’ll have to convert to a functional component and also defined an Interface for the props.
Change the extension to .tsx and then open the file and edit with the code snippet below.
import React from 'react'
import { Link, graphql } from 'gatsby'

import Bio from '../components/bio'
import Layout from '../components/layout'
import SEO from '../components/seo'
import { rhythm, scale } from '../utils/typography'

interface Props {
  data: {
    markdownRemark: any
    site: {
      siteMetadata: {
        title: string
      }
    }
  }
  pageContext: any
}

const BlogPostTemplate = ({ data, pageContext }: Props) => {
  const post = data.markdownRemark
  const siteTitle = data.site.siteMetadata.title
  const { previous, next } = pageContext

  return (
    <Layout location={window.location} title={siteTitle}>
      <SEO
        title={post.frontmatter.title}
        description={post.frontmatter.description || post.excerpt}
      />
      <h1
        style={{
          marginTop: rhythm(1),
          marginBottom: 0,
        }}
      >
        {post.frontmatter.title}
      </h1>
      <p
        style={{
          ...scale(-1 / 5),
          display: `block`,
          marginBottom: rhythm(1),
        }}
      >
        {post.frontmatter.date}
      </p>
      <div dangerouslySetInnerHTML={{ __html: post.html }} />
      <hr
        style={{
          marginBottom: rhythm(1),
        }}
      />
      <Bio />

      <ul
        style={{
          display: `flex`,
          flexWrap: `wrap`,
          justifyContent: `space-between`,
          listStyle: `none`,
          padding: 0,
        }}
      >
        <li>
          {previous && (
            <Link to={previous.fields.slug} rel="prev">
              ← {previous.frontmatter.title}
            </Link>
          )}
        </li>
        <li>
          {next && (
            <Link to={next.fields.slug} rel="next">
              {next.frontmatter.title} →
            </Link>
          )}
        </li>
      </ul>
    </Layout>
  )
}

export default BlogPostTemplate

export const pageQuery = graphql`
  query BlogPostBySlug($slug: String!) {
    site {
      siteMetadata {
        title
        author
      }
    }
    markdownRemark(fields: { slug: { eq: $slug } }) {
      id
      excerpt(pruneLength: 160)
      html
      frontmatter {
        title
        date(formatString: "MMMM DD, YYYY")
        description
      }
    }
  }
`
typography.js
For this file, we’ll be changing the extension to .ts since we won’t be returning any markup at all. Navigate to the src/utils folder and change the extension to .ts.
Now, if you try to run the app at localhost:8000 now, you should see some typing errors. This is because some packages that we use might not come with a type definition. For those, we’ll have to declare these types ourselves in our project.
To declare these types, create a node_modules.d.ts in the root directory of the app and then edit it with the code snippet below.
// node_modules.d.ts

declare module "typography"
declare module "typography-theme-wordpress-2016"
declare module "react-helmet"
This file declares TypeScript modules/types for node modules that don’t yet have TypeScript declaration files of their own.
One final thing to do before running the app again would be to edit the gatsby-node.js file. There’s a bit in that file where the path of the component to be used in rendering the blog post page is declared. We’ll need to change the extension of that file from .js to .tsx.
Open up the gatsby-node.js file (line 7) and edit with the code below.
const blogPost = path.resolve(`./src/templates/blog-post.tsx`)
If that’s done, restart the Gatsby app and try checking out the blog at localhost:8000 and it should be working fine now!
Conclusion
In this article, we looked at Gatsby and it’s usage with GraphQL and TypeScript.
Gatsby is a static site generator that ships with features like server-side rendering and being able to generate static Progressive Web Apps. It allows you to build modern and performant sites with HTML, CSS and React.
TypeScript is a superset of JavaScript which primarily provides optional static typing, classes, and interfaces. In this article, you saw how to use Interfaces to structure data (props) for components.
You also saw how to fetch data in Gatsby apps by using GraphQL, which can either be page queries or StaticQuery.
Lastly, in this article, you saw how to use the gatsby-typescript-plugin to integrate TypeScript into the existing codebase.
You can find the repository for the Gatsby app here.
Editor's note: Seeing something wrong with this post? You can find the correct version here.
Plug: LogRocket, a DVR for web apps

LogRocket is a frontend logging tool that lets you replay problems as if they happened in your own browser. Instead of guessing why errors happen, or asking users for screenshots and log dumps, LogRocket lets you replay the session to quickly understand what went wrong. It works perfectly with any app, regardless of framework, and has plugins to log additional context from Redux, Vuex, and @ngrx/store.
In addition to logging Redux actions and state, LogRocket records console logs, JavaScript errors, stacktraces, network requests/responses with headers + bodies, browser metadata, and custom logs. It also instruments the DOM to record the HTML and CSS on the page, recreating pixel-perfect videos of even the most complex single-page apps.
Try it for free.
The post How to set up a TypeScript + Gatsby app appeared first on LogRocket Blog.


Top comments (0)