
Written by Paramanantham Harrison✏️
Publishing an NPM package is always a daunting task. Initial setup can be painful because there’s a lot you need to do to make it work correctly.
Some of these tasks include:
- compiling the package to the supported JS version
- versioning
- publishing
- automating the workflow for publishing next time
Today, we’re going to automate an NPM publishing workflow using Github actions.
We’ll look at three different methods of doing this:
- publishing to NPM manually
- semi-automated publishing based on Github releases
- fully-automated publishing through Github push to master
All methods have their own pros and cons. This article will give you a solid understanding of how Github actions work and how you can automate some of your code using Github actions.

Introduction
In my last blog post, I created a headless React component. I wanted to publish it to NPM so anyone could use it in their React application.
Today, we are going to publish the component to NPM and automate the workflow to publish it again and again in newer versions.
Publish to NPM manually
First, we will create the library and publish it manually. I already have the component — you can see how I built it in my previous blog post.
It is a simple date-based countdown component. The code will look like this:
// index.js
import { useState, useEffect, useRef } from "react";
import { calculateTimeLeft } from "./utils";
const Countdown = ({ date, children }) => {
  const initialTimeLeft = calculateTimeLeft(date);
  const [timeLeft, setTimeLeft] = useState(initialTimeLeft);
  const timer = useRef();
  useEffect(() => {
    timer.current = setInterval(() => {
      setTimeLeft(calculateTimeLeft(date));
    }, 1000);
    return () => {
      if (timer.current !== undefined) {
        clearInterval(timer.current);
      }
    };
  }, [date]);
  let isValidDate = true,
    isValidFutureDate = true;
  if (timeLeft === null) isValidDate = false;
  if (timeLeft && timeLeft.seconds === undefined) isValidFutureDate = false;
  return children({
    isValidDate,
    isValidFutureDate,
    timeLeft
  });
};
export default Countdown;
The utility functions used can be found in a separate file called utils.js:
import isValid from "date-fns/isValid";
export const calculateTimeLeft = date => {
  if (!isValid(date)) return null;
  const difference = new Date(date) - new Date();
  let timeLeft = {};
  if (difference > 0) {
    timeLeft = {
      days: Math.floor(difference / (1000 * 60 * 60 * 24)),
      hours: Math.floor((difference / (1000 * 60 * 60)) % 24),
      minutes: Math.floor((difference / 1000 / 60) % 60),
      seconds: Math.floor((difference / 1000) % 60)
    };
  }
  return timeLeft;
};
You can find the complete repo for the React component here with a working example folder showing you how to use the component.
I have used create-react-library to build the component and compile it for a different JS version using rollup. It wasn’t a smooth experience, so I upgraded create-react-library to work for react-hooks.
You can check out the codebase for a basic reference to create a simple React library.
For publishing to NPM manually, the steps are pretty simple:
- compile to different supported JS versions (ex.,
npm run build) - add the default source entry files in
package.json
// Example config
"main": "dist/index.js",
"module": "dist/index.es.js",
"jsnext:main": "dist/index.es.js"
- upgrade the version (major, minor, patch, etc.,)
- publish to NPM
Here, the compilation and default path varies from project to project. In our simple project with one component, it’s pretty straightforward. But it might be tricky for larger components, libraries, or packages.
Upgrade the Version
NPM has its own command to upgrade the package:
npm version major | minor | patch
There are more values in the NPM version, but the most common ones are:
- major: any breaking changes
- minor: any feature updates
- All Categories
- patch: any bug fixes or hot updates to existing features
Example of a version number:
v1.2.3 – Here, 1 denotes the major version number, 2 denotes the minor version number, and 3 denotes the patch version number.
First, we need to update the version number either manually in package.json or using the npm version command.
Then, we need to run the publish command to publish it to the NPM registry:
npm publish
For publishing to the NPM registry, you need an NPM account. Then, in your command line, you need to log in using npm login before running the publish command.
But how does NPM know the package name?
NPM gets the package name and version from the package.json file directly. If you already used the package name, then the npm publish command will throw an error.
In this case, you’ll need to change the name and try publishing again.
Something to keep in mind is that by default, the package isn’t public if it is name-spaced with your account name.
For example, my account username is learnwithparam. If I name my package learnwithparam/react-headless-countdown, then npm publish will publish it as a private package.
In order to make it a public package, you need to explicitly provide the access details:
npm publish --access=public
This will make the package public.
If the package isn’t name-spaced, it will depend on your NPM settings. It will either be public or private. So, always pass the access value along with the command to make it public explicitly.
Now we have successfully published our package to the NPM registry through an all-in manual process. The major advantage with this approach will be that you can publish whenever you want.
The biggest disadvantage is that it’s difficult to follow a standard procedure to release it and make changes to the versioning if you have many people contributing to the project.
Deciding on the version number and when to release it will haunt you forever and slow down active development of the package if it is published through a manual process.
How do we rectify that? Let’s find out.
Automate the releases using Github actions
Steps to automate the release flow:
- update the package version using the
npm versioncommand - push to Github and publish the release
- Github actions will then take care of compiling and publishing to NPM
npm version not only updates the package.json version, but it also creates a new commit and adds a new version tag in Git.
So you can push the update commit to Github using git push and also push the tags using git push --tags.
This will create a draft release.
Github doesn’t publish it by default. You need to manually go to the releases in Github repo and edit the release to publish it.

We need to setup a Github action for a release event to trigger npm publish.
Before taking a deep dive into Github actions, let’s try to understand what it is and then write our first Github action.
What is Github actions?
Github actions is a Hook on Github events like push, release, and do automation on top of those events. Whenever those events occur, Github will call the actions and run whatever operation we run inside the actions.
Let’s get started with a sample action. If you click on action tab in any Github repo, it will show you some of the pre-existing actions. We will skip this and create our own actions

If we click on setup a workflow yourself, then it will show a sample Github action:

The code will look like this:
name: CI

on: [push]

jobs:
  build:

    runs-on: ubuntu-latest

    steps:
    - uses: actions/checkout@v2
    - name: Run a one-line script
      run: echo Hello, world!
    - name: Run a multi-line script
      run: |
        echo Add other actions to build,
        echo test, and deploy your project.
If you are familiar with other CI config yaml files, this will be pretty self explanatory. Let’s go through the code step by step:
# Create a github action and give a name
name: CI

# `on` is event listener which listens to github events. Here the github action gets triggered whenever you push to github
on: [push]

# Create jobs whenever the `on` event is triggered - You can run multiple jobs.
jobs:
  build:
    # This job will run on a ubuntu instance
    runs-on: ubuntu-latest

    # These are the steps it runs in sequence
    steps:
    # Uses is the keyword to use other github actions. Here we are cloning the project using github's own checkout action
    - uses: actions/checkout@v2
    # Give a name for the next steps (It is optional, it will be useful to see thee name in github CI)
    - name: Run a one-line script
      # `run` command will run the command on the ubuntu instance we created before
      run: echo Hello, world!
    # This is a sample to create multi line script
    - name: Run a multi-line script
      run: |
        echo Add other actions to build,
        echo test, and deploy your project.
If you go through the comments in the code, you’ll get an understanding of the basic steps in a Github action.
First, you set a name for the Github action and indicate when to run the action (i.e., the trigger point).
Then, you’ll create jobs that you want to run in this Github action.
Each job can have multiple steps, and each step can have a name and run command. You can also run other Github actions with the uses command.
Let’s create our first Github action to build and publish to NPM:
# NPM Publish is the name for this action
name: NPM Publish

# This action will trigger on every release get created
on:
  release:
    types: [created]

# Job will run on a ubuntu instance
jobs:
  build:
    runs-on: ubuntu-latest
    steps:
      # Checkout the code
      - uses: actions/checkout@v2
      # Setup node with version 12.x and NPM registry url
      - uses: actions/setup-node@v1
        with:
          node-version: "12.x"
          registry-url: "https://registry.npmjs.org"
      # Run yarn install to install project packages
      - run: yarn install
      # yarn build to build the project
      - run: yarn build
      # publish the files to NPM
      - run: npm publish --access public
      # for publishing, npm need authorization. We add the NPM token to the environment which will take care of authorization to publish to the package
        env:
          NODE_AUTH_TOKEN: ${{secrets.NPM_TOKEN}}
For this Github action, we have a name for the action (i.e., NPM Publish), and we set an on listener to listen for any newly created release event.
We then run our build on a Ubuntu instance and checkout the code in the Ubuntu instance using a checkout action.
Since our code is a Node project, we’ll use another action called setup-node to install the necessary dependencies to run the Node project.
Then, we’ll install and build our project inside the Ubuntu instance and run the publish command npm publish.
We need authorization to publish to NPM. Since we are publishing through a machine, NPM provides a token to read and publish.
You can go to settings and create new auth token and add this token to Github secrets.
Refer to this guide to see how to create an auth token in NPM. Refer to this guide to see how to ad secrets to the Github repo.
In our repo, we added the secret called NPM_TOKEN and added the value of the NPM auth token.
This keeps the auth token secure and renders it in runtime through the secrets variable.
This is how you can render the secret in the action yaml file ${{secrets.NPM_TOKEN}}
Now we have everything ready. If you create a new release through Github UI, then it will automatically trigger the Github action and publish the new version to NPM.
The pros to this approach are that we can publish whenever we want — we just need to create and publish a new release.
Additionally, there’s no need for developers to worry about NPM login, or publishing from local machines.
This approach is semi-automated. It requires humans to create the releases.
It works in most cases, but for larger projects, it’s better to automate completely based on the commit messages. Next, we will see how to employ a fully-automated approach.
Note: If you want to learn more about Github actions, checkout the documentation from Github. It is very extensive and excellent for learning how a CI works.

Fully automate releases using semantic-release and Github actions
There is a package called semantic-release. It automates the whole publishing and releasing process.
You can just push updates to master, then run the Github action, which will run semantic-release under the hood and create a new release.
It will release documentation based on the commits and then push the package to NPM.
This is the definition of semantic release from the package:
semantic-release automates the whole package release workflow including: determining the next version number, generating the release notes and publishing the package.
We are going to use an existing Github action for semantic-release. The action is a very basic use case for semantic release:
# Name for the github action
name: Push to Master

# Trigger this action when we push to master or merge a pull-request to master
on:
  push:
    branches:
      - master

# runs the jobs
jobs:
  build:
    # runs on ubuntu
    runs-on: ubuntu-latest
    steps:
      # checkout to github
      - uses: actions/checkout@v2
      # semantic release action from third party
      - uses: codfish/semantic-release-action@master
    # Add the environment variable for NPM and github. Github is needed because semantic-release will create a new release and release notes automatically
    env:
      GITHUB_TOKEN: ${{ secrets.GH_TOKEN }}
      NPM_TOKEN: ${{ secrets.NPM_TOKEN }}
How it works
When you push to master:
- based on the commit message, it will create a new version
- the commit message should follow a standard format (i.e., Angular Commit Message Conventions)
- semantic version creates the release notes and releases the new version
- after release, it will publish to NPM
The semantic release package is very powerful and has lot of other options to automate your workflow beyond simply publishing to NPM.
But as with every nifty trick in programming, there will always be cons.
Semantic versioning will help you automate, but sometimes it won’t work very well for your use case.
Make sure to only fully automate the process when you need to. Most of the small packages don’t require full automation — semi-automation is often enough.
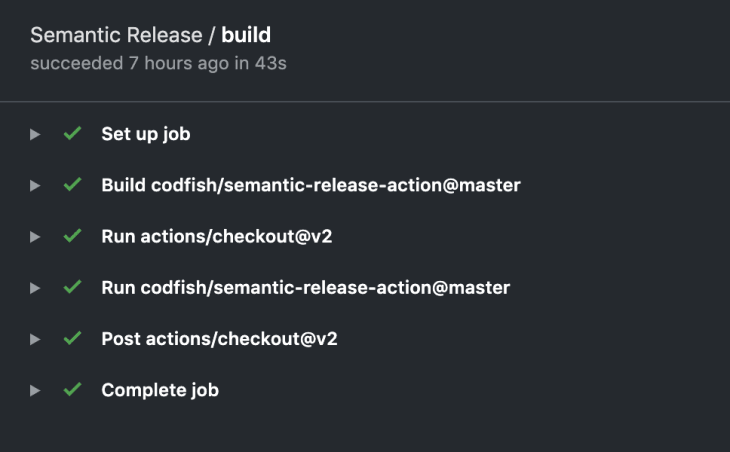
Here is the sample Github action which runs the semantic-release in my package:

The only problem with semantic release is that it won’t update the package.json.
It creates a new version and also creates a release with that, but it doesn’t update the package.json version number.
You need to manually update it for your reference. There are ways to update that, too, but I’ll leave that to you as an exercise.
For people who don’t like these kinds of tricks, you can also do these automations on your own and control the process wherever needed.
You can check the commit message, create a new version, and push new release to master. Then add a new Github action, which runs on release to push to NPM.
Power of Github actions
Github actions are very powerful. It is a CI from Github. Github actions help you:
- run a test on every Github push to any branch
- deploy to your server when you push to master
- publish to NPM or any other registry
and much more.
Explore Github actions. They’re almost third party actions created for anything you can think of.
Conclusion
You’ve now learned how to automate publishing an NPM package through Github.
Hope you enjoyed the article. Tell me about your experience with Github actions in the comments!
Full visibility into production React apps
Debugging React applications can be difficult, especially when users experience issues that are difficult to reproduce. If you’re interested in monitoring and tracking Redux state, automatically surfacing JavaScript errors, and tracking slow network requests and component load time, try LogRocket.

LogRocket is like a DVR for web apps, recording literally everything that happens on your React app. Instead of guessing why problems happen, you can aggregate and report on what state your application was in when an issue occurred. LogRocket also monitors your app's performance, reporting with metrics like client CPU load, client memory usage, and more.
The LogRocket Redux middleware package adds an extra layer of visibility into your user sessions. LogRocket logs all actions and state from your Redux stores.
Modernize how you debug your React apps — start monitoring for free.
The post Complete workflow guide to publish a React library to NPM using Github actions appeared first on LogRocket Blog.


Top comments (0)