In this post, I will explain from scratch in 10 steps, how to build a Azure DevOps pipeline to publish Angular app in Azure Web app for Linux using FTP method. Using this method you can also publish app in any FTP location also.
Azure DevOps — Is a continuous integration tool offered by Microsoft.
For creating Azure Web app for Linux checkout this
https://dev.to/bharatdwarkani/how-to-publish-an-angular-app-in-azure-linux-web-app-service-explained-from-scratch-4e9m
Login in your Azure DevOps account. https://azure.microsoft.com/en-in/services/devops/
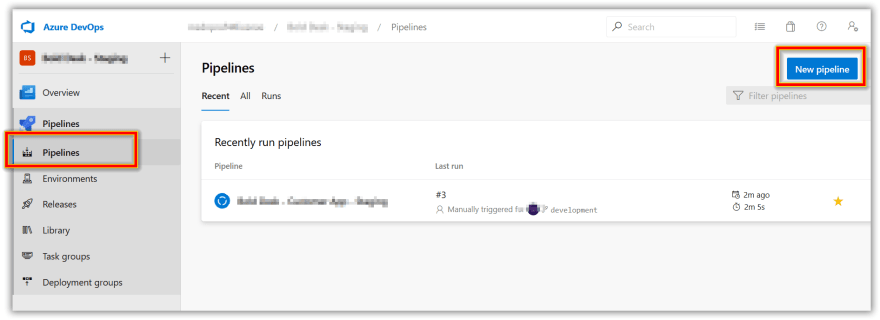
Create a new Pipeline
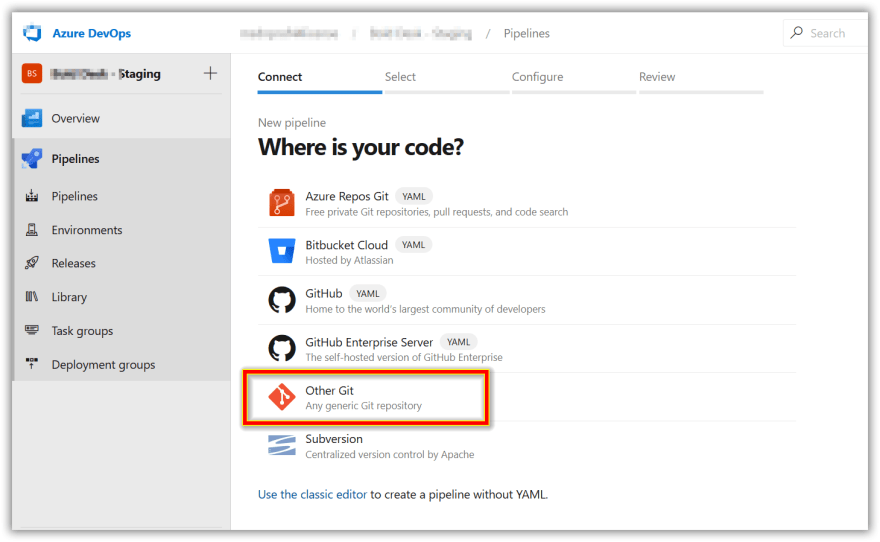
- Select the source where your application source code is located.
Since my source is located in Gitlab, so I have selected Other Git , you can select based on your need
- Select new service connection
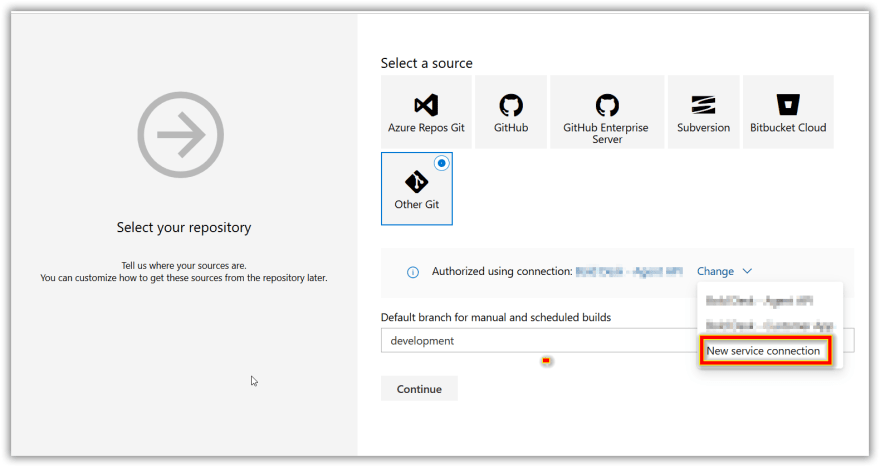
Fill the details related to your Source Git repository and click continue.

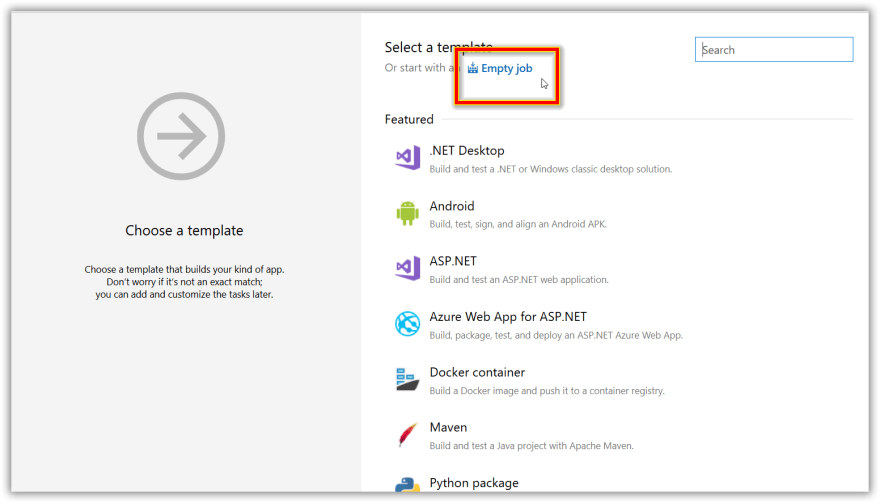
- Select Empty Job in template.
Now pipeline view will appear. There are various predefined tasks available in Azure DevOps. In next few steps I will explain which tasks to add to build and publish Angular app.
i) NPM Install
ii) NPM Build
iii) Publish Artifact
iv) FTP Upload
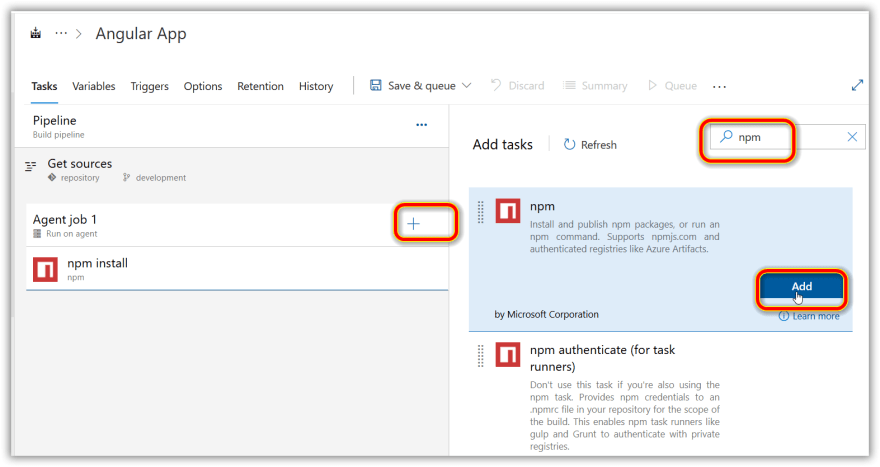
- Add task — NPM

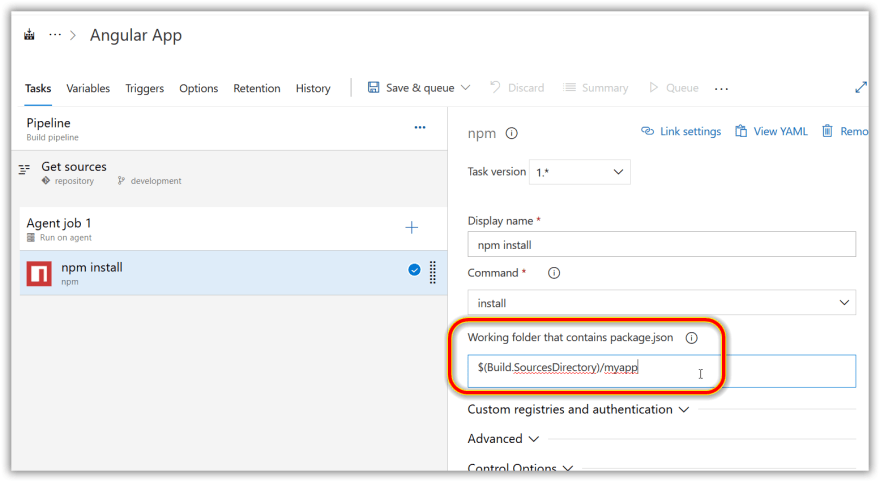
Click on npm install. In property select your app location.
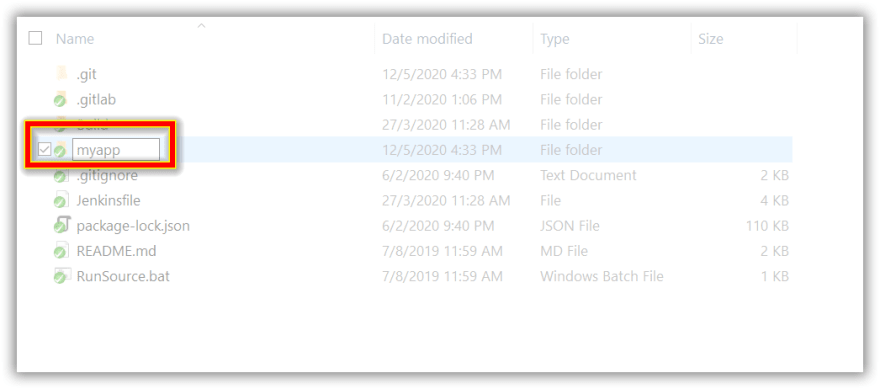
Here I have filled** $(Build.SourcesDirectory)/myapp**
Since in repository, my source is located not directly in root folder instead inside myapp folder. Based on your source folder structure you can fill appropriate source path folder which contains package.json file
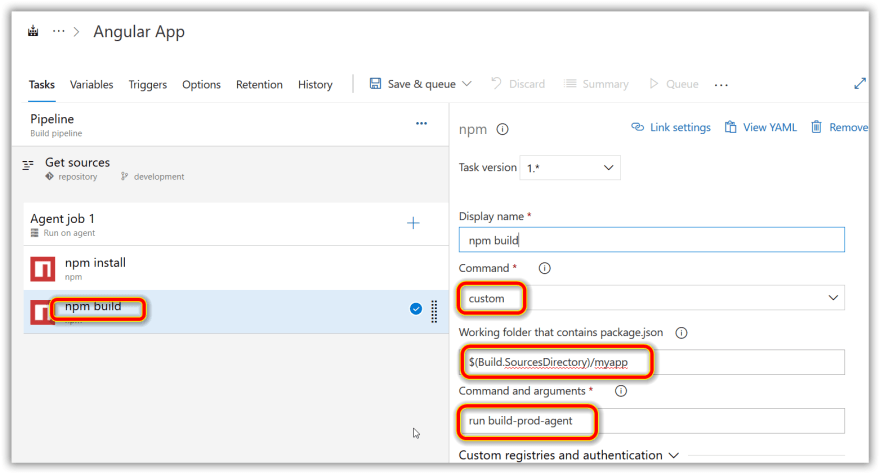
- Next, again search NPM and add npm task. This task is for build.
Change properties as shown in screenshot for Build task.
i)** Command** to Custom
ii) Working folder — $(Build.SourcesDirectory)/myapp
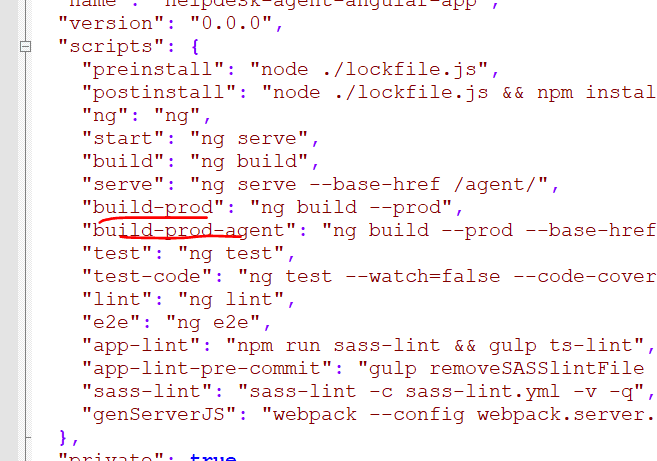
iii) *Command and arguments *— run build-prod-agent
build-prod-agent — depends on what you have set in package.json file of your app.
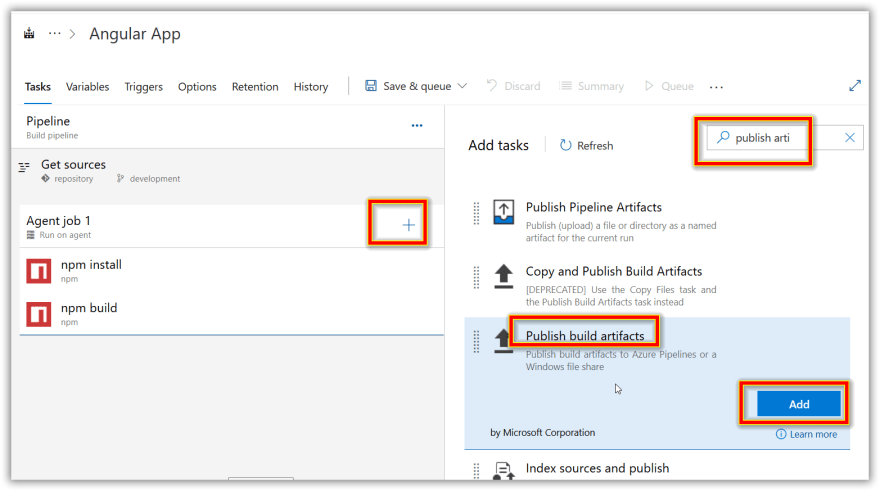
- Now add one more task Publish build artifacts. Using this you can download published files after CI completes. If this is not added after build completes you wont be able to access published files.
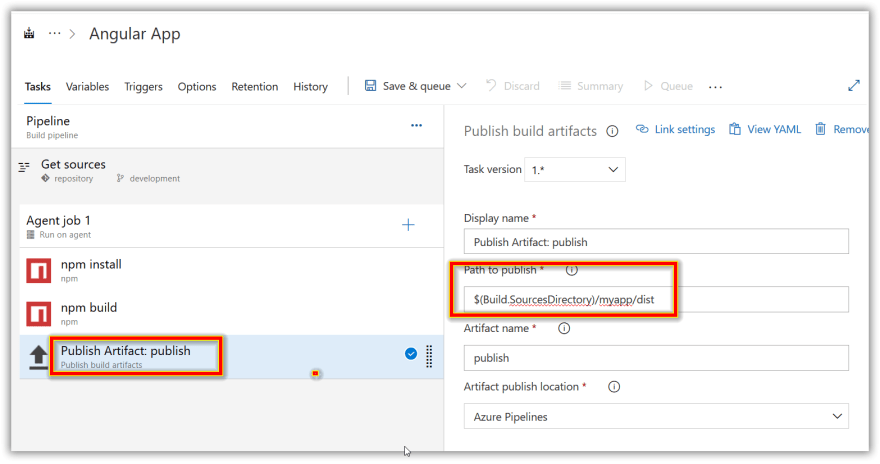
Change artifacts properties
*Path to publish *→ Angular dist folder path
*Artifact name *— publish
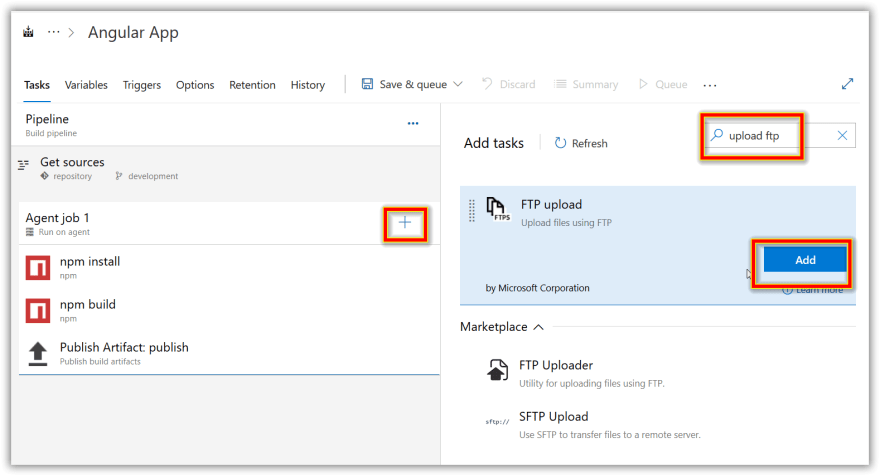
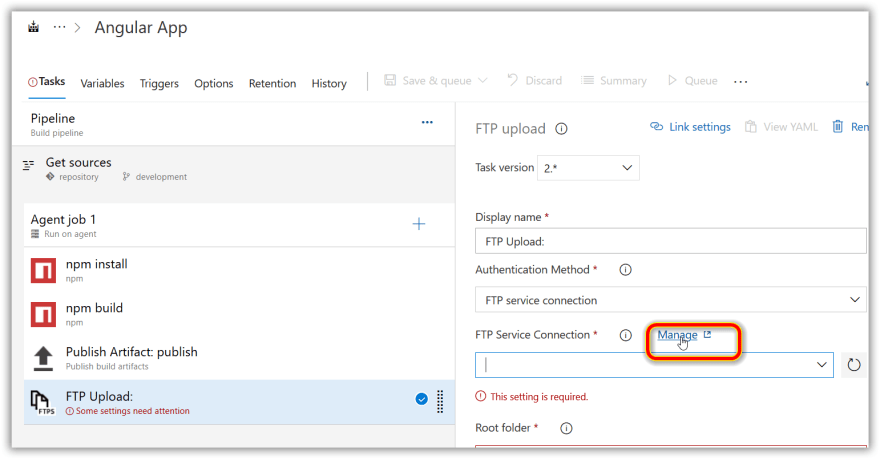
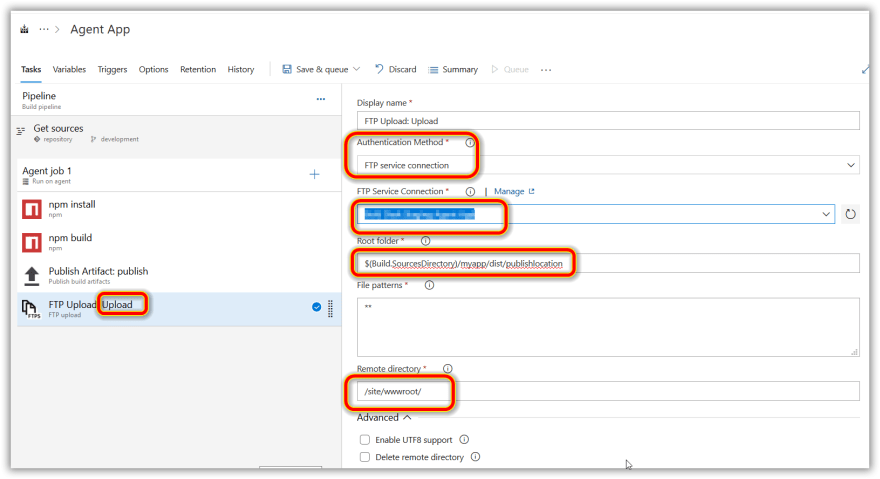
- Final step is to Create a FTP upload task. Select and add.
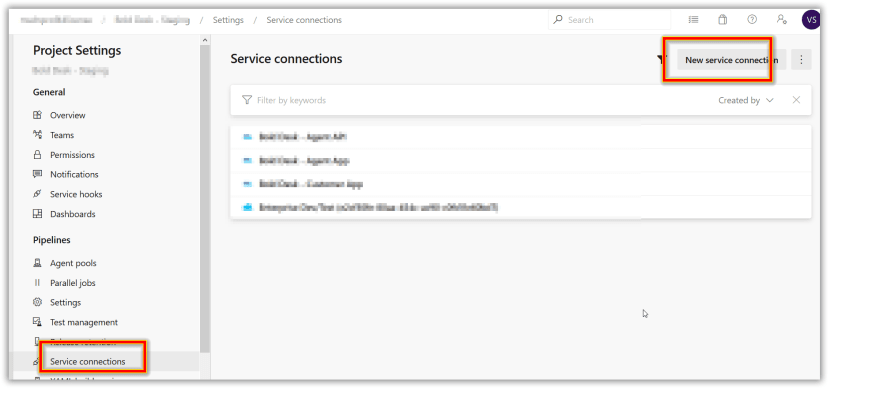
Click on manage FTP to add a FTP connection for your azure app service.
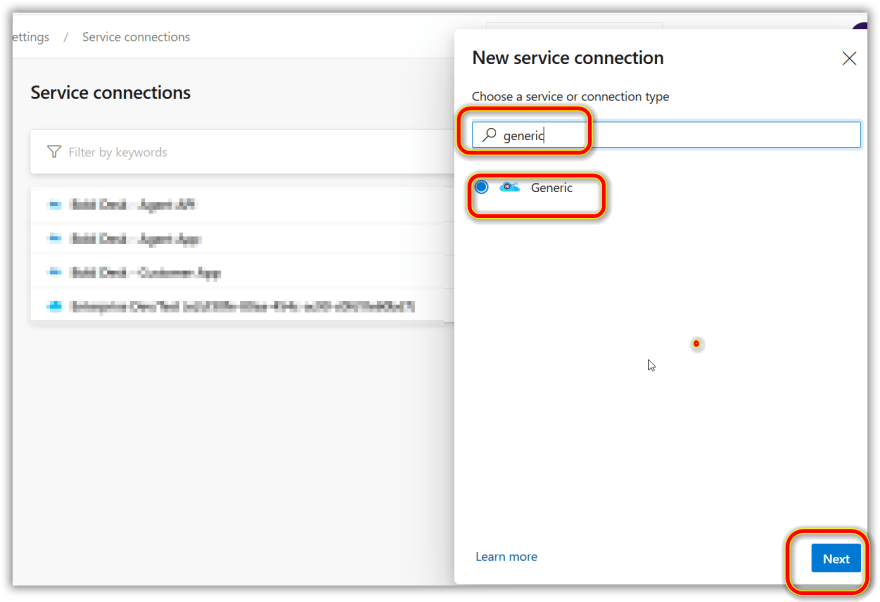
On clicking manage a Service connection page will appear. Click new Service connection.
Select type — Generic
Now go to your Azure app, Click on Deployment center and get Endpoint, Username and password.
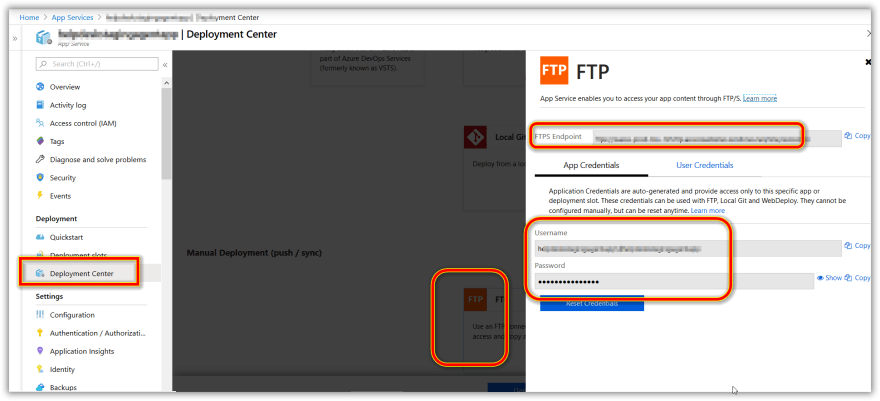
File the details in FTP connection page and click OK.
After that in FTP task properties select recently created FTP service connection name and fill root folder
Root folder is your publish location where your app creates publish dist folder.
$(Build.SourcesDirectory)/myapp/dist/publishfiles.
If your app produces files directly in dist then can just give $(Build.SourcesDirectory)/myapp/dist
- Final step is to create a trigger. Here I am creating a trigger scheduled task. Every day at 2 AM Pipeline will run at 2.00 AM to build and publish development branch source to Azure app service for Linux.

- You can also run manually build from pipelines page.

On clicking pipeline you can view details and also download publish files

Hope, you have found this post useful. Azure DevOps has several inbuilt tasks you can add to enhance your pipelines. Like adding Test, Security testing etc., There is one more way by using yaml file you can create pipeline.
For more such interesting technology related blogs, resources visit my site
(https://sharetechlinks.com/)

Top comments (0)