
TLDR; This post outlines how to get started training Multi GPU Models with PyTorch Lightning using Azure Machine Learning.
If you are new to Azure you can get started a free subscription using the link below.
Create your Azure free account today | Microsoft Azure
What is PyTorch Lightning?

PyTorch Lighting is a lightweight PyTorch wrapper for high-performance AI research. Lightning is designed with four principles that simplify the development and scalability of production PyTorch Models:
- Enable maximum flexibility
- Abstract away unnecessary boilerplate, but make it accessible when needed.
- Systems should be self-contained (ie: optimizers, computation code, etc).
- Deep learning code should be organized into 4 distinct categories, Research code (the LightningModule), Engineering code (you delete, and is handled by the Trainer), Non-essential research code (logging, etc… this goes in Callbacks), Data (use PyTorch Dataloaders or organize them into a LightningDataModule).
Once you do this, you can train on multiple-GPUs, TPUs, CPUs and even in 16-bit precision without changing your code which is perfect for taking advantage of distributed cloud computing services such as Azure Machine Learning.
PyTorchLightning/pytorch-lightning
Additionally PyTorch Lighting Bolts provide pre-trained models that can be wrapped and combined to more rapidly prototype research ideas.
PyTorchLightning/pytorch-lightning-bolts
What is Azure Machine Learning?
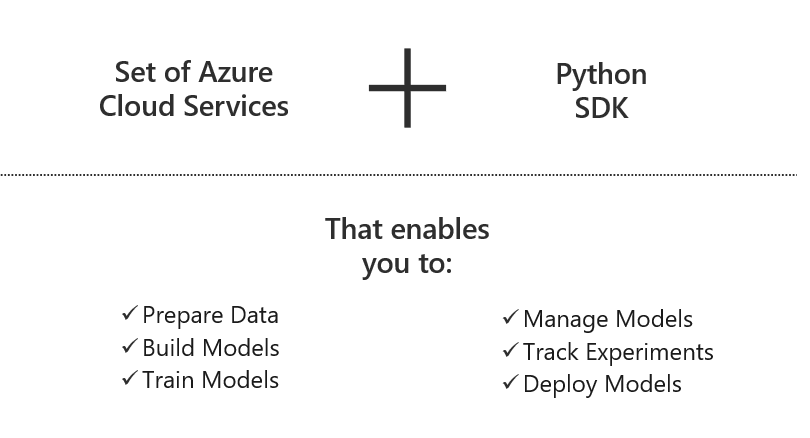
Azure Machine Learning ( Azure ML ) is a cloud-based service for creating and managing machine learning solutions. It’s designed to help data scientists and machine learning engineers to leverage their existing data processing and model development skills & frameworks.
Azure Machine Learning provides the tools developers and data scientists need for their machine learning workflows, including:
Azure Compute Instances that can be accessed online or linked to remotely with Visual Studio Code.
What is an Azure Machine Learning compute instance? - Azure Machine Learning
Connect to compute instance in Visual Studio Code (preview) - Azure Machine Learning
Out of the box support for Machine Learning libraries such as PyTorch, Tensorflow, ScikitLearn and Keras.
azureml.train.estimator.Estimator class - Azure Machine Learning Python
- Code, Data, Model Management
Tutorial: Get started with machine learning - Python - Azure Machine Learning
- Scalable Distributed Training and Cheap Low Priority GPU Compute
What is distributed training? - Azure Machine Learning
Auto ML and Hyper Parameter Optimization
Tune hyperparameters for your model - Azure Machine Learning
Container Registry, Kubernetes Deployment and MLOps Pipelines
Deploy ML models to Kubernetes Service - Azure Machine Learning
Interpretability Tools and Data Drift Monitoring
Interpret & explain ML models in Python (preview) - Azure Machine Learning
Analyze and monitor for data drift on datasets (preview) - Azure Machine Learning
You can even use external open source services like MLflow to track metrics and deploy models or Kubeflow to build end-to-end workflow pipelines.
Check out some AzureML best practices examples at
With the advantages of PyTorch Lighting and Azure ML it makes sense to provide an example of how to leverage the best of both worlds.
Getting Started
Step 1 — Set up Azure ML Workspace

Connect to the workspace with the Azure ML SDK as follows
from azureml.core import Workspace
ws = Workspace.get(name="myworkspace", subscription\_id='<azure-subscription-id>', resource\_group='myresourcegroup')
Step 2 — Set up Multi GPU Cluster
Create compute clusters - Azure Machine Learning
from azureml.core.compute import ComputeTarget, AmlCompute
from azureml.core.compute\_target import ComputeTargetException

# Choose a name for your GPU cluster
gpu\_cluster\_name = "gpu cluster"

# Verify that cluster does not exist already
try:
 gpu\_cluster = ComputeTarget(workspace=ws, name=gpu\_cluster\_name)
 print('Found existing cluster, use it.')
except ComputeTargetException:
 compute\_config = AmlCompute.provisioning\_configuration(vm\_size='Standard\_NC12s\_v3',
max\_nodes=2)
 gpu\_cluster = ComputeTarget.create(ws, gpu\_cluster\_name, compute\_config)

gpu\_cluster.wait\_for\_completion(show\_output=True)
Step 3 — Configure Environment
To run PyTorch Lighting code on our cluster we need to configure our dependencies we can do that with simple yml file.
channels:
 - conda-forge
dependencies:
 - python=3.6
 - pip
 - pip:
 - azureml-defaults
 - torch
 - torchvision
 - pytorch-lightning
We can then use the AzureML SDK to create an environment from our dependencies file and configure it to run on any Docker base image we want.
**from**  **azureml.core**  **import** Environment

env = Environment.from\_conda\_specification(environment\_name, environment\_file)

_# specify a GPU base image_
env.docker.enabled = **True**
env.docker.base\_image = (
 "mcr.microsoft.com/azureml/openmpi3.1.2-cuda10.2-cudnn8-ubuntu18.04"
)
Step 4 — Training Script
Create a ScriptRunConfig to specify the training script & arguments, environment, and cluster to run on.
We can use any example train script from the PyTorch Lighting examples or our own experiments.
Step 5 — Run Experiment
For GPU training on a single node, specify the number of GPUs to train on (typically this will correspond to the number of GPUs in your cluster’s SKU) and the distributed mode, in this case DistributedDataParallel ("ddp"), which PyTorch Lightning expects as arguments --gpus and --distributed_backend, respectively. See their Multi-GPU training documentation for more information.
**import**  **os**
 **from**  **azureml.core**  **import** ScriptRunConfig, Experiment

cluster = ws.compute\_targets[cluster\_name]

src = ScriptRunConfig(
 source\_directory=source\_dir,
 script=script\_name,
 arguments=["--max\_epochs", 25, "--gpus", 2, "--distributed\_backend", "ddp"],
 compute\_target=cluster,
 environment=env,
)

run = Experiment(ws, experiment\_name).submit(src)
run
We can view the run logs and details in realtime with the following SDK commands.
**from**  **azureml.widgets**  **import** RunDetails

RunDetails(run).show()
run.wait\_for\_completion(show\_output= **True** )
Next Steps and Future Post
Now that we’ve set up our first Azure ML PyTorch lighting experiment. Here are some advanced steps to try out we will cover them in more depth in a later post.
1. Link a Custom Dataset from Azure Datastore
This example used the MNIST dataset from PyTorch datasets, if we want to train on our data we would need to integrate with the Azure ML Datastore which is relatively trivial we will show how to do this in a follow up post.
Create Azure Machine Learning datasets to access data - Azure Machine Learning
2. Create a Custom PyTorch Lightning Logger for AML and Optimize with Hyperdrive
In this example all our model logging was stored in the Azure ML driver.log but Azure ML experiments have much more robust logging tools that can directly integrate into PyTorch lightning with very little work. In the next post we will show how to do this and what we gain with HyperDrive.
- nateraw/pytorch-lightning-azureml
- [DRAFT] Add logger for Azure Machine Learning by dkmiller · Pull Request #223 · PyTorchLightning/pytorch-lightning-bolts
3. Multi Node Distributed Compute with PyTorch Lightining Horovod Backend
In this example we showed how to leverage all the GPUs on a one Node Cluster in the next post we will show how to distribute across clusters with the PyTorch Lightnings Horovod Backend.
4. Deploy our Model to Production
In this example we showed how to train a distributed PyTorch lighting model in the next post we will show how to deploy the model as an AKS service.
How and where to deploy models - Azure Machine Learning
If you enjoyed this article check out my post on 9 tips for Production Machine Learning and feel free to share it with your friends!
9 Advanced Tips for Production Machine Learning
Acknowledgements
I want to give a major shout out to Minna Xiao from the Azure ML team for her support and commitment working towards a better developer experience with Open Source Frameworks such as PyTorch Lighting on Azure.
About the Author
Aaron (Ari) Bornstein is an AI researcher with a passion for history, engaging with new technologies and computational medicine. As an Open Source Engineer at Microsoft’s Cloud Developer Advocacy team, he collaborates with the Israeli Hi-Tech Community, to solve real world problems with game changing technologies that are then documented, open sourced, and shared with the rest of the world.


Top comments (0)