
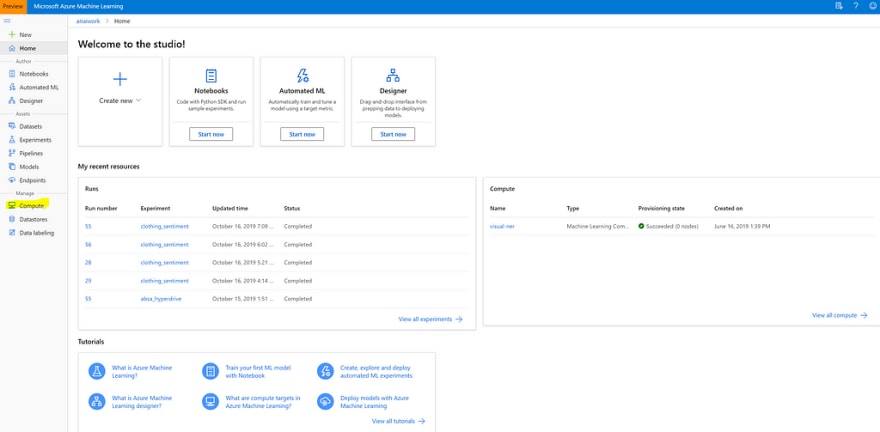
TLDR; Azure Machine Learning (AML), a cloud-based environment you can use to train, deploy, automate, manage, and track ML models. In the following tutorial we will walk through how to set up an Azure Notebook VM.
What are the benefits of AzureML Notebook VMs?
Azure ML Notebook VMs are cloud-based environments preloaded with everything you need to get started with ML and data science in Azure.
AML Notebook VMs are secure and easy-to-use, fully customizable and directly integrated into Azure Machine Learning Service, providing a code-first experience for data scientists to build and deploy models using AzureML
Azure ML Notebook VM Features:
- Secure — Azure Active Directory login integrated with the AML Workspace, provides access to files stored in the workspace, implicitly configured for the workspace.
- Scalable — created with a few clicks in the AML workspace portal, managed from within the AML workspace portal. Since notebooks are managed by the AML Service compute can be scaled as needed.
- Pre-Configured — up-to-date AML Python Environment, GPU drivers, Pytorch, Tensorflow, Scikit learn, R etc.
- Customizable — ssh to the machine, install your own tools (or drivers), changes persist when machines are shut down or restarted.
Step 1: Login to Azure
If you don’t have an Azure Subscription you can get a free account using the link below.
Create your Azure free account today | Microsoft Azure
Step 2: Create Azure Machine Learning Workspace

Follow the instructions in the gif above to create a new azure machine learning service instance. More information can be found below.
Tutorial: Create your first ML experiment - Azure Machine Learning
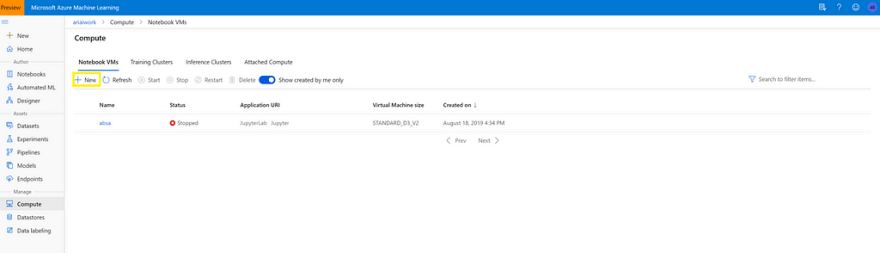
Step 3: Navigate to Azure ML Compute
Step 4: Click New Compute
Step 5: Choose the VM Size and Deploy
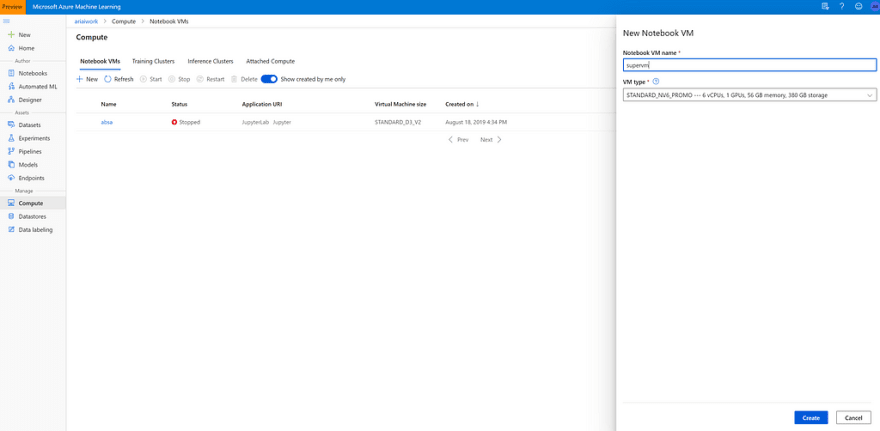
A list of VM Sizes and pricing can be found in the documentation below. The standard series is recommended for most projects and the N series are recommended for projects requiring GPU.
Virtual Machine series | Microsoft Azure
When you are done click create it should take about 5–10 mins to set up the new VM depending on the specified configuration.
Step 6: Jupyter, JupyterLab or Open R Studio and Get Started Coding


Bonus Best Practice: Shutdown VM when not in use delete VM when using standard dependencies.

Since all notebooks are persisted in the notebooks section of the Azure ML Service unlike a DSVM your work can be recovered and shared across multiple notebook VMs. So it is seamless to start with a standard VM for basic data processing and later switch to a N Series VM if GPU Compute is needed.
Next Steps
Now that you have set up your first Notebook VM check out my previous post on 9 Advanced Tips for Production machine learning.
9 Advanced Tips for Production Machine Learning
About the Author
Aaron (Ari) Bornstein is an avid AI enthusiast with a passion for history, engaging with new technologies and computational medicine. As an Open Source Engineer at Microsoft’s Cloud Developer Advocacy team, he collaborates with Israeli Hi-Tech Community, to solve real world problems with game changing technologies that are then documented, open sourced, and shared with the rest of the world.


Top comments (0)