For accessibility reasons all video content you create should be captioned but adding subtitles can be a daunting task. In this article we cover how to quickly and easily add subtitles to your existing videos without any video editing software.
Requirements
Inputs
Video Format: This approach will only work for MP4 videos. Both H.264 and H.265/HEVC are supported.
Caption / Subtitle file: Either SRT or WebVTT format are supported. Don't have a caption file? See instructions below.
FFmpeg
The instructions rely on the open-source FFmpeg tool.
FFmpeg is the leading multimedia framework, able to decode, encode, transcode, mux, demux, stream, filter and play pretty much anything that humans and machines have created.
Please follow the installation instructions here.
On Mac, simply use Homebrew with brew install ffmpeg
Creating a caption file automatically (optional)
If you do not have a captions file with subtitles for your video you can easily auto-caption your video with one of two methods.
- Upload your video to YouTube. YouTube can automatically caption your video. Captions can be downloaded in SRT file format.
- If your company has Microsoft Stream, upload your video to enjoy auto-captioning. Once the captions have been generated you can easily make edits through the web interface before downloading your captions in WebVTT format.
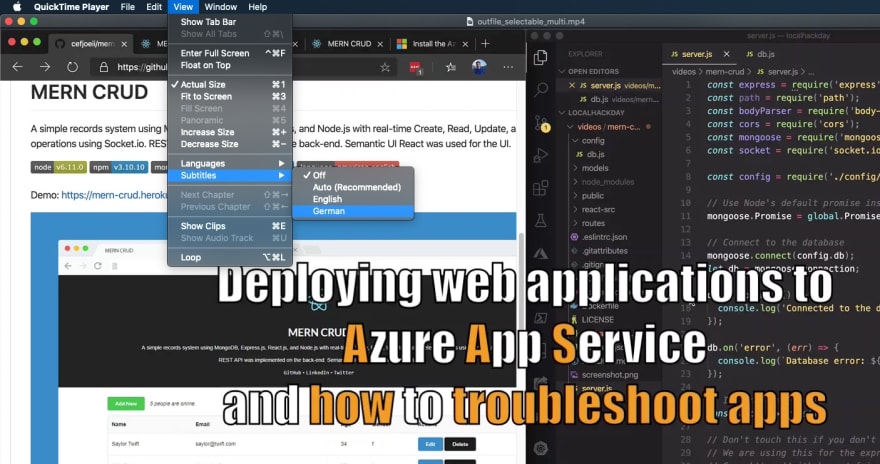
Making subtitles selectable
These subtitles can be toggled on or off in any video player that supports subtitles.

# Replace with your input video and subtitle file
INFILE=video.mp4
SUBTITLES=subtitles.vtt

ffmpeg -i $INFILE -i $SUBTITLES -c copy -c:s mov_text \
  -metadata:s:s:0 language=eng outfile_selectable.mp4
Multiple languages
You can even have multiple subtitles in different languages all within the same video.
# Replace with your input video and subtitle files
INFILE=video.mp4
SUBTITLESENG=english.vtt
SUBTITLEGER=german.vtt
SUBTITLESSPA=spanish.vtt

ffmpeg -i $INFILE -i $SUBTITLESENG -i $SUBTITLESGER -i $SUBTITLESSPA \
  -map 0 -map 1:s -map 2:s -map 3:s -c copy -c:s mov_text -c:s mov_text c:s mov_text \
  -metadata:s:s:0 language=eng -metadata:s:s:1 language=ger \
  -metadata:s:s:2 language=spa outfile_selectable_multi.mp4
Burned in subtitles
These subtitles are part of the video itself and cannot be toggled off.

We will need to render the video again with the subtitles permanently added into the video stream. Note that this will take some time depending on the video duration, quality and the quality of your CPU and GPU.
Tradeoff: While hardware accelerated encoding using GPUs is generally significantly faster, software encoding (CPU only) produces smaller files and better quality.
Tradeoff: H.264 has the most compatibility. You likely have hardware support for encoding and decoding. H.265/HEVC files are 25-50% more efficient but decoding is much more compute intensive. Only recent GPUs have hardware support for encoding in this format. Nevertheless, H.265/HEVC is the format of the future.
For output in H.264 with hardware encoding on MacOS
# Replace with your input video and subtitle file
INFILE=video.mp4
SUBTITLES=subtitles.vtt

ffmpeg -i $SUBTITLES temp.ass && \
BITRATE=$(ffprobe -v error -select_streams v:0 -show_entries stream=bit_rate \
  -of default=noprint_wrappers=1:nokey=1 $INFILE) && \
ffmpeg -i $INFILE -vf ass=temp.ass -vcodec h264_videotoolbox \
  -b:v $BITRATE -c:a copy output_burnedin.mp4
For H.264 with hardware encoding on Windows/Linux with NVIDIA GPU
# Replace with your input video and subtitle file
INFILE=video.mp4
SUBTITLES=subtitles.vtt

ffmpeg -i $SUBTITLES temp.ass && \
BITRATE=$(ffprobe -v error -select_streams v:0 -show_entries stream=bit_rate \
  -of default=noprint_wrappers=1:nokey=1 $INFILE) && \
ffmpeg -i $INFILE -vf ass=temp.ass -vcodec h264_nvenc \
  -b:v $BITRATE -c:a copy output_burnedin.mp4
For H.264 with software encoding on any operating system
# Replace with your input video and subtitle file
INFILE=video.mp4
SUBTITLES=subtitles.vtt

ffmpeg -i $SUBTITLES temp.ass && \
BITRATE=$(ffprobe -v error -select_streams v:0 -show_entries stream=bit_rate \
  -of default=noprint_wrappers=1:nokey=1 $INFILE) && \
ffmpeg -i $INFILE -vf ass=temp.ass -vcodec libx264 \
  -b:v $BITRATE -c:a copy output_burnedin.mp4
For H.265/HEVC with hardware encoding on MacOS
# Replace with your input video and subtitle file
INFILE=video.mp4
SUBTITLES=subtitles.vtt

ffmpeg -i $SUBTITLES temp.ass && \
BITRATE=$(ffprobe -v error -select_streams v:0 -show_entries stream=bit_rate \
  -of default=noprint_wrappers=1:nokey=1 $INFILE) && \
ffmpeg -i $INFILE -vcodec hevc_videotoolbox -tag:v hvc1 \
  -b:v $BITRATE -c:a copy -vf ass=temp.ass output_burnedin.mp4
For H.265/HEVC with hardware encoding on Windows/Linux with NVIDIA GPU
# Replace with your input video and subtitle file
INFILE=video.mp4
SUBTITLES=subtitles.vtt

ffmpeg -i $SUBTITLES temp.ass && \
BITRATE=$(ffprobe -v error -select_streams v:0 -show_entries stream=bit_rate \
  -of default=noprint_wrappers=1:nokey=1 $INFILE) && \
ffmpeg -i $INFILE -vcodec hevc_nvenc -tag:v hvc1 \
  -b:v $BITRATE -c:a copy -vf ass=temp.ass output_burnedin.mp4
For H.265/HEVC software encoding on any operating system
# Replace with your input video and subtitle file
INFILE=video.mp4
SUBTITLES=subtitles.vtt

ffmpeg -i $SUBTITLES temp.ass && \
BITRATE=$(ffprobe -v error -select_streams v:0 -show_entries stream=bit_rate \
  -of default=noprint_wrappers=1:nokey=1 $INFILE) && \
ffmpeg -i $INFILE -vcodec libx265 -tag:v hvc1 \
  -b:v $BITRATE -c:a copy -vf ass=temp.ass output_burnedin.mp4
Note: If the source video was in H.264 format you can also use the H.265 command to produce a final video in H.265/HEVC format. Since H.265 is 25-50% more efficient you should be able to reduce the Bitrate and still maintain the same video quality.


Top comments (0)