If you have ever wondered how HTML is used to make websites with pictures and videos, you have landed at the right place. I am going to walk you through the 9 steps of building a one page website using HTML. If you can build a one page website, you can build a multi-page website.
Requirements
You only need two things: a text editor and a browser. If you know how to use these two, skip the requirements section and go to the 9 steps process.
1. A text editor
You need a text editor to write the HTML code. Every computer has a text editor so don’t be in a hurry to install anything yet. You can use Notepad on Windows, Gedit on Ubuntu and TextEdit on MacOS X.
You will hear about fancy text editors that you should install. However, for your first HTML webpage, you don’t need to install anything. Use the text editors already in your computer.
After building your first webpage, you can check some of the other tools I use when making webpages that will make your work more comfortable.
2. A browser
You will be using Firefox, Chrome, Chromium, Safari or any other web browser already installed in your computer.
3. Content of the webpage
All webpages always contain some kind of information in various format like text, images, videos etc. For you to make a webpage, you need to some content or use dummy text and images.
If you just want to practice, you can copy the content I already prepared here.
If you want to create a unique webpage, you will have to:
- Write the Content
Write or copy the text content that you will use on your webpage and save it on a document. If you copied some of content from other sources online, remember to copy the URL of the source. Then, save this in a document.
If you cannot find a topic for the webpage, pick a topic on 100 topic ideas for your first webpage.
- Download the images or copy image URL
Find some relevant and useful images. Once you have found them, download the images or copy the url of the image and save it in document.
Once you have the text and image, its time to move on to the next step.
4. The website design
For your first webpage, I would recommend that you stick with a simple design web page. The web design is how the website looks. Remember, you are just practicing how to build webpages not design them.
You can choose from this simple html projects collection I prepared.
For this tutorial we will be building a webpage about Crickets For Food. 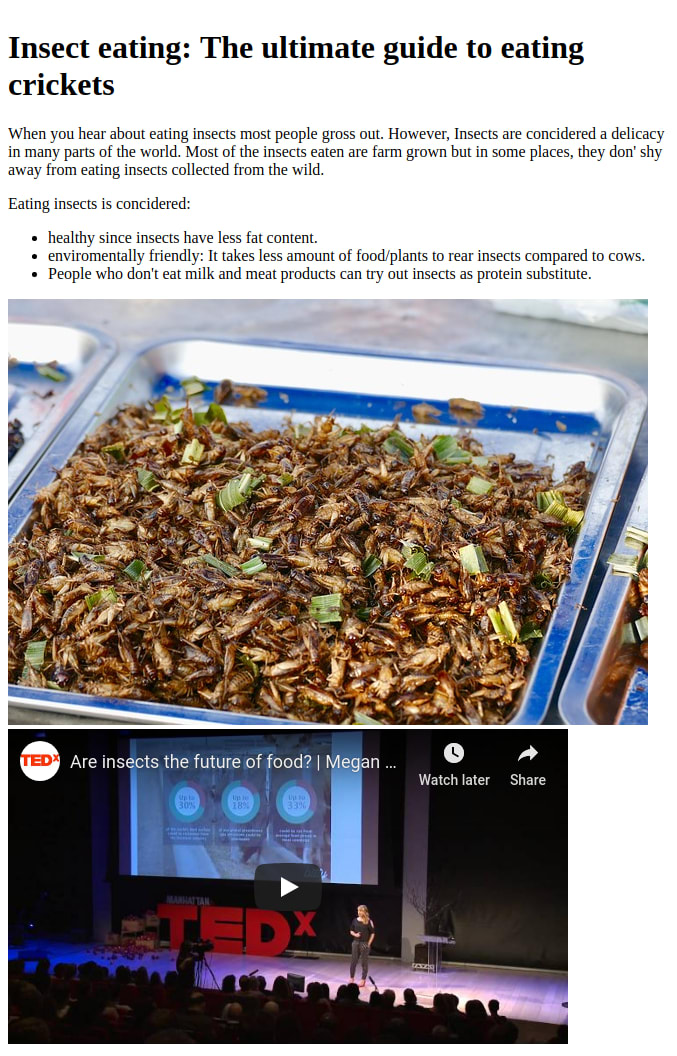
This webpage is not fancy but it a good first project. I made it one column to keep things beginner friendly.
7 steps to create your first HTML webpage
Step 1: Open a text/ html editor
Remember the text editor I talked about earlier on, time to open and use it. If you have used one before, skip to the next section. If you don’t know how, the instructions below will help you depending on the kind of computer you use.
- How to open a text editor on a Ubuntu [Youtube]
- How to open a text editor on a Window computer [Youtube]
- How to open a text editor on a Mac [Youtube]
After opening the text editor of your choice, create a new file. Then, you can proceed to the next step.
Step 2: Write some html code
We are now going to add the HTML boiler plate code. This is the code that will allow the browser to correctly display your webpage.
Copy and paste the code below into your file. Your file should look like this now:
<!DOCTYPE html>
<html>
  <head>
   <title></title>
  </head>
  <body>
   Your content here.
  </body>
</html>
Save the html page by pressing CTRL + S or click on file option then save option. Ensure that you name the file in the following format: “name” then “.html” examples index.html, cooking.html.
You can use these two guidelines when naming webpage file:
- use .html file name extension: The file name extension html tells the computer that that file is a web page and should be viewed by a web browser.
- Use underscore or hyphen instead of space: If you choose to name your file to have more than one word, use hyphen or underscore between the words. If you put spaces in the file name, the webpage may not be found by the web browser.
Choose where to save the file. Once you have choosen a place to save the file, click save.
To view the file. Use your file manager to navigate to the folder your HTML file is. Right click on the file and open it with a browser. You should see something like this.

Step 3: Add the text content
Copy the content you wrote earlier or the ready made content I arranged for you to use. Paste it in between the body tags.
Refresh the webpage on the browser. It will look like a blob of text with no paragraphs or headings shown below.

Step 4: Add the html tags.
Headings
First, we shall tackle the headings. Check which part or the text was the main heading.In our example it is “Insect eating: The ultimate guide to eating crickets”.
Place this text between h1 tags as shown below:
  <h1>
    Insect eating: The ultimate guide to eating crickets
  </h1>
Save your work and check the result on the browser.

Paragraphs
For the paragraphs of text, place each paragraph of text between the <p></p> html tags.Example:
<p>
  When you hear about eating insects most people gross out. However, Insects are concidered a delicacy in many parts of the world. Most of the insects eaten are farm grown but in some places, they don' shy away from eating insects collected from the wild.
</p>
<p>
  Eating insects is concidered:
</p>
  healthy since insects have less fat content.
  enviromentally friendly: It takes less amount of food/plants to rear insects compared to cows.
  people who don't eat milk and meat products can try out insects as protein substitute.
View the result on the browser.

Step 6: Add a list
Lists make reading a group of things easier on our eyes and brain. Lets add a bullet points type list:
<ul>
  <li>healthy since insects have less fat content.</li>
  <li>enviromentally friendly: It takes less amount of food/plants to rear insects compared to cows.</li>
  <li>people who don't eat milk and meat products can try out insects as protein substitute.</li>
</ul>
Refresh and view the result on the browser.

Step 7: Add images
Remember the URL’s or the images you saved. Now is the time to unleash them.
We are going to use the HTML’s img tag <img src="URL" alt="Shown when image cannot load"> to add your images on the webpage.
If you just copied the images’ URL, you will add the URL inside the quotes of src attribute. Remember to add alt attribute that shows when the image cannot be displayed. Example:
<img src="https://avicndugu.github.io/practice-projects-html/cricket-eating/final/img/fried-crickets.jpg" alt="Fried crickets on display">

Step 8: Embed a youtube video
Search for relevant video on youtube. Once you have found it, click on share button/ link. You will get a popup. Click on embed option.
Click on the copy button to copy the code that is displayed.
Paste your code on your webpage where you want the video to be displayed. For my case this is the code that i got:
<iframe width="560" height="315" src="https://www.youtube.com/embed/BwC4WRKi5QY" frameborder="0" allow="accelerometer; autoplay; encrypted-media; gyroscope; picture-in-picture" allowfullscreen></iframe>
View the html page on a browser.

If you have completed all the 8 steps, you should have a working HTML page that you should be proud of.
Step 9: Add a link to your source of information
If you copied some content from another web page, it is concidered appropriate to add a URL pointing to the original source of information.
You can add a link using <a href="URL">Words explaining what you will find if you click on the link</a> HTML tag.
<a href="https://avicndugu.github.io/practice-projects-html/cricket-eating/final/">HTML and CSS Cricket Project</a>
View the html page on a browser. You should now have a link at the bottom with the words: “HTML and CSS Cricket Project”.

Additional Tips
- Test your links to make sure they are working. You can test your link by clicking on them to see if they take you to the right page.
- Optional: Publish the web page online. Once you are ready, you can share your works online. You can use github or on codepen to publish your webpage online.
- Optional: Add some CSS to make the webpage look great. Once you compete working on the HTML, you can proceed to style the webpage using CSS. Here are some of the things you can do to make the webpage great:
- Adjust the font-size and font type of the text.
- Adjust the size of the images. If you downloaded your images, we are going to put them in one folder. It is common practice to place all images to be used on one folder. So, lets create an folder called img. Add all your downloaded images here.


Top comments (0)