
When you first create your AWS account, you create a root user. A root user can access everything that AWS offers and you cannot reduce the permissions associated with it. Amazon best practices recommend that you can create an admin group for administrative tasks. However, IAM users do not have access to the AWS Billing and Cost Management Console by default so we need to explicitly enable access.
Let's see how we can create a user with administrator and Billing Access rights so that we can reduce the number of reasons of why we would need to login as a root user.
First login as the root user
Enable Access to Billing Informations for IAM users
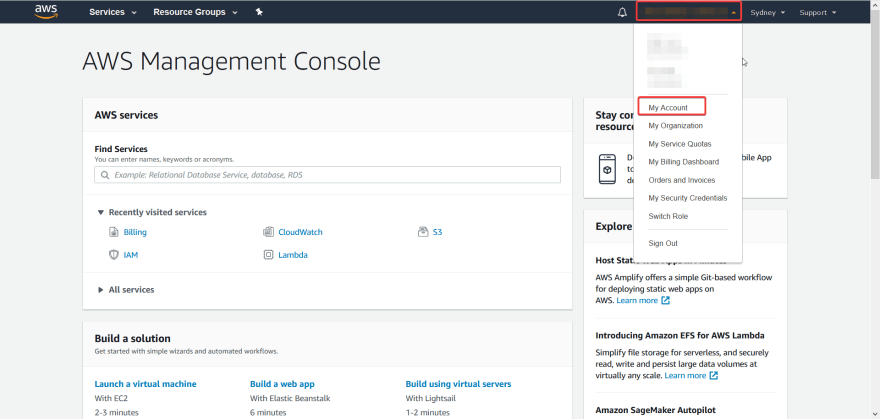
On the navigation bar, choose the account name and click on My Account.
Enable Access to Billing Information
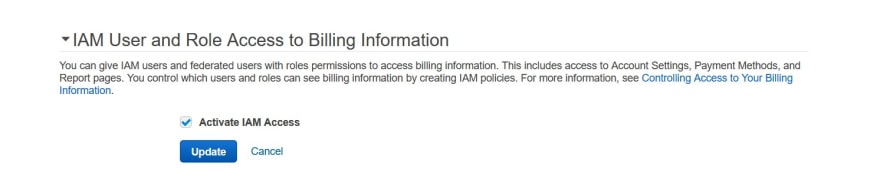
In the IAM User and Role Access to Billing Information section select the Activate IAM Access checkbox and click on the Update button.
Secure root user
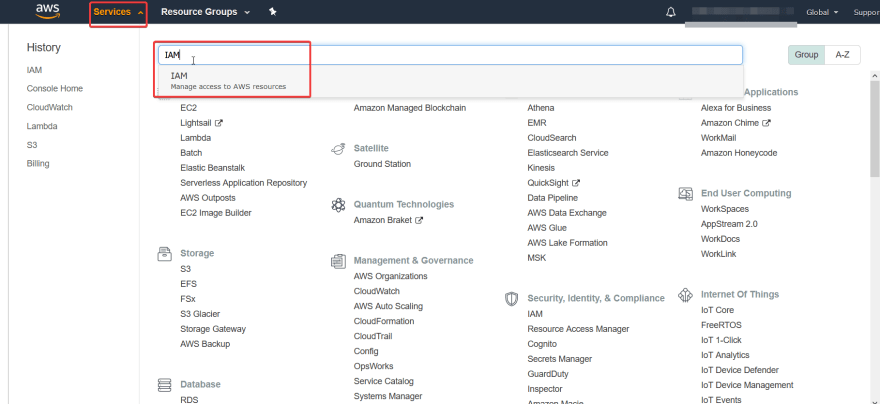
Navigate to the IAM(Identity and Access Management) console.
Activate MFA on the root account to secure it.
Change the sign-in link to be more friendly by clicking on the Customize button.

Add User with Administrator Rights
Click on the User item in the navigation pane and then click the Add User button.

Set User Details
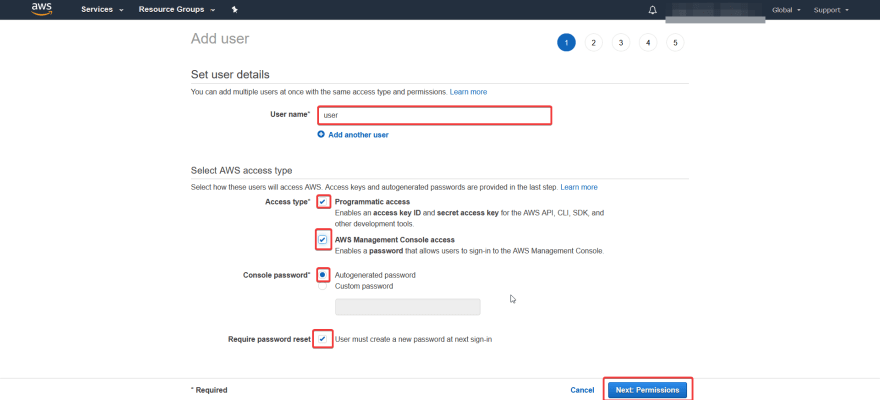
- Add the username eg user.
- Select the Programmatic Access and AWS Management Console Access checkboxes.
- Select Autogenerated password for Console Password.
- Select the Require Password Reset checkbox.
- Click the Next: Permissions button.
Set Permissions

- Select the Add user to group item.
- Click on the Create group button.
Create Admin Group
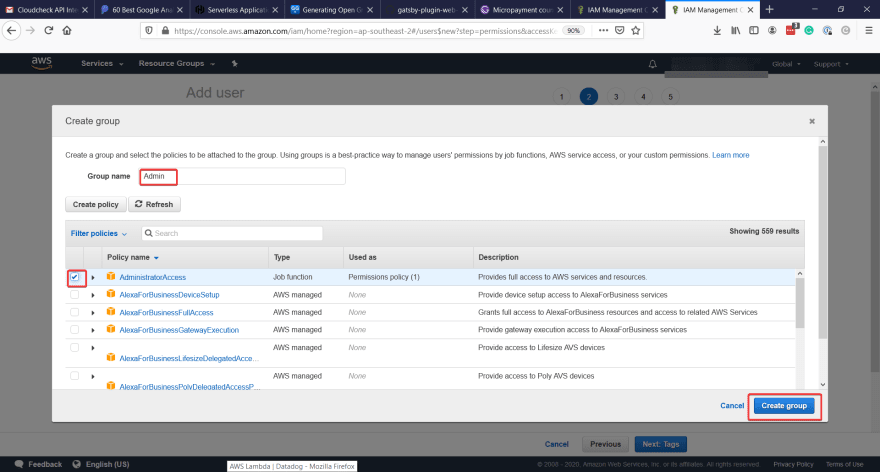
- Add the group name. eg Admin.
- Select the AdminstratorAccess policy from the list of the policies.
- Click Create Group. This will take you back to the Set Permissions screen.
Add user to Admin group

- Select the Admin group that you just created.
- Click on Next: Tags.
Add tags
Adding tags is optional so we will skip tags

Click on Next: Review.
Review User
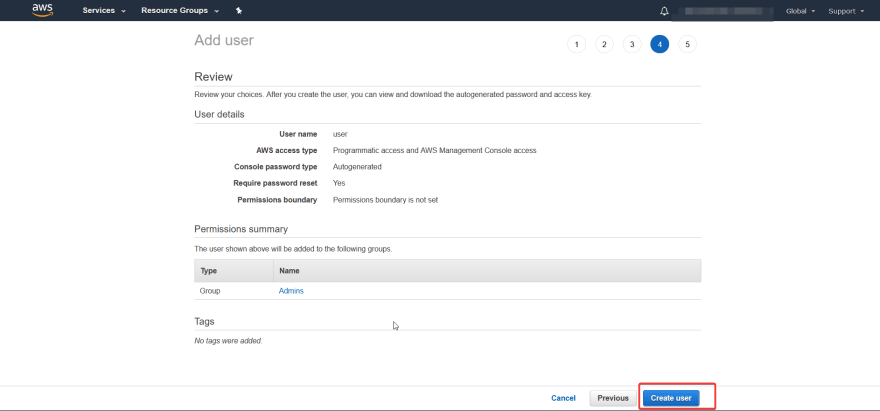
Review the settings and if everything is correct, press the Create user button.
Download Credential Information
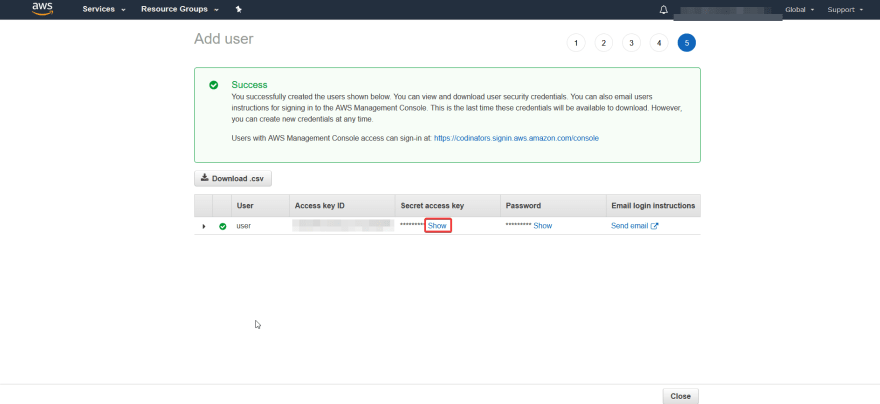
Once the user has been created, you can download the credential information. Remember, that this will be the only time
you can access this information.
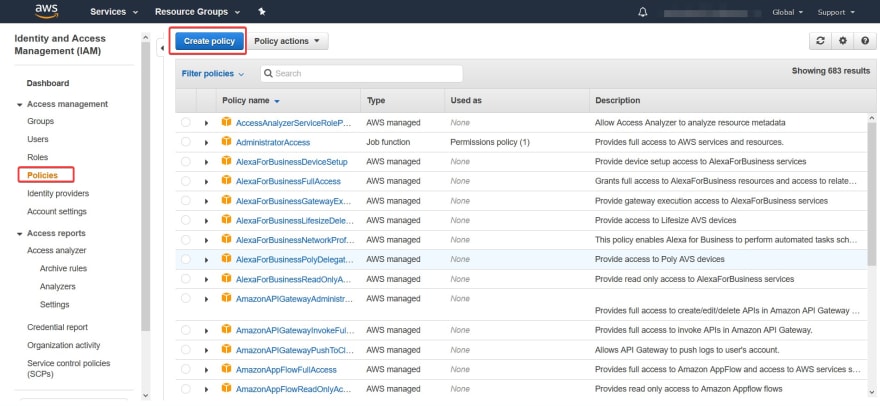
Create a group and policy for accessing Billing Service
Click on the Policies item in the navigation pane and then click the Create Policy button
Add Billing Service
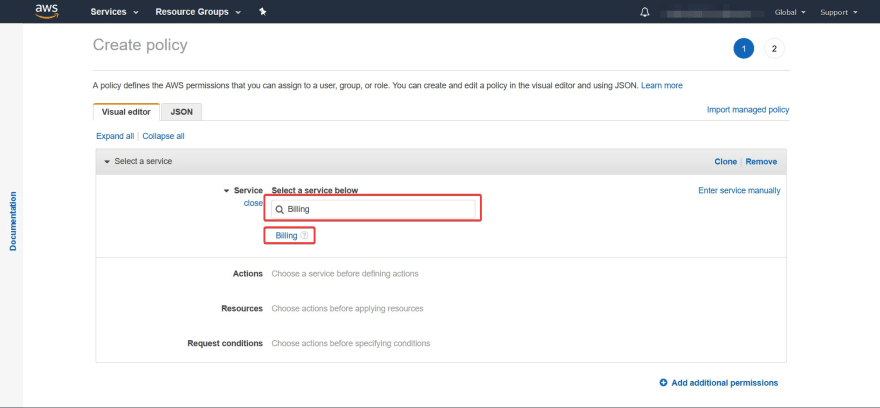
In the Select a service section, search for Billing and then select Billing.
Add Allowed Actions for Billing Policy
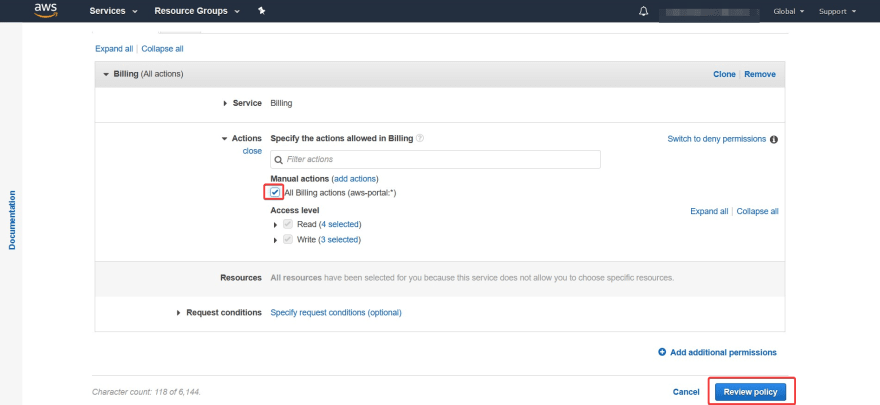
- Select the All Billing actions checkbox.
- Click on the Review policy button.
Create Billing Policy
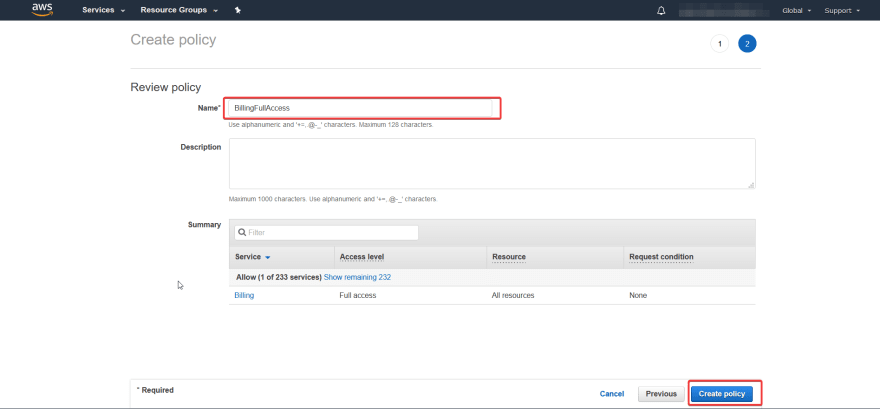
- Add the name for the policy eg BillingFullAccess.
- Click the Create Policy button.
Create Billing Group
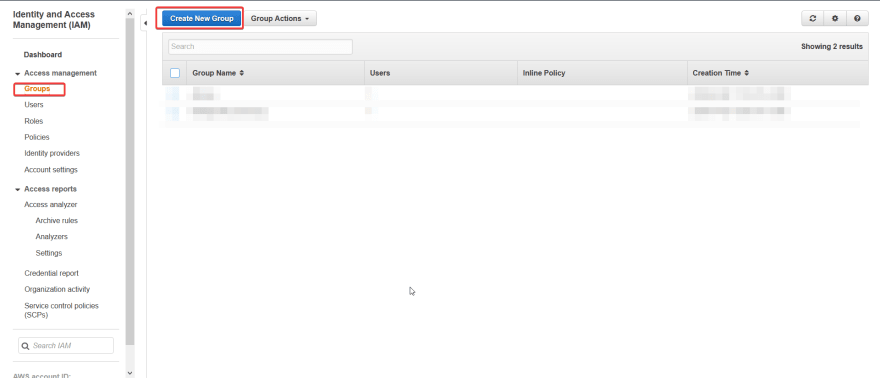
Click on the Groups item in the navigation pane and then click the Create New Group button.
Set group name
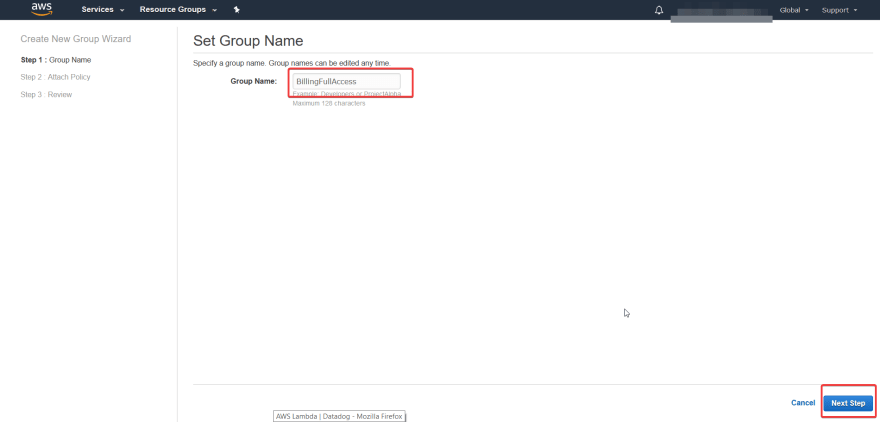
- Give a name for the Billing group eg BillingFullAccess.
- Click on the Next Step button.
Attach Policy
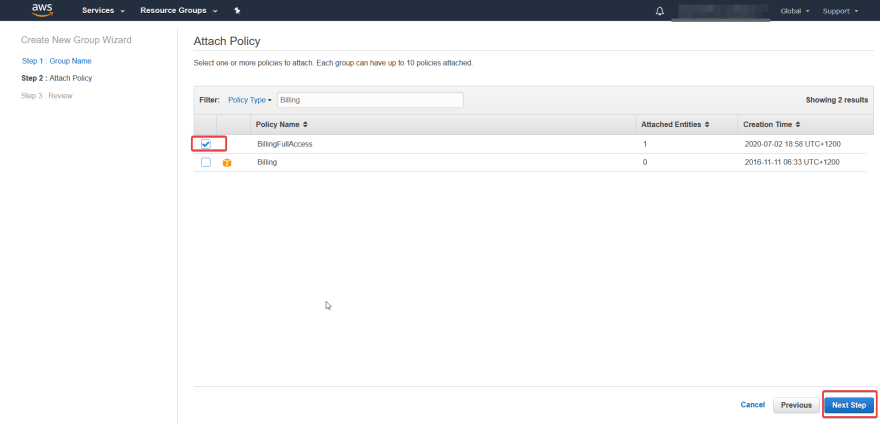
- Search for Billing in the filter.
- Select the BillingFullAccess policy checkbox.
- Click on the Next Step button.
Review Group

- Click the Create Group button.
Add User to the Billing Group

Click on the Users item in the navigation pane and then click the user that you want to add to the group.
Groups
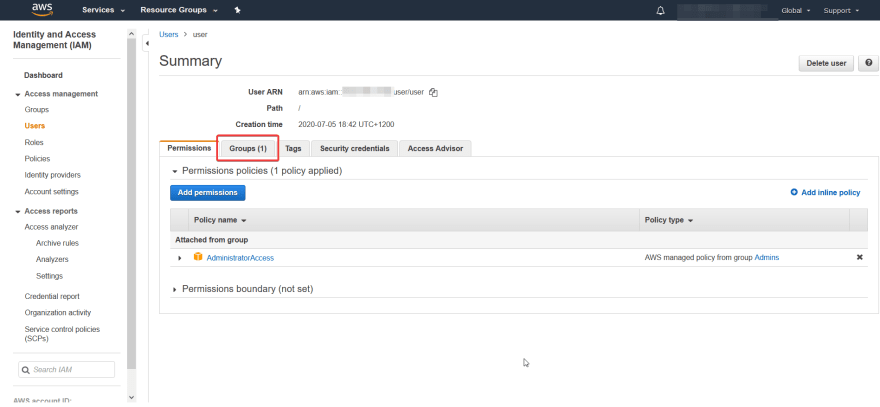
Select the Groups tab.
Add user to group
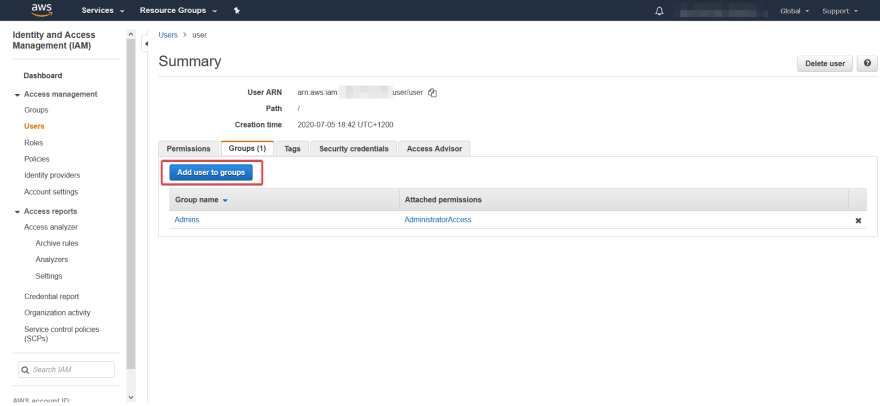
Click on the Add User to Group Button.
Select Billing group

- Select the BillingFullAccessGroup checkbox.
- Click on the Add to Groups button.
Conclusion
We now have an IAM user that has administrator rights for our AWS account and also has full access to the AWS Billing and Cost Management Console. Its also easy to give other users access to either Administrator rights or Billing rights.

Top comments (0)