
GraphQL, Prisma, and MongoDB have become the go-to options for building highly scalable APIs for modern web applications. With GraphQL, developers can easily define and request the precise data they need, while Prisma and MongoDB simplify database interactions.
This article aims to provide a comprehensive guide to building a robust API with GraphQL, Prisma, MongoDB, and Node.js. But, I will take a different path than the traditional approach and introduce Amplication to demonstrate how to further simplify the process of creating a GraphQL API.
GraphQL
GraphQL is a server-side runtime and a query language for APIs. It allows developers to define queries that define the exact structure of the data they require, eliminating the over-fetching and under-fetching of data. Hence, it has become popular over REST APIs in modern application development.
Prisma
Prisma is an open-source ORM that streamlines database access in your applications. It offers a range of tools and features to simplify database access by abstracting away the database-specific complexities. This allows developers to seamlessly interact with multiple database systems like PostgreSQL, MySQL, SQLite, and SQL Server without writing specific code tailored to each database.
MongoDB
MongoDB is a highly scalable document-type database. Its flexible schema approach allows developers to adapt and modify the data structure as needed, providing agility in application development.
Amplication
Amplication is an open-source platform that automatically generates APIs and clients based on pre-defined data models. It streamlines the development process by minimizing repetitive coding tasks and boilerplate code, enabling developers to focus on building backend services more efficiently.
How to Create API with GraphQL, Prisma, and MongoDB
To demonstrate a combination of these technologies, I have used a small inventory management process to implement. The scenario will contain parts and packets where a packet contains parts.
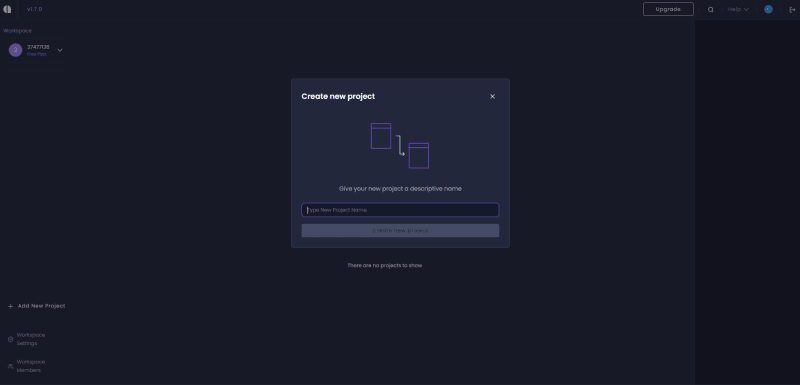
Step 1 - Creating a project with Amplication
The first step is creating a project with Amplication. You will see an option to create a New project in the bottom left corner of the Amplication dashboard. It will open a modal to enter a project name, and click the Create new Project button.
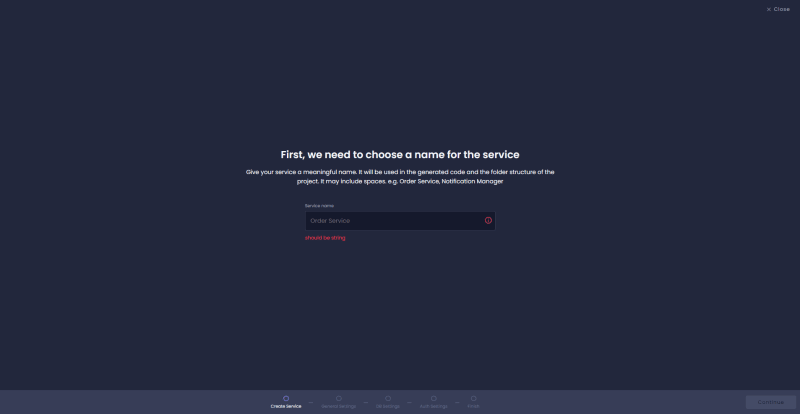
Step 2 - Create and setup a service and connect it to the Git repository
Click on Add Resource button and select the Service option from the dropdown. It will redirect you to a page to enter a name for the service.
Then, you will be asked to connect a git repository.

Next, you need to to choose between GraphQL and REST. In this case, I will choose GraphQL.

Next, Amplication gives us two options to build the project structure. If you plan to create multiple services in the repo, choose the Monorepo option. In this case, we only have GraphQL API service to create. So, I will be selecting a Polyrepo here.

Then you have to choose the database option. In this project, we are using MongoDB as the database provider.

Then, it will ask you to select a template to generate entities automatically. In this case, we will define the data model later, so select "Empty".

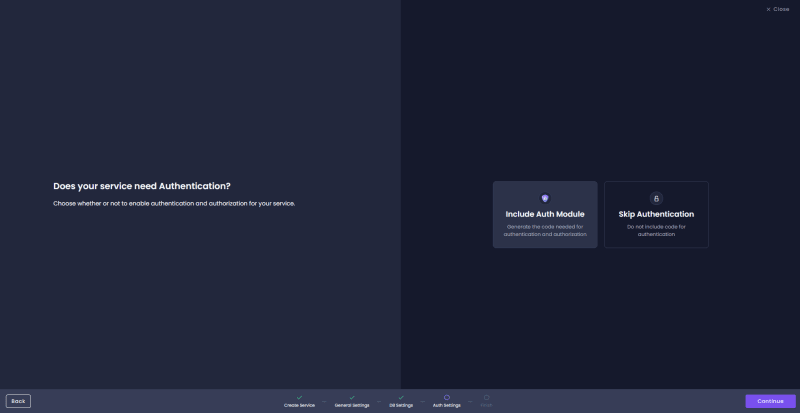
Finally, you can include authentication for your service by selecting the Include Auth Module option. It will automatically generate the authentication code for your service.
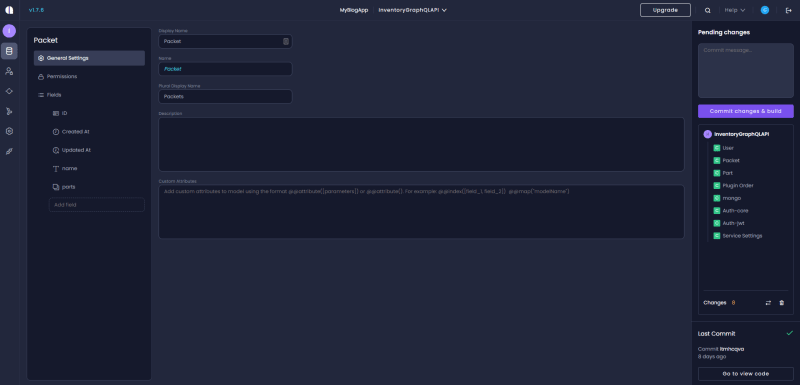
Step 3 - Defining the data model with Amplication
Amplication is using Prisma for the ORM. Prisma simplifies database operations and integrates seamlessly with GraphQL. In this section, we will define our data model using Amplication, and it will generate models with Prisma's declarative syntax.
You can create new entities by clicking the Add Entity button in the Entities tab. Here, I'm creating two entities that have a relation with each other.
- Part model - This consists of the fields - id, description, weight, color, created time, and last modified time.

- Packet model - This consists of the fields - id, name, parts, created time, and last modified time.
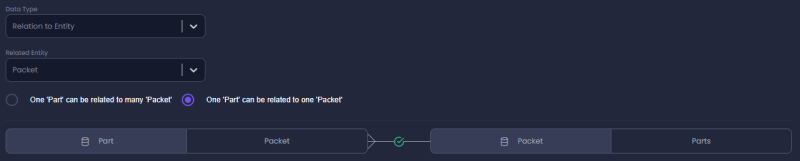
You can also define the relationship between the two entities through Amplication. For that, open the Part entity, and create a field named "packet". It will automatically be set as a relation field. Navigate back to the "Packet" entity, and you can see that you also have a new relation field called "Parts".

One Packet can be related to many Parts.

One Part can be related to one Packet.
Step 4: Commit changes
Once all the entities are created, click the Commit changes & build button to sync the changes with the GitHub repository.
Step 5: Get the source code
Navigate to the GitHub repo by clicking the Open With GitHub button and clone the source code to your local machine.

Amplication has successfully generated all the required files and boilerplate code for you. For example, prisma/prisma.schema file contains the data models we created from the Amplication UI.
datasource mongo {
  provider = "mongodb"
  url      = env("DB_URL")
}

generator client {
  provider = "prisma-client-js"
}

model User {
  createdAt DateTime @default(now())
  firstName String?
  id        String   @id @default(auto()) @map("_id") @mongo.ObjectId
  lastName  String?
  password  String
  roles     Json
  updatedAt DateTime @updatedAt
  username  String   @unique
}

model Part {
  color       String?
  createdAt   DateTime @default(now())
  description String?
  id          String   @id @default(auto()) @map("_id") @mongo.ObjectId
  packet      Packet?  @relation(fields: [packetId], references: [id])
  packetId    String?
  updatedAt   DateTime @updatedAt
  weight      String?
}

model Packet {
  createdAt DateTime @default(now())
  id        String   @id @default(auto()) @map("_id") @mongo.ObjectId
  name      String?
  parts     Part[]
  updatedAt DateTime @updatedAt
}
Now, you can customize the application based on your specific requirements.
Step 6: Install npm packages
Once the application is ready, you need to install npm packages and dependencies using npm install command.
npm i
Step 7: Start the Docker container for the database
Start the Docker container to run the database using the below command.
npm run docker:db
Then create the application schema on the database using Prisma. You can use the below migration commands for that:
npm run prisma:generate
npm run db:init
Step 8: Run the application
Finally, you can run the application using npm run start command. It will start the server at http://localhost:3000
npm run start
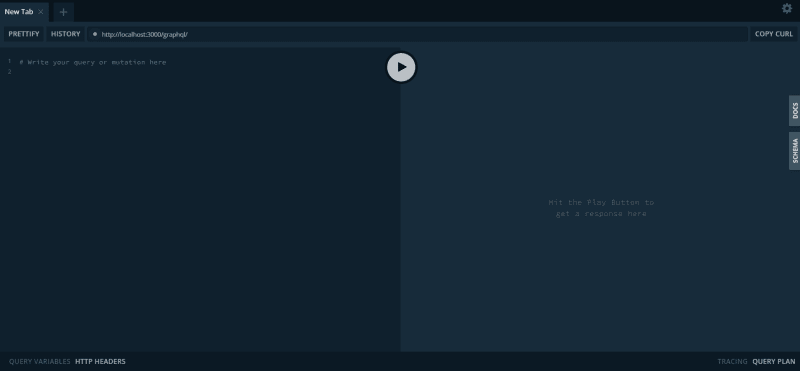
Also, you can access the GraphQL API using the GraphQL Playground available at http://localhost:3000/graphql.
Note: All the above instructions are commands are also listed in the README.md file in the root of the server code
Step 9: Testing the APIs using GraphQL playground
Once the GraphQL server is up, you can test your APIs with the GraphQL Playground. The below examples show how to test the GraphQL APIs for creating a Part and retrieving all parts. Now, you can customize the application based on your specific requirements.
Sample Mutation API
mutation {
  createPart(data:{
    color: "orange"
    description: "orange part 001"
    weight: "25"
  }) {
    color
    createdAt
    description
    id
    updatedAt
    weight
  }
}

{
    "data": {
        "createPart": {
            "color": "orange",
            "createdAt": "2023-06-19T06:17:48.964Z",
            "description": "orange part 001",
            "id": "648ff30c6af532b09aeb5562",
            "updatedAt": "2023-06-19T06:17:48.964Z",
            "weight": 25
        }
    }
}
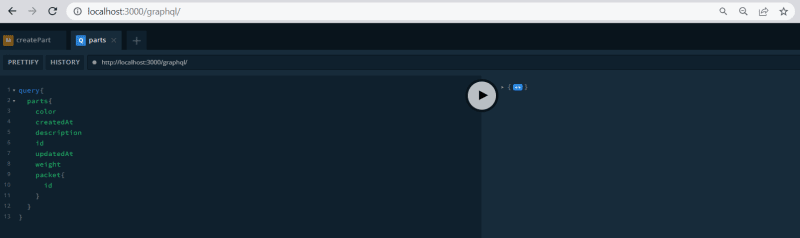
Sample Query API
query{
    parts{
        color
        createdAt
        description
        id
        updatedAt
        weight
        packet{
             id
         }
    }
}
{
    "data": {
        "parts": [
            {
                "color": "red",
                "createdAt": "2023-06-13T20:22:08.544Z",
                "description": "red part 001",
                "id": "6488cff0c0b65f41f03c4d3a",
                "updatedAt": "2023-06-13T20:22:08.544Z",
                "weight": 20,
                "packet": null
            },
            {
                "color": "green",
                "createdAt": "2023-06-13T20:22:26.267Z",
                "description": "green part 001",
                "id": "6488d002c0b65f41f03c4d3b",
                "updatedAt": "2023-06-13T20:22:26.267Z",
                "weight": 50,
                "packet": null
            },
            {
                "color": "yellow",
                "createdAt": "2023-06-13T20:25:05.531Z",
                "description": "yellow part 001",
                "id": "6488d0a1c0b65f41f03c4d3d",
                "updatedAt": "2023-06-13T20:25:05.531Z",
                "weight": 50,
                "packet": null
            },
        ]
    }
}
Conclusion
As you can see, Amplication significantly simplifies the process of creating GraphQL APIs while reducing the effort you need to initialize a new project. You can effortlessly generate all the required files for multiple data models with a few straightforward steps.
Amplication is an open-source tool designed to streamline Node.js development by generating fully functional Node.js services. It goes beyond supporting GraphQL and MongoDB. With Amplication, you can create Node.js APIs and services using other technologies like PostgreSQL, MySQL, Passport, Jest, and Docker. I strongly encourage you to give Amplication a try and witness the impact it can have on your development workflow.

Top comments (1)
Great , thanks for sharing .
here another Starter Advanced GraphQL Next.js TypeScript & MongoDb (CRUD)
: dev.to/idurar/graphql-generic-crud...