We start this series by building and debugging a .NET 6 Web API application in Docker containers. Many developers still avoid using Docker for development and debugging purposes, so I hope this will somehow reduce the gap of the unexplored. This is the first part, so come back later to check others where we add PostgreSQL with persistence, log to Elasticsearch, explore and visualize with Kibana to the existing setup, and much more.
This part of the tutorial will cover .NET 6, but the whole idea of containerized services is that we are not limited to just a particular technology. Instead of .NET, maybe you prefer writing applications in NodeJS or Python (in later examples), or you want to combine all these technologies, containers allow us to do so with the least effort.
What you will learn
After this series, you should be able to understand the significance of containerization with Docker and apply new knowledge to your projects. Also, I will try to keep up with best practices as much as possible so you can produce better software.
Prerequisites
Before we can even support this kind of story, we need to ensure that our machine and operating system keep the minimum requirements for the Docker engine.
A couple of things need to be installed on your machine before we start with this process:
- .NET 6 SDK
- Docker Engine
- Visual Studio Code (You can use others, but this one is with most extensions)
Source
You can find the source code on GitHub. Every part of this series will have a separate branch, and all of them will be merged into the master branch.
https://github.com/amelspahic/blog-series/tree/part-1
Why Docker
Docker is a containerization technology for packaging your program and its dependencies into containers, ensuring that your application runs smoothly in any environment, including development, test, and production. Docker is a program that makes it easier to construct, deploy, and run containerized applications. With Docker in mind, the code running on your machine will function the same on every other machine.
.NET 6 Web API
Create a directory where we will hold everything related to our project.
# Create a new folder named `blog-series`
mkdir blog-series

# Change directory to the new directory
cd blog-series
Create a .NET 6 Web API application using .NET CLI in the terminal (if you use Visual Studio, you can create a new project from the template).
dotnet new webapi --no-https -o src/sample-app -n SampleAPI
cd src/sample-app
Command explanation:
-
dotnet new webapiwill create a new Web API project (check additional templates withdotnet new --list -
--no-httpswill turn off HTTPS (I use reverse proxy configuration anyways) -
-o src/sample-appwill output created boilerplate in thesrc/sample-appfolder -
-n SampleAPIis the name of our projectSampleAPI.csproj
CLI will generate a sample boilerplate that we will use in this example. The project is ready to run, so for validation, run dotnet run from the src/sample-app folder (where we created our .NET 6 project).
dotnet run
The output will look like the image below, and it will show on which ports your application is available.
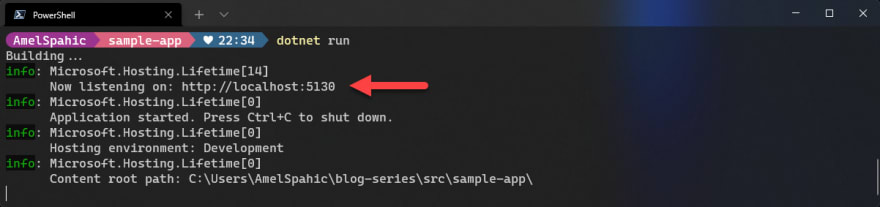
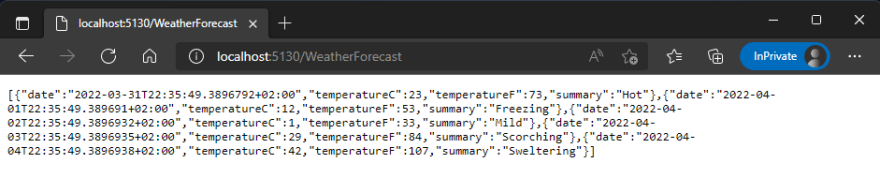
We can access the endpoint on the presented URL (mine is on localhost, port 5130), http://localhost:5130/WeatherForecast will get the sample response.
Visual Studio Code
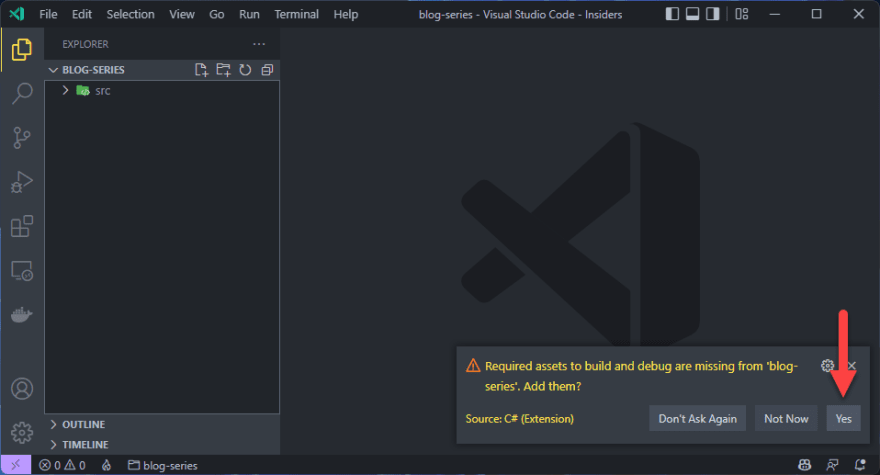
At the start, we created a new folder, blog-series (maybe you named it differently), where we keep all our independent projects. Open it in Visual Studio Code.
You will be prompted to add build and debug assets for C# - choose Yes and VS Code will create another folder .vscode in which debugging and task configurations are stored.
If you are not prompted to generate build and debug assets, you can do it manually through the Command Palette (
Ctrl+Shift+P) and run the.NET: Generate Assets for Build and Debugcommand.
Application containerization
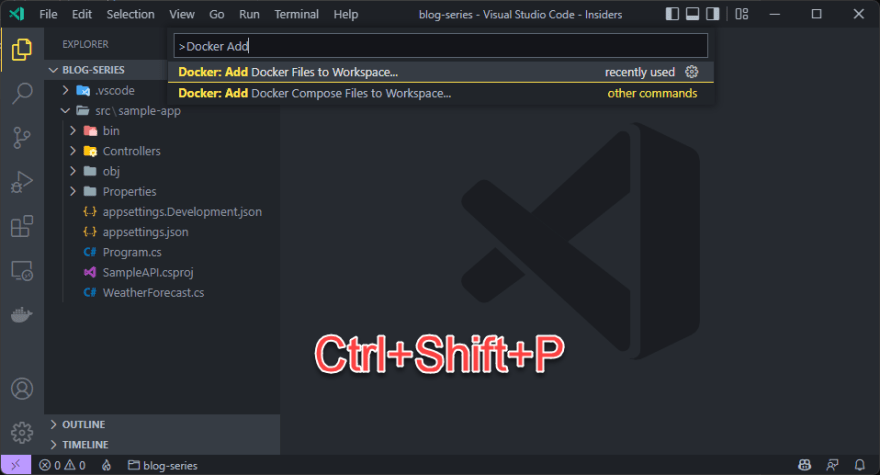
Be sure to have the Docker extension installed so that we can use extension goodies. We could create our own, but we won't bother since this is a more convenient method.

This extension will expand VS Code Command Palette with additional options. Press Ctrl+Shift+P to open the Command Palette and search for Docker: Add Docker Files to Workspace... (start typing).
You will be prompted with different options, including:
-
Select Application Platform- choose.NET: ASP.NET Core -
Select Operating System- chooseLinux(this is the operating system of the container, not your machine, so definitely choose Linux) -
Port- type in which container port your application will use (I prefer 5000) -
Include optional Docker Compose files- chooseYes
The extension will create a couple of files and configurations:
Dockerfile-
.dockerignore, which contains files and directories patterns to be excluded from the context -
docker-compose.yml- a YAML file that defines the services and, with a single command, can spin everything up or tear it all down -
docker-compose.debug.yml- same asdocker-compose.yml, but with debugging configuration - VS Code tasks for building and running the container (in both debug- and release configuration, four tasks in total), and a debugging configuration for launching the container in debug mode.
Dockerfile
The previous step created a Dockerfile, a text document that contains all the commands to assemble an image in our src/sample-app folder. Visual Studio Code extension did a good job, but I added a comment above each step to better understand what happened.
# Initialize a new build stage and set the Base Image
FROM mcr.microsoft.com/dotnet/aspnet:6.0-focal AS base
# Set the working directory
WORKDIR /app
# Expose the port 5000
EXPOSE 5000
# Sets the environment variable
ENV ASPNETCORE_URLS=http://+:5000

# Creates a non-root user with an explicit UID and adds a permission to access the /app folder
# For more info, please refer to https://aka.ms/vscode-docker-dotnet-configure-containers
RUN adduser -u 5678 --disabled-password --gecos "" appuser && chown -R appuser /app
USER appuser

# Initialize the new build stage and set the Build Image
FROM mcr.microsoft.com/dotnet/sdk:6.0-focal AS build
# Set the working directory for subsequent COPY and RUN commands
WORKDIR /src
# Copy the project file to the container filesystem /src folder
COPY ["src/sample-app/SampleAPI.csproj", "src/sample-app/"]
# Execute dotnet restore to restore dependencies specified in the .csproj file
RUN dotnet restore "src/sample-app/SampleAPI.csproj"
# Copy everything to the container filesystem
COPY . .
# Set the working directory for subsequent RUN commands
WORKDIR "/src/src/sample-app"
# Execute project build with all of its dependencies
RUN dotnet build "SampleAPI.csproj" -c Release -o /app/build

# Pick up where a previous build stage left off
FROM build AS publish
# Publish the application and its dependencies to a folder for deployment
# UseAppHost=false to disable the generation of the native executable.
RUN dotnet publish "SampleAPI.csproj" -c Release -o /app/publish /p:UseAppHost=false

# Pick up where a previous base stage left off
FROM base AS final
# Set the working directory for the subsequent COPY command
WORKDIR /app
# Copy from the publish image /app/publish directory to the container filesystem
COPY --from=publish /app/publish .
# Specify the command executed when the container is started
ENTRYPOINT ["dotnet", "SampleAPI.dll"]
If you are interested in more Docker references, please check the official documentation.
.dockerignore
Visual Studio Code Docker extension created a .dockerignore file which contains files and directories patterns to be excluded from the build context. This helps avoid unnecessarily sending large or sensitive files and directories to the daemon and potentially adding them to images using ADD or COPY.
**/.classpath
**/.dockerignore
**/.env
**/.git
**/.gitignore
**/.project
**/.settings
**/.toolstarget
**/.vs
**/.vscode
**/*.*proj.user
**/*.dbmdl
**/*.jfm
**/bin
**/charts
**/docker-compose*
**/compose*
**/Dockerfile*
**/node_modules
**/npm-debug.log
**/obj
**/secrets.dev.yaml
**/values.dev.yaml
README.md
docker-compose.yml and docker-compose.debug.yml
Our project needs to run multiple containers, and while we can do that separately, we want to have them configured in one place. That is the perfect place to introduce docker-compose. Even in scenarios where we use a single container, using Docker Compose provides a tool-independent configuration in a way that a single Dockerfile does not. Configuration settings such as volume mounts for the container, port mappings, and environment variables can be declared in the docker-compose YML files.
The Compose file is a YAML file defining services, networks, and volumes. Docker-compose and Docker-compose.debug are pretty much the same, with a slightly different setup for the debug configuration (i.e., setting the Development environment and attaching a debugger from the host machine).
version: "3.4"
# A service definition contains a configuration that is applied to each container
# started for that service, much like passing command-line parameters to docker run
services:
  # Define a service called 'sampleapi'
  sampleapi:
    # Specify the image to start the container from
    image: sampleapi
    # Configuration options that are applied at build time.
    build:
      # Either a path to a directory containing a Dockerfile
      context: .
      # Compose uses an alternate file to build with. A build path must also be specified.
      dockerfile: src/sample-app/Dockerfile
    # Expose ports (HOST:CONTAINER)
    ports:
      - 5000:5000
    # Set environment variables
    environment:
      - ASPNETCORE_ENVIRONMENT=Development
    # Mount host directories to container directories
    volumes:
      - ~/.vsdbg:/remote_debugger:rw
Please check the official Docker Compose documentation for more details on docker-compose specifications.
Starting the application
We have everything in place to spin up our application in Docker. We can do it in two ways using the command line or the Visual Studio Code Command Palette.
Command line
From the root folder, run the following command.
docker-compose up -d
Command explanation:
-
docker-compose upcreates and starts containers defined in thedocker-compose.ymlfile -
-ddetaches the execution from the terminal
Wait for the process to complete:
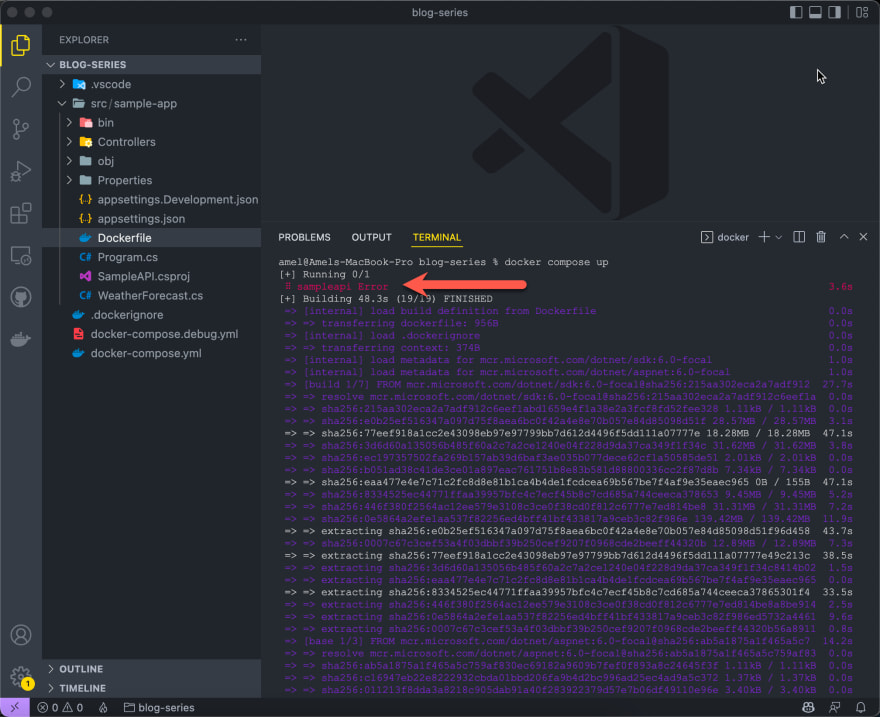
The error on the image is expected since we do not have any images created
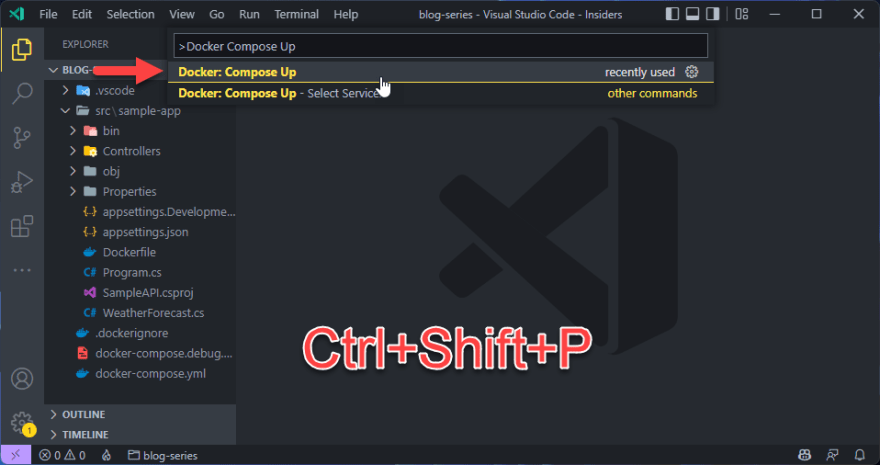
Visual Studio Code Command Palette
After the Docker extension installation, we have additional options in the Command Palette (Ctrl+Shift+P). Pick which docker-compose file you want to run.
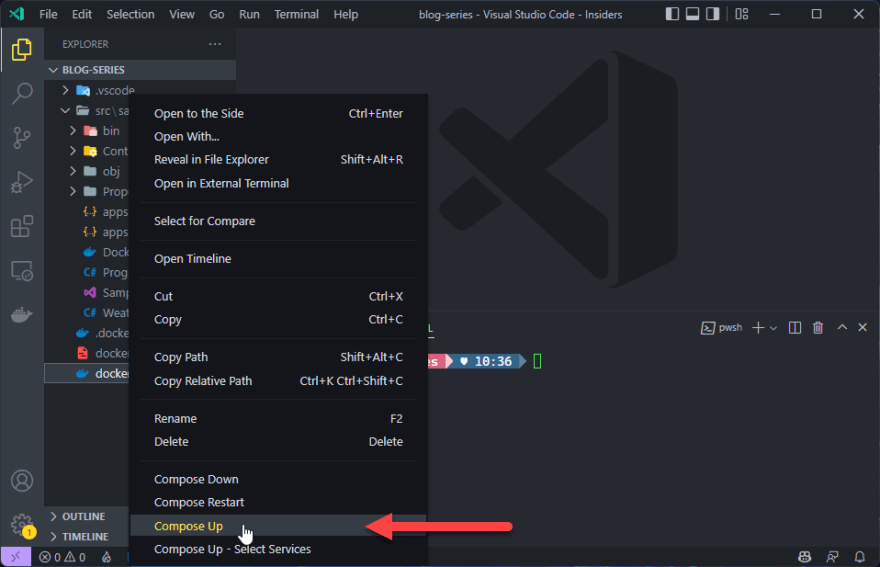
Another way is to right-click on docker-compose.yml or docker-compose.debug.yml and select Compose Up to reproduce the same behavior as the command-line execution.
Running the commands above will create an image with a sampleapi tag (image name from the docker-compose.yml), (re)create, start, and attach to a service container. You can run docker image ls to check if the image is successfully created. It will list the images we have on our machine. Also, docker ps will show running containers.

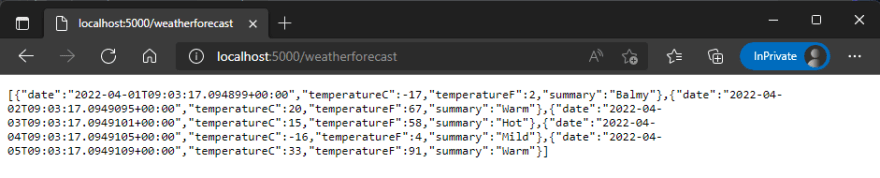
Our application should be up and running. We can access it on the port configured in the docker-compose file (in my case, 5000).
Debugging in Docker
If you came this far, you probably know how to use standard debugging techniques. Just act as if it is a typical application without container support.
We are skipping the part of standard debugging techniques and jump straight to Docker debugging. This one is more interesting as it brings you closer to the real-world container behavior.
From the Debug tab, select the
Configurationdropdown and selectAdd Configuration
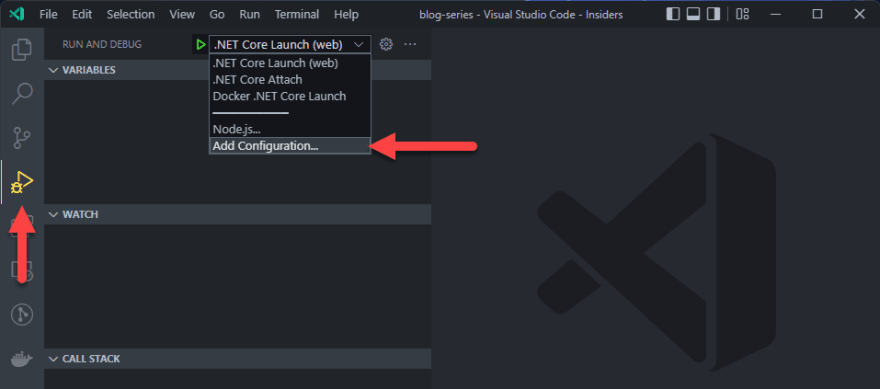
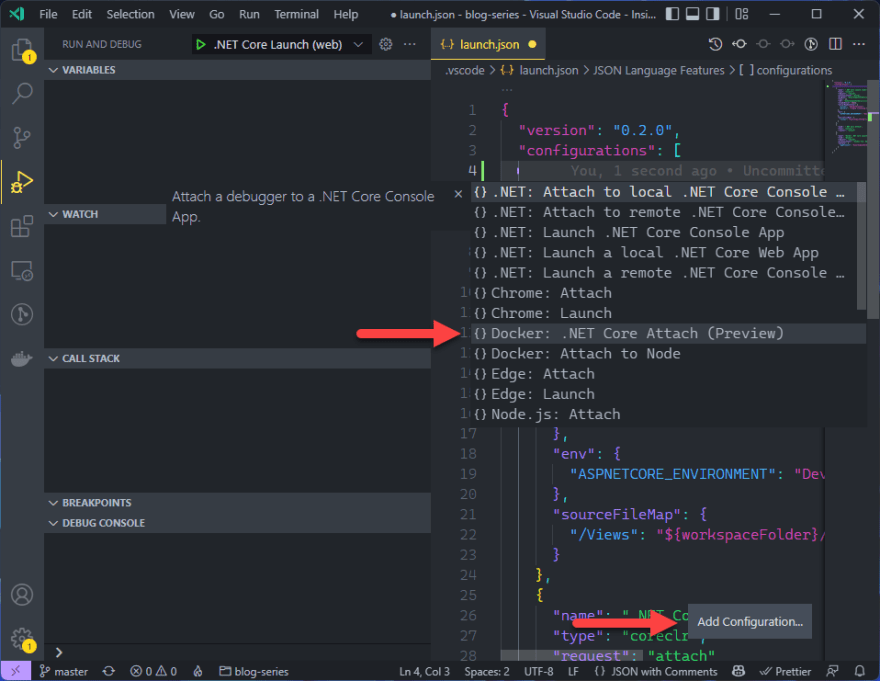
You will be prompted to choose a predefined configuration, so choose
Docker: .NET Core Attach (Preview), and it will automatically add a predefined configuration tolaunch.json
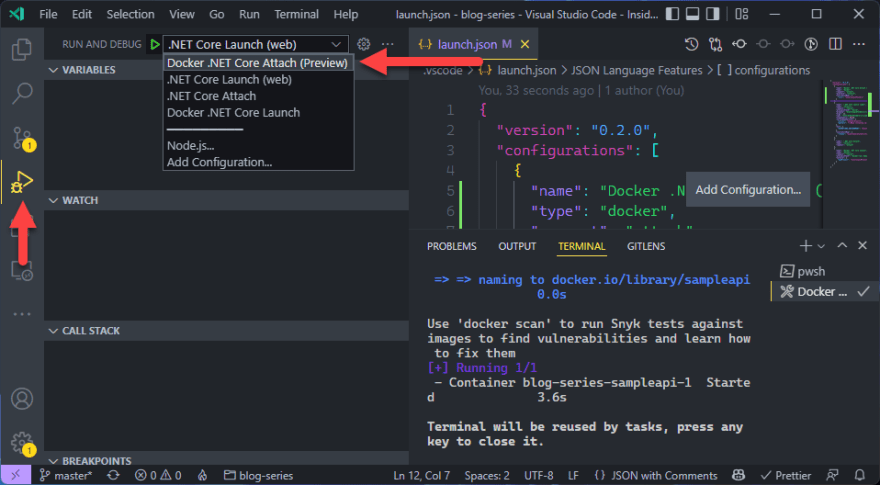
Right-click on one of the
docker-compose*.ymlfiles and selectCompose Up. If you go with thedocker-compose.yml(without.debug), you will be asked to copy the debugger to the container. Choose Yes to be able to debug. If you are going withdocker-compose.debug.yml, it will just spin up the service(s).Open your browser and go to
http://localhost:5000/weatherforecast. You should get the expected response.Attach the debugger - you will need to choose container group and container
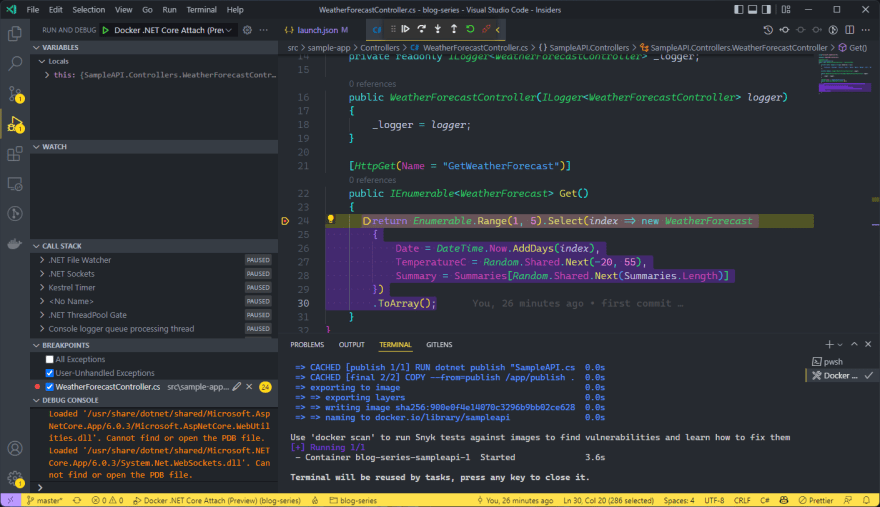
Add a breakpoint and refresh the
http://localhost:5000/weatherforecast. If everything is configured correctly, the debugger should attach to your breakpoint.
Reloading changes
When changing your code, right-click on the docker-compose*.yml file, choose Compose Restart, and reattach the debugger.

Next steps
In the next part, we will add database support to our project in the containerized environment. We will focus on PostgreSQL, but a similar approach can be used for many other database systems (the main difference is in the code implementation).

Top comments (0)