
Now let's get our hands dirty
So hopefully I've piqued your curiosity and you want to jump in now and join in on the fun.
If you want to read my wee rambling on the build-up, see previous post:

Reconsidering
After fooling around and installing, then following some tutorials and attempting to build the first steps in the project, I figured I don't actually want to make a WeTransfer clone, but something any developer can take, add their own Token and fire up their own WT-Like-Thing.
Identifying more issues
I've followed the tutorials and have had to update few things to get it working with Vue 3. These, I will cover when I stumble across them again.
Step 1: Installing
- Create a web3.storage account
- Get an API Token (Including 1TB of storage!)
- If you haven't done so already, install: Node version 14 or higher and NPM version 7 just to be sure we're on the same page. I use nvm, so it's pretty easy to switch between versions.
- Create your Application (I used the vue-cli to generate one: i.e.
vue create web3-storage-tutorial) - Install web3storage
npm install web3.storagein the app's folder
Step 2: Javascript
Create web3storage.js
I put this in a /src/utils folder. Maybe I'll have more utils and put them in there. I don't know. It seems like a good enough place for now.
Add the following code:
// web3storage.js
import {
    Web3Storage
} from 'web3.storage/dist/bundle.esm.min.js'
This is to import web3storage for Vue 3. We have to use the pre-compiled bundle, otherwise Webpack will go all wonky and we'll get stupid errors. We don't want stupid errors. They lead us nowhere.
Now we want to export our code for use in our Vue modules, so we add this under the import:
// web3storage.js
export default {
  // Code for accessing and uploading files goes here.
}
Now inside of this export we're going to create a couple of functions that will make sense in a minute:
    getAccessToken() {
        return process.env.VUE_APP_WEB3STORAGE_TOKEN
    },

    makeStorageClient() {
        return new Web3Storage({
            token: this.getAccessToken()
        })
    },
-
getAccessTokenwill read our web3storage access token from the .env.local file. For Vue 3 we have to prepend it withVUE_APP_in order for it to load. We'll need this token in a minute.
makeStorageClient we will need whenever we want to upload something. Again, we'll be needing this soon.
Soon is now, so we need these functions
I'm going to already let you know that I basically copied these functions from the web3.storage docs. I'm hoping we can use them as a basis, though, and make something great!
      async storeWithProgress(myFileList) {
        const files = [...myFileList]
        // show the root cid as soon as it's ready
        const onRootCidReady = cid => {
            console.log('uploading files with cid:', cid)
        }
        // when each chunk is stored,
        //update the percentage complete and display
        const totalSize = files.map(f => f.size)
                          .reduce((a, b) => a + b, 0)
        let uploaded = 0

        const onStoredChunk = size => {
            uploaded += size
            const pct = totalSize / uploaded
            console.log(`Uploading... ${pct.toFixed(2)}% complete`)
            // TODO: can we get this to show in browser & update?
        }

        // makeStorageClient returns
        // an authorized Web3.Storage client instance
        const client = this.makeStorageClient()

        // client.put will invoke our callbacks during the upload
        // and return the root cid when the upload completes
        return client.put(files, {
            onRootCidReady,
            onStoredChunk
        })
    },
This is the method that uploads our files and then responds to our app with the CID. we need this to display, and make a link. Right? Yes, we want to be able to send the link to cool people...
And, here's our JavaScript so far:
Step 3: Feed it something
Now this beast we are creating wants to be fed. It likes files, so we want to give it some files.
And then finally we want to tell it what to do with said files (Upload them and make them available to the world… to the solar sisters, to the universal compadre-hood of file-sharing-ness. Hello aliens. See our files!)

Right.
We scaffolded out our project with vue-cli, so it has almost everything I need. Oh shoot. Except some CSS. I'm going to go ahead and some CSS reset and my CSS Framework I'm using.
Some CSS first
npm install equal-vue
And we update our main.js file to look something like this:
// Regular app stuff
import { createApp } from 'vue'
import App from './App.vue'
// Equal stuff here
import Equal from 'equal-vue'
import 'equal-vue/dist/style.css'

// Notice **.use(Equal)**
createApp(App).use(Equal).mount('#app')
Now some Vue
We want to render a button that triggers a file input. Probably we should be able to select multiple files and upload them all to the same cab.
In the pre-scaffolded Vue project there is the App.vue which loads HelloWorld.vue.
Let's rename this to UploadFiles.vue
Remember: in App.vue we should change HelloWorld to UploadFiles.
In UploadFiles, we basically want a button that opens a file dialog when we click it, then we want to return the file and then upload it with another button.
Basic html structure
<template>
  <title />
  <preview />
  <button @click="file_select"/><button @click="upload") />
</template>
The button opens the file dialog. Then when we have some files selected, the upload button appears, and some image previews show up.
Let's try to get it to look something like this:

The following is what I turned UploadFiles.vue into:
<!--UploadFiles.vue-->
<template>
  <div class="hero">
    <h1>{{ title }}</h1>
    <it-divider />
    <it-alert
      v-if="my_thumbs!==null"
      iconbox type="primary"
      title="Chosen Files">
      <it-avatar-group square>
        <it-badge position="top-left"
          type="primary"
          v-for="(thumb, i) in my_thumbs"
          :key="i"
          :value="i+1">
          <it-avatar
            square class="upload_preview"
            :src="thumb"/>
        </it-badge>
      </it-avatar-group>
    </it-alert>
    <it-divider  v-if="my_thumbs!==null" />
    <it-button-group>
      <it-button
        :type="my_thumbs!==null?'warning':'black'"
        icon="note_add"
        outlined
        @click="onPickFile">
          Select {{my_thumbs!==null?'New ':''}}Files
      </it-button>
      <it-button
        type="danger"
        icon="upload"
        outlined
        @click="onUploadFile"
        v-if="my_thumbs!==null">
          Upload Files
      </it-button>
    </it-button-group>
    <input
      type="file"
      style="display: none"
      ref="fileInput"
      accept="image/*"
      multiple
      @change="onFilePicked"/>
    <it-divider v-if="cid!==null" />
    <it-badge
      value="Copy link"
      type="success"
      v-if="cid!==null">
      <it-button
        @click="onCopyLink(cidLink(cid))"
        ref="cid_link">
          {{cidLink(cid)}}
      </it-button>
    </it-badge>
  </div>
</template>
<script>
import * as web3storage from '../utils/web3storage'
export default {
  name: 'UploadFile',
  components: {
    RevealCID
  },
  props: {
    title: String
  },
  data () {
    return {
      filelist: null,
      my_thumbs: null
      cid: null
    }
  },
  methods: {
    onPickFile () {
      this.$refs.fileInput.click()
    },
    onFilePicked (event) {
      const files = event.target.files
      this.filelist = files
      let data = []
      console.dir(files)
      for (let i = 0; i < files.length; i++) {
        console.log("File", files[i])
        data.push(URL.createObjectURL(files[i]))
      }
      this.my_thumbs = data
    },
    onUploadFile () {
      this.cid = web3storage.default.storeWithProgress(this.filelist)
      this.my_thumbs = null
      this.filelist = null
    },
    cidLink (cid) {
      return 'https://' + cid + '.ipfs.dweb.link'
    },
    async onCopyLink (textToCopy) {
      await navigator.clipboard.writeText(textToCopy)
      console.log(textToCopy)
      console.log("copied!")
    }
  }
}
</script>

A lot of code, but I think it's pretty straight forward, but I'll go through some of it, just for clarification.
HTML & Equal CSS
The it- tags are from the Equal CSS framework. We make an alert box with the images in it, which only shows up if we have images. The v-if="my_thumbs!==null" ensures this.
my_thumbsis set tonullat first, until you've triggered theonFilePickedmethod.
We loop through the thumbnails with v-for, and beneath that we have our file select button, and our upload button (which also only shows when my_thumbs!==null).
Then, our markup has an invisible input file selector, we need that to be able to display our system's file select dialog. (If there's another way to do this, I'd love to hear from you.)
Finally, we have a place to display our link to the files when we get the CID back. And it is clickable to copy. Yay!
Javascript Data & Methods
The data is pretty clear... cid should hold a returned cid value once our files have been queued.
Then, I will run through our methods:
onPickFile
    onPickFile () {
      this.$refs.fileInput.click()
    },
This just issues a click command on our file input, to trigger a file dialog.
onFilePicked
    onFilePicked (event) {
      const files = event.target.files
      this.filelist = files
      let data = []
      for (let i = 0; i < files.length; i++) {
        console.log("File", files[i])
        data.push(URL.createObjectURL(files[i]))
      }
      this.my_thumbs = data
    },
This happens when the file input changes. This does two main things:
- Our
filelistis updated to contain the files we selected - Our
my_thumbscontains a bunch of file blobs that we can then display in the upload preview.
onUploadFile
    onUploadFile () {
      this.cid = web3storage.default.storeWithProgress(this.filelist)
      this.my_thumbs = null
      this.filelist = null
    },
This is our simple upload method. It sets the cid to what we get returned when we call our storeWithProgress method from before. That method, we send our filelist.
Finally we set our my_thumbs and filelist to null, so our state resets.
Our returned data and copying links
    cidLink (cid) {
      return 'https://' + cid + '.ipfs.dweb.link'
    },
    async onCopyLink (textToCopy) {
      await navigator.clipboard.writeText(textToCopy)
      console.log(textToCopy)
      console.log("copied!")
    }
cidLink just returns the URL that a specific CID would have.
onCopyLink takes a some text (we are sending it one of these cidLinks), and copies it to the clipboard... assuming our super-modern browser supports such shenanigans.
I didn't do much css here today, besides the components I took from Equal. Of course, we'd want to do some more awesome stuff with that. For example, I added my own main.css file to add custom styles to center and pretty things up a bit.
If you'd like for me to cover more CSS, please comment.
For now, though, (in case you were following along and want to know how I made it look like that) here's a gist of my main.css:
Next steps
Tune in next time for these exciting topics:
- Go back and return upload status and CID to interface.
- Realized we didn't get this to work yet!
- List already uploaded files.

- Create/save/retrieve shortened links. ___
File uploaded with App to web3.storage:
Sunset@Achterwasser - File uploaded with App

aldorr


Top comments (7)
Really apreciate all the effort that went into putting this together. I followed along and can't get it to work at all. I won't be your work I just dont know enough about coding.
Thanks anyway all the best
Thanks for the note.
Is there any specific step you need help with?
I've been busy on other projects, but would like to finish this soon.
Thank you much for your reply. I think I have the hang of it, I am looking to find a one-click solution to add site updates on IPFS I am using IPNS in the DNS so was wondering if there was a way to resolve the steps to upload a folder to IPFS and have it attach to the IPNS.
Suppose I am looking for someone much better at coding than me to come up with an FTP solution for IPFS. It was a while since I commented and I have a blur of tutorials swimming around my head. But since I commented I have managed to work out how to get a site to resolve in IPNS using the legacy. domain and of course CID.
I was hoping I could adapt your useful tutorial for what I was looking for, I still have much to learn but I wanted to reply as you were so kind to respond.
All the best
Sure thing. What you want to do sounds similar to the direction I was taking.
I left off at the point where I was trying to list the files in a better organized fashion: i.e. Folders. So that one could share folders with people, etc...
It turns out, though, that I needed to set up a database to keep track of all this, then my own link-shortener/redirector in order to be able to send files to people. Not impossible, but the idea of using ipfs exclusively went out the window for me.
I haven't figured out the ideal and complete solution for this fun project yet, though.
I did work further on this... though I'm not finished.
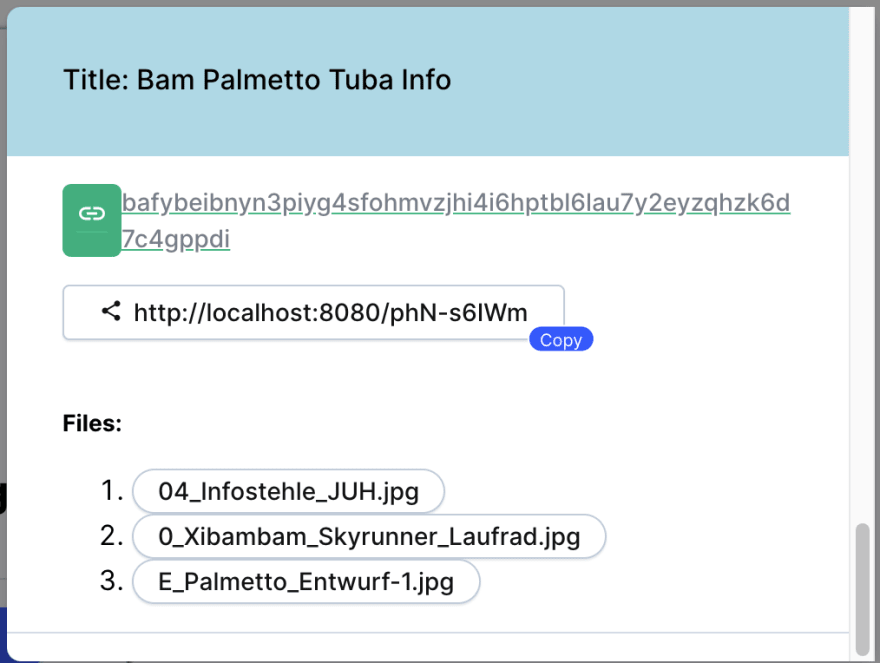
And I realize now, why I used web3.storage! Because if you upload multiple files, it automatically groups them into nodes or folders. So you get one URL for all the files uploaded together. Plus the files keep their names. :)
Here's a screenshot of the uploaded files "drawer".
My last step was to create a json file (instead of a database) to keep track of the short URLs. Perhaps a database would be more prudent, since it would be easier to update/delete elements.
Remember, though, these files will really "never" be deleted. They will probably exist somewhere, as long as the filecoin network is up.
I just stumbled upon this and it is so fascinating. I love seeing code and software that incorporates web3, and this definitely inspiring. I am a CS undergraduate and I just finished my third year🫰. I am thinking of making a file transfer site that uses web3 so that me and other students can share files, code and all the large files that come with being a CS student.
Thanks for the tutorial and interesting article!
Thanks for the comment and the like.
Just so you know: in the meantime web3.storage has introduced a pricing model... There is a free tier with 5GB of storage. If that's enough for you, then awesome. Otherwise, uhm, I haven't looked into how practical the free plan would be. Probably no longer ideal for my original idea: as a sort of WeTransfer replacement. Oh well, it was a fun idea. Please let me know if you do anything with it.