Kubernetes(k8s) has become the de facto standard for not only container orchestration but also for cloud-native development. Being the flagship product for CNCF (Cloud Native Computing Foundation), Kubernetes has managed to establish an ecosystem of opensource projects around it, from service mesh to monitoring, observability, storage, policy driven controls and many more. It is remarkable how fast k8s matured and became enterprise ready with impressive success stories.
VMware calls Kubernetes “the new Java”, after the programming language invented in 1996 and used in just about everything today. That is how big and pervasive they think this technology will become.

Everyone is talking about Kubernetes, but what the heck it really is?
Kubernetes is a containers deployment and orchestration platform. It helps you deploy, monitor, scale, upgrade, rollback containers and many more seamlessly.
But why would I need an extra software to manage my containers?
With the rise of microservices architecture, more and more organizations move to adopt it heavily, ending in many cases with hundreds and in some cases thousands of microservices in a single project. Each microservice of these would most probably be wrapped in a container on its own. Imagine having to manage hundred containers manually. Imagine having to deploy, upgrade, monitor and scale all of these containers. You probably got a sense by now how difficult/impossible it is to handle these operations using only a containerization platform like docker. A layer on top of docker is indeed needed to orchestrate and manage the containers, this layer is Kubernetes.
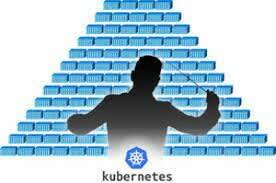
Here is an analogy to help you have a better understanding: You can think of a container orchestrator (like Kubernetes ) as a conductor for an orchestra, says Dave Egts, chief technologist, North America Public Sector, Red Hat.
“In the same way a conductor would say how many trumpets are needed, which ones play first trumpet, and how loud each should play, a container orchestrator would say how many web server front end containers are needed, what they serve, and how many resources are to be dedicated to each one.” Egts explains
K8s in practice
Now that we have a good understanding of what Kubernetes is, let’s see it in practice.
In this tutorial, we will:
- Create a simple http server with golang
- Deploy a k8s cluster, we will use K3s (a lightweight Kubernetes distribution)
- Deploy the golang server on top of K8s
- Expose the server to the outer world to be able to access it over the internet.
Prerequisites:
- Linux based machine (Ubuntu or Centos)- For Windows you can use MiniKube or Kind instead of K3s and almost everything else should remain the same.
- Docker
- Golang (this tutorial assumes version 1.15.3 but older versions should work as well)
- A docker registry account (you can create an account for free on dockerhub)
Now let’s get our hands dirty!
- Install golang following the steps mentioned here. Then create a folder in any location of your choice. In this tutorial I will be using the following path as the root folder to my project
/root/tutorial/ - Create a simple http go server. Use the following code block and save it in
/root/tutorialunder any name. I will refer to it asserver.go
package main

import (
"fmt"
"log"
"net/http"
)

func helloHandler(w http.ResponseWriter, r *http.Request) {
    if r.URL.Path != "/hello" {
        http.Error(w, "404 not found.", http.StatusNotFound)
        return
    }
    if r.Method != "GET" {
        http.Error(w, "Method is not supported.", http.StatusNotFound)
        return
    }
    fmt.Fprintf(w, "Hello!")
}

func main() {
    http.HandleFunc("/hello", helloHandler) // Update this line of code
    fmt.Printf("Starting server at port 8080\n")
    if err := http.ListenAndServe(":8080", nil); err != nil {
        log.Fatal(err)
    }
}
- Make sure everything is setup correctly and the files runs correctly by running the following command
$ go run server.goYou should be able to see “Starting server at port 8080” - Next step is to build our go project into an executable. Run the following command at the root directory of the project(where server.go occurs)
$ GOOS=linux GOARCH=amd64 CGO_ENABLED=0 go build .You should be able to see a newly created file with no extension. - To complete the next steps we’ll need to create a dockerhub account. You can signup on it for free. We will need an account on dockerhub on any registry to push the docker image that we will create.
- Then we need to containerize our server to run it inside a container. First we will need to install docker. After installing docker successfully, we can then build a docker image for our server. To do that, copy the following code block into a file named
Dockerfileinside/root/tutorial
FROM alpine

WORKDIR /home/

ADD tutorial /home/

CMD ./tutorial
Afterwards run the following command
$ docker build . -t <dockerhub-username>/tutorial where you should replace <dockerhub-username> with your username on dockerhub.
- Login using docker cli command
$ docker login -u <dockerhub-username>Then push the created image to dockerhub$ docker push <dockerhub-username>/tutorial - Now that our docker image is ready, we can use K8s to deploy and manage for us container(s) from that image. To do that, let’s install K3s first. I am using K3s for this tutorial as I find it a great reliable and lightweight distribution for K8s, perfect for development and edge (environments with limited resources) deployments. To install it you just need to run
$ curl -sfL https://get.k3s.io | sh -That’s it! That is all what you need to do in order to have a functional Kubernetes cluster. - Next we want to create a k8s deployment file for our image. Copy and paste the following code block on your machine.
apiVersion: apps/v1
kind: Deployment
metadata:
  name: go-server-deployment
  labels:
    app: go-server
spec:
  replicas: 1
  selector:
    matchLabels:
      app: go-server
  template:
    metadata:
      labels:
        app: go-server
    spec:
      containers:
      - name: go-server
        image: <dockerhub-username>/tutorial #replace the variable with your username on dockerhub
        ports:
        - containerPort: 8080
- Now we want to instruct k8s to create that deployment for us. To do that we need to run
$ kubectl create -f tutorial-deployment.yamlTo validate the deployment was created successfully, we should run$ kubectl get podsand we should be able to see something similar to
NAME                        READY   STATUS    RESTARTS   AGE
go-server-deployment-xxxx   1/1     Running   0          65m
- We are almost there, we have everything set by now and K8s is currently managing our container for us. The only missing step is to expose our pod to the outer world in order to be able to access it over the internet. To achieve that we just need to run the following command
$ kubectl expose deployment go-server-deployment --type=NodePortThis command will expose our deployment to the outer world on a random port. To identify that random port, we need to run$ kubectl get svcwe should be able to see a service that got created for us
NAME         TYPE        CLUSTER-IP    EXTERNAL-IP   PORT(S)     AGE
kubernetes  ClusterIP     x.x.x.x       <none>      443/TCP      87m
go-xxx       NodePort     x.x.x.x       <none>    8080:31628/TCP 37m
Under PORT(s) column we should be able to find 8080:<external-random-port> We can then use our machine IP and that external port that k8s assigned for our service in order to access our server. This can be tested from any browser by visiting http://<machine-ip>:<external-port>/hello We should be able to see Hello! in the browser.

That’s all folks 🎉
A quick recap of what we have accomplished here:
- Implemented a simple http server using golang
- Dockerized our server and pushed the image on Dockerhub
- Installed and Deployed a functional single node k8s cluster
- Used k8s to deploy and manage the http server container for us
- Exposed our server to the outer world through k8s
Disclaimer: all code files used are not meant for production use, they just show the functionality. You will need to introduce some changes to make them production ready


Top comments (2)
That was a great article, thanks for sharing!
For macOS users, you can use
minikubefor local container deployment:minikube.sigs.k8s.io/docs/start/
Thanks for sharing Payam!