In this article I will try to teach you how to flash your Jetson Nano using the Nvidia SDK Manager.
My experience with the Jetson Nano has been that of frustration, and navigating through the minefield of misleading documentation, and us-answered questions can be quite difficult, especially for a beginner developer such as myself. So I am here to try and help anyone who is in a similar situation as myself.
Issues I was facing:
- Jetson was booting and running.
- Flashed Jetson with Jetpack 4.6, powered down device and it would no longer boot.
- No Nvidia Splash screen on boot
- No output from HDMI or Displayport
- Green power LED was ON when powered
- Could not flash new image to Jetson via SD card
- Bootloader was likely corrupt
The Nvidia SDK Manager can only be run through a Linux operating system.
You can run it through the command line via docker on a Windows or Mac system but in this tutorial I am going to show you how to do it on a Ubuntu operating system, as the GUI is much easier to navigate and understand.
Things you will need:
- Jetson Nano (I used 4GB Developer Kit, B01)
- Micro SD Card (I used Kingston 64GB Canvas-Go)
- Micro SD Card Adapter
- System Running Ubuntu
I had a spare SSD for my PC so I installed Lubuntu 18.04 amd64 on it and used that to install and run the SDK Manager.
1. Setup Nvidia SDK Manager
- Download the SDK Manager installation (https://developer.nvidia.com/nvidia-sdk-manager) I downloaded the .deb file for Ubuntu.
- Install the Nvidia SDK Manager.
2. Download Jetson Image
Make sure your Jetson is plugged out and powered down.
- Login to Nvidia Developer through Nvidia SDK Manager.

- Under the "Hardware Configuration" menu, make sure "Host Machine" is selected, and Jetson Nano under "Target Hardware".
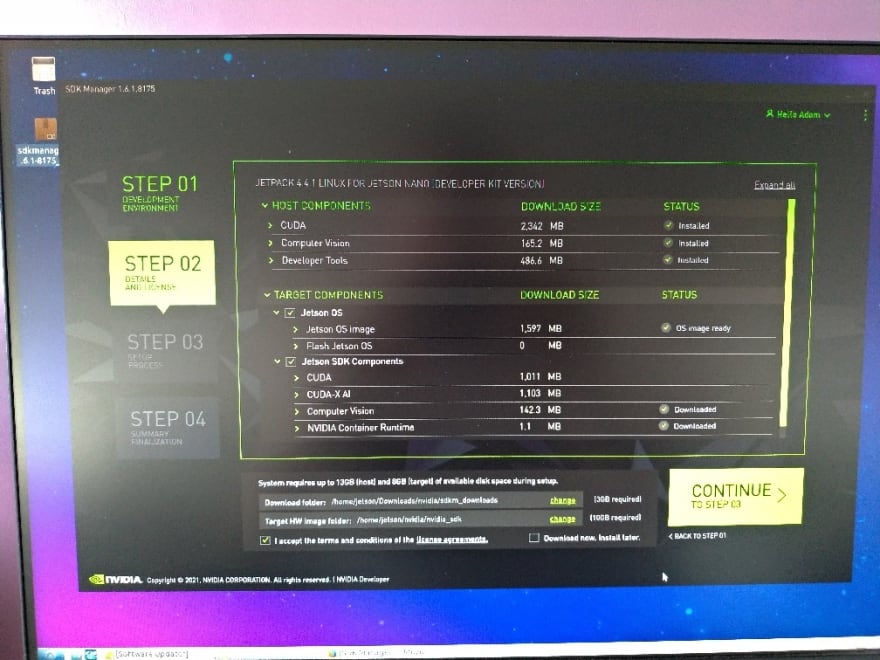
- Select the image which you want to flash onto your Jetson.
 I downloaded 4.4.1.
 - Click "Continue" and select your target board.

- Download the required components for your image.
I selected all the components for this image.
- Enter in your Ubuntu password if requested.
- Change the dropdown menu from "Automatic Setup" to "Manual Setup".
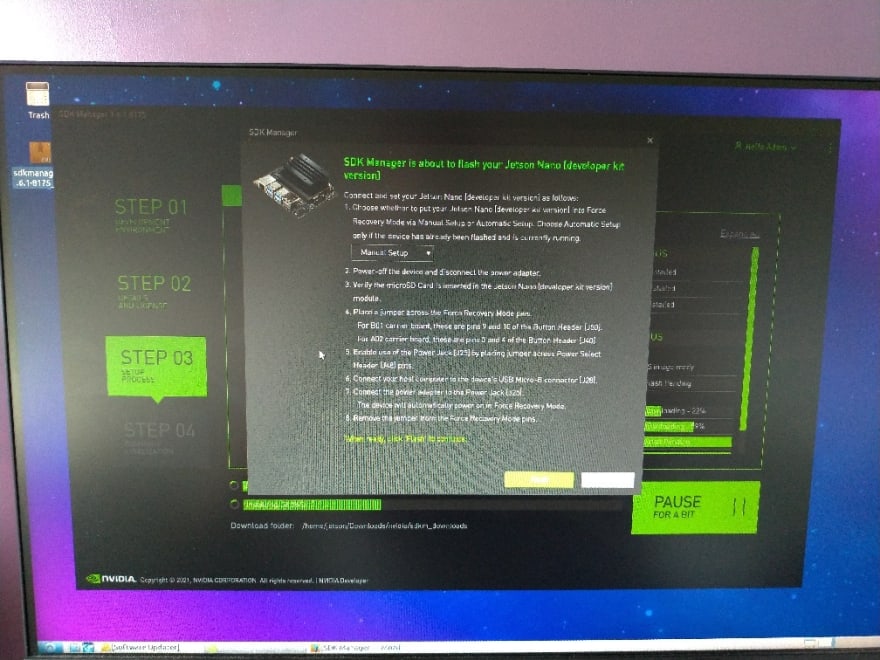
- Follow the on screen steps. For my Jetson B01, the recovery pin was on the J50 header, as seen in the picture below.
 B01 J50 Header Pin Layout
Ensure that all USB ports are empty on the Jetson before doing this step.
B01 J50 Header Pin Layout
Ensure that all USB ports are empty on the Jetson before doing this step. - Once the SDK Manager successfully flashes your Jetson it should boot as normal.
The SDK Manager can encounter issues while flashing the Jetson but I didn't encounter any, so I can't give any advice on how to solve these.
Optional Steps:
If you are still having issues you can get a serial TTL to USB cable. This will allow you to read the boot logs from your Jetson and possibly identify any issues which you are facing.
Here is a video from JetsonHacks to get started. I then used Putty's Serial mode to view the logs from my Jetson.

The BAUD speed for my Jetson was 115200.
Thanks for reading, I hope this article helps. This is my first developer article so go easy on me.
If you have any questions please leave a comment.
Good Luck!


Top comments (0)