
Almost all the apps designed and developed will have either one of the 3 or all 3 types of navigation. These 3 types of navigation has been common to all apps. Flutter is no exemption to that convention. Flutter also supports all these 3 types of navigation. Navigation in flutter is almost exactly similar to other apps. But I felt it was super smooth when I built it on Flutter.
In this article, let’s try to build a Flutter app implementing all the 3 types of navigation in a single app.
Types of Navigation
As I have been saying 3 types of navigation from the beginning, you may wonder what are the 3?
Here it is,
Stack Navigation
Tab Navigation
Drawer Navigation
Let’s understand quickly about each of them.
Stack Navigation
Picture a deck of cards, where you can add or remove cards from the top of the stack. Stack Navigation in Flutter works in a similar fashion. It helps you navigate between pages or screens by stacking new pages on top of existing ones. When you move to a new screen, the current screen is pushed onto the navigation stack, and when you return, the top screen is popped off the stack. This navigation type is commonly used for hierarchical and linear flows within an app.
Tab Navigation
Tabs are a staple of mobile app navigation, allowing users to quickly switch between different sections or views without losing their current context. Flutter makes it easy to implement tabbed navigation with its built-in widgets, such as TabBar and TabBarView. By using these widgets, you can create a beautiful and functional tab navigation experience, perfect for organizing content into logical sections. With Flutter, you have the freedom to customize the appearance of your tabs, making it simple to create a unique look and feel for your app.
Drawer Navigation
The Drawer Navigation pattern, also known as the “hamburger menu” or “side menu,” is a popular navigation style in mobile apps. It consists of a hidden panel that slides out from the side of the screen, revealing a menu with various navigation options. This space-saving technique keeps your app’s main content visible while providing easy access to additional features or sections.
Let’s start building the app
Create the Project
Instead of creating a new project everytime from the scratch, I’ve created a boilerplate app and uploaded in Github. You can pull the code and run. Hope that make project creation simple.
Navigate to the folder where you want to create your project in Terminal and run the following command.
git clone https://github.com/5minslearn/Flutter-Boilerplate.git
Navigate to the Flutter-Boilerplate folder and run flutter pub get command to install the dependencies.
cd Flutter-Boilerplate/ flutter pub get
That’s it. We got our dependencies installed.
Open the project in Visual Studio Code by running code ./ command in Terminal.

Start your emulator/connect your device and press F5 in VS Code to run our app.
Our app will just contain an empty screen as shown in the below screenshot.

Let’s build all 3 types of navigation into our app.
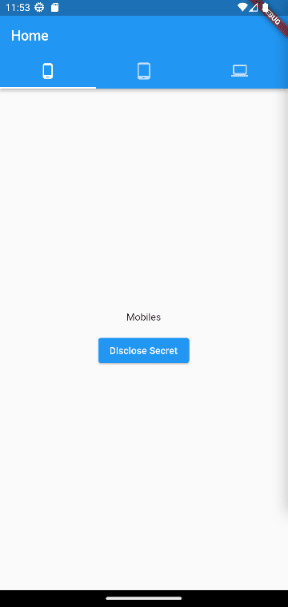
This is how our final app will look.

We’ll have a Drawer & Tab Navigator at the top. Pressing on the button in the first tab will take us to the next page via Stack Navigator.
Tab Navigation
Let’s begin with building the tab navigator. Let’s assume the tab will be on the home page (ideally it’ll be).
Create a new filed named tab.dart in the lib/ directory. Add the following code.
import 'package:flutter/material.dart';
import './tabs/tab1.dart';
import './tabs/tab2.dart';
import './tabs/tab3.dart';
class HomePage extends StatelessWidget {
  const HomePage({super.key});
  @override
  Widget build(BuildContext context) {
    return DefaultTabController(
      length: 3,
      child: Scaffold(
          appBar: AppBar(
            title: const Text("Home"),
            bottom: const TabBar(
              tabs: [
                Tab(icon: Icon(Icons.phone_android)),
                Tab(icon: Icon(Icons.tablet_android)),
                Tab(icon: Icon(Icons.laptop_windows)),
              ],
            ),
          ),
          body: const TabBarView(
            children: [
              Tab1(),
              Tab2(),
              Tab3(),
            ],
          )),
    );
  }
}
In the above code, we’re creating a class named HomePage. In the build method, we return DefaultTabController widget, which is basically a tab view. We define that we need 3 tabs in the length property. At the bottom of the appBar property we have defined icons for each tab (Phone, Tablet, and Computer icons). Below that we define the body property with a TabBarView rendering all the tabs inside it.
Immediately you paste the above code, you’ll notice lot of errors being highlighted in your VS Code editor. The reason is, if you look at the top 4 lines, the 1st line is the import of Flutter’s Material UI package whereas the rest 3 are import from the user defined files. We haven’t created them yet. So, your code editor will throw an error in those lines and at the last 3 lines where we call Tab1(), Tab2(), and Tab3(). Because, these classes are imported from those files. Let's resolve this issue now.
Create a new folder named tabs inside lib/ directory and create 3 files naming them as tab1.dart, tab2.dart, and tab3.dart.
Copy the below content into tab1.dart file.
import 'package:flutter/material.dart';
class Tab1 extends StatelessWidget {
  const Tab1({super.key});
  @override
  Widget build(BuildContext context) {
    return SizedBox(
      width: double.infinity,
      child: Column(
        mainAxisAlignment: MainAxisAlignment.center,
        children: [
          const Text("Mobiles"),
          Padding(
            padding: const EdgeInsets.only(top: 16.0),
            child: ElevatedButton(
              onPressed: () {
                Navigator.of(context).pushNamed("/secret");
              },
              child: const Text('Disclose Secret'),
            ),
          ),
        ],
      ),
    );
  }
}
Copy the below content into tab2.dart file.
import 'package:flutter/material.dart';
class Tab2 extends StatelessWidget {
  const Tab2({super.key});
  @override
  Widget build(BuildContext context) {
    return SizedBox(
      width: double.infinity,
      child: Column(
        mainAxisAlignment: MainAxisAlignment.center,
        children: const [
          Text("Tablets"),
        ],
      ),
    );
  }
}
Copy the below code into tab3.dart file.
import 'package:flutter/material.dart';
class Tab3 extends StatelessWidget {
  const Tab3({super.key});
  @override
  Widget build(BuildContext context) {
    return SizedBox(
      width: double.infinity,
      child: Column(
        mainAxisAlignment: MainAxisAlignment.center,
        children: const [
          Text("Laptops"),
        ],
      ),
    );
  }
}
If you look at the code for all the 3 files, you’ll notice everything is common except that the first tab file ( tab1.dart) has an additional button called "Disclose Secret" and pressing that will navigate to the /secret route. It'll not throw any error as this route has not been defined yet. The other 2 files ( tab2.dart and tab3.dart) will show only the text.
All the errors you saw in tab.dart file will be resolved now. But, if you run your app, you will not notice any changes in the output. This is because, we have just created the tab layout and we haven't mapped it to our main.dart file.
Add the following line at the top of the main.dart file.
import './tab.dart';
Replace home: const MyHomePage(title: 'Home'), with home: const HomePage(), in the build method of the MyApp class.
Save the file and run your app. You should be able to see the tab layout on your screen now.

Don’t press the “Disclose Secret” button. If you press it, it will throw an error. Because, remember I mentioned earlier, we setup a route navigation in the onPress property of this button, while the route is not yet defined.
“Let’s click that and see what happens”,
Hopefully, this thought would have hit your mind by now. It’s not your mistake, but it’s human mentality. We’ll be curious to explore the things which the other (experienced person) do not recommend to do. You’ll see the following error (Exception in programming terminology) if you click on the button.

In a nutshell, this error screenshot describes that the provided route does not exist.
Drawer Navigation
Own next target is to add a drawer navigation. But before that, we have to create 2 files. They are,
drawer.dart - To show the Navigation Drawer
about.dart - An option will be provided on Drawer Navigator to navigate here
Create drawer.dart file inside lib/ directory and not inside tab/ directory. tab/ directory is only for tabs and we don't need to touch that further as we're done with the tabs. Copy the below code into the drawer.dart file.
import 'package:flutter/material.dart';

class MyDrawer extends StatelessWidget {
  const MyDrawer({super.key});

  navigateTo(String route, BuildContext context) {
    Navigator.of(context).pushReplacementNamed(route);
  }

  @override
  Widget build(BuildContext context) {
    return Drawer(
      child: ListView(
        padding: const EdgeInsets.all(16.0),
        children: <Widget>[
          ListTile(
            leading: const Icon(Icons.home),
            title: const Text('Home'),
            onTap: () {
              navigateTo("/home", context);
            },
          ),
          ListTile(
            leading: const Icon(Icons.info),
            title: const Text('About'),
            onTap: () {
              navigateTo("/about", context);
            },
          ),
        ],
      ),
    );
  }
}
In this file, we define the class named MyDrawer. In the build method we render the Drawer widget with Home and About options in list. Click on those options will navigate us to the appropriate routes.
Create about.dart file in the same directory and copy the below code.
import './drawer.dart';
import 'package:flutter/material.dart';

class About extends StatelessWidget {
  const About({super.key});

  @override
  Widget build(BuildContext context) {
    return Scaffold(
      drawer: const MyDrawer(),
      appBar: AppBar(title: const Text("About")),
      body: const Center(child: Text("About")),
    );
  }
}
In this file, we create a class named About which returns a Scaffold widget containing the drawer which we defined right before this file. The appBar and the body will show the text "About".
Again, you’ll not be able to see these changes immediately in the app. Because, we haven’t linked it into the main.dart file.
Before we linking them, we have one item in our backlog. Let’s finish it and come back to linking them altogether.
Create a file named secret.dart in the lib/ directory and copy the below code.
import 'package:flutter/material.dart';

class SecretPage extends StatelessWidget {
  const SecretPage({super.key});

  @override
  Widget build(BuildContext context) {
    return Scaffold(
        appBar: AppBar(
          // backgroundColor: Colors.red,
          title: const Text("Secret"),
        ),
        body: SizedBox(
          width: double.infinity,
          child: Column(
            mainAxisAlignment: MainAxisAlignment.center,
            children: const <Widget>[
              Text("Nothing to show"),
            ],
          ),
        ));
  }
}
In this file, we have created a class named SecretPage and return just a Text in the body. Nothing fancy here. It's a super simple Flutter widget.
Our backlog item is also done. This is the most awaited time. We’re going to define our routes now.
Open main.dart file and add the following imports at the top of the file.
import './about.dart';
import './secret.dart';
Replace the build method of MyApp class with the below code.
@override
  Widget build(BuildContext context) {
    return MaterialApp(
      routes: <String, WidgetBuilder>{
        "/about": (BuildContext context) => const About(),
        "/home": (BuildContext context) => const HomePage(),
        "/secret": (BuildContext context) => const SecretPage(),
      },
      initialRoute: "/home",
      title: 'Flutter Navigation',
      theme: ThemeData(
        primarySwatch: Colors.blue,
      ),
      home: const HomePage(),
    );
  }
In the above code, you can see we’re defining the MaterialApp to contain routes. They’re defined as key-value pairs, mapping a route with a Widget. We have defined 3 routes.
/about - Route for drawer navigator
/home - Route for tab navigator
/secret - Route for stack navigator
We have set the initial route to be /home, which has the tab navigator.
Run the app and you should be able to see the following output on your device.

On pressing the “Disclose Secret” button you’ll be taken to the Secret page which we created (ideally it does not have any secret). You should also be scroll through the tabs smoothly.
By now, I hope you would have noticed an error here. If not, I’m revealing here for you. The back button is shown on the 1st screen of our app.
“What is the need to show the back button on the 1st screen?”
That’s an error and we have to resolve it. Press the back button and let’s see what happens. Hopefully, you saw the same I saw. The back button was hidden and we see just the “Home” title in the appBar (similar to the below screenshot).
But there’s an another issue available in the same screen. Hopefully you got that too. If not, don’t worry, I’m revealing it right here.
“Can you access the drawer navigator by any means?”
No. Right?
But, do you know the fix for above two issues is the same. If we fix the 2nd issue, the 1st issue will automatically be fixed.
That’s great. But, How to fix the 2nd issue?
You have to show the drawer navigator button (Hamburger icon) on the top left. This will eventually hide the back button.
Open tab.dart file and import the drawer file at the top of this file.
import './drawer.dart';
Add the following line inside the Scaffold widget of the build method.
drawer: const MyDrawer(),
That’s it.
Here’s the output you can see when you run your app.

Conclusion
n this article, you’ve learnt about navigation in Flutter. We’ve implemented all 3 types of navigation in a single app. Ideally, this will not be the case with any real app you build. Most apps will be built on either 1 or 2 types of navigation.
This repo has my code. You can use it for your reference.
If you wish to learn more about Flutter, subscribe to my article by entering your email address in the below box.
Have a look at my site which has a consolidated list of all my blogs.
Originally published at https://www.gogosoon.com on April 24, 2023.

Top comments (0)