Part 5: Using ERC20 standard to create a token
The purpose of building this blog is to write down the detailed operation history and my memo for learning the dApps.
If you are also interested and want to get hands dirty, just follow these steps below and have fun!~
Previous Blog
Tutorial: Ethereum BlockChain Development (1)
Tutorial: Ethereum BlockChain Development (2)
Tutorial: Ethereum BlockChain Development (3)
Tutorial: Ethereum BlockChain Development (4)
Intro & Review
Previously We have created tokens that can be used locally when running React dApp, and we can send tokens to recipient account :

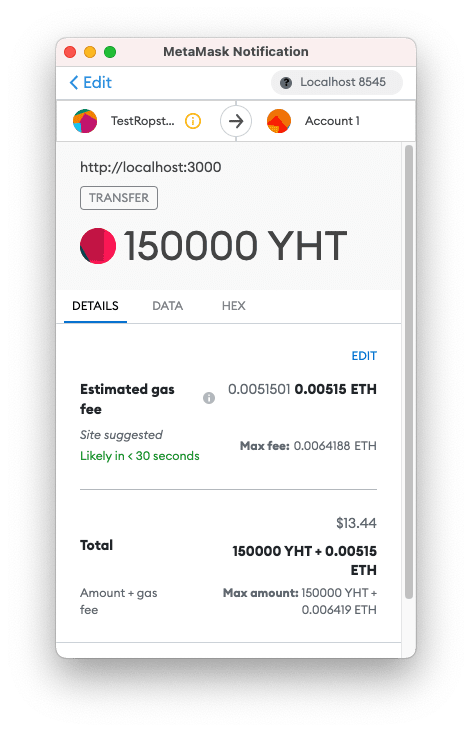
This time let's take a look at how to use ERC20 standard to create token, which is being used in the real cryptocurrency world.
Preparation
- what is token?
A token represents a set of rules encoded in a smart contract. Each token belongs to a blockchain address. It’s essentially a digital asset that is stored securely on the blockchain.
Tokens are most often known to be cryptocurrencies such as Bitcoin or Ether tokens.
- What is ERC20 token standard?
The ERC-20 introduces a standard for Fungible Tokens, in other words, they have a property that makes each Token be exactly the same (in type and value) of another Token. For example, an ERC-20 Token acts just like the ETH, meaning that 1 Token is and will always be equal to all the other Tokens.
Getting Started
First we shall install OpenZepplin smart contract library where we will be importing the ERC20 token:
npm install @openzeppelin/contracts
Next, we will create our token. We can go to a website - Remix IDE and create a ERC20 token.
Remix IDE is an open source web and desktop application. It fosters a fast development cycle and has a rich set of plugins with intuitive GUIs. Remix is used for the entire journey of contract development as well as act as a playground for learning and teaching Ethereum.
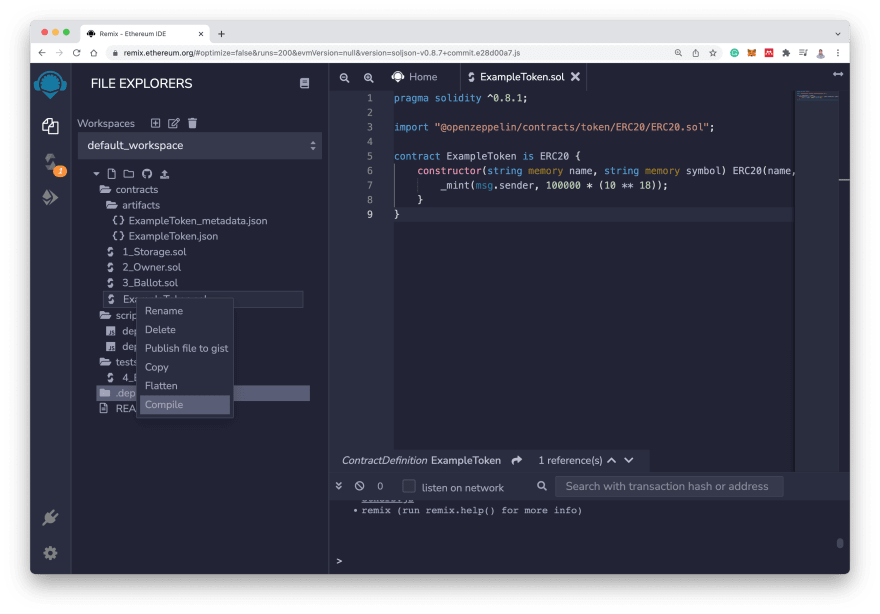
Let's create a new file called ExampleToken.sol in directory /contracts in Workspaces and add the following code to the new file:
pragma solidity ^0.8.0;

import "@openzeppelin/contracts/token/ERC20/ERC20.sol";

contract ExampleToken is ERC20 {
    constructor(string memory name, string memory symbol) ERC20(name, symbol) {
        _mint(msg.sender, 100000 * (10 ** 18));
    }
}
The constructor allows us to set the token name and the symbol, and the function _mint allows us to mint the tokens and set the amount.
By default, ERC20 sets the number of decimals to 18, so in our
_mintfunction we multiply 100,000 by 10 to the 18 power to mint a total of 100,000 tokens, each with 18 decimal places (similarly to how 1 ETH is made up of 10 to the 18 wei (smallest denomination of ether).
Now right click ExampleToken.sol and click Compile:
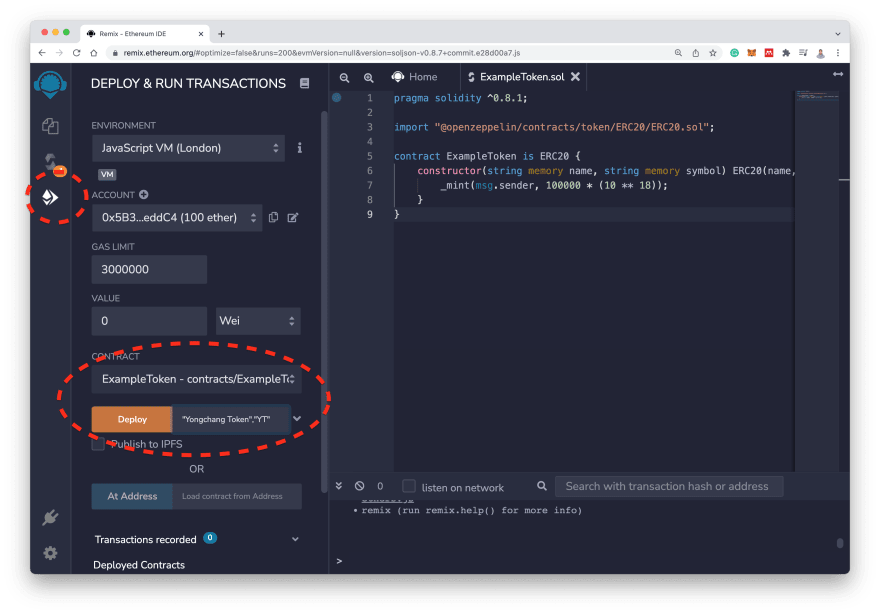
Then, click on Deploy & run transactions, and choose the contract that we have created, and type your name and symbol that right next to deploy button (e.g. "Yongchang Token","YT"), and click Deploy:

We should see pop-up messages in terminal and should see Deployed Contracts when we scroll down DEPLOY & RUN TRANSACTIONS area and expand our token's name:
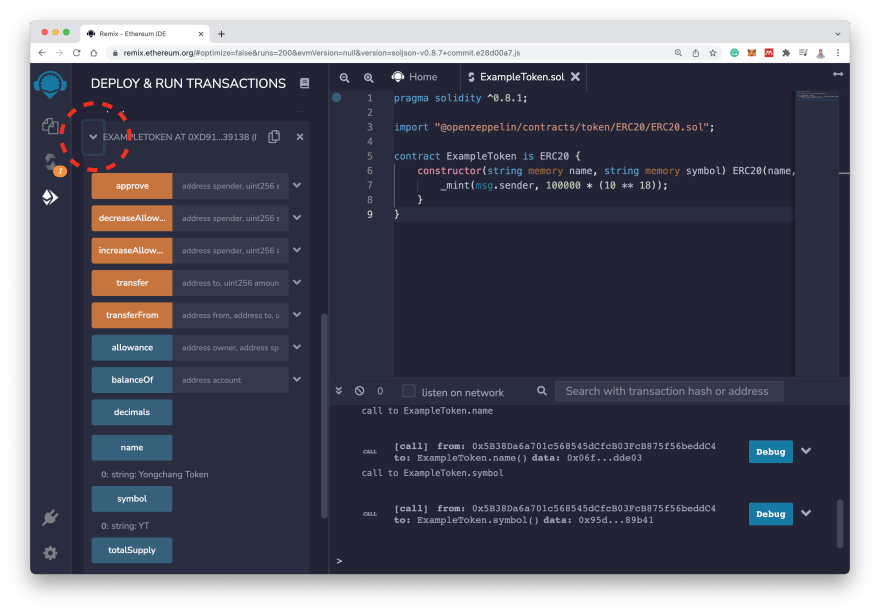
And we can also transfer ERC20 Tokens among the different accounts provided and check account's balance:
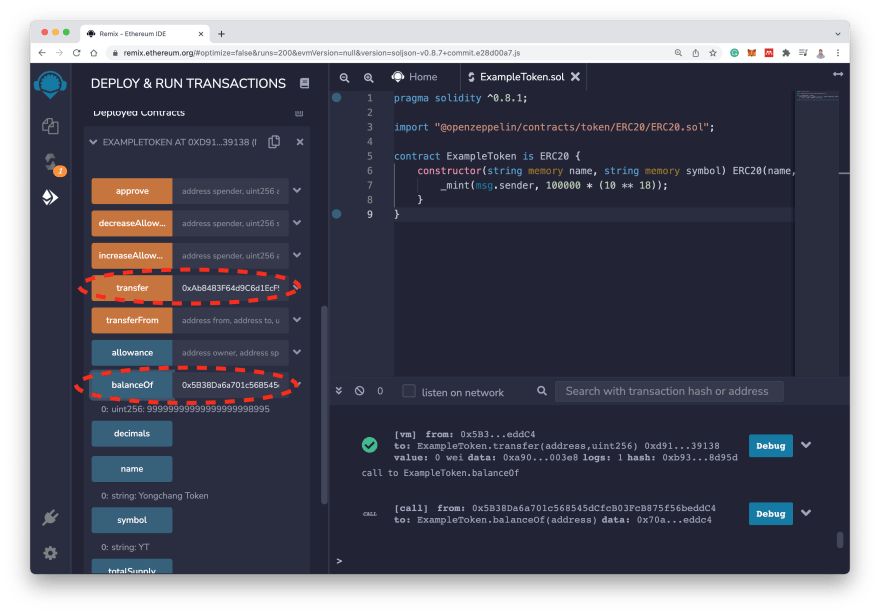
Pretty Cool!
References
https://blockheadtechnologies.com/what-is-a-blockchain-token-is-it-just-cryptocurrency/#:~:text=A%20token%20represents%20a%20set,as%20Bitcoin%20or%20Ether%20tokens.
https://dev.to/dabit3/the-complete-guide-to-full-stack-ethereum-development-3j13
https://ethereum.org/en/developers/docs/standards/tokens/erc-20/



Top comments (0)