
Introduction to figma auto-layout and how it help us to code easily. From design to code.
with help of figma auto-layout we can understand the basics of UI and it reduce the stress while coding.
What are we going to design and code?
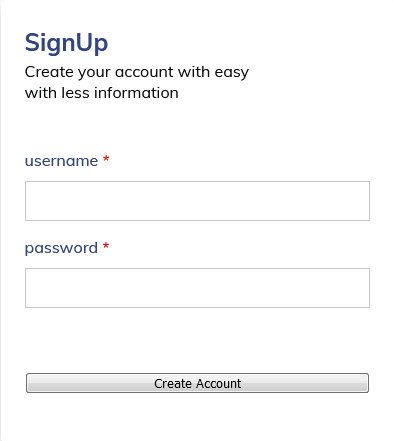
A simple sign up form lets start

1. setting up of our container
<!--Note: I made color and text styles. add your own styles to your project-->
Select the text layer

After writing our text select the auto layout option

Now auto layout is added 
properties of auto layout
Direction (flex-direction)
spacing between items
padding
positioning the items

now add the padding (top,bottom, left,right) of
24pxand add fill to our container.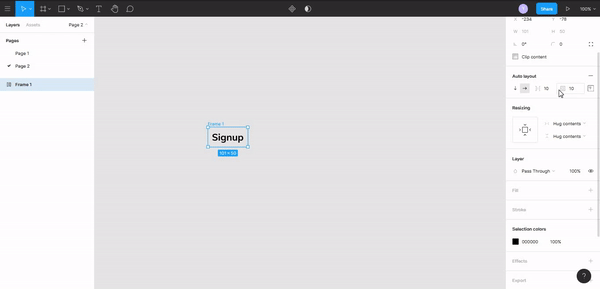
now copy the same text and change the direction and the copied text to (Create your account with easy
with less information)
Now our container is ready and add space between two text to
16px.
2. Setting up th Input container.
create a label for our input

Add auto layout to this label

Add a rectangle to our Frame2(label frame).

Add width and height to our rectangle and spacing is
10pxand padding is0px
Now change the direction

adjust the width of the rectangle(input) and make it as a component

Input component is ready. add the component instance to our container and copy it and change the label name.

Now group everything inside our container and space between our groups is 48px.
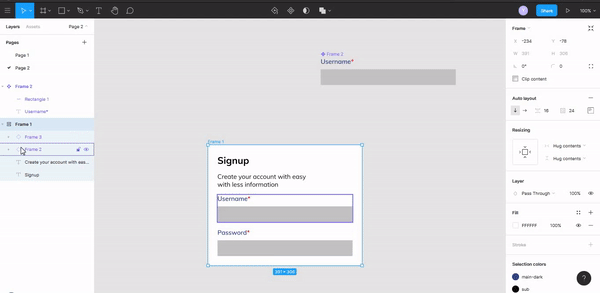
now change the style of input by changing the component. 
Now submit button.

- Add a text layer
-
Add a button label
- Add auto layout to this text layer
paddding of
16px 24px(16, 24 in input) - Align to center direction
corner radius of
50px - Add Fill and change the colour
- Add a button to our main container.
- Add auto layout to this text layer
paddding of
3. Design is ready and Design to code.
add little adjustment to our container add padding-bottom :48px
destructuring from our design

HTML structure
container 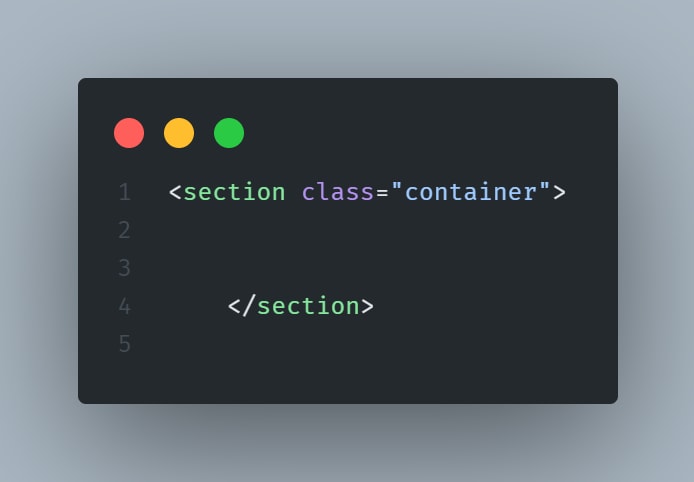
component-1 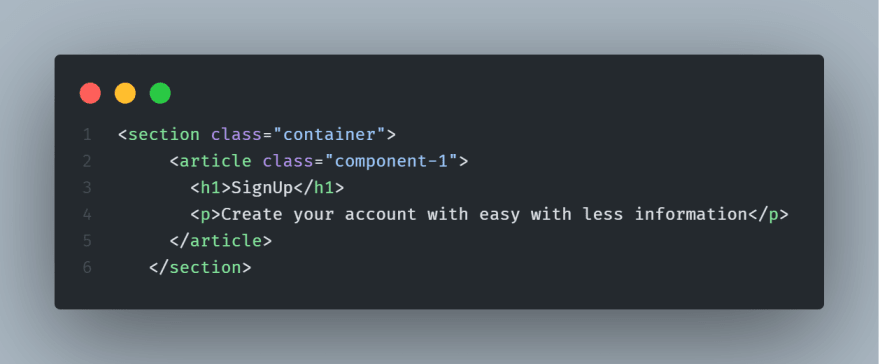 component-2
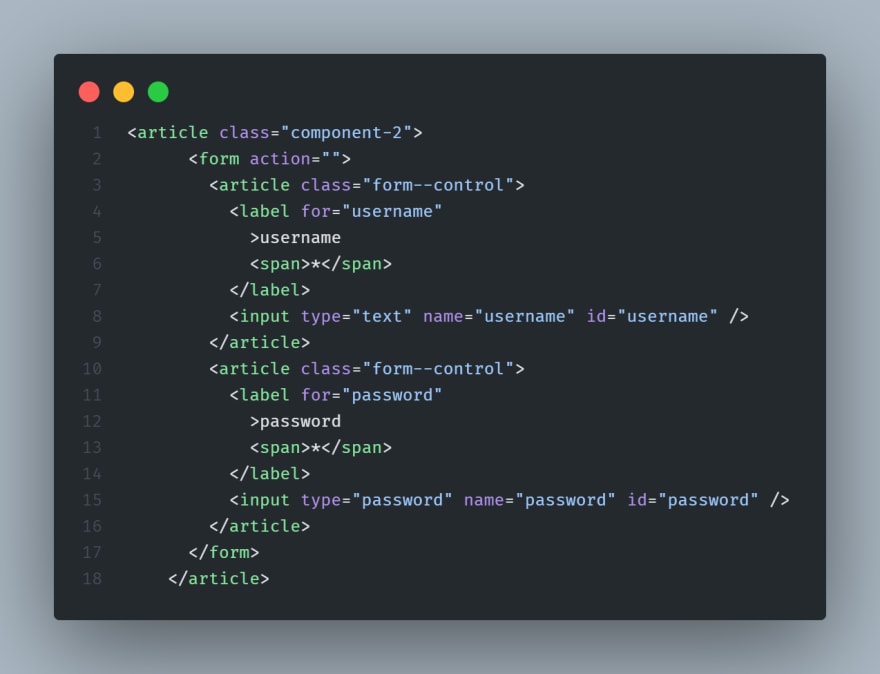
component-3 

CSS
with basics styles, we can code our form.
centre our container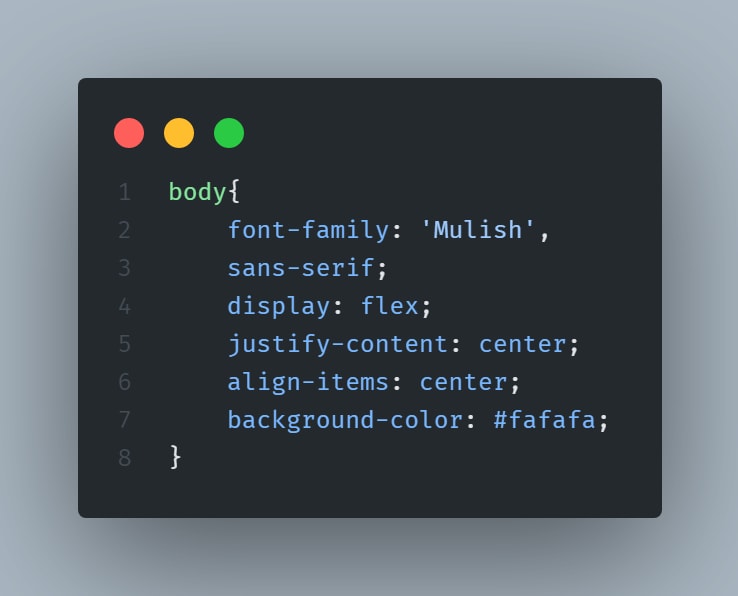
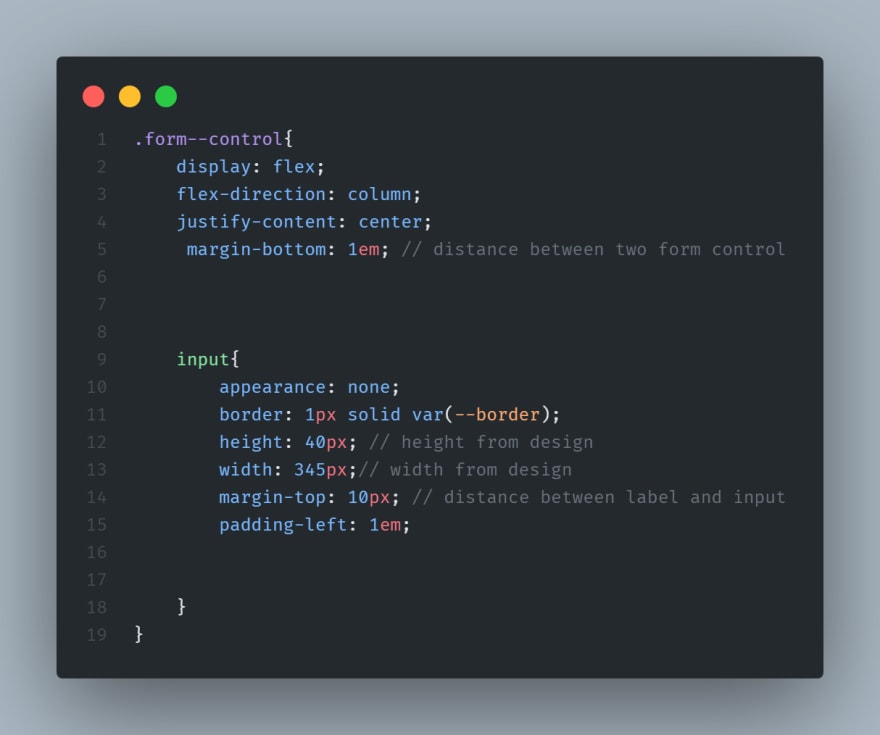
adding styles to our container the padding from auto layout and using grid we're aligning our components in a single Column

now adding styles and spacing to our component-2
Final out button styles

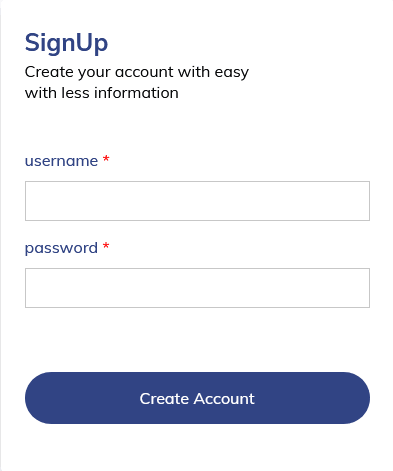
our form is ready

Top comments (1)
Figma definitely has some layout helpers borrowed from the css world, which is great. This will bridge the gap between designers and front-end developers even more.
You can try Desech Studio to import your figma design file and get clean html positioned with css grids. Although, you still have to make slight changes to the margins and sizes.