I got into the private Beta program of the new ChiselStrike product - Turso, an edge-hosted distributed database based on libSQL - the open-source and open-contribution fork of SQLite.
Turso is hosted using Fly.io, meaning you have 26 regions of choice when it comes to deploying it.
We’ll talk about all of these aspects of Turso in a moment.
I wrote about ChiselStrike last year in a feature post with LogRocket, and if you want to know more about the service, I can refer you to that post.
The Turso Beta program is still open to new applicants(at the time of writing), to get into it, just head to chiselstrike.com.
With Turso, ChiselStrike is trying to “Eliminate application bottlenecks by bringing performance and data portability of open-source, lightweight SQL close to your users with low overhead”.
The idea is for builders to be able to use their current hosting services e.g Netlify, Vercel, and Cloudflare when hosting their apps while building their databases on the edge with Turso, meaning, ChiselStrike is moving away from their previous model that involved hosting their customer's backends to hosting their data, on the edge.
Let’s see how to install and use Turso.
Installing Turso
To use Turso, we need to install its CLI. Currently(time of writing), you need to apply to the private Beta program to be authorised to use it. You need to also have a GitHub account as that is the only supported authentication method.
Here’s how to install the Turso CLI.
# On Mac
brew install chiselstrike/tap/turso

# linux script
curl -sSfL https://get.tur.so/install.sh | bash
Next, authenticate into Turso (at this point, you will be prompted to authenticate with GitHub).
turso auth login
Creating a new database
To create a new database in Turso run the db create command as follows.
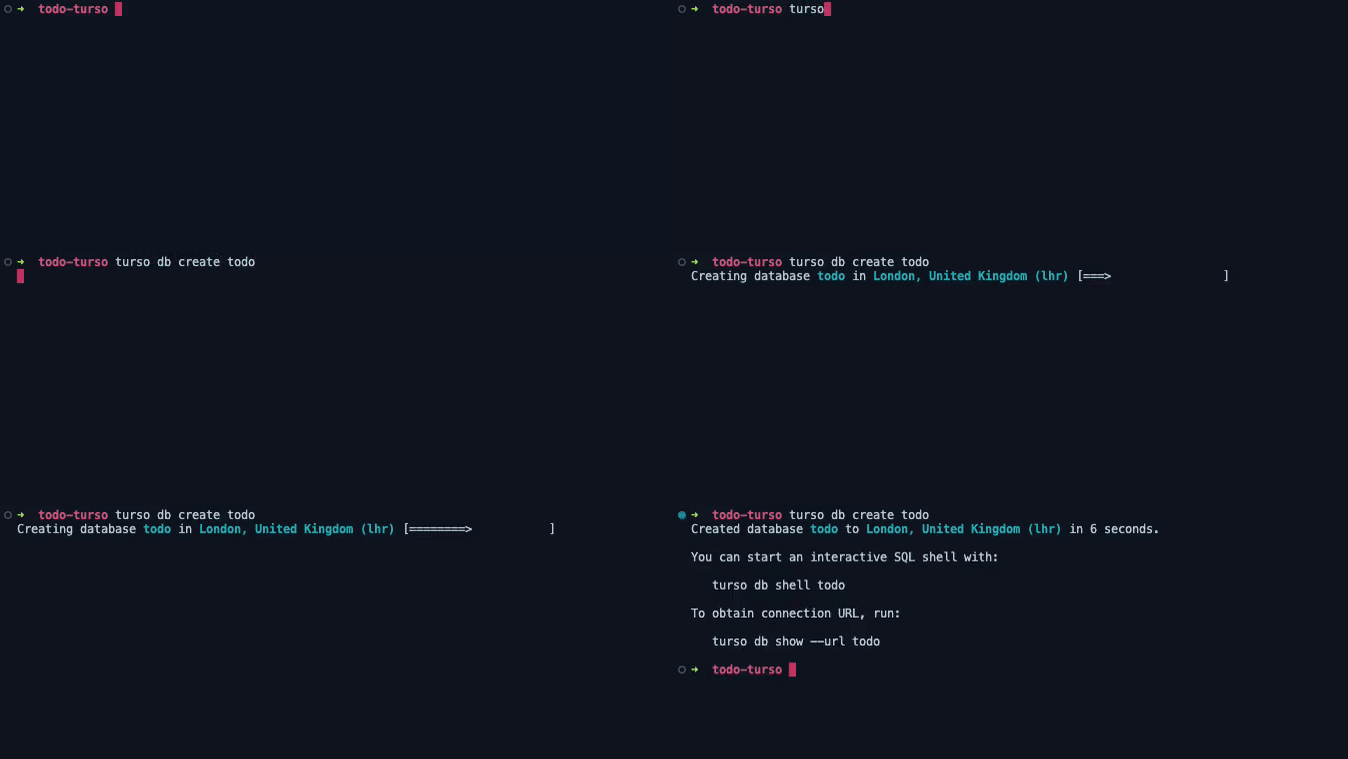
turso db create todo
This should give us the following output.
The last command created a database called todo which was deployed in London as that was deemed the nearest deployment zone adjacent to where I am.
Turso’s db command is quite powerful, as we’ll see as we proceed.
Choosing the primary database region
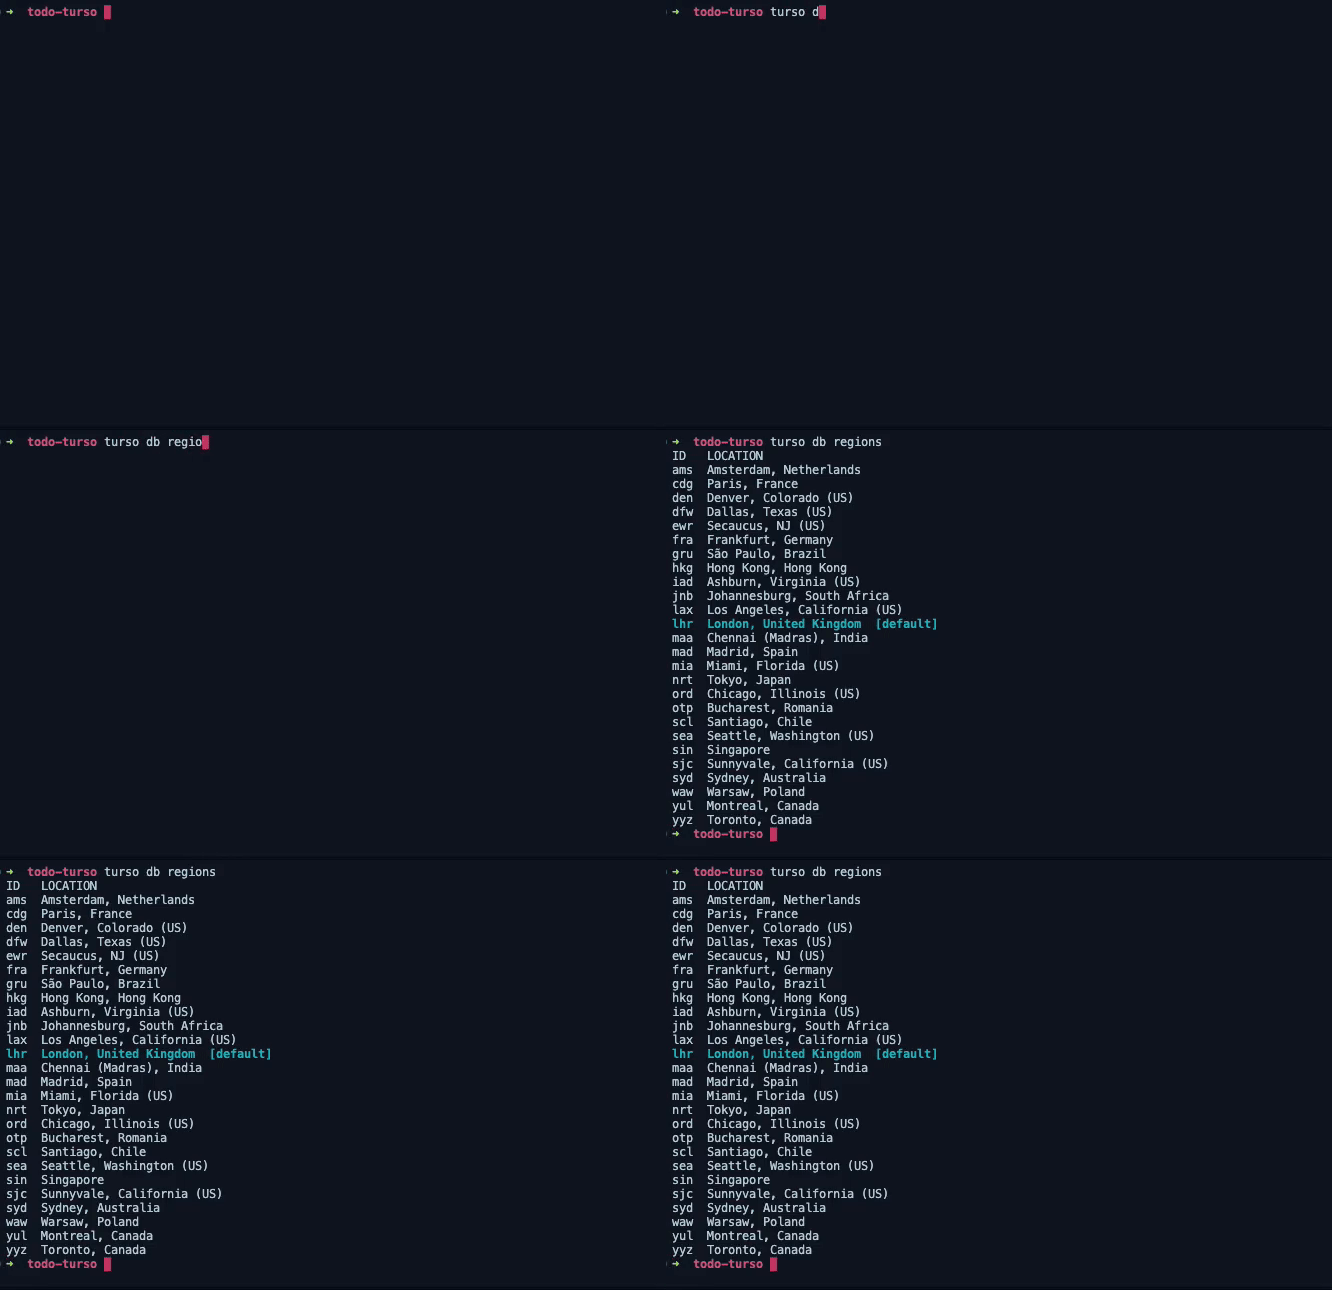
When creating a new database without much configuration, as in the case above, Fly.to determines a default(primary) region depending on our location to deploy the database. To see the list of locations where we can have our Turso databases, run the following command.
turso db regions
This command will display a list of supported regions such as the one below.
London, United Kingdom is listed here as the default region, because it was the best edge location determined by Fly.io relative to my location.
In case, Fly.io picked the wrong region, and we wanted to specify one, run the db create command, passing the id of the region we want our primary database in on the --region flag. We get these region ids from the output of the previous command.
turso db create todo --region jnb
Creating database tables
Before creating new tables in Turso you need to first access the SQL shell using the Turso CLI, and afterwards run table-creating SQL scripts.
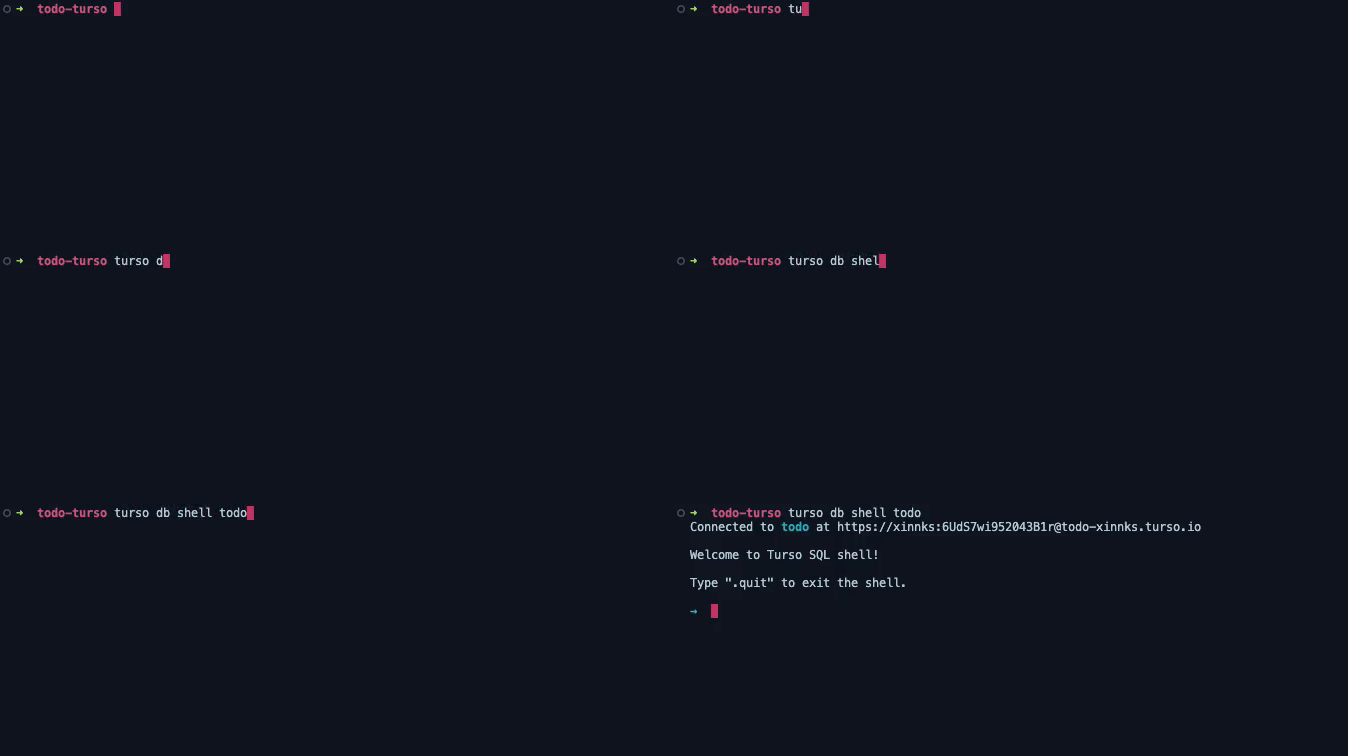
To switch to the shell and work on out todo database, run the following command.
turso db shell todo
Now, let’s create a new tasks table with the following columns.
create table tasks (
    id int primary key,
    task varchar(255),
    completed boolean default false,
    created_at datetime default current_timestamp
);
Run select name from sqlite_schema; to see if the newly created table is listed.
Submitting data to a Turso database
There are some language-specific clients suited for data transaction with a Turso database, such as @libsql/client for TypeScript, libsql-client for Python, and libsql-client for Rust(currently works with Cloudflare workers), but for simplicity, we’re going to use curl scripts.
We’ll interact with the database by sending HTTP POST requests containing the JSON-encoded SQL queries that we’d otherwise run on the SQL shell as already demonstrated. By supporting database interaction via the HTTP protocol, Turso guarantees easy access from all types of applications, especially edge functions.
While previously connecting to the SQL shell, the output Connected to todo at [URL], lists the connection URL at which our database can be accessed.
You can also run the db show list command to see the list of databases and their connection URLs.
N.B., At the current early access program, these URLs aren’t secure. You can see that the username and password are being passed within them. So, share the connection URLs with care, since anyone who has them can access and manipulate your database. A proper auth solution will be added soon.
Let’s seed some data to our tasks table using the following curl script.
curl "https://xinnks:KZobXle750129i86@todo-xinnks.turso.io" \
  -X POST \
  -H "Accept: application/json" \
  -H "Content-Type: application/json" \
  -d '{
        "statements": [
          {
            "q": "insert into tasks (task) values(\"Go to the gym\")"
          },
          {
            "q": "insert into tasks (task) values(\"Read some memes\")"
          },
          {
            "q" :"insert into tasks (task) values(\"Take the mice for a walk\")"
          },
          {
            "q" :"insert into tasks (task) values(\"Buy some fruits\")"
          },
          {
            "q" :"insert into tasks (task) values(\"Wate the garden\")"
          },
          {
            "q" :"insert into tasks (task) values(\"Go to the cinema\")"
          },
          {
            "q" :"insert into tasks (task) values(\"Plant a tree\")"
          }
        ]
      }'
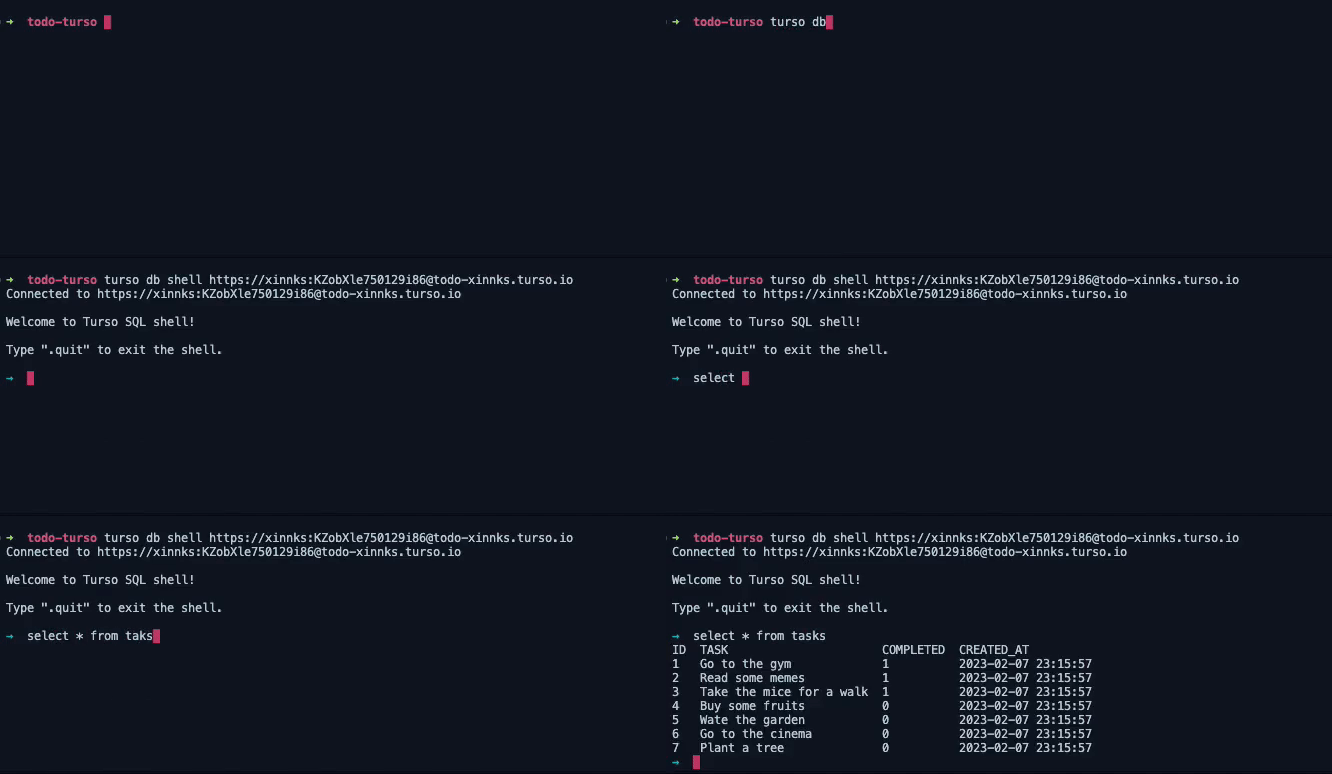
Back in the SQL shell, running select * from tasks should give us the list of data added to the table.
We can also send an HTTP POST request to fetch the data from the database, just as we were able to seed some.
curl "https://xinnks:KZobXle750129i86@todo-xinnks.turso.io" \
  -X POST \
  -H "Accept: application/json" \
  -H "Content-Type: application/json" \
  -d '{
        "statements": [
          {
            "q" :"select * from tasks"
          }
        ]
      }'
Which should return the following data.
[
  {
    "results": {
      "columns": [
        "id",
        "task",
        "completed",
        "created_at"
      ],
      "rows": [
        [
          1,
          "Go to the gym",
          0,
          "2023-02-07 23:15:57"
        ],
        [
          2,
          "Read some memes",
          0,
          "2023-02-07 23:15:57"
        ],
        // ...
      ]
    }
  }
]
If we want to set all tasks with id <= 3 as completed we can send this POST request.
curl "https://xinnks:6UdS7wi952043B1r@todo-xinnks.turso.io" \
  -X POST \
  -H "Accept: application/json" \
  -H "Content-Type: application/json" \
  -d '{
        "statements": [
          {
            "q" :"update tasks set completed = 1 where id <= 3"
          }
        ]
      }'
And, to see the results of the previous request, we can send another request with the SQL query select * from tasks where completed = 1 to fetch the modified rows.
[
  {
    "results": {
      "columns": [
        "id",
        "task",
        "completed",
        "created_at"
      ],
      "rows": [
        [
          1,
          "Go to the gym",
          1,
          "2023-02-07 23:15:57"
        ],
        [
          2,
          "Read some memes",
          1,
          "2023-02-07 23:15:57"
        ],
        [
          3,
          "Take the mice for a walk",
          1,
          "2023-02-07 23:15:57"
        ]
      ]
    }
  }
]
As we can observe in these examples, to make requests to the Turso database, we just need to pass an Array of SQL queries - “statements” as the body of our HTTP request. Each concurrent statement needs to have the SQL query as the value of the property “q”.
We can either send one or multiple statements per the needs of our apps. The query response speeds are fast as we’d expect with SQLite, but, all good indexing practices should be applied for fast query speeds, especially when dealing with large datasets.
Replicating a Turso database into other regions
Since databases are hosted on servers, the response times would normally vary depending on, among other factors, the distance between the users making the requests and the location of the servers responding to them.
To enable users to build applications that serve multiple locations with low response times, Turso, as discussed in the introduction, gives us the option to replicate our databases in 26 locations around the world, as supported by Fly.io.
To replicate an existing Turso database into a region, we use the db replicate command. If we decided to replicate the todo database in Madrid, Spain, we’d do the following.
turso db replicate todo mad
To verify that the data we had in the primary version of the todo database has been replicated to our new replica, open the shell of the database in the created region by passing its database URL in place of the database name on the db shell command.
turso db shell [database-url]
We can run some SQL scripts to see if our data is intact.
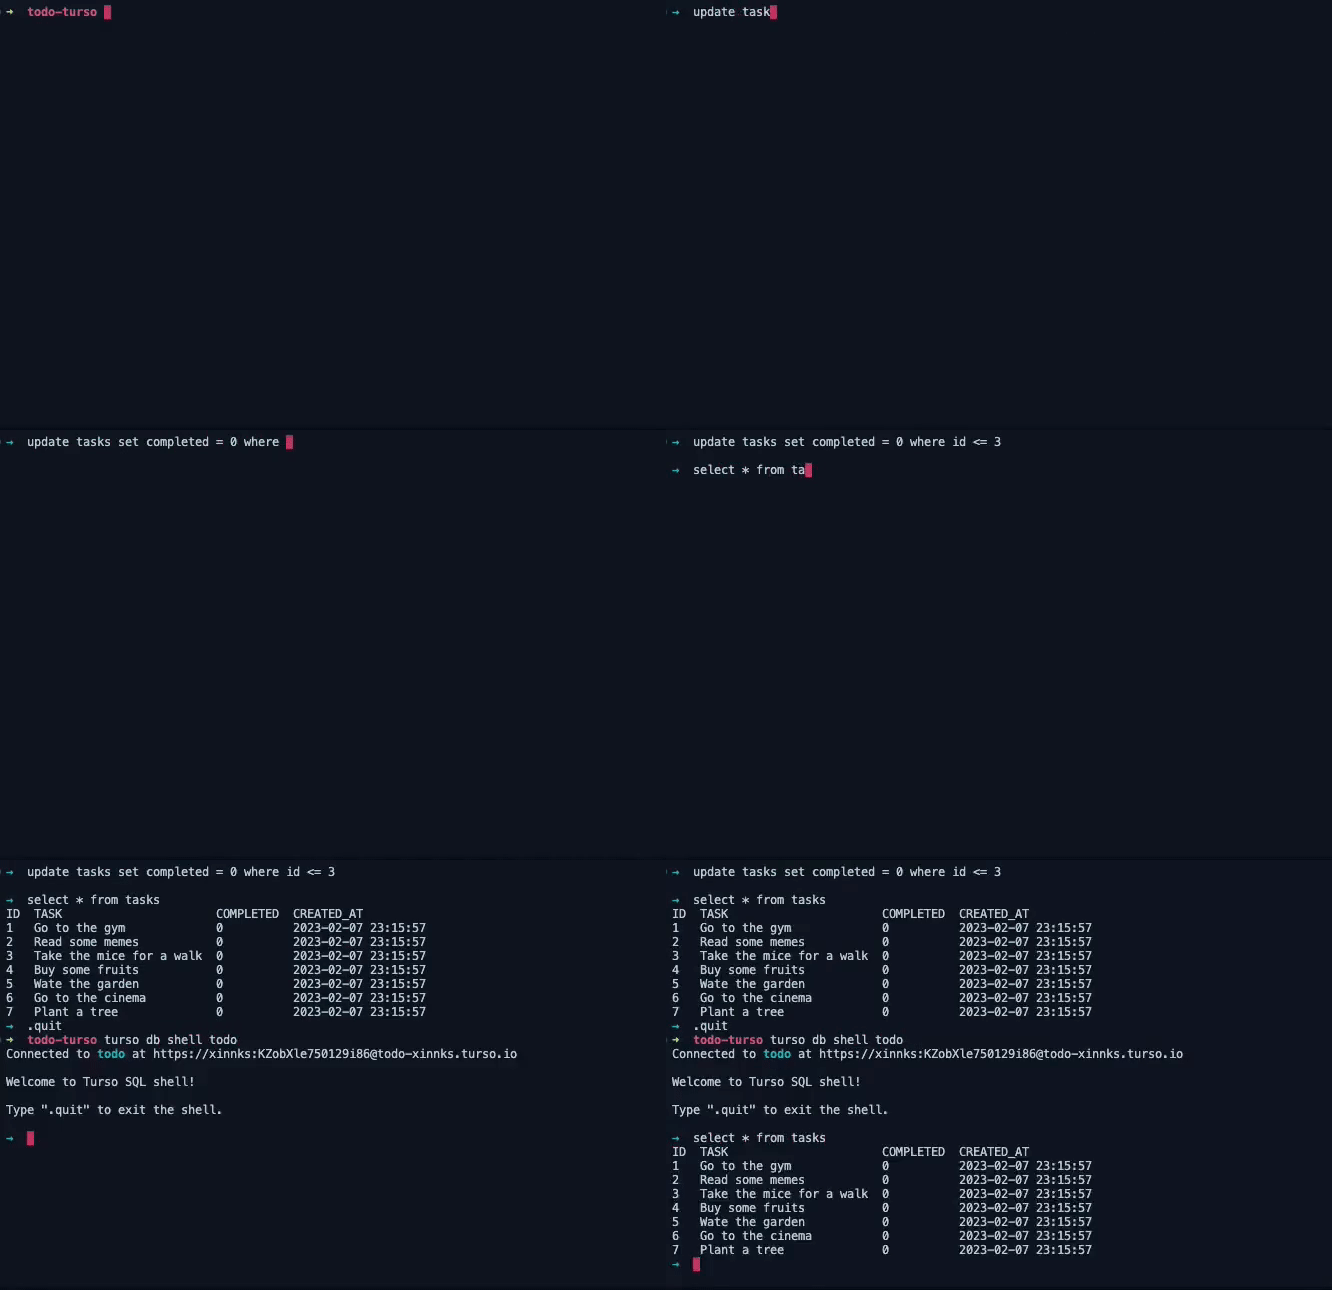
In fact, Turso first proxies the writes made to our replicas to our primary region and then replicate them in the replicas.
From the above output, we can see that everything has been synchronised.
Let’s try updating our Madrid database and then check the changes in our primary database.
Deleting a database replica from a region
If we do not need a Turso database replica in a certain region anymore, we can delete it by running the db destroy command, passing the name of the database followed by the id of the region on the --region flag.
turso db destroy todo --region mad
The above command deletes all replicas of a database we have in a selected region.
If we have multiple instances within a region and would like to specify the instance to delete, we need to add an --instance flag with the name of the instance to be deleted.
Summary
As explained, Turso is currently in early access (and will be until the end of March), meaning there will be some changes. For the moment, and with what I was able to examine and test, there’s so much promise. Creation limits are at the imagination of the builder (and the needs of the apps being built) because we have the sheer power of SQL queries at the tip of the edge.
I’ve barely scratched the surface here, we could have as sophisticated an example as possible with joins, unions, triggers, and all kinds of SQL functions(maybe in a future post), but learning SQL wasn’t the target of this one.
I was trying to examine this interesting tool, that the folks at ChiselStrike are trying to place in our hands.
To try Turso out, you can sign up for the early access program by going to their website - chiselstrike.com.








Top comments (0)