This is Part 2 of a two part series focused on deployment of a full-stack, JavaScript application on Google Cloud Platform.
In Part 1, I covered setting up a GCP account, creating an App Engine, using the Cloud Shell terminal to clone a Github repo into the cloud, and configuring the app.yaml.
In Part 2, we’ll create a Cloud SQL instance, make additional configurations, and deploy the app!
Make a Cloud SQL Instance
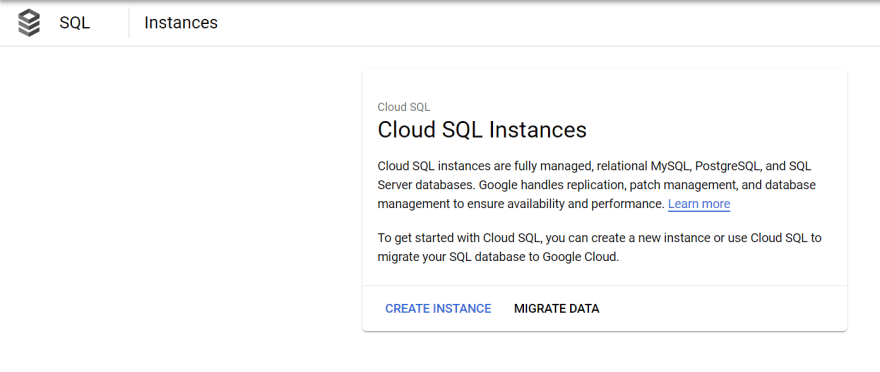
From the Google Cloud Platform dashboard, navigate to the SQL product page by searching in the Search products and resources bar. Then, click Create Instance.
On the following screen, select Choose MySQL.
Select an Instance ID and a Root password. Make sure to write the password down somewhere. I usually have a text file open while I’m deploying where I can temporarily write down credentials which will eventually end up in the app.yaml.
We can use the default values for the remaining options. Click Create.
This will take a minute or two to spin up. Make a note of the Instance connection name from the instances table. It should have the following form: instance-id:zone:instance-name.
Enable Cloud SQL and Cloud SQL Admin APIs
Before we forget, let’s enable the Cloud SQL and Cloud SQL Admin APIs. Search for them in the Search product and resources bar. In my case, the Cloud SQL API was already enabled, but I had to manually enable the Cloud SQL Admin.
Simply click Enable. This is the only step here because you won’t need credentials for connecting via the App Engine.
Development Configuration
With the exception of the app.yaml file which should only exist in the cloud repo, all of these changes should be made in your local development environment. After making these configuration changes, you should be able to seamlessly pull them into the cloud repo.
Server Configuration
The Google Cloud Platform App Engine expects there to be an npm start script inside your package.json to start the server upon deployment. If for some reason this doesn’t exist, create it inside the scripts of your package.json. Make sure your file path matches the location of your server index file.
{
  "scripts": {
    “start”: “node server/index.js”
  }
}
Front-End Configuration
All you really need here is an index.html file somewhere inside the client side of the repository to bootstrap the front-end. Obviously this should exist. Since, I’m usually using Webpack or a similar bundler, this index file simply runs the bundle script.
A sample index.html for a React front-end built with Webpack:
<!DOCTYPE html>
  <html>
  <head>
    <title>Project Title</title>
  </head>
  <body>
    <div id="app"></div>
    <script type="text/javascript" src="bundle.js"></script>
  </body>
</html>
Database Configuration
Now let’s get the database configuration correct. In my experience, this is where most projects run into issues. I’ll show two options here, one database configured with the (mysql node package)[https://www.npmjs.com/package/mysql] and another with (Sequelize)[https://sequelize.org/].
mysql:
const mysql = require('mysql');

const DB_HOST = process.env.DB_HOST;
const DB_USER = process.env.DB_USER;
const DB_PASS = process.env.DB_PASS;
const DB_NAME = process.env.DB_NAME;

const connection = mysql.createConnection({
  host: `/cloudsql/${process.env.DB_INSTANCE}`,
  user: DB_USER,
  password: DB_PASS,
  database: DB_NAME,
  socketPath: `/cloudsql/${process.env.DB_INSTANCE}`,
});
sequelize:
const { Sequelize } = require('sequelize');

const DB_NAME = process.env.DB_NAME;
const DB_USER = process.env.DB_USER;
const DB_PASS = process.env.DB_PASS;
const DB_INSTANCE = process.env.DB_INSTANCE;

const sequelize = new Sequelize(DB_NAME, DB_USER, DB_PASS, {
  host: `/cloudsql/${process.env.DB_INSTANCE}`,
  dialect: 'mysql',
  dialectOptions: {
    socketPath: `/cloudsql/${DB_INSTANCE}`,
  },
});
Navigate back to the app.yaml file in the Cloud Shell terminal to include these database environment variables. The app.yaml should and must be in the root directory of the project folder.
runtime: nodejs10

env_variables:
  DB_USER: "root"
  DB_NAME: “<your-database-name>"
  DB_PASS: "<your-database-password>"
  DB_INSTANCE: "<your-database-instance-name>"
Pull Latest Version & Build in the Cloud
If you’ve followed all the steps so far, you should have a GCP project setup with an App Engine, Cloud SQL instance, and a cloned repository cloned with an app.yaml in the project root directory. If you’ve made any upstream changes to your repository since your initial setup, feel free to pull those changes in now. As long as you added the app.yaml to the .gitignore before cloning it into the cloud and resisted the urge to make any last minute corrections in the cloud, you should be able to pull your new code without any conflicts.
Next run your client and server build scripts in the Cloud Shell terminal.
Deploy Your App Engine
The final step is really easy! Simply run the following command in the Cloud Shell terminal.
gcloud app deploy
And that should do it! Google will give you a link where your new app is hosted. To double check that everything has connected properly, navigate to the App Engine Dashboard and select Services from the left-side navigation panel. In the Services table, select Logs from the Diagnose dropdown menu.
If for some reason you are in the wrong project, you may receive an error message. Simply run the following command to switch projects.
gcloud config set project [PROJECT_ID]
Conclusion
That’s it for Part 2! We’ve created a Cloud SQL instance and made configurations across the stack to ensure a smooth deployment. And hopefully, you were able to successfully deploy your app! In case you missed it, be sure to check out Part 1 of this tutorial. Thanks for reading!


Top comments (0)