Hi everyone,
Today, I am writing about how to install Kubuntu on VirtualBox but also installing on your HDD is the same(you can use the same technique described here).
So we can also call it the unified(one single way), to install Kubuntu.
Warning": Save all your important data before you are going to take this step and follow along if you intend and moving completely to Linux.
Otherwise, all your data it will be lost.
Peresquites(you will need Dear Reader):
Virtualbox
Kubuntu image for your OS, 32 bit(Kubuntu 18.04) or 64 bit(Kubuntu 19.10) from here (if you don't know ask in the comments for help)
10 - 25 GB space for a virtual image(if you use VirtualBox)
the whole HDD if you are using it to install as your main OS.
For HDD install, you will need a USB bootable Kubuntu or DVD bootable Kubuntu. You can use my previous article to create this article
A cup of tea or coffee, it will be a nice company for this journey
I don't recommend dual-boot a lot of problems may appear from corrupt HDD so I don't want to be responsible for your data loss. If you just want to try it then use VirtualBox.
Section 1
Virtualbox Image creation
Skip to Section 2, if you already did this step from my previous article or if you want to install Kubuntu on your HDD.
If you haven't installed VirtualBox just yet Dear User, please do that now. You will find instruction for all the operating systems online.
Important when you head to the download page of virtualbox, the term of OS hosts will appear.
For example, Windows hosts and Mac hosts, this refers to the OS you are using on your HDD or the main OS.
So if you have a Windows OS, you will need to download VirtualBox for Windows hosts, if you have a Mac OS, you will need to download the Mac hosts VirtualBox.
Also if you don't know which to choose to write in the comments and I will try to help, also the whole community.
Let's begin creating the virtual image where our Kubuntu install will be.
Without further ado:
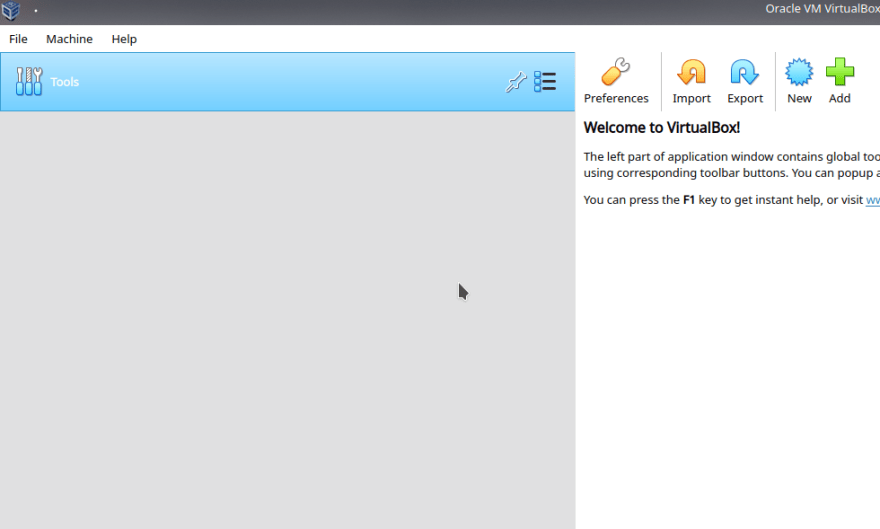
- Open VirtualBox
- Now press the new button
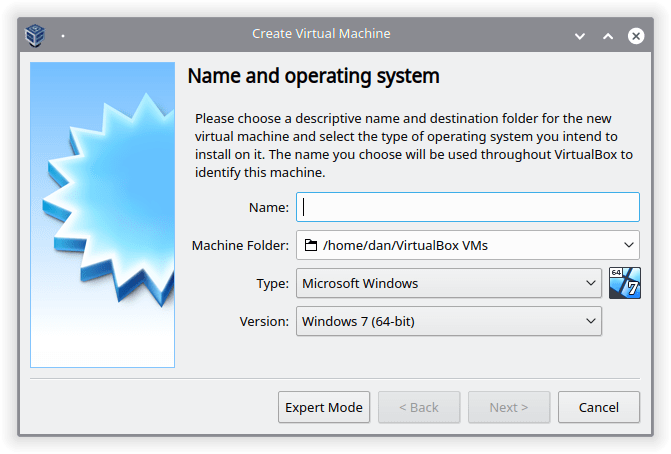
- The Create Virtual Machine window will popup, with the Name and operating system
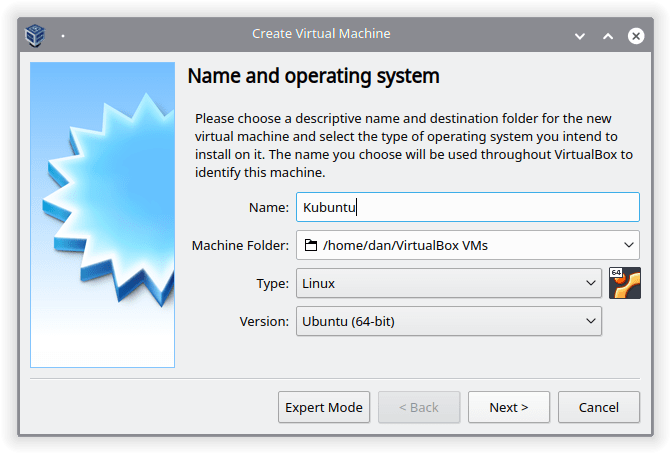
- Modify it like this
Warning: I have a 64 bit system that is why I choose for the
Version: Ubuntu 64(bit), if you have Dear reader a 32 bit system then chooseVersion: Ubuntu 32(bit)The
Namecan be anything you likeMachine folder is where our virtual image will be stored(saved)
Type: Linux is what OS we are installing
Press
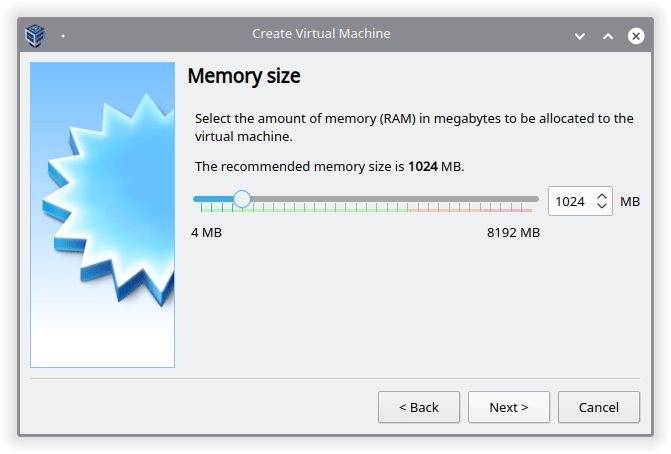
Next >The Memory size window, keep the default or put half of your physical RAM. Do this only if you have a minimum of 8 GB or more.
Press
Next >Hard disk window, choose the option to
Create a virtual hard disk now, which is the default option.
- Press
Create
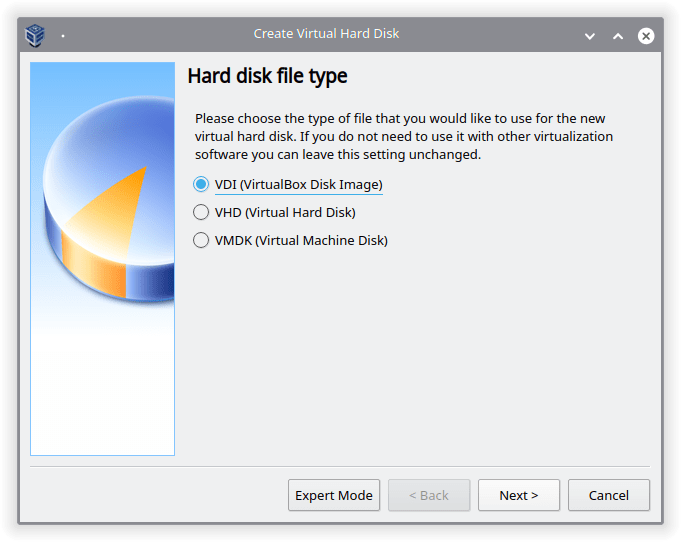
Hard disk file type, choose VDI(Virtual Disk Image), a lot easier to move around(more portable)
Press
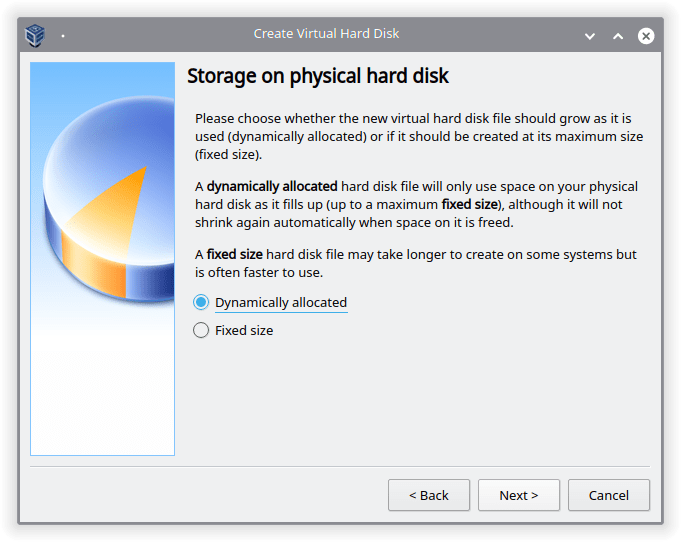
Next >Storage on Physical Hard Disk, choose dynamically allocated because it will shrink the amount of space it is using.
For example, in the next steps, you will choose a 25 GB but Kubuntu only uses 15 Gb, then if we choose dynamically allocated the space the virtual Image will be on our real Hdd is 15GB. But if we choose the fixed size option. Kubuntu will use all the 25 GB.
So dynamic will help us more in this case.
Press
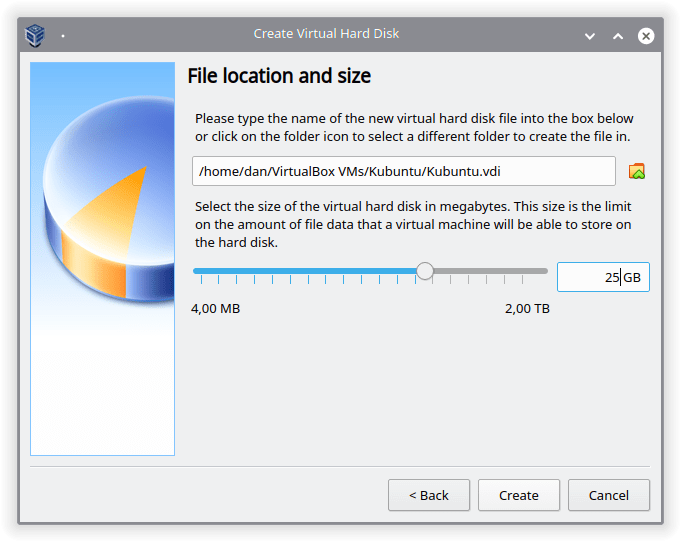
Next >File location and size, I choose 25GB and keeping the default save location
Press Create
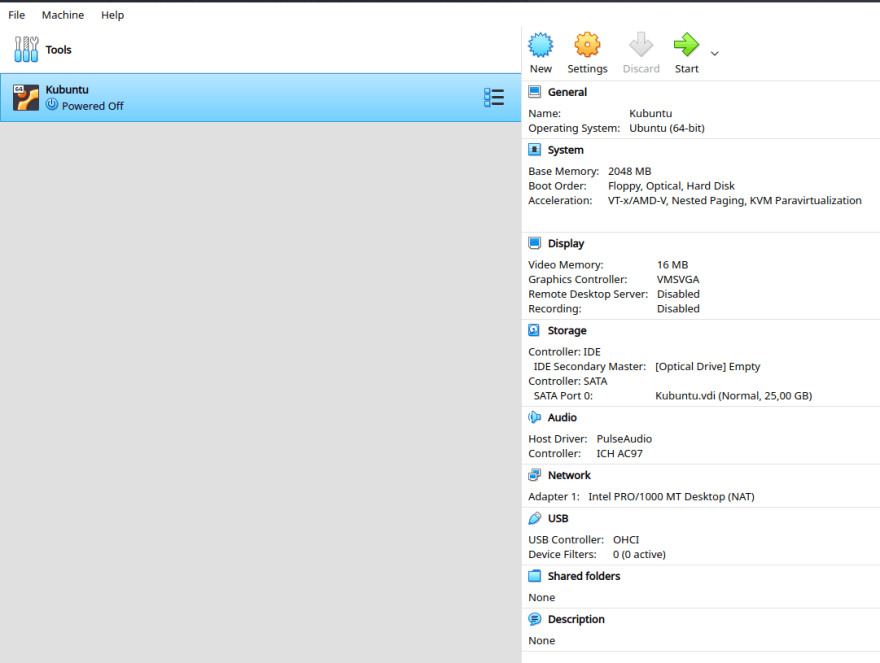
We are done with this section and the Virtual image for our OS is ready for us to install Kubuntu.
Section 2
Installing Kubuntu
Instructions step by step:
- Open VirtualBox and press
Start
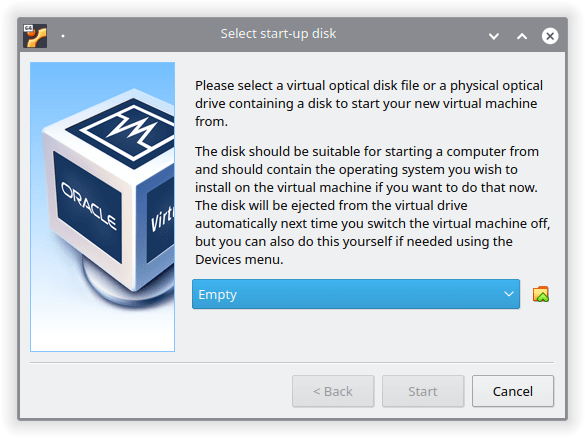
- We are greeted with Select startup disk window
- Left-click on the folder icon
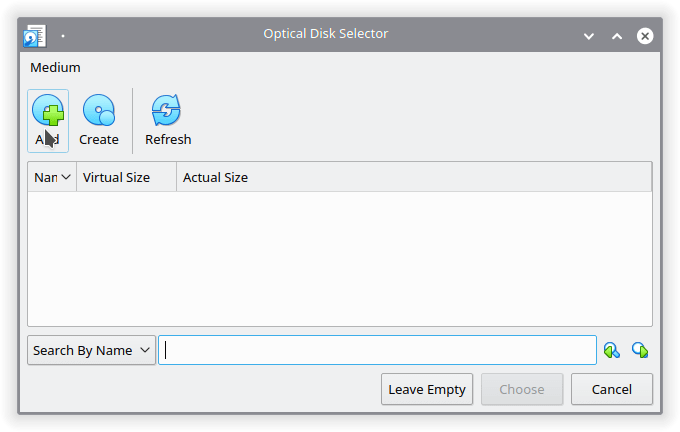
New windows open up Optical Disk Selector, press Add
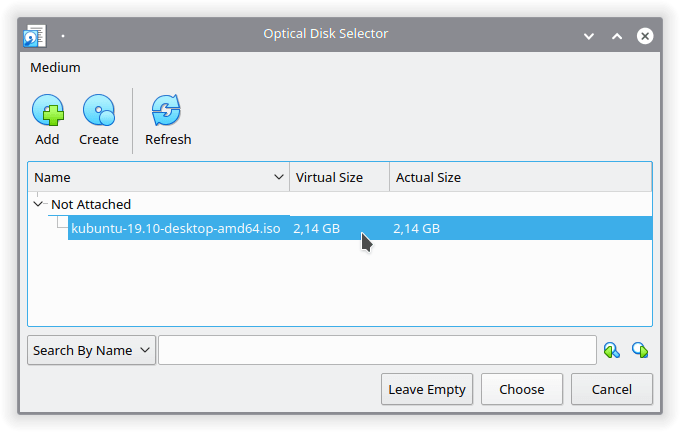
- Now go to the location your Kubuntu image download(saved) and Press
Open
Now press
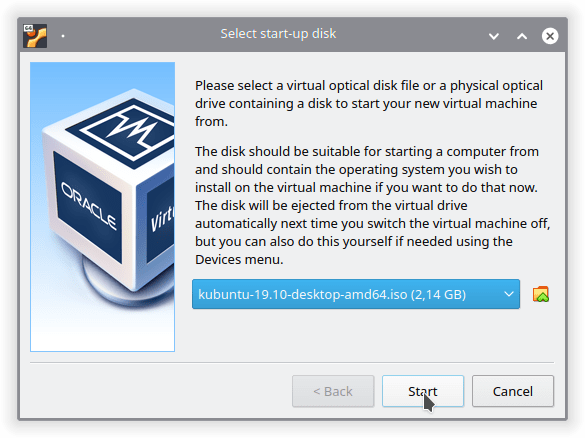
ChoosePress
Start
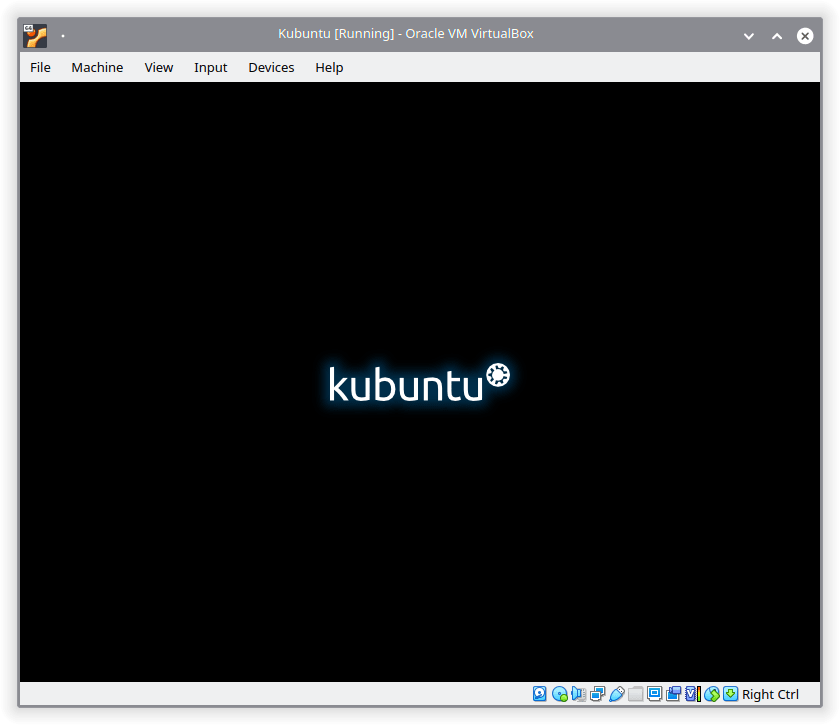
- After a bit of time, you should get this
This is the unified part and everyone can follow this and it doesn't matter if you install Kubuntu on HDD or on VirtualBox
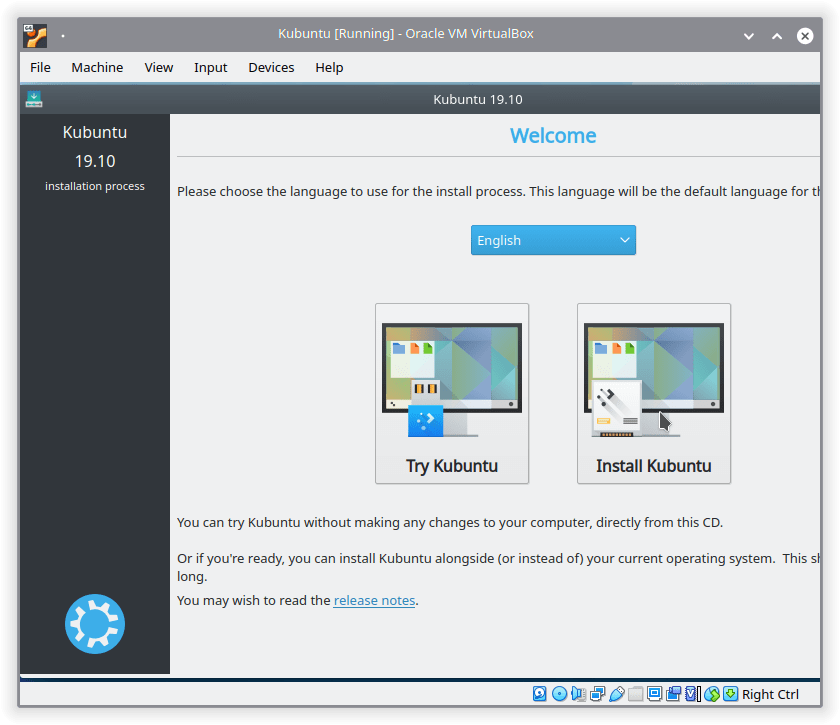
After Kubuntu is done loading the following screen will be present
- Select
Install Kubuntulike in the picture below
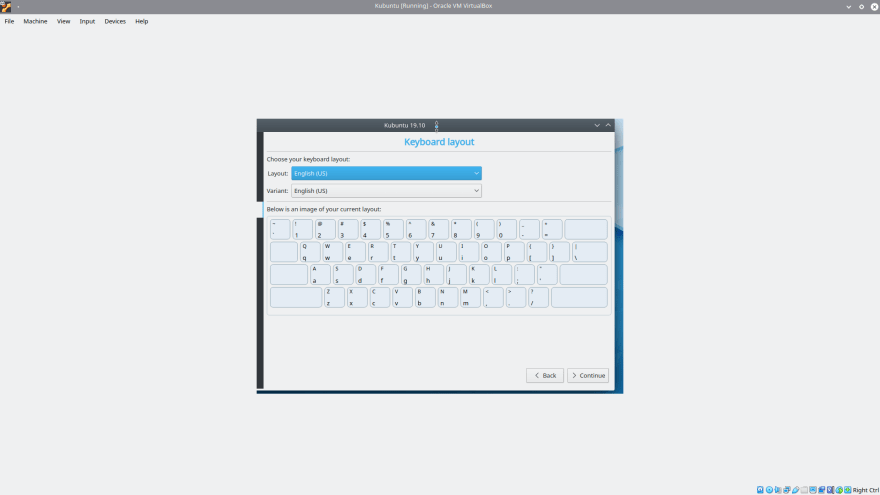
- Drag the new window to be able to see the
ContinueandBackbuttons(only on VirtualBox you will need to do the drag)
Here you can choose your favorite layout for your keyboard Dear Reader, please feel free to do so. I will go with the default.
- Press
Continue
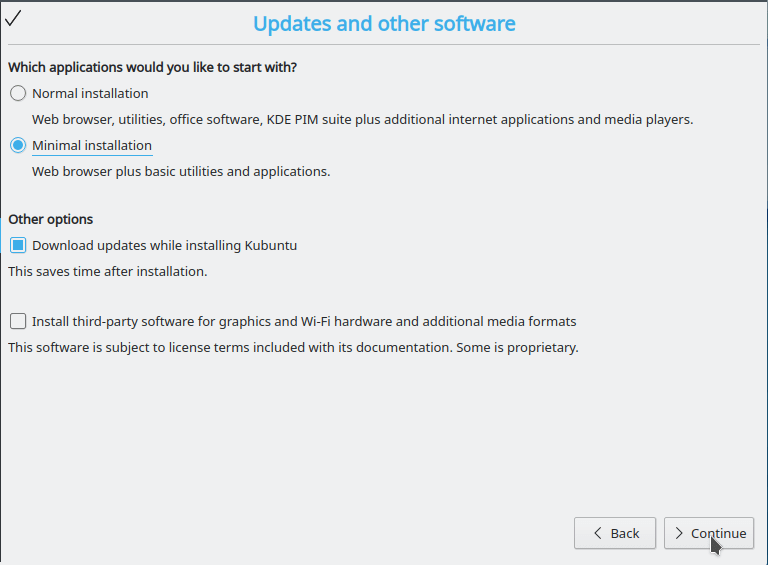
- Choose the following here:
Minimal installationand leave the rest as the defaults and pressContinue
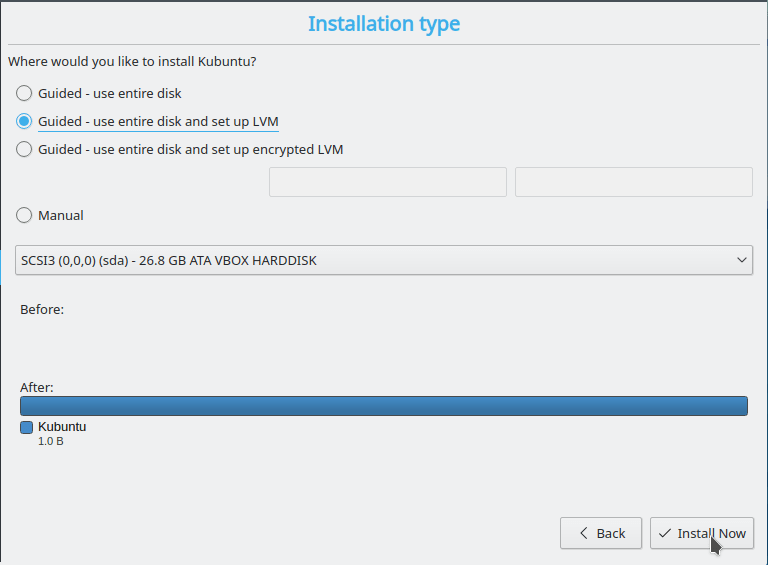
- Guided use entire disk set up LVM, press
Install Now
Press
Continuewhen asked to write changes to diskNow we are almost there!
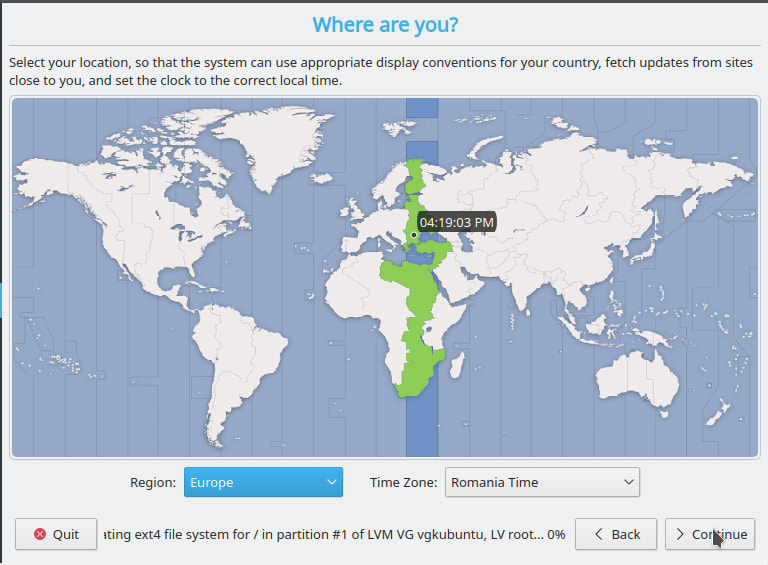
Select your country for date and hour local settings(to format the hour and date to your region). If the autodetect is good leave it and press
Continue
-
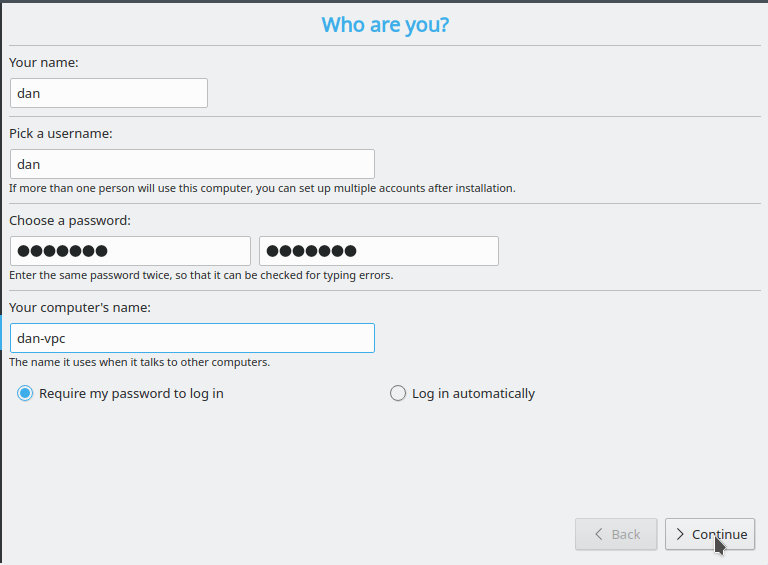
The final step :
- add a username
- set a password that you will need always(a lot in Linux)
- set your hostname or computer name
Press
Continue
My settings are below
We are done!
Congratulations on your first Kubuntu install, Dear Reader
I hope you enjoyed the article and also the cup of coffee or tea.
Also if you find this article useful share it on social.





Top comments (4)
This is a fantastic write-up! Lubuntu was the first-ever Linux distro I tried, followed by Kubuntu. Now, I use Pop!_OS on my laptop, and Ubuntu on my server. But Kubuntu remains one of my favorite OSes. Excellent tutorial, and solid walkthrough of using VirtualBox.
Thank you @moelong for appreciating my article. I am also glad that you shared your previous experiences with Linux distros.
Great article and very precise in the instructions to install kubuntu on virtualbox. Much appreciated!
Thank you @asharkhan for appreciating my work.