
Now that we’ve made it past the halfway point at Flatiron, I'm starting to understand a lot more about what blogs are and what their basic utility is, especially for beginners.
The point of blogs - at least from my perspective at this point - is to find those diamonds in the rough that hold your hand and spell out the little bits of code you‘re missing, or fire up the right light bulbs in your brain to give you the right ah-HA! moment get your program working. Then you copy-paste what you can, curse at the rest, add it to your bookmarks under Blogs & Stuff.
But feelings come first. And I've gotta say that starting Ruby was tough, and I think that this phase was probably the one that I struggled the most with, but in that same vein, I also learned the most. It’s gratifying and humbling at the same time, and I’m kind of in love with the feeling, but I digress...
For this entry, I’ll assume that the reader is here for the same things I was looking for during Phase 3, that they also have a fair understanding of Ruby, ActiveRecord, Sinatra, and a sprinkle of SQL, and that really they’re just looking for that diamond...or ruby. As such, the following are some helpful snippets that I learned during my back-end brigade.
DATA MIGRATIONS
The order of operations for establishing our migrations and creating our tables starts by creating the migration files. Open the terminal and navigate to the project's directory. Once there, type into the console:
rake db:create_migration create_table_name
NOTE: Our table names should be PLURAL, because they are tables, and they hold many instances of a single thing...they are large, they contain multitudes. For example, my group and I created a mock eCommerce website for our final project, and we needed to create a table of data for our ITEMS, so we ran:
rake db:create_migration create_items
This creates a time-stamped migration files that determine how the tables are set up. Inside of those files, we assign data types and the associated symbol to each 'row' of our table.
For example, for our Items table, we needed a name, price, description, image URL, brand, and category. After creating our migration file, our table looked like this:

We can assign the data types to whatever we like. Other available types are float, decimal, numeric, datetime, time, date, timestamp, binary, primary_key, boolean, bigint, & text, but integer and string seem to be the most common in BeginnerLand. And don't forget to add end at the end of the create_table method! Once our tables are all set up, run:
rake db:migrate
If successful, we should have a new file called schema.rb in the db folder. Next, we needed to establish our relationships so our data can get to know each other and be friends. For our project
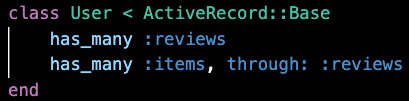
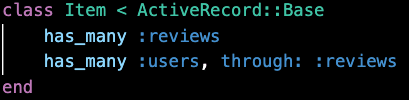
These are 'one-to-many' relationships, as in this ONE ITEM, HAS MANY USERS that leave REVIEWS on it. So for the syntax we say
Item has_many :reviews, through: :users
...and, as always, we pay extra special attention to where we put our colons.
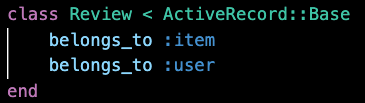
This is our 'many-to-many' relationship. Notice how the use of item and user are both SINGULAR here! That makes sense - a review can only be for ONE item and can only be written by ONE user. Once these relationships are set up we can create our SQL tables by running this code in the console:
rake db:migrate
If we have a seed file, that's amazing. If we don't, I somewhat recommend using faker to help out. It's great for making random seeds, but my project group and I ran into some trouble manipulating the output data as beginners, so I'd say it's handy, but only to a certain degree. Once our seeds are filled in, run:
rake db:seed
and that should fill up our SQL tables will some nice juicy data that we can do whatever we like with...well, whatever we know how to do. Which as beginners isn't that much, but WE GOT THIS!
The next step is to set up Sinatra, which you can find much better-explained in their docs HERE.
CREATE, READ, UPDATE, DELETE
So what about CRUD?! Well, I'm not going to give up everything, but it starts with setting up the paths within our application controller. For example:
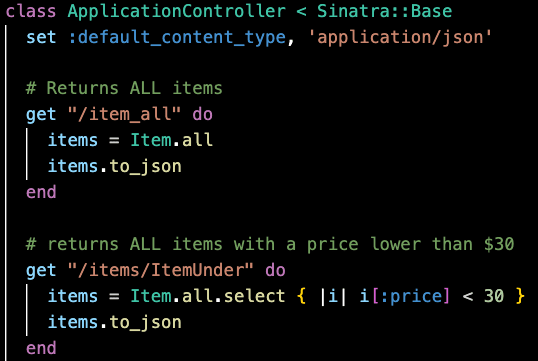
Those are simple GET requests. We can check our work using an application like Postman, or by running
rake server
in the terminal, and opening up http://localhost:9292 in the browser, followed by whatever our path name is. For example, to route to our item_all path, we would type into the browser:
http://localhost:9292/item_all/
The real money-maker here is the associations within our Object-Oriented-Program. When we pull data using Sinatra ActiveRecord, we can also pull the data that that data is associated with by using include:. So, if we make a route to pull a single item's data, we can also pull the reviews for that item AND the user data for those reviews, like so:

This one route now allows us access to literally every bit of data that we added to our tables. That's...super neat y'all.
Now what does this look like on the front end? Well we made a component that displays the details of an individual item, AS WELL AS all the reviews associated with that item, AS WELL AS all of the user data for whatever user wrote the review. We'll need useState, useEffect and useParams like so:

In our component function we set our item state:

Then we implement useEffect and add a catch if we have any trouble rendering our data for any reason.

Then after a little destructuring, we can add our data to our JSX...
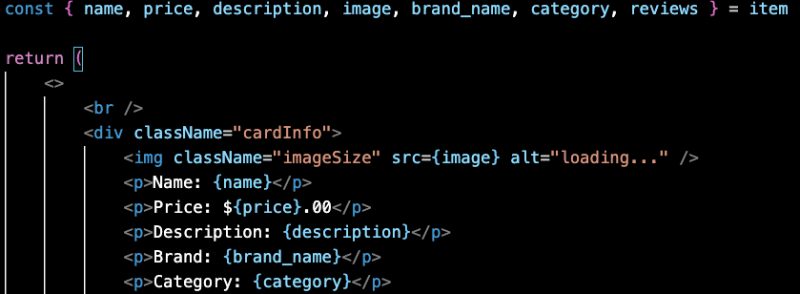
Sweeeeeeeeeeeeeeeeeeet! Rendering data is so cool. It's trending. Or...trendering!
To get the rest of the CRUD, my project group and I ended up setting the list of item reviews as its own separate component, and then each individual review as a card within the component. So we had Details.js which was a parent of ReviewsList.js, which was a parent of ReviewCard.js. This allowed for us to manipulate all the data we were handling without making a huge mess out of the variable names and turning our Details file into callback hell. When in doubt, make another component.
Figuring out the rest was a matter of passing through the correct data using HTTP in our Application_Controller.rb, making the correct handler functions in the correct React Component, and making sure the fetch was doing everything we needed it to do...
For DELETE our application_controller.rb path was:

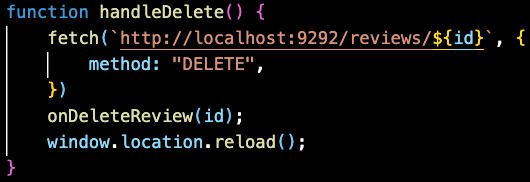
Our HandlerFunction was:

And the accompanying fetch:
For POST our path was:

The POST HandlerFunction was:

And the POST Fetch was:

And the tricksiest little Hobbitses of them all...the PATCH path looked like:

The HandlerFunction was:

And the Fetch:

... This, of course, isn't the entirety of the code for our React components, but I think it covers more than enough to get the gears turning, especially for my fellow Flatironeers.
And that's it - thanks so much for making it this far! I went lighter on the gifs and heavier on the content this time.
Hopefully this was helpful, especially to my fellow Flatironeers that are having trouble finding a blog where all of this stuff is literally spelled out for you. That blog now exists!
If you have any questions or recommendations for edits, feel free to reach out. I welcome any and all feedback.
Keep fightin' the good fight! ʕ•ᴥ•ʔ

Top comments (0)