As a web developer, you may come up with the situation of needing to set up a Virtual Machine to host your website online. While it's great that we have a variety of managed cloud services to lift this complexity for us, it's not a bad thing if we want to learn about some basic knowledge of setting up your own server. In fact, I come across this situation, and having this kind of knowledge is essential to me, especially when running a small project all by yourself or run with a tight budget.
Without further ado, let's start:
1. Use a web hosting control panel
This is true, especially if you don't familiar with the Linux tools or come from a Windows background. There's a lot of setup and maintenance hurdles that come when you start to manage your own server. And definitely, you don't want to memorize all the things using only the terminal! So to lift this up, we need to install this piece of software.
While there are some popular options like cPanel or Plesk, it comes with string (price) attached. So we need to use the free one, and Virtualmin, to me, is just perfect.
The installation step is easy too. I won't cover them all here but all it needs to do is run this command (as root):
wget http://software.virtualmin.com/gpl/scripts/install.sh
chmod 0700 ./install.sh
sh ./install.sh --bundle LEMP
Do you see that? I put --bundle LEMP because I prefer to install Nginx over Apache. Whatever the choice is up to you but overall Nginx is way faster than Apache because of its simple configuration and event-driven, and you need those (the webserver) anyway to let it handle the heavy lifting of managing your app processes.
I'll discuss these later but one thing you need to know is installing Virtualmin or any of these will destroy any existing setup on your server so only install it when your VM or server is a fresh install.
But then, what happens after the installation? Head to https://<Your IP address>:10000 to open Webmin portal (yes, Virtualmin is part of Webmin).
You may encounter some SSL issues but skip it, it's fine. Login with root account and password that you've set up, then follow the initial setup and create a new domain. Voila, you're done! No need to learn the hassle of creating a non-root user in a terminal and tries to synchronize everything overnight!
Sounds good? Let's continue.
2. Know how to run your app properly
Chances are you already know how to start your own local server. You may do the same thing on your VM but it will be a bad, bad idea. For an online server that needs to run 24 hours 7 days a week, you need some sort of proxy that protects your app processes from randomly crashing due to fatal crashes or high flood of traffic, and this proxy is what Nginx (or Apache) really does. What these proxies really do is they're run the actual HTTP(S) port on 80 and 443 and forward any incoming traffic to a local port or socket which your app really listens to. Web proxies also really good at dividing traffic based on domains (like domain A goes to this app then domain B goes to that app) and reporting or logging crashes of your app. Web proxies are just that awesome and you need to understand how to configure them properly, even though Virtualmin will already do the heavy lifting for you.
After the installation of Nginx that comes from Virtualmin, you might be surprised that, it already comes with PHP support by default, like the usual way web hosting does. You can see how NginX config on a specific domain looks like:
server {
    server_name example.com;
    listen 1.2.3.4;
    listen 1.2.3.4:443 ssl;
    root /home/username/public_html;
    index index.html index.htm index.php;
    access_log /var/log/virtualmin/example.com_access_log;
    error_log /var/log/virtualmin/example.com_error_log;
    location ~ \.php(/|$) {
        try_files $uri =404;
        fastcgi_pass localhost:8001;
    }
    ssl_certificate /home/username/ssl.combined;
    ssl_certificate_key /home/username/ssl.key;
}
You can see that it has the domain you want to listen to example, the server IP to listen with 1.2.3.4, where the base directory is /home/username/public_html and so on. What essential in NginX is that by default it only serves as a static web server. To make most of the features it gives you need to understand additional configs, like the fastcgi_pass to enable dynamic processing on .php files.
PHP is great, but not for all of us. What about running Node.js or Python apps? You might be tempted to use proxy_pass but it won't handle the app startup and crashes for us. Luckily we have a better option: Phusion Passenger.
What is that? That is the app server, which able to manage and automatically run Node.JS, Python, Ruby, well, all kinds of server apps you might need to run in your server, and it has an awesome integration with Nginx.
After you follow the installation step, all you need to do is add these options in NginX config:
    root /home/username/public_html/public;
    passenger_enabled on;
    # for easier debugging!
    passenger_friendly_error_pages on;
It will magically find any relevant startup file (like app.js or passenger_wsgi.py) in the parent root directory (public_html) and boot the relevant process (of course, you need to already do have Node.js or whatever programming language you want to run with and already installing node_modules or whatever code dependencies your app need beforehand).
Can you run your app now? Great. Let's continue.
3. Overcoming DNS (and SSL) problems
Your app runs on an IP public address now. Great! But nobody (even Google) wants to remember your IP address. You need to buy a domain yourself. I won't point out what's to recommend on this one so go buy a domain from whatever web hosting service you're already familiar with. But what I need to tell you is that after you buy a domain, you need to point out that domain to your server's IP address. This is done under "DNS Management" and in there, you can insert your server IP address using A record (and AAAA if care about IPv6), and that's it!
But wait. There's more...
DNS caches everything under the TTL (Time to Live), and by default for most services, it's set for about 4 hours (14400). You certainly don't want to wait 4 hours to just be able to see your new shiny website, right?
While you can just bypass DNS using hosts file, it's much better if you can go to Google DNS resolver and see if Google itself picks up your new domain. It usually works for the first time without flushing their cache. (if it doesn't work, well something may wrong with your registrar?!).
After you check it, if Google DNS resolver sees your IP address now but your device still won't pick up it, you can set your device DNS resolver to 8.8.8.8 and 8.8.4.4 (the Google Public DNS) and after that, it will certainly work. Yay!
But wait. There's more (again!)...
You can access your site using http:// but not https://, right? HTTPS is very important nowadays so you can't ignore it. But then, to do that, you need to sign your SSL certificates. I won't go into detail about why it works like that but what I need to tell you is that there's one and only kind of SSL agency there, it's called Let's Encrypt and it will create a signed SSL certificate for your domain for free. How?
Assuming you already have a correct configuration in your Nginx, with Virtualmin you can go to SSL certificate panel and send a request to Let's encrypt in a few clicks. Sound simple? Yes, but not just that. You can also make Virtualmin renew your SSL certificate automatically. Awesome, isn't it?
Now your website should be online and can start gaining users. Congrats!
4. Understand memory management (and when to panic)
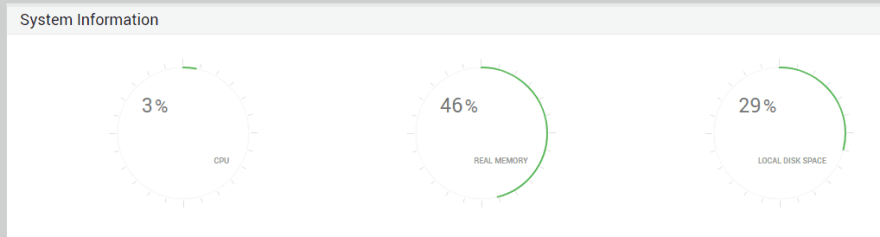
It's a regular evening and your server has been running for few weeks. Yet you look at the Virtualmin memory gauges of your server and start wondering.
Usually, this will come in two situations:
Situation A: Your server is wasting resources
You notice that your server only uses around 40% of memory so you think if you could cut the monthly bill in half by reducing its computing memory. Before it happens, I will tell you: don't do that! unless you're running into a budget problem.
Even though it seems your system is wasting the excess memory, it's actually not. Linux will always use most of your RAM because of RAM cache. And you might wonder, what's the deal with it?
Well, most operations on Linux rely heavily on files. The kernel is smart, when a process is done reading or writing a file, it's actually kept temporarily as RAM cache so when another process reads it the next time, it won't wait for the storage disk to actually perform the read, dramatically improving the overall system performance.
I won't tell more details in this, but that's the whole point. Cutting your free memory will severely decrease the overall performance. Don't reduce it unless you have a problem with budgeting.
Situation B: Your server is heating
Some users tell you slower loading times and some error pages show up significantly. How would you confirm what goes wrong? Firstly, you need to check the load. If the load metric is going like tens, it means your server can't keep up the traffic. Then you need to check your memory consumption by going to free -m. The result is probably like this:
              total        used        free      shared  buff/cache   available
Mem:           1817        1327          67          72         421         268
Swap:             0           0           0
If you have low memory available, it means your server struggling to find more memory. You can increase the computation memory right now but it would be a bad idea if you actually turn off your VM during high traffic, so what you can do is create a swap file.
A swap file is basically an additional memory attached to a storage disk. You might think it's a good idea to put a large swap file and suddenly your memory problem would go, but no. Because too much swapping could render the system unstable too.
A better way to think about a swapfile is like a band-aid. During temporary traffic surges, Linux can put non-essential memory processes to swapfile so the actual memory can better spend on essential programs and frequently used RAM caches. For this to work, I recommend a swapfile about 1 or 2 GB size and swappiness around 30.
But if you have already done these but still has low memory availability, yeah it's time to add more actual memory.
I talked frequently about memory. While it's the most likely problem during high load, sometimes there's another factor too, like a rogue process running in the background or maybe there's just not enough core counts in your VM. A look at top can help you a lot to diagnose this.
5. Protect your server with basic security and backup knowledge
This is the final piece of advice that I need to tell you, as security and backups are so easy to overlook yet most people don't realize how important it is until it's too late.
Good basic security of any VM serving the internet is to only allow specific inbound ports like SSH, HTTP(S), and any related port you might use. Most cloud providers already have a firewall config so it's good to use them if available. Or if it isn't you can use firewalld or iptables to safeguard your traffic at kernel level. If you're like me who uses Webmin, you might want to change the port to something else as leaving the default 10000 probably would make it vulnerable to botnets that swarming the internet.
If you have some memory and computation to spare, it might be a good idea to install software that prevents brute force attacks like Fail2Ban, or maybe just don't enable password-based login in SSH and disable database remote control when you don't need it.
And lastly, do a frequent backup, as you probably don't aware of how things can be messed up certainly in the future. The good news is most cloud providers have a way to make a "snapshot" of your VM and allow you to schedule it weekly. It probably cost you an additional pennies but it totally worth it.
Closing
That is a lot of topics I discover. You might think, where do I get all those knowledge? Well, I have some background story that you might want to read, go check it out :)

Top comments (0)