
My career in front-end developing has just started. Currently, I am on a trial period in one of the IT companies in Minsk. I am exploring the subtleties of the web-ui development on the basis of the JS Webix library. Sure enough I am glad to share my modest experience and to save it as a guideline of this curious UI library.
FOURTH TASK
The Webix library has all the tools for implementing basic web development functions, or CRUD. This article covers the following tasks:
- editing table data via the form;
- installing the built-in row editor;
- adding data to the list and the chart;
- deleting items.
In the documentation, you can learn more about the List widget, the Treetable widget, and the DataTable widget covered in the article.
The source codes are here.
You can find the finished application here.
Step 1. Editing data via the form.
I work here with the "Dashboard" tab where the table and the form are drawn. The table code is located in the table.js file, the form code is in form.js.
I will add the onAfterSelect event to the Table widget. When this event is triggered, I will get data from the table and pass it to the form fields.
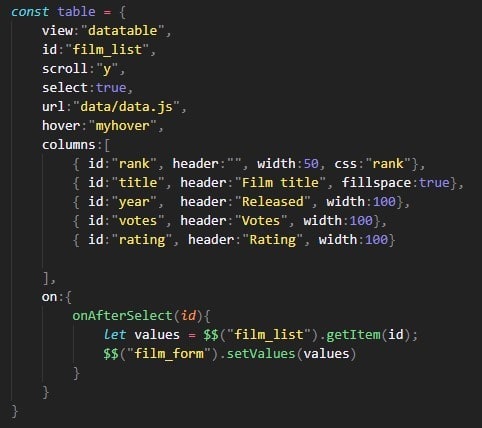
The setValues() method in the above code passes the received values to the form.
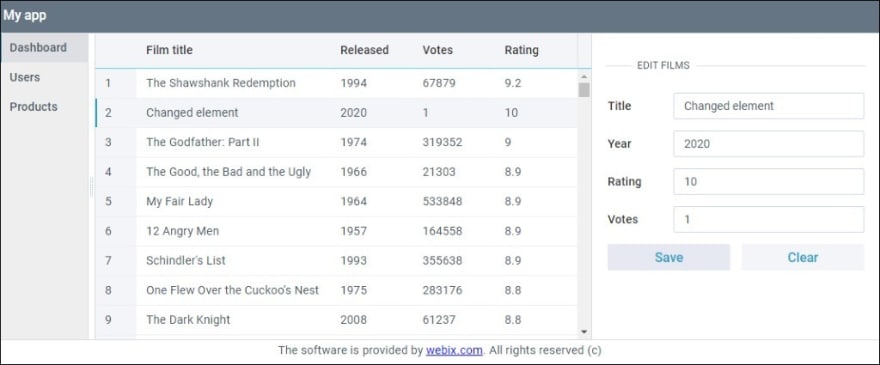
I run the code and check the result:

When the row in a table is selected, its data automatically enters the form and is ready to work.
To make the process more challenging, I will save the changes if the data is taken from the table and edited.
I rewrite the saveItem function and add new methods to it:

Now there is the following algorithm in the function:
- first, two conditions are checked : whether the form data has passed validation, and whether changes have occurred in the form. Changes in the form are tracked by the isDirty() method;
- second, the condition "item_data.id" allows you to define a new record. A row with all its data is passed to the form, including the id, for which there is no text field in the form, but it is required for the data. The form stores and allows you to read all the passed values, so we use the id for verification.
- finally, after verification, either a new record is added using the add() method, or the current element is updated with new properties.
To update the edited data, I use the updateItem() method. It takes two parameters: id of the selected element and a set of new properties taken from the form. When the function is called, the current data is replaced and supplemented with new data.
Result:
Step 2. Installing the built-in editor.
In the previous step, I edited the table data using the form. Now I will try the editing method directly in the element. This method is applicable both in the table and in other components for working with a large amount of data, for example, in the list.
I start with a tree table in the "Products" tab. The table code is in the products_module.js file.
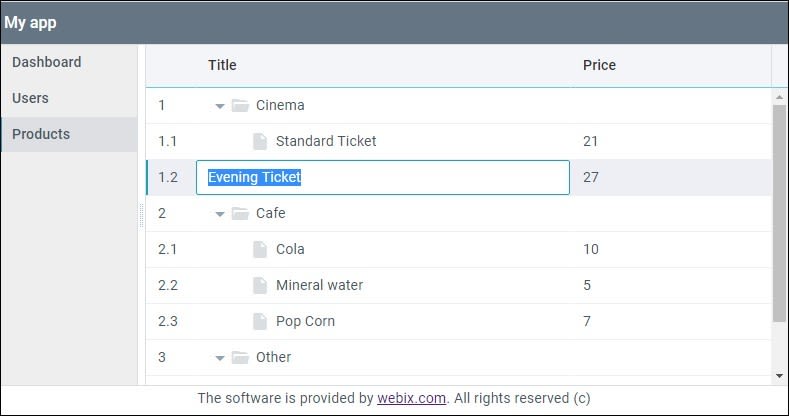
The Treetable widget allows you to edit table contents, but this feature is disabled by default. Editing is set in two places: in the table configuration with the editable:true setting, and in the configuration of each column. The editor:"text" setting is set to the columns. The “text" attribute specifies the type of the editor. For more information about editor types, see the documentation.

I added editors for the Title and Price columns in the code. By clicking on any cell the text field editor opens up:
Now I will go to the "Users" tab, and analyze the option with editing the List widget. The widget code is located in the users_module.js file.
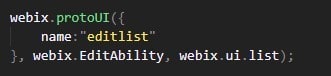
Data editing is available by default for the TreeTable and DataTable widgets. To use the built-in editor in other widgets, you can use the special EditAbility module. I use this module to edit the List widget data. To do this, I will create a user component using the protoUI method based on the List widget.
I write the name of the future widget (the name property) and inherit the necessary modules for the widget base.
Prototype of the List widget.
After calling protoUI, I get the finished component. It is built into the widget in the same way as all other components: with the view:"editlist" setting.
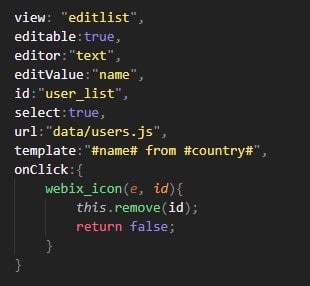
Since there can be many fields in each record, and both name and country are drawn in the List template, the editorValue:"name" setting is added in the configuration, indicating which field can be edited.
Result:

Step 3. Adding data to the list and chart.
This part of the article uses the List and Chart widgets, the code of which is located in the users_module.js file and drawn in the Users tab.
The Chart and List widgets use the same data of the JSON array. Therefore, when I implement the opportunity to add data, it is necessary that it falls into both components.
To do this, I will draw the "Add new person" button in the users module.

Clicking on the button calls the addPerson function that adds a new entry to the list.
The chart shows the age from each record, so a random number will be generated for a larger spread.
Function for adding a new record:
Result:


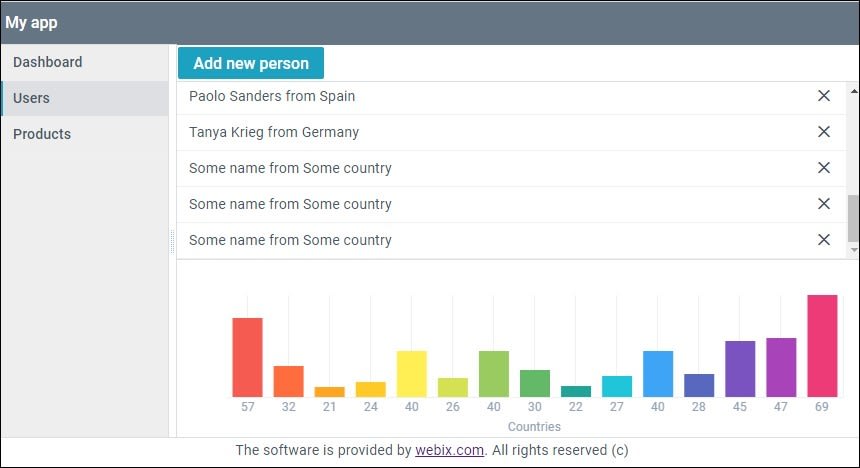
Step 4. Deleting elements.
To begin with, I create a new column with an html tag and an icon in the Table widget.
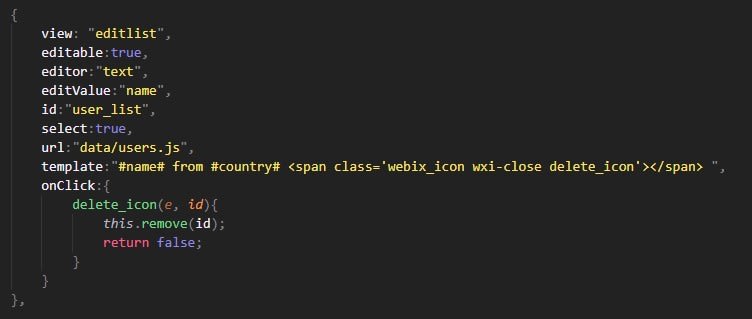
To process clicks on icons, I take the delete_icon class and write it to the onClick object as a key, the value of this key will be the function, which is the handler. Among the arguments the ID of the record comes, so I can delete it with the remove() method.
List widget code:

The List widget’s rows removal algorithm is the same as the Table widget’s:
Result of rows removal in the Users tab:
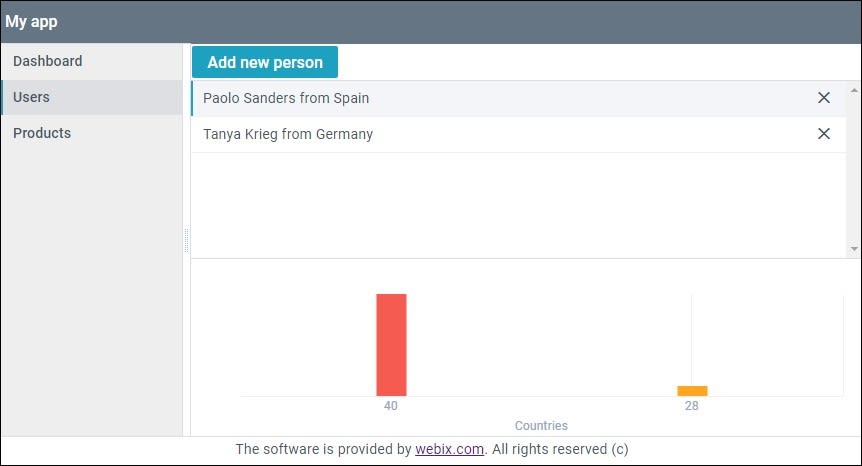
You can find the finished application here.
Conclusion
CRUD implementation in the Webix JS library is performed in different ways. There are built-in editors for changing data, and API that allows you to do the same through a third-party form. The whole set of CRUD functions can happen in the form with several rows of the code. It is easy to combine various functions in the library architecture.


Top comments (0)