
Let's learn how to integrate Airtable. In the first example, we will receive an HTML form from a website and add a row to Airtable. This can be used for:
You can use this form to:
- Allow users to contact you
- A way for users to submit bug reports
- Collect user feedback
- Waitlist signups for your product
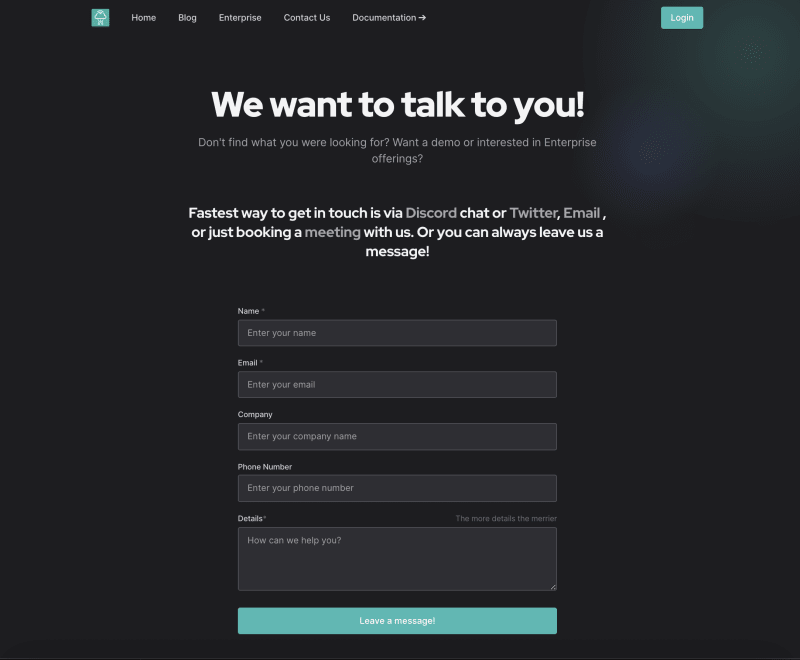
Example form on https://synpse.net/contact/
Prerequisites
- Webhook Relay account.
- Airtable account with a workspace.
- Static website of your choice. We are using websites hosted both on GitHub and Cloudflare pages, however with this setup it doesn't matter where the website is hosted.
Prepare Airtable
In order to start adding rows to Airtable you will need to prepare few things:
- Create a new base
- Find your base ID and table name. To do this, check your URL when you are in the table view. It should look something like this:
https://airtable.com/appXXXX/tblXXXX/viwtXXXX. The first part is your base ID and the second part is your table name. From here,appXXXXis the base ID andtblXXXXis the table ID.
Create forwarding configuration
You will need to create forwarding config to a public destination here https://my.webhookrelay.com/new-public-destination. The URL will be https://api.airtable.com/v0/appXXXX/tblXXXX.
🚨 Don't just copy/paste the URL from the browser! they are not the same as your browser uses
https://airtable.com/appXXXX/tblXXXX/viwtXXXXbut we need to send webhooks tohttps://api.airtable.com/v0/appXXXX/tblXXXX🚨

Don't try to send requests to this yet as we will need to set up an Airtable webhook integration first.
Setup Airtable webhook integration
Next step is to transform the incoming HTML form request into a webhook that will add or create a new record in your Airtable table:
- Go to the Functions page
- Create a new function and copy paste the code into the composer:
local json = require("json")
local time = require("time")

if r.RequestMethod == "POST" then
    -- Only POST requests allowed
else
    r:StopForwarding()
    return
end

-- Taking fields from the HTML form and
-- using them to prepare Airtable webhook
local encoded_payload = {
  records={
      {
          fields= {
          Email= r.RequestFormData.email[1],
          Name = r.RequestFormData.name[1],
          Added= time.format(time.unix(), "2006-01-02", "UTC") ,
          Message = r.RequestFormData.message[1],
      }
      }

  }
}

-- Encoding payload to JSON
local encoded_payload, err = json.encode(encoded_payload)
if err then error(err) end

r:SetRequestHeader("Authorization", "Bearer " .. cfg:GetValue("SECRET_API_TOKEN"))
r:SetRequestHeader("Content-Type", "application/json")
r:SetRequestBody(encoded_payload)
r:SetRequestMethod("POST")
Once added:
- Get your personal access token from here https://airtable.com/create/tokens. Give it a name and ensure it has
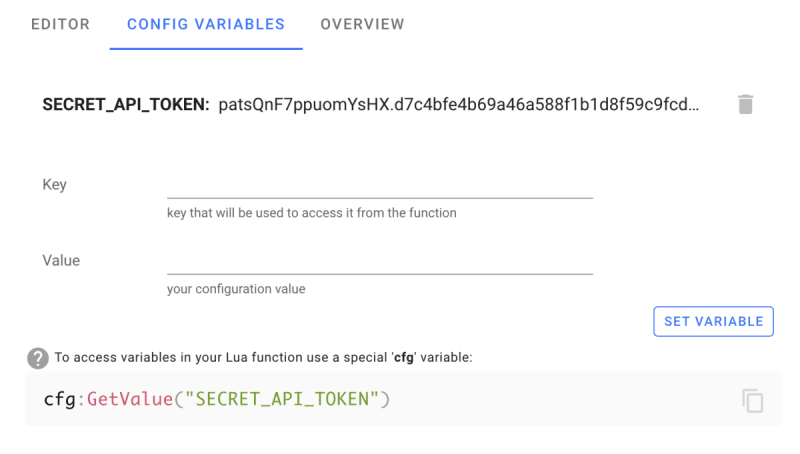
data.records:writescope and set Access to the base you want to add records to. - Open
CONFIG VARIABLEStab of the function and create a new variableSECRET_API_TOKENwith the value of your personal access token:
Setting up HTML form
We will use a simple HTML script. Replace the https://XXXXXX.hooks.webhookrelay.com URL with your own Webhook Relay input endpoint. You can find it in the Bucket details:
<iframe name="form-i" style="display:none;"></iframe>
<!-- Forwarding to Webhook Relay which transforms requests and adds it to the Airtable as a new row -->
<form action="https://XXXXXX.hooks.webhookrelay.com" method="post" target="form-i">
  <div>
    <label for="name">Name:</label>
    <input type="text" id="name" name="name" required>
  </div>
  <div>
    <label for="email">Email:</label>
    <input type="email" id="email" name="email" required>
  </div>

  <div>
    <label for="message">Message: </label>
    <br>
<textarea name="message" id="message" rows="10" cols="40">
</textarea>
  </div>
  <input type="submit" value="Submit">
</form>
I have made a simple CodePen example here https://codepen.io/defiant77/pen/gOQeRMm which you can open and edit the webhooks URL with the one from your bucket.

Testing it out
Fill in the form and click submit. In your Airtable you should be able to see the new record. If you can't, check out webhook logs in Webhook Relay's bucket details.
Troubleshooting
There are very few moving parts here but if something doesn't work, things to check:
- Form
actionURL is pointing at the bucket that you have created. - Function is attached to the output. It's required to have it as it needs to do the transformation.
- The destination URL should be pointing at the correct base ID and table ID in Airtable.
- Personal access token needs to have permissions to write (
data.records:write) and access is allowed to the base that you are working with.
That's it! 😃 You can also make a very similar integration for Google Sheets as the process is the same - using webhook as an API call.
Originally posted on Webhook Relay blog:
https://webhookrelay.com/blog/2023/08/07/airtable-integrations/

Top comments (0)