Introduction
Netlify is a fantastic choice for hosting JAMstack websites as all sites on Netlify are prebuilt for performance and deployed directly to Netlify Edge, which works similarly to a CDN but with extra functionality. JAMstack websites are often misrepresented because it’s often claimed they are not dynamic, hard to update and cannot support a CMS but that’s simply not true.
What is JAMstack?
JAMstack is a term coined by Mathias Biilmann (founder of Netlify), which stands for JavaScript, APIs, and Markup. JAMstack offers better performance, higher security and lower cost because the user is served static files. There are a number of familiar frameworks you can use to build JAMstack websites: Vue, Nuxt, Gridsome, React, Next, Gatsby and 11ty to name a few.
What is Netlify?
Neflify offers a web hosting infrastructure and automation technology at an affordable price — In fact Netlify offers a free plan with 300 build minutes/month, perfect for hosting JAMstack websites.
Getting started
NOTE: From this point onwards will I assume you have a JAMstack website in Github and will walk you through the transferable steps.
To get started with Netlify, we’re going to create a new site from Git:

In our case we’ll be creating a new site from Github. From here we’ll be able to pick our chosen Github repository:

Upon choosing a repo you will be able to configure your deployment settings. From the settings you can specify the build command that Netlify runs when the repo is updated, as well as the build output directory. For example, in a Nuxt project (assuming you have used the default settings), you would set the build command to:
npm run generate
and the publish directory to: dist
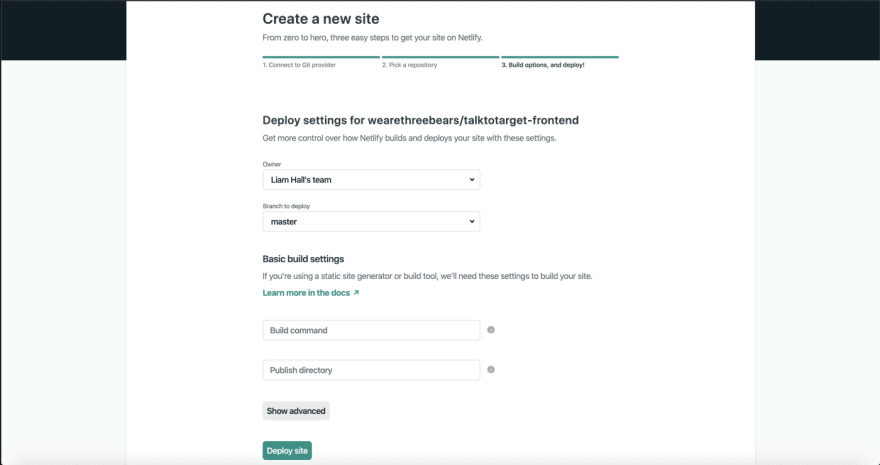
On clicking Deploy site, if your settings are correct, Netlify will build your site — Giving you a personal Neflify URL:

Netlify is now set up to build the website from your Git repository, every time you push to your chosen branch, Netlify will rebuild your JAMstack website.
So this is great — But what if we have a website driven via a CMS? It’s not practical to log into Netlify or to push a change to Git every time we want to rebuild with up to date content. Thankfully Netlify offers Build hooks.
What are Build hooks?
Build hooks in Netlify allow us to set up an a unique end point to trigger a deployment build.
Setting up a build hook
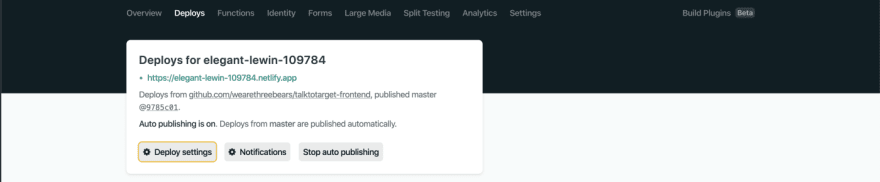
Setting up a build hook in Netlify is really simple — Begin by clicking Deploy Settings from the Deploys dashboard:
Scroll down to the Build hooks section:

Create a new build hook by giving it a name and select your chosen branch — Usually master.

Save the Build hook configuration and take note of the unique URL:

So now we have a build hook set up, what exactly do we do with it? One option would be to use Web hooks.
What are Web hooks?
Web hooks are a means of delivering data to other applications as it happens, meaning you get data immediately. We could use Web hooks to perform a POST request to our Netlify every time some data is created, updated or deleted within our CMS.
The issue with Web hooks is that if data is changing all the time we are constantly hitting our build hook and racking up a lot of build time minutes which could take us beyond our threshold. This is where we can take advantage of Github actions to automate our JAMstack builds.
What are Github actions?
GitHub Actions help you automate your software development workflows in the same place you store code.
To view Github actions from your repository click actions:

Creating a Github action to Trigger Netlify builds
To create a Github action to trigger Netlify builds you’ll need to create a new file in your local directory: .github/workflows/main.yml
Within main.yml you’ll need to add the following code:
# .github/workflows/main.yml

name: Trigger Netlify Build
on:
  schedule:
    # Every 20 minutes
    - cron: '0-59/20 * * * *'
jobs:
  build:
    name: Netlify build
    runs-on: ubuntu-latest
    steps:
      - name: Curl request
        run: curl -X POST -d {} NETLIFY_BUILD_HOOK_URL
To suit your needs you’ll need to replace NETLIFY_BUILD_HOOK_URL with your Netlify build hook URL that you generated earlier. The example will run every 20 minutes, if you’d like to run your build at shorter or longer intervals you’ll need to update the - cron value. A fantastic tool for cron schedule expressions is https://crontab.guru/.
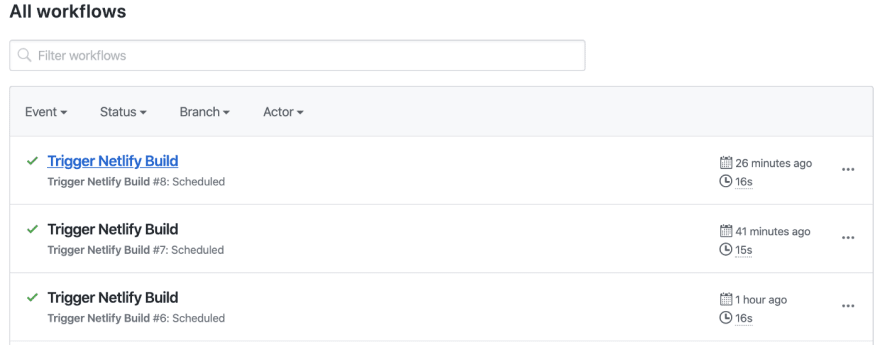
Once you’ve configured your main.yml create a new commit and push to origin master. Your Github actions will now appear in the actions tab, triggering your Netlify build hooks at the configured intervals:
Conclusion
I’m a big fan of the JAMstack and in my opinion Github actions are a great way to schedule builds at given intervals, reducing the demand for manual deployments and reducing the burden of web hook triggered builds.
If you’ve found this article useful, please follow me here, on Medium and Twitter.

Oldest comments (0)