
There are numerous materials comparing tools like Terraform vs Ansible. However, today is not about comparing them. Today is the day when we effectively combine these powerful utilities in AWS Cloud Realm!
Table of Contents

Introduction
Hey Folks! Today, we're diving into a powerful trio for AWS infrastructure automation: Terraform, Ansible, and AWS Systems Manager (SSM). If you've ever managed cloud infrastructure, you know the challenges of provisioning, configuring, and maintaining resources efficiently.
Originally, Ansible leverages SSH connections for configuration management. While this works well, handling SSH keys and passwords for EC2 instances can be cumbersome and pose security risks. Enter AWS Systems Manager (SSM), a game-changer that simplifies and secures the management of your instances. SSM Session Manager allows you to access your EC2 instances without needing SSH, making the process smoother and more secure.
We'll start by setting up Terraform to provision our infrastructure. Then, we'll use Ansible, leveraging SSM sessions, to handle configuration tasks. This includes patching our EC2 instances, installing necessary tools, and even managing application installations—all done idempotently.
Prerequisites
We'll need a few tools and setups. You can find the entire codebase for this project on GitHub.
Terraform: The cornerstone of our infrastructure provisioning. You can install Terraform from the official site. Install Terraform.
AWS CLI: Necessary for interacting with AWS services. Install AWS CLI and configure it with your AWS credentials.
Ansible: Alongside with the king of CaC - we will use Ansible's SSM plugin for secure and efficient management of our EC2 instances. You can find more about the plugin and installation instructions here.
AWS SSM Plugin: This plugin allows us (and Ansible plugin) to connect to EC2 instances using SSM sessions, avoiding the need for SSH authorization. Download and install the AWS SSM session manager plugin from the official AWS documentation.
Docker Quickstart
For a seamless setup, you can use the Docker image built from the Dockerfile provided in the GitHub repository. This image contains all necessary tools and configurations, allowing you to start without individual installations.
Docker: You can install Docker from the official site. Install Docker.
Review
The backend.sh script in our project initializes the backend for Terraform. It sets up an S3 bucket to store the Terraform state files and a DynamoDB table to manage state locking and consistency. This ensures that our infrastructure state is safely stored and prevents simultaneous operations that could corrupt the state.
The s3.tf file sets up an S3 bucket for storing files related to our project, such as Ansible playbooks and configuration files. This bucket is essential as it provides a centralized location for these artifacts, which can be accessed by our EC2 instances during their configuration process. The AWS SSM plugin manages the transfer of these files seamlessly in the background, ensuring that all necessary files are available to the instances without manual intervention.
resource "aws_s3_bucket" "main" {
  bucket = "ansible-bucket-4-demo"

  tags = merge({
    Name = "ansible-bucket-4-demo",
  }, local.default_tags)
}
It’s important to ensure that the bucket name is unique across all of AWS.
The main.tf file contains the configuration for our AWS EC2 instances and all the supplementary resources. It defines the necessary AWS resources, such as subnets, AMIs, IAM roles, security groups, and the EC2 instance itself. Notably, it uses the existing default subnet, an Ubuntu 22.04 image, and a simple security group setup - for demo purposes.
The ansible.tf file integrates Ansible with our Terraform setup. It uses Terraform's local-exec provisioner to run Ansible playbooks for configuring the EC2 instances. This setup allows us to automate the configuration and management of instances using Ansible, leveraging SSM sessions for secure and seamless connections.
resource "time_sleep" "wait_60_seconds" {
  depends_on      = [aws_instance.main]
  create_duration = var.revision == 1 ? "60s" : "0s"
}

resource "null_resource" "ansible_os_patch" {
  depends_on = [time_sleep.wait_60_seconds]

  provisioner "local-exec" {
    command = "ansible-playbook ${path.root}/playbooks/os_patch.yaml"

    environment = {
      SSM_BUCKET_NAME = aws_s3_bucket.main.id
      SSM_INSTANCE_ID = aws_instance.main.id
    }
  }

  triggers = {
    playbook_update = filesha256("${path.root}/playbooks/os_patch.yaml")
    ssm_instance_id = aws_instance.main.id
    revision        = var.revision
  }
}

resource "null_resource" "ansible_app_install" {
  depends_on = [
    time_sleep.wait_60_seconds,
    null_resource.ansible_os_patch
  ]

  provisioner "local-exec" {
    command = "ansible-playbook ${path.root}/playbooks/app_install.yaml"

    environment = {
      SSM_BUCKET_NAME = aws_s3_bucket.main.id
      SSM_INSTANCE_ID = aws_instance.main.id
    }
  }

  triggers = {
    playbook_update = filesha256("${path.root}/playbooks/app_install.yaml")
    ssm_instance_id = aws_instance.main.id
    revision        = var.revision
  }
}
The time_sleep resource ensures a delay before provisioning starts, with the duration dependent on the revision variable. This is crucial for the first launch when we need to wait for initial status checks and instance start, and also additional adjustments might be needed. The null_resource triggers ensure that changes in the playbook or instance ID trigger a re-run of the playbooks, maintaining idempotency.
And ofc Playbooks to be used by terraform local-exec, already adjusted to leverage ssm for connection: ansible_connection: community.aws.aws_ssm
Quickstart
In this section, we'll build our Docker image and mount the current directory to interactively go through the process. Follow these steps after cloning the repository:
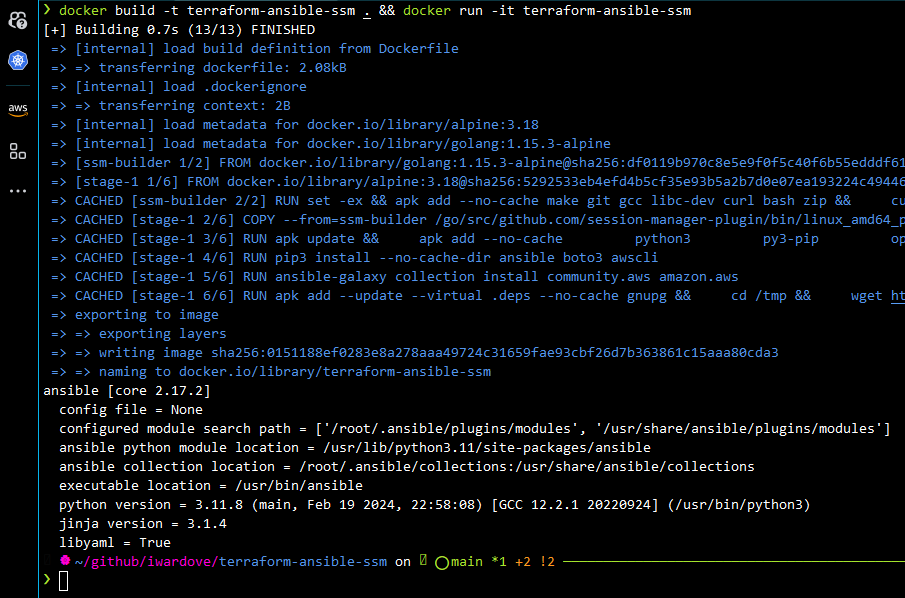
- Build and verify the Docker Image: ```sh
cd terraform-ansible-ssm
docker build -t terraform-ansible-ssm . && docker run -it terraform-ansible-ssm
- **Run and attach the Docker Container**:
```sh
docker run --rm -it -v $PWD:/app terraform-ansible-ssm /bin/sh
cd /app
- Configure AWS CLI: Configure the AWS CLI by setting up a default profile or exporting environment variables: ```sh
aws configure
#Alternatively, export the necessary environment variables:
export AWS_REGION=
export AWS_ACCESS_KEY_ID=
export AWS_SECRET_ACCESS_KEY=
For more details, refer to the [AWS CLI configuration documentation](https://docs.aws.amazon.com/cli/latest/userguide/cli-configure-quickstart.html).

- **Initialize Terraform Backend & Validate & plan**:
   Run the `backend.sh` script to set up the Terraform backend, add a randomizer string to make the state bucket name unique:
   ```sh


   RANDOM_STRING=<your-random-string> ./backend.sh
The backend.sh script will populate the backend configuration in backend.tf. Initialize Terraform with the following command:
terraform init && terraform validate && terraform plan

- It's the terraform apply moment! ```sh
terraform apply

- **Verify the Provisioned EC2 Instance**:
After applying the configuration, grab the output to check your freshly provisioned EC2 instance with all installed dependencies and applications. For example:
```sh
Instance_public_dns = "ec2-18-191-254-165.us-east-2.compute.amazonaws.com"
Boom and it works!

Building a CI/CD Pipeline
To set up a CI/CD pipeline (or name it Continuous Provisioning pipeline 😎) using GitHub Actions, we'll create a workflow that builds our Docker image, runs Terraform, and applies our infrastructure changes automatically.
Tagging and Pushing Docker Image
First we will make sure to tag and push the Docker image to a public repository, as we will use our image as the runtime for our pipeline:
docker tag terraform-ansible-ssm wardove/terraform-ansible-ssm

docker push wardove/terraform-ansible-ssm
Workflow Configuration
We have a workflow file in the repository at .github/workflows/main.yml with the following content:
name: Terraform CI/CD
run-name: "Terraform CI/CD | triggered by @${{ github.actor }}"
on:
push:
branches:
- 'main'
jobs:
terraform-apply:
runs-on: ubuntu-latest
container:
image: wardove/terraform-ansible-ssm:latest
env:
AWS_ACCESS_KEY_ID: ${{ secrets.AWS_ACCESS_KEY_ID }}
AWS_SECRET_ACCESS_KEY: ${{ secrets.AWS_SECRET_ACCESS_KEY }}
AWS_REGION: us-east-2
<span class="na">steps</span><span class="pi">:</span>
<span class="pi">-</span> <span class="na">uses</span><span class="pi">:</span> <span class="s">actions/checkout@v4</span>
<span class="pi">-</span> <span class="na">name</span><span class="pi">:</span> <span class="s">Terraform Init</span>
<span class="na">run</span><span class="pi">:</span> <span class="s">terraform init</span>
<span class="pi">-</span> <span class="na">name</span><span class="pi">:</span> <span class="s">Terraform Validate</span>
<span class="na">run</span><span class="pi">:</span> <span class="s">terraform validate</span>
<span class="pi">-</span> <span class="na">name</span><span class="pi">:</span> <span class="s">Terraform Apply</span>
<span class="na">run</span><span class="pi">:</span> <span class="s">terraform apply -auto-approve</span>
Adding Secrets to GitHub
To allow GitHub Actions to interact with your AWS environment, you'll need to add your AWS credentials to GitHub secrets:
- Go to your repository on GitHub.
- Navigate to
Settings->Secrets->New repository secret. - Add the following secrets:
-
AWS_ACCESS_KEY_ID: Your AWS access key ID. -
AWS_SECRET_ACCESS_KEY: Your AWS secret access key.
-
Note: There are more secure alternatives which provide access to GHA, so consider this approach only for demo purposes! and ofc we would do PRs instead of direct pushes on prod 😋
Once everything is in place, we commit and push the changes to the main branch of your repository. This will trigger the GitHub Actions workflow, which will run the Terraform scripts to apply our infrastructure changes!

And success again! But no infrastructure changes yet 🤓
There is also an alternative approach (without ansible plugin usage) with SSM Run-command and aws-cli to leverage Ansible with SSM, a flow that is very professionally described in this AWS Blog by Andres Silva.
Farewell 😊

We’ve journeyed through an effective method of AWS infrastructure automation using Terraform, Ansible, and AWS Systems Manager. By integrating these powerful tools, we've simplified and automated the management of cloud resources. Thank you for following along with this article. I hope it has provided you with valuable insights and serves as a useful reference for your future projects. Keep exploring, keep learning, and continue refining your cloud automation practices!


Top comments (0)