Features & Benefits
- Free Hosting on Github.io
- Hosted on username.github.io subdomain
- Jekyll gives you the speed and simplicity of hosting your home or your application page.
- Configurable with themes
Requirements
- Github account
- Ruby 2.6.*, Ruby Devkit
- Git
- VSCode or any other preferred editor
- GCC, G++ and Make
- Chocolately for simpler installation of required components
Github Setup
Creating a github account
- Goto to the Github sign up page and create an account with your preferred username. The username you choose here will be the subdomain on which your site will be hosted.
- Now that you have created an account and setup your profile (not required) you are ready to create repositories on that account.
- Create a repository in your newly created account with the name username.github.io. Do not initiate the repository with a readme yet.
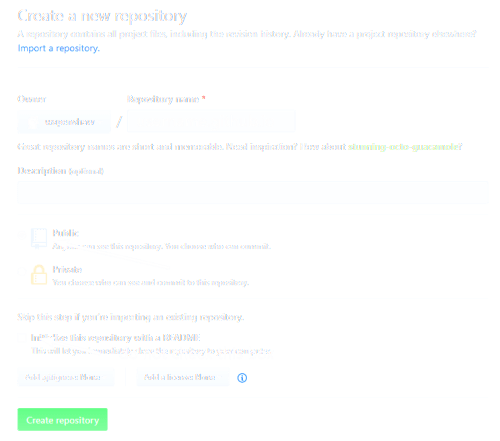
You are done on Github for now. We will get back after setting up our local environment.
(Note: You cannot publish your github pages if you set the repository to "Private". To use GitHub pages on a private repository, you need the PRO plan. If you have bought a jekyll theme, you might be required to make the repository private, check with your vendor.)
Ruby Setup
Installing Ruby
- Download and install using the Ruby Installer available Here, As of writing this guide Ruby 2.6.x is the preferred version as 2.7.x has compatibility issues with some gems that are needed to be installed via bundle. Make sure you download the installer named Ruby+Devkit 2.6.x
  - You can also do this via [Chocolatey](https://chocolatey.org/) using these commands
  - `choco install ruby --version=2.6.5.1`
  - `choco install ruby.devkit`
- Or Follow the Jekyll Docs to complete the installation of basic environment (
Ruby,RubyGemsandBundler). - Install GCC, G++ and Make, just use the default settings.
- Even better get Chocolately to install them with
choco install makechoco install mingw
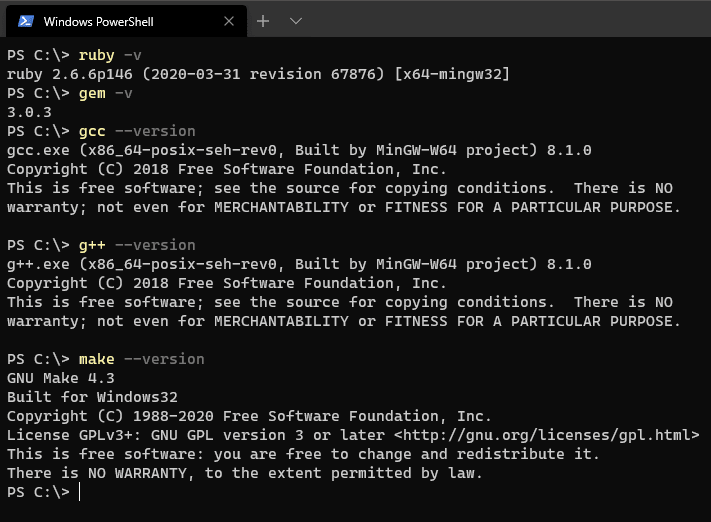
4) To verify everything has been installed and setup properly use the following commands\
ruby -v | gem -v | gcc --version | g++ --version | make --version
5) If everything went according to plan, your terminal should look like this
Git Setup
Installation
- Download Git installer and start the git installer.
- Use the default settings unless you specifically want something to be different.
- Adjusting your PATH environment, keep the default, "Use Git from the command line and also from 3rd-party software". This option will allow you to use Git from either Git Bash or the Windows Command Prompt / Powershell.
- Once you have finished installation, open a CMD(Command Promt)/PS(Powershell) window. Type in
git --versionto verify - If you prefer the bash terminal, your start menu should have a Git Bash entry in it.
Configuration
- Now to configure the installed instance of git with your Github Account.
- In PS/CMD/Bash shell type in
git config --global user.username "<your name>"git config --global user.email "<your e-mail>"- (username = the account you created & email = email associated with that account)
- We are done for now.
Jekyll Setup
Installation
For a comprehensive guide on how to start a jekyll site from scratch follow the directions on the Jekyll Website - Installation
- For this guide we are gonna do a bit of cheating to get setup as quickly as possible.
- Open up a shell, and type in
gem install jekyll bundler - Check installation by typing in
jekyll -v
Configuration and Setup
- We will start with a theme of your choice which you can download at:
- Select a Theme which you like to use. For example for this site I have chosen the Chirpy Theme. Make sure you have the layout and page structure the way you want it.
- Once you have selected your theme, either download the zip file or save the github repository URL.
- Open up a shell again and naviage to the path where you want to create a folder for your new website
- If using windows explorer, create a folder and extract all the files from your theme file into that folder, make sure the GEMFILE file in the path foldername
- If using a shell, Create a folder with
mkdir foldername - Change Directory to the newly created folder
cd foldername - If you havent extracted the files, you can check out the file from the github repo, this is preferred.
- Remember the theme's github repository url? Now is the time to use it.
- Clone the repository to your foldername using
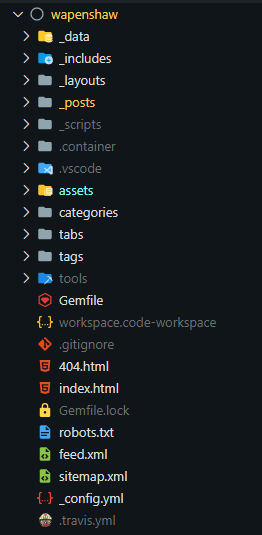
git clone repository-URL-you-just-copied.git -b master - Now your foldername should look something similar to this
Setting up remote git repo
- Go back to the shell you were using, make sure its currently in foldername/
- Initialilze git in that folder with\
git init\ This will initialize your foldername/ as a git repository - In your browser go to your git hub repository and copy the URL of YOUR REPOSITORY. When you created the repository in your account. It should look like this\
https://github.com/username/username.github.io.git - Add this URL as a remote\
git remote add origin https://github.com/username/username.github.io.git - Your Git repository is set for now and the remote is configured so when you commit the files and push, they will be added to your repository.
Jekyll Final Steps
- Back to the shell you were using, time to install everything needed for your jekyll website.
- Type in
bundle installwhen you are in foldername/ - This will automatically install all the Jekyll plugins and dependencies that are listed in the Gemfile.
- If you are using Ruby 2.6.x you shouldn't get any errors. If there are dependeny errors, check the version numbers and install the needed ones.
- Now open the _config.yml file and modify the settings according to your needs, the important ones are:
-
url: 'https://username.github.io'(if you are hosting it to the username.github.io repository) -
baseurl: ''(not required for this instance)
-
- Type in
bundle exec jekyll serveThis will launch a webserver and host your website locally at http://127.0.0.1:4000/
Commiting and pushing everything to Github
- After you have made all the changes in the configuration and other pages, it is now time to push all the files to Github
- Check git status, this will show you which files are unstaged:
git status - Add all files to staging:
git add . - Commit the files to the branch:
git commit -m Initial Commit - Push the commit to the remote repository (github repo)
git push origin master - Now visit your github repository page at https://github.com/username/username.github.io and verify the files are uploaded
- Wait a minute or two and visit https://username.github.io and the pages will appear!
Maintenance
When you make changes to your website from now these are the steps to follow,
- check everything is working fine with:
bundle exec jekyll serveand visitinghttp://127.0.0.1:4000/ - Add all changed files to staging with:
git add . - Commit changes to the branch:
git commit -m "my commit message" - Push the commit to the remote (github) repository with:
git push origin master

Top comments (2)
Hi there,
I really like Chirpy theme and this is my first time trying Github Pages.
I follow your guide. But when I copy the source code to my folder, I deleted the .github folder.
I successfully run it locally, push it to my new username.github.io project. When I navigate to lisathetechnologue.github.io/, there is nothing.
Did I miss something? Please help. Thanks.
@jolisa did you set up github pages properly on the github repository?
what do you see in the settings page? for example for my website it looks like this
dev-to-uploads.s3.amazonaws.com/i/...