
When it comes to managing SMS messages with the Vonage Messaging API, receiving inbound SMS messages is paramount. In this tutorial, we’re going to explore receiving SMS messages into our app and pushing them out to our front end in real-time using Blazor and SignalR Core.
Jump Right to the Code
If you just want to jump right to the code, just visit this demo’s repository in GitHub.
Prerequisites
- You’ll need a Vonage API account. You can sign up here
- You’ll need the latest version of the .NET Core 3.1 SDK
- You’ll need either Visual Studio 2019, Visual Studio for Mac, or Visual Studio Code, I will be using VS Code for this demo
Vonage API Account
To complete this tutorial, you will need a Vonage API account. If you don’t have one already, you can sign up today and start building with free credit. Once you have an account, you can find your API Key and API Secret at the top of the Vonage API Dashboard.
Create the App
Navigate to a directory where you want to put the project folder and run the following command in your terminal.
dotnet new blazorserver -o ReceiveSmsBlazor
After that’s done, cd into the ReceiveSmsBlazor folder that we created and run code . to launch VS Code. Alternatively, you can open the ReceiveSmsBlazor.csproj file in Visual Studio.
Install NuGet Packages
There are two NuGet Packages that we are going to need for this demo.
Go back to your console and run:
dotnet add package Microsoft.AspNetCore.SignalR.Client
dotnet add package Nexmo.Csharp.Client
Create the SMS Hub
SignalR disperses all messages through central “Hubs.” A hub will notify all clients connected to it when a particular event occurs; in this case, the events we are going to be receiving are inbound SMS messages.
Create a folder called Hubs. In that folder, create a file called SmsHub.cs and import SignalR with using Microsoft.AspNetCore.SignalR; within it. Then, create a SmsHub class within the ReceiveSmsBlazor.Hubs namespace like so:
namespace ReceiveSmsBlazor.Hubs{ public class SmsHub : Hub { }}
You don’t need to add any code in here; we’ll be driving this from outside of this class, it just needs to be here so that we can talk to all the clients of the Hub.
Build our Controller
We are going to need to create an API controller. This controller is where we are going to be receiving our inbound SMS webhooks from Vonage.
Create a new folder at the top level of our project called Controllers, and add a new file SmsController.cs to this folder.
Open up SmsController.cs and add the following using statements to it.
using Microsoft.AspNetCore.Mvc;
using Microsoft.AspNetCore.SignalR;
using Newtonsoft.Json;
using Nexmo.Api.Messaging;
using System.IO;
using System.Threading.Tasks;
using ReceiveSmsBlazor.Hubs;
Next, create a SmsController class in the ReceiveSmsBlazor.Controllers namespace extending Controller and annotate it with a Route to api/[controller] and an ApiController attribute like so:
namespace ReceiveSmsBlazor.Controllers
{
    [Route("api/[controller]")]
    [ApiController]
    public class SmsController : Controller
    {
    }
}
Inject the SmsHub Context
To access the SmsHub, we’ll dependency inject its context. Create an IHubContext<SmsHub> property called HubContext in your SmsController class, then add a constructor taking an IHubContex as an argument, and assign our HubContext property to that value.
IHubContext<SmsHub> HubContext { get; set; }
public SmsController(IHubContext<SmsHub> hubContext)
{
    HubContext = hubContext;
}
Add the Inbound SMS Webhook Action
Now that we have our Hub available, we just need to add a method to handle the inbound SMS and send it to our client.
Add a new async method called InboundSms that returns a Task<IActionResult>. In this method we are going to read the SMS in from the Request’s body, then we are going to send a message out to all of the clients connected to our SmsHub containing the inbound message’s Msisdn (the number the message originated from) and Text.
[HttpPost("[action]")]
public async Task<IActionResult> InboundSms()
{
    using (var reader = new StreamReader(Request.Body))
    {
        var json = await reader.ReadToEndAsync();
        var inbound = JsonConvert.DeserializeObject<InboundSms>(json);
        await HubContext.Clients.All.SendAsync("ReceiveMessage", inbound.Msisdn, inbound.Text);
    }
    return NoContent();
}
If you’ve been following along, the route will look like api/sms/inboundsms on our server when it launches. Keep this in mind for later because this is going to be where we are aiming our webhooks when we are configuring our webhooks.
Configure Middleware in Startup
Since we are using Controllers and SignalR, we need to make sure that we configure the middleware. Open up Startup.cs and add using Microsoft.AspNetCore.ResponseCompression; to the import section. Then drop into the ConfigureServices method and add the following.
services.AddSignalR();
services.AddResponseCompression(opts => {
    opts.MimeTypes = ResponseCompressionDefaults.MimeTypes
        .Concat(new []{"application/octet-stream"});
});
This snippet will add SignalR and response compression for SignalR to your application.
Add Controller and SmsHub
The next thing we need to do is to tell our application to use our controllers and our SmsHub. Drop into the Configure method in Startup.cs and add the line app.UseResponseCompression(); at the beginning of the method. Then, in the UseEndpoints delegate, add endpoints.MapControllers(); and endpoints.MapHub<Hubs.SmsHub>("/smshub");. When it’s all said and done your app.UseEndpoints should look something like this:
app.UseEndpoints(endpoints =>
{
    endpoints.MapControllers();
    endpoints.MapBlazorHub();
    endpoints.MapHub<Hubs.SmsHub>("/smshub");
    endpoints.MapFallbackToPage("/_Host");
});
Add a Frontend
Now that we have all the internal stuff working for handling the inbound SMS and we have all of our services and hubs stood up, the last thing we need to do is to create a frontend.
If you ran dotnet run in your console and opened the app on localhost:5001 you’d see the generic blazor starter page.
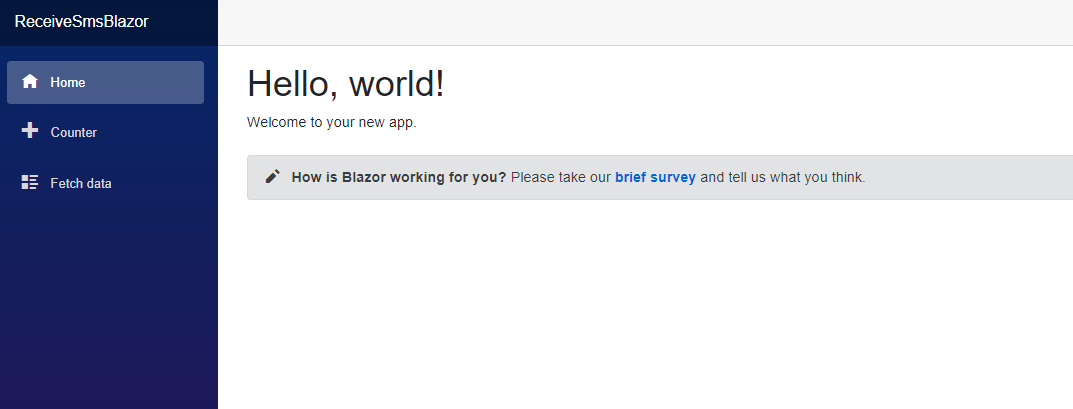
If you want to remove the navigation bar on the side just go into Shared/MinLayout.razor and remove the sidebar div.
Everything else we need to do is in Pages/index.razor so go ahead and open that file now.
Pull in Dependencies
Delete everything below line 2 in index.razor as it’s just generic hello world code. With that done, let’s import our SignalR client, inject a navigation manager, and declare that we will implement IDisposable to clean up the SignalR hub when it winds down.
@using Microsoft.AspNetCore.SignalR.Client
@inject NavigationManager NavigationManager
@implements IDisposable
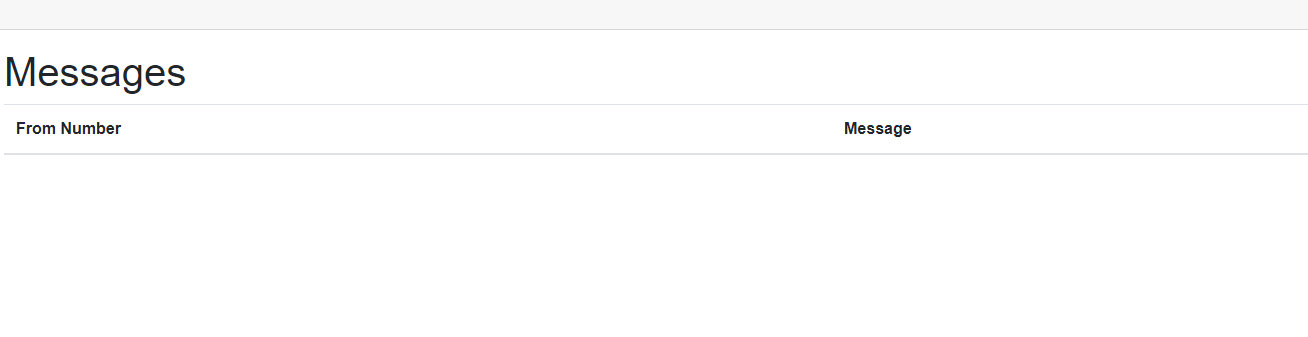
Add our Messages Table
We’re going to display inbound messages in a Table. Let’s go ahead and add a simple table into our index.razor file. Add the following razor code.
<h1>Messages</h1>

<table class="table" id="messageList">
    <thead>
        <tr>
            <th>From Number</th>
            <th>Message</th>
        </tr>
        @foreach (var message in _messages)
        {
            <tr>
                <td>@message.FromNumber</td>
                <td>@message.Text</td>
            </tr>
        }
    </thead>

</table>
The foreach will loop through our page’s _messages collection and create a new row with each message’s FromNumber and Text.
Handle Inbound Messages
Back in our controller, we used the call await HubContext.Clients.All.SendAsync("ReceiveMessage", inbound.Msisdn, inbound.Text); to send the inbound message’s Msisdn and Text down to all clients connected to the SMS hub. Now it’s time to connect to that Hub. I’m going to go ahead and show you the whole @code blob and then walk you through how each part operates.
@code {
    private HubConnection _hubConnection;
    private List<Message> _messages = new List<Message>();
    private class Message
    {
        public string FromNumber { get; set; }
        public string Text { get; set; }
    }
    protected override async Task OnInitializedAsync()
    {
        _hubConnection = new HubConnectionBuilder()
            .WithUrl(NavigationManager.ToAbsoluteUri("/SmsHub"))
            .Build();
        _hubConnection.On<string, string>("ReceiveMessage", (from, text) =>
        {
            var message = new Message { FromNumber = from, Text = text };
            _messages.Add(message);
            StateHasChanged();
        });
        await _hubConnection.StartAsync();
    }
    public bool IsConnected => _hubConnection.State == HubConnectionState.Connected;
    public void Dispose()
    {
        _ = _hubConnection.DisposeAsync();
    }
}
Declare Private Fields and Message Class
The following bit of code declares the private fields of the component. That _messages list is where we are going to be pulling messages.
private HubConnection _hubConnection;
private List<Message> _messages = new List<Message>();
private class Message
{
    public string FromNumber { get; set; }
    public string Text { get; set; }
}
OnInitializedAsync
We override the OnInitializedAsync method; this is the method that is invoked when the component is initialized. This method initializes the _hubConnection (the connection to our SmsHub). It then registers a handler for the ReceiveMessage callback that we are invoking with our SmsController. Thus whenever that event occurs, this method will fire, we’ll add the inbound message to our _messages collection, and then we’ll call the StateHasChanged function to tell the component that it needs to re-render, this will make our messages reload live. Lastly, we start _hubConnection.
Testing with Ngrok
Now that we have everything built, we can go ahead and get testing with ngrok. Ngrok allows us to create a tunnel to our server from our local machine. If you are using ngrok with IIS Express, I will encourage you to check our explainer on the subject as there are special considerations. For this demo, since we are using the dotnet CLI, we don’t need to worry about this. Open up your Properties/launchSettings.json file in the profiles object, the profile named after your app is going to be used when you startup. Check the applicationUrl; it will typically point to https://localhost:5001 and http://localhost:5000. Ensure that you delete the non-SSL one of these and then run the following command in another command prompt window.
ngrok http 5000
Replace 5000 with whatever port number your app is going to be running without SSL.
This command will build a tunnel to that port. You can now run your application by using the dotnet run command. Check back at your ngrok console; it will tell you the publicly accessible URL of your app.
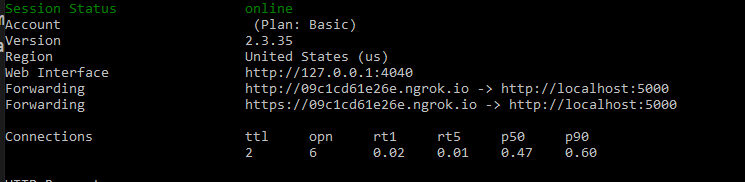
In my case, it’s pointing to http://09c1cd61e26e.ngrok.io/. By navigating to that URL, I can see my application’s frontend.
Configure your Webhooks
The route for inbound sms webhooks is /api/sms/inboundsms with our ngrok URL as the base path. This means that the full route is going to be something along the lines of http://09c1cd61e26e.ngrok.io/api/sms/inboundsms. All we need to do now is navigate to our settings page and set the inbound messages URL to our route, and set the HTTP method to POST-JSON. Click the Save Changes button at the bottom, and we’re good to go.

Test
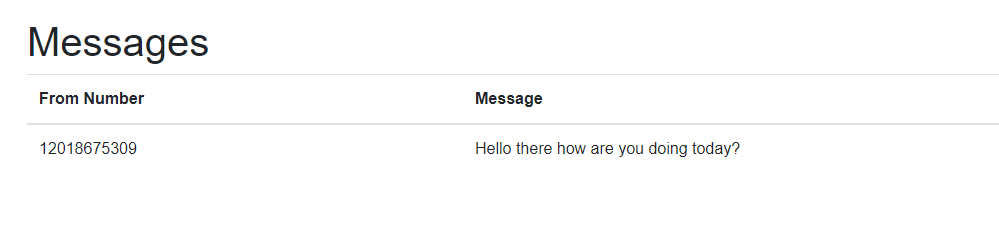
To test, all we need to do is send a text message to a Nexmo Number associated with this account. That can be found on the dashboard under numbers->Your Number.
It will look something like this after you receive a message.
Wrapping Up
That’s all that’s needed to allow us to watch SMS messages come into an app in real-time. It’s clear that by combining SignalR, Blazor, and the Vonage APIs, we can build some cool stuff!
Resources
- The code for this demo can be found in GitHub
- You can learn more about the Vonage APIs on our Developer Website
The post How to Receive an SMS With Blazor and SignalR appeared first on Vonage Developer Blog.


Top comments (0)