In this tutorial, we will build a Progressive Web App (PWA) that serves as a personal health blogging tool with live video chat functionality—allowing you to receive coaching directly on the app! PWAs are websites that have been enhanced to feel and function like native apps and boast many features that a traditional website doesn’t, such as:
- Installable on mobile devices
- Push notifications
- Offline support
- Discoverable from web search results and app stores
And you can update your app by directly editing your web server code.
So how do you get started?
Just about any traditional web app can be converted into a baseline PWA with the addition of a manifest.json file and a Service Worker JavaScript file. However, if you’re starting from scratch, several tools can streamline the process.
PWAs with Create React App vs. Preact CLI
Create React App (CRA) is a tool for creating PWAs that is incredibly popular amongst developers, especially given the sheer size of the React.js ecosystem. By default, every new CRA project is a PWA—amazing! However, a PWA should be as fast and performant as possible, and CRA doesn’t do much for code optimization.
This is why our demo is built using Preact.js, a lightweight and faster alternative to React, with the same built-in support for PWAs. Preact delivers on performance, size, efficiency, and compatibility in a big way. Notably, it’s only 3.5kb in size and is compatible with the React modules you would find on npm. Being able to write React/React DOM code without making changes to workflow or codebase also significantly limits any learning curve.
For more information on how the libraries differ and features unique to Preact, check out the Preact documentation.
The Preact CLI functions like Create React App and is just as easy to use. It gets you up and running instantly with a minimal and understandable project structure and puts your project on the path to excellent performance. New projects ship with only 4.5kB of JavaScript in production and become interactive in under 3s—even on slow devices and networks. Noteworthy features include:
- 100/100 Lighthouse score, right out of the box
- Fully automatic code-splitting for routes
- Differential JavaScript serving
- Auto-generated Service Workers for offline caching powered by sw-precache
- Support for CSS Modules, LESS, Sass, and Stylus with Autoprefixer
- Monitoring of your bundle/chunk sizes with built-in tracking
- Push Render Pre-Cache Lazy-load (PRPL) pattern support for efficient loading
More information regarding features may be found in the Preact CLI documentation.
Build a Health Coaching PWA using Preact CLI and Vonage Video API
The Use Case
Is becoming healthier one of your New Year’s resolutions? This application will help you track your progress by enabling you to blog about daily activity, diet, energy levels, mood and more using the Preact CLI Netlify CMS template. Share your app with any professionals you work with (personal trainer, nutritionist, therapist) and receive live video coaching directly from the platform with Vonage Video API.
In case you’ve fallen off track with your health goals, keeping a journal has been proven to help with accountability!
The steps:
- Install Preact CLI and Create Your Project
- Update Default Text and Styling
- Create a Vonage Video Project
- Add Custom Video Chat
- Deploy with Netlify
- Publish Posts with Netlify CMS
Prerequisites
Before getting started, you’ll need a couple of things:
- A Vonage Video API Account — create one for free if you haven’t already.
- Node and NPM installed on your development environment. This tutorial uses Node (> V6.x) and NPM 6. Check that they’re installed and up-to-date by running the following in your terminal:
node --version

npm --version
If needed, navigate to nodejs.org to install the correct version (> V6.x).
Want to skip to the end? You can find the code for this tutorial on GitHub.
Step 1: Install Preact CLI and Create Your Project
To set up the application, we’ll need to have the Preact CLI installed globally. Use the following command to install the CLI.
npm install -g preact-cli
Now, let’s create a new project using the netlify-cms template. This will provide a simple blog that will serve as the base of our application. Remember to replace my-project-name with what you would like to call the project.
preact create netlify my-project-name
Start the development server with the following command:
cd my-project-name && npm run dev
You’re all set! A new project has been created. Open your browser and go to http://localhost:8080 to check progress on the application as we continue with the tutorial.
Step 2: Update Default Text and Styling
The application we are building is a platform personal to you—and I encourage you to get creative and customize the design! If you’d like to quickly get started, for now, the demo has some basic text and styling implemented, and the code can be found on GitHub. To change the default text on the homepage, update the code in home/index.js. For styling changes, style/index.css, home/style.css, blog/styles.css, and contact/styles.css are good places to look.
Feel free to revisit this step and change up the styling as often as inspiration hits!
Step 3: Create a Vonage Video Project
In your Vonage Video API account, click the Projects menu and Create New Project. You will have the option to Create Embed Project or Create Custom Project. The Video Chat Embed is the easiest way to add basic video functionality quickly and involves no coding. However, it does not currently allow for mobile app integration (which is a crucial PWA feature) and advanced features such as archiving, screen sharing, and text chat.
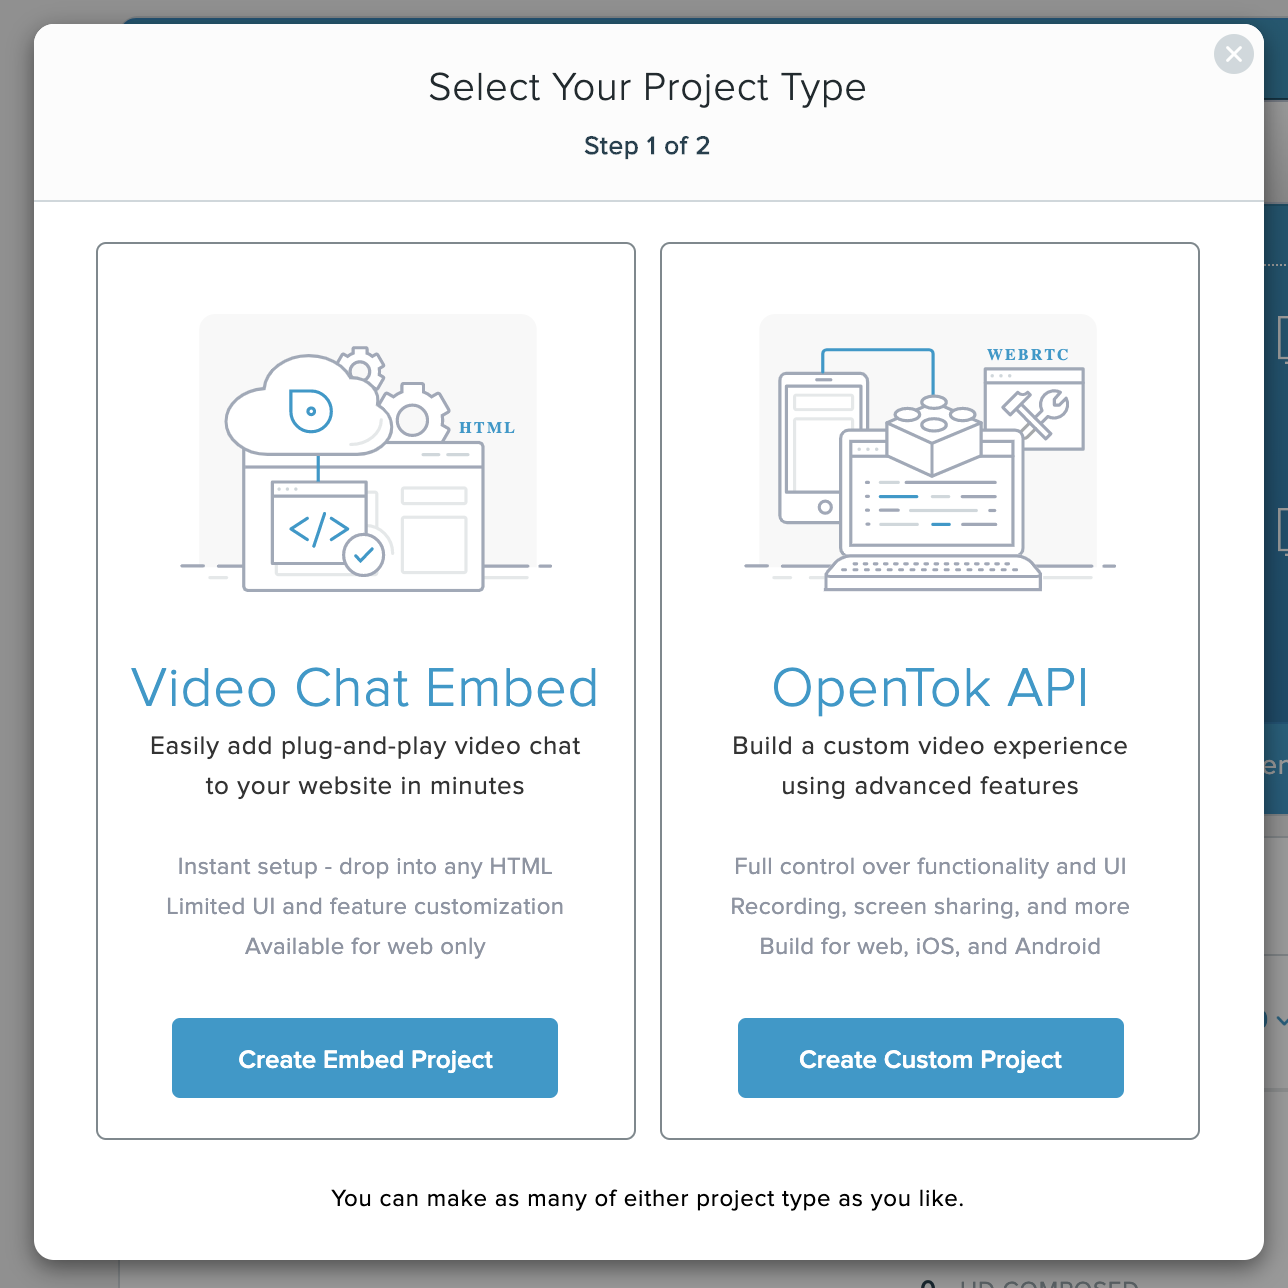
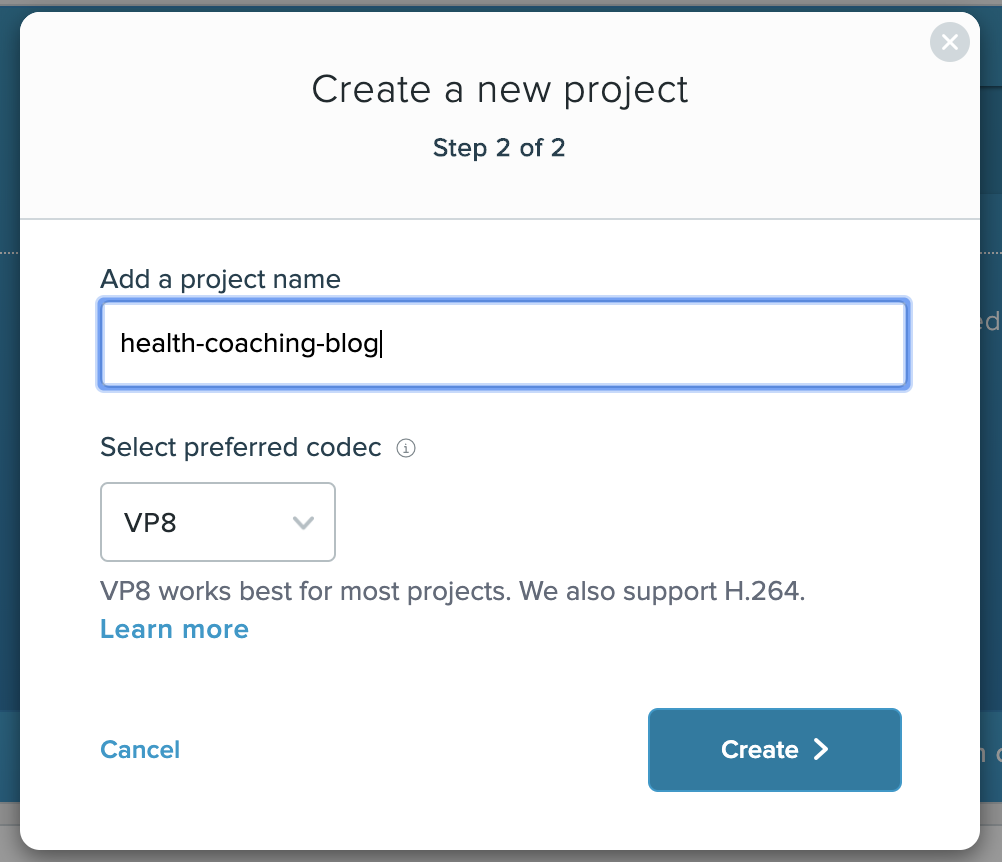
So, let’s proceed by clicking the Create Custom Project button. Give your new project a name and press the Create button. You can leave the preferred codec as ‘VP8’.
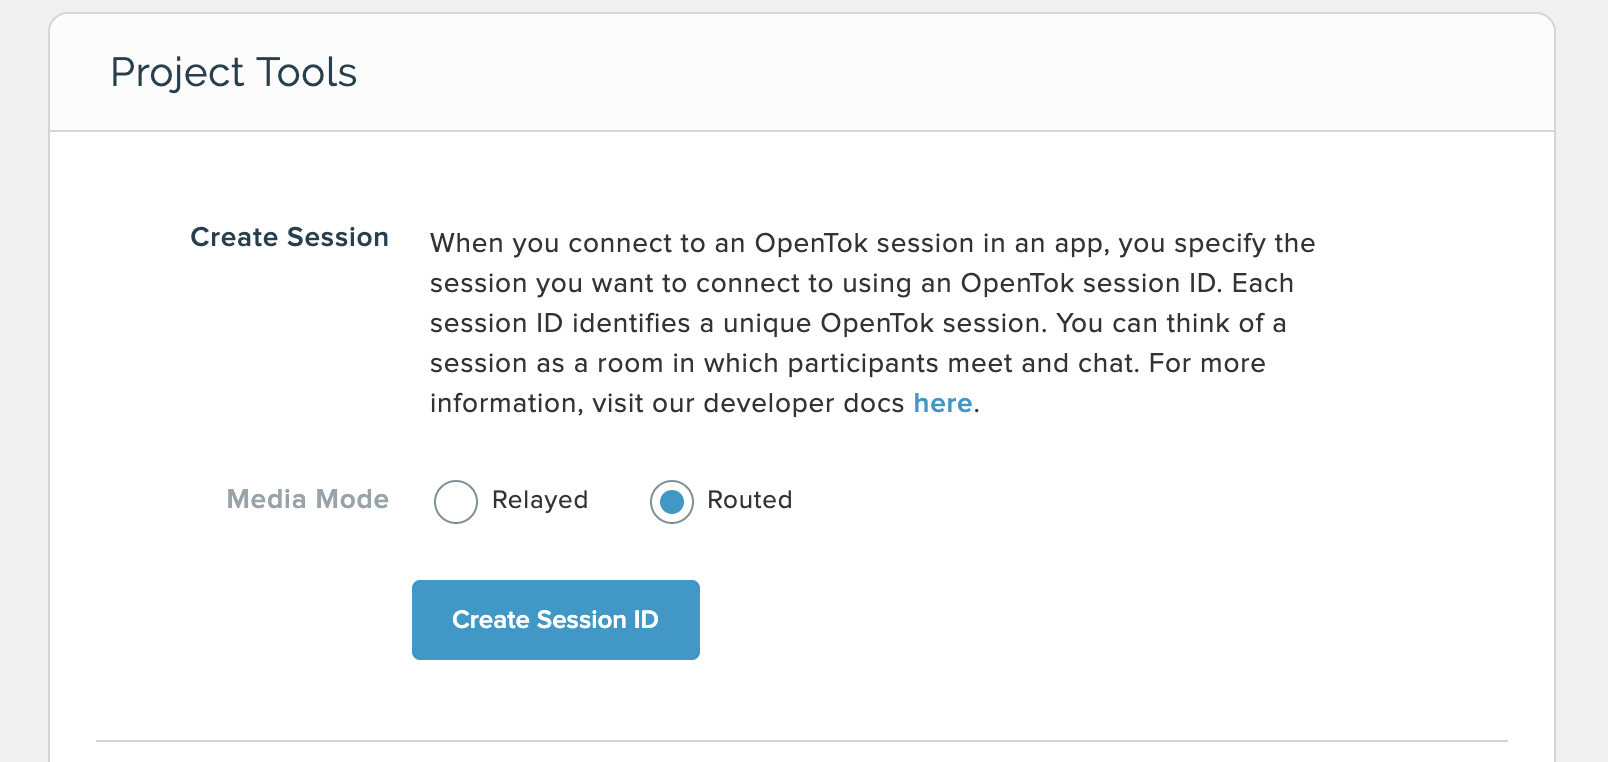
Next, click on View Project. At the bottom of the project detail page, you’ll find the Project Tools where you can create a Session ID and Token. Leave Routed as your session’s media mode and press the Create Session ID button.
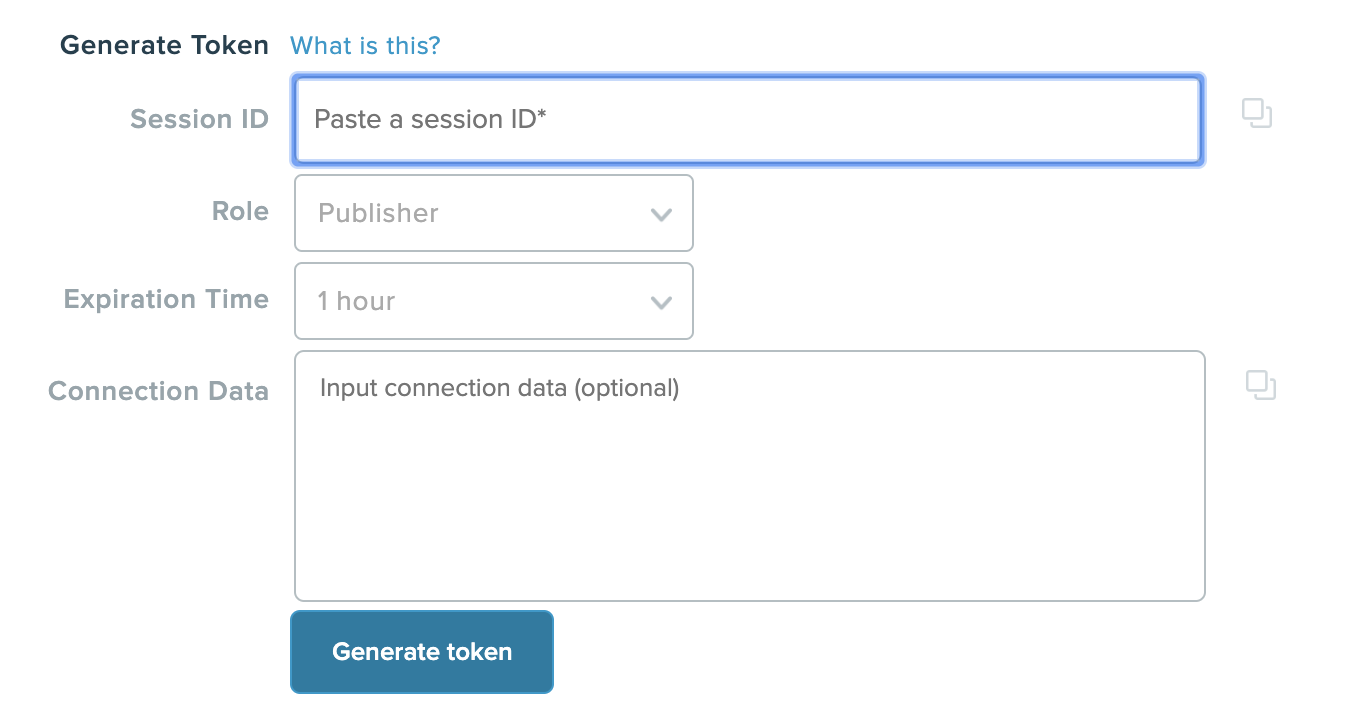
Lastly, paste the generated session ID into the Session ID field of the Generate Token form and press the Generate Token button.
Note: The default expiration time for the token is one hour. Feel free to prolong that for up to 30 days at a time.
We’re now all set to start building out the video component!
Step 4: Add Custom Video Chat
One of the benefits of Preact is its ability to be used in the browser, with no build tools needed. As JSX, the syntax commonly used in React apps needs to be transpiled, Preact uses an alternative called HTM. Instead of using a custom syntax, it relies on native tagged template strings which are already in JavaScript.
To help with readability, we will mostly use JSX in this tutorial. We can easily switch between JSX and HTM because of preact-compat— more on that later!
Create a Video Component
Inside the components folder, create a video folder to hold all the components we are about to add. The structure should look like this:
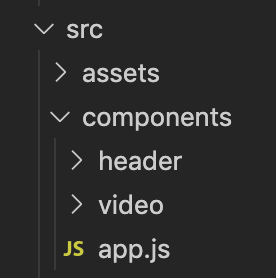
Now, add the following files to the video folder:
- video.js
- publisher.js
- subscriber.js
- checkbox.js
- connectionStatus.js
Go to src/routes/contact/index.js and import the Video component and call it within your return statement. This is where the video chat screen will be located in the app once we have built out the necessary components. The code should resemble this:
import { h } from 'preact';import { lazy, Suspense } from 'preact/compat';import style from './style';let Video;if (typeof window !== 'undefined') { Video = lazy(() => import('../../components/video/video.js'));}const photographs = (props) => { return ( <div class={style.pageContact}> <h1 class={style.pageTitle}>Hello.</h1> <p>Enable your audio and video to begin.</p> <div class={style.formWrapper}> <Suspense fallback={<div>loading...</div>}> <Video /> </Suspense> </div> </div> );};export default photographs;
Note: When the app is pre-rendering, our module as components are executed in a Node.js environment, where most Web APIs are not available. To account for this, we have wrapped the code in a check with:
if (typeof window !== ‘undefined’). Neglecting this step will cause the deploy process to inevitably fail.
Install OpenTok
In your terminal, run:
npm install opentok-react
You may be wondering if that command has a typo in it. Shouldn’t that read opentok-preact? Interestingly enough, no!
The Preact CLI includes preact-compat, which is a thin layer over Preact that works to achieve 100% compatibility with React. preact/compat adds around 2kb to our bundle size, but has the advantage of supporting the large majority of existing React modules you may find on npm. This also lets us continue writing React/ReactDOM code without any changes to workflow or codebase.
Build the Video Component
Copy and insert the values for your API Key, Session ID and Token to the video.js component. These are the values we generated in our Vonage Video API account in Step 2.
The session is essentially a room where the video chat will occur. It starts as unoccupied and listens for users to join.
import { h, Component } from 'preact';import { OTSession, OTStreams, preloadScript } from 'opentok-react';import ConnectionStatus from './connectionStatus';import Publisher from './publisher';import Subscriber from './subscriber';class VideoComponent extends Component { constructor(props) { super(props); this.state = { error: null, connected: false }; this.sessionEvents = { sessionConnected: () => { this.setState({ connected: true }); }, sessionDisconnected: () => { this.setState({ connected: false }); } }; } onError = (err) => { this.setState({ error: `Failed to connect: ${err.message}` }); } render() { return ( <OTSession apiKey='' sessionId='' token='' eventHandlers={this.sessionEvents} onError={this.onError} > {this.state.error ? <div id="error">{this.state.error}</div> : null} <ConnectionStatus connected={this.state.connected} /> <Publisher /> <OTStreams> <Subscriber /> </OTStreams> </OTSession> ); }}export default preloadScript(VideoComponent);
This component is responsible for displaying your video (if you’re first to join the session) with <Publisher />, your coach’s video with <Subscriber />, and whether you are connected in a session with <ConnectionStatus />.
Video Publishing Functionality
After the session has been established, the session ID and token are used to publish an audio-video stream from the first user. At this point, there is one participant in the session.
In publisher.js, insert:
import { h, Component } from 'preact';import { OTPublisher } from "opentok-react";import CheckBox from "./checkbox";class Publisher extends Component { constructor(props) { super(props); this.state = { error: null, audio: false, video: false, videoSource: "camera" }; } setAudio = audio => { this.setState({ audio }); }; setVideo = video => { this.setState({ video }); }; changeVideoSource = videoSource => { this.state.videoSource !== "camera" ? this.setState({ videoSource: "camera" }) : this.setState({ videoSource: "screen" }); }; onError = err => { this.setState({ error: `Failed to publish: ${err.message}` }); }; render() { return ( <div className="publisher"> {this.state.error ? <div id="error">{this.state.error}</div> : null} <OTPublisher properties={{ publishAudio: this.state.audio, publishVideo: this.state.video, videoSource: this.state.videoSource === "screen" ? "screen" : undefined }} onError={this.onError} /> <CheckBox label="Share Screen" checked={this.state.videoSource === "screen"} onChange={this.changeVideoSource} /> <CheckBox label="Enable Audio" checked={this.state.audio === "audio"} onChange={this.setAudio} /> <CheckBox label="Enable Video" checked={this.state.videoSource === "video"} onChange={this.setVideo} /> </div> ); }}export default Publisher;
Using the CheckBox component, we are allowing the user to share their screen or choose to enable audio and/or video.
Video Subscribing Functionality
When a new user launches the app, the app server will send the session ID and a unique token that is then used to connect to the session. Once connected, both users have the ability to publish their audio-video stream and subscribe to access the other user’s stream.
In subscriber.js, insert:
import { h, Component } from 'preact';import { OTSubscriber } from "opentok-react";import CheckBox from "./checkbox";class Subscriber extends Component { constructor(props) { super(props); this.state = { error: null, audio: false, video: false }; } setAudio = audio => { this.setState({ audio }); }; setVideo = video => { this.setState({ video }); }; onError = err => { this.setState({ error: `Failed to subscribe: ${err.message}` }); }; render() { return ( <div className="subscriber"> Guest {this.state.error ? <div id="error">{this.state.error}</div> : null} <OTSubscriber properties={{ subscribeToAudio: this.state.audio, subscribeToVideo: this.state.video }} onError={this.onError} /> <CheckBox label="Enable Guest Audio" initialChecked={this.state.audio} onChange={this.setAudio} /> <CheckBox label="Enable Guest Video" initialChecked={this.state.video} onChange={this.setVideo} /> </div> ); }}export default Subscriber;
Using the CheckBox component once again, we are giving the second user the option to select whether to share their audio and/or video with you.
Enable/Disable Audio and Video Functionality
In checkbox.js, insert:
import { h, Component } from 'preact';import { uniqueId } from "lodash";class CheckBox extends Component { constructor(props) { super(props); this.state = { id: uniqueId("Checkbox") }; } onChange = e => { const checked = e.currentTarget.checked; if (checked !== this.props.value) { this.props.onChange(checked); } } render() { return <div> <label for={this.id}>{this.props.label}</label> <input id={this.id} type="checkbox" checked={this.checked} onChange={this.onChange} /> </div> }}export default CheckBox;
If you would prefer to display a toggle or radio button for users, make that swap in this component.
Display Chat Connection Status
With connectionStatus.js, we display whether the chat session is connected to both users. This step is optional but recommended.
import { h, Component } from 'preact';class ConnectionStatus extends Component { render() { let status = this.props.connected ? "Connected" : "Disconnected"; return ( <div className="connectionStatus"> <strong>Coaching Session Status:</strong> {status} </div> ); }}export default ConnectionStatus;
Congrats! You have now added all the components needed for your live chat sessions. Check http://localhost:8080 to test it all out.
Step 5: Deploy with Netlify
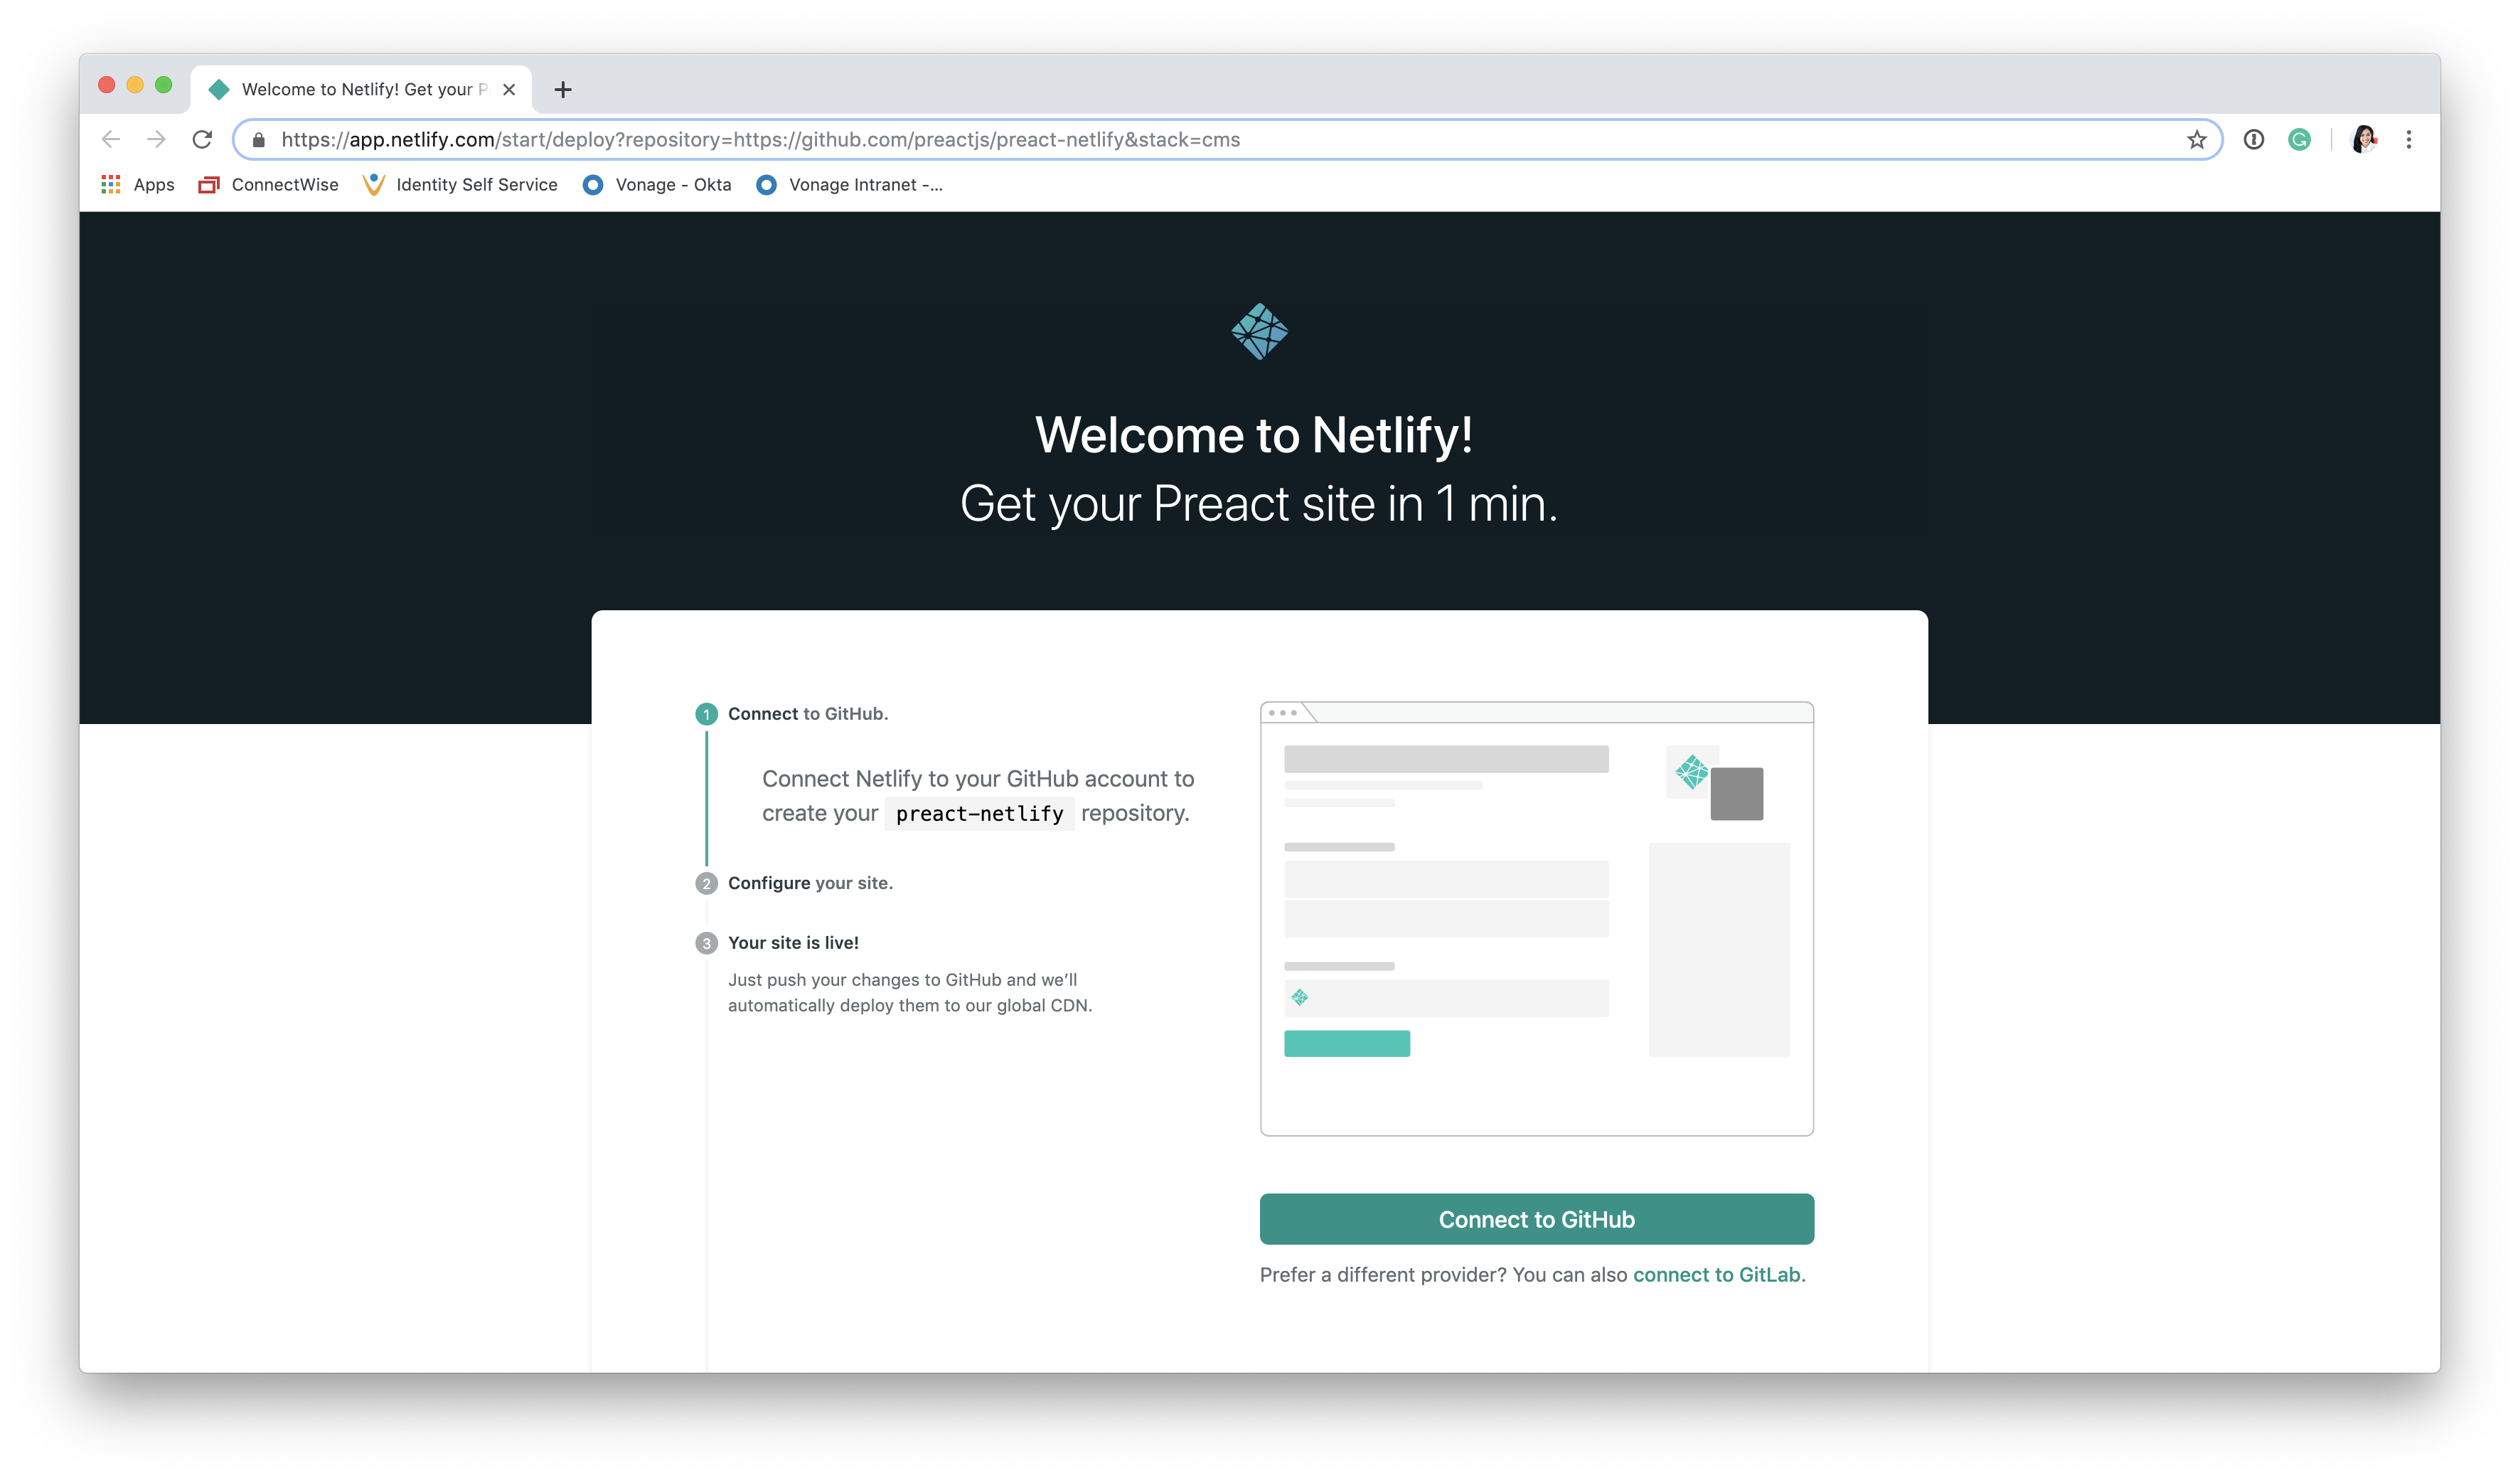
Deploying with Netlify is highly recommended as the Netlify bot for Preact CLI is capable of launching your CMS-enabled health app with one click. Once the bot has been connected to your GitHub (or GitLab) account, it will create a repository for your health app. Then, once the deploy has completed, push your local changes to the repo. Each time you push more changes, the bot will automatically deploy them to the global CDN.
Step 6: Publish Posts with Netlify CMS
The template deploy process will have emailed you an invitation to your new app. Wait for the deployment to complete, then click the link to accept the invite. Your app will open with a prompt to create a password. Enter a password, sign in, and you’ll go to the CMS. For future visits, you can go straight to <yoursiteaddress.com>/admin/ to access the CMS. Try editing and publishing placeholder posts to get yourself familiar with the platform.

With the CMS configured, our basic Health Coaching PWA is done!
Auditing
To audit the PWA, use Google’s Lighthouse in the Chrome Dev Tools or add the Firefox extension. Lighthouse will simulate a mobile device and throttle the internet to 3G speeds and generate scores and advice for improvement.
What’s Next?
There are a number of ways this application could be enhanced for better utility and experience.
Archive and log your video coaching sessions. If you’d like to watch the videos offline, add custom functionality to the Service Worker.
Import data from any additional health tools you may be using (e.g., My Fitness Pal API or FitBit API). This could help trainers provide more accurate coaching.
Send an SMS (or message on WhatsApp, Viber, or Facebook Messenger) to your coach when a new post has been published. Check out the Vonage Messages API for more information.
The post Build a Health Blog With Video Coaching Using Preact.js and Vonage appeared first on Vonage Developer Blog.

Top comments (1)
Fantastic tutorial! Integrating video into a health blog can really boost engagement and credibility. As someone who works in the aesthetic industry, I find video content especially helpful for educating clients about treatments like Hip Dip Filler Los Angeles . Embedding real patient experiences through Preact and Netlify CMS could be a game-changer for clinics looking to enhance their online presence.