WHAT IS DEPLOYMENT?
"Application Deployment, also known as Software Deployment, is the process of installing, configuring, updating, and enabling one application or suite of applications that make a software system available for use, like facilitating a certain URL on a server."[1]
There are many providers of deployment service, each with their own benefits and flaws. Deciding which ones are optimal to use for your application will be a huge asset in becoming the best developer you can be. Today we will be talking about one particular deployment service provider: Digital Ocean
ABOUT DIGITAL OCEAN
Digital ocean is a cloud-based deployment service that is geared towards helping developers, startups, and small-medium sized businesses get their projects up and running which is why its the perfect platform to understanding the basics of deployment.
GETTING STARTED
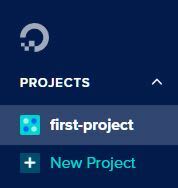
After creating your account on Digital Ocean, you'll be able to create your first project.
After clicking the + New Project button, you will be prompted to provide a name, description, and provide a description for the purpose of your project.
For me, I will be selecting the "Class Project/Educational Purposes" option.
Once your project has been created, you can select what type of product want.
PRODUCTS
Digital Ocean offers a variety of products which include:
Droplets: Linux-based virtual machines (VMs) that run on top of virtualized Hardware[2]. These are essentially an individual server that you can use by itself or part of a larger cloud-based infrastructure.
Kubernetes: a service that automates software development, project scaling, and management. Useful when you have an application that is being deployed across multiple servers. This provides an open source API to orchestrate each of the VMs run based on their available resources and resource requirements.
App: service that allows the user to directly publish code to Digital Ocean's servers. Can build your code directly from your GitHub, GitLab, or public Git repositories and publish the app straight to the cloud. Provides lifecycle management services, such as scaling, push-to-deploy support, DBM (database management) and integration.
There are many more products/services but these are some of the more common ones you'll see as you are just learning about deployment.
COST
Digital ocean provides a large amount of flexibility on pricing depending on your application's resource needs. A full listing on their pricing can be found here: https://www.digitalocean.com/pricing but as this blog is geared towards beginners who want to learn the basics of deployment, we will choose their "most used" product as our example, droplets.
The starting price for the most basic droplet is currently $5/month but can go up depending on you the expected resource requirements of your application. Droplets are a great way to get started because they get your app up, running, and scaled with increased traffic flow.
See the link below for a full, updated listing of their droplet prices. As mentioned it is highly flexible and can cater to your app's specific requirements.
droplet prices
CREATING YOUR DROPLET
Choose Your Distributions System
Choose which distribution system your application is run on and its corresponding version.
Choose a plan
Same step as our pricings section, this is just a verification step to ensure you are selecting the right plan for your project.
Select your DataCenter Region
Digital Ocean hosts servers globally so choose the one that will be closest to where your application will be visited most often to reduce service times.
AUTHENTICATION
You'll want your newly created server to be secure. There are two options: creating an SSH key or a Password. SSH Keys, or Security Shell Keys, don't have password authentication so it's safer against brute force attacks and is usually the recommended option. Hitting the New SSH Key button will provides steps to creating your key.
FINALIZE
Finally, you'll want to determine how many servers you will want to run under the same configurations you've set above and provide the hostname. If you want to host websites, you'll want to choose a hostname that is a fully qualified domain name.
Once you have done so, click the 'Create Droplet' and you are officially finished creating your server! It'll take a minute or two before your droplet is fully deployed so definitely use that time to give yourself a pat on the back.
Your newly created droplet will come with an ip address which you can now include in your application to load it onto the server!


Top comments (1)
Cool guide.