It’s a little-known fact that when Julius Caesar delivered his famous quote “Divide and conquer,” he was actually talking about using layered architecture for building web applications. Its principle lies in separating the user interface from the business logic and the business logic from the data access logic. Layered architecture offers increased flexibility, maintainability and scalability, plus it’s easier to write, test and maintain. Sounds good but how can you implement it using modern technologies?
For those of you who are new to Node.js and RESTful API, we’ve written a how-to guide that will help you create a RESTful API that can be developed into a large service. In this tutorial, we’ll show you how to start building a RESTful API in three steps. The JSON Web Token technique will help us handle authentication and PostgreSQL will be our database.
So, our steps to writing a RESTful API are:
- Initializing a Node.js project
- JWT authentication
- Adding layers
Initializing a Node.js project
Let’s start building our application. Create an empty folder and initialize a new project with the following command:npm init
To install the necessary packages, run the command:npm i bcrypt bluebird body-parser express http jsonwebtoken lodash pg sequelize sequelize-values — save
Next, create the following files in the main folder:
- config.js (the application’s configuration like database connections, password salts, etc.)
- db.js (responsible for the database connection)
- router.js (handles http requests and dispatches them to controllers)
- index.js — (a startup file)


Here’s the code our files contain:
config.js:
module.exports = {
     port: 3000,
     dbConnectionString: 'your postgresql connection',
     saltRounds: 2,
     jwtSecret: 'yo-its-a-secret',
     tokenExpireTime: '6h'
}
db.js:
const config = require('./config');
const Sequelize = require('sequelize');
var sequelize = new Sequelize(config.dbConnectionString);
require('sequelize-values')(sequelize);
module.exports = sequelize;router.js:
module.exports.set = app => {
     //endpoints will be here soon
}
index.js:
const express = require('express');
const http = require('http');
const bodyParser = require('body-parser');
const app = express();
const config = require('./config');
const router = require('./router');
app.use(bodyParser.json());
app.use(bodyParser.urlencoded({
extended: true
}));
app.use(express.static('client'));
router.set(app);app.listen(config.port, () => console.log('App listening on port '+ config.port));After you’ve finished creating the files in the main folder, you have to define data models. To do this, create a folder models with the file index.js inside. Like this:
/models/index.js:
const Sequelize = require('sequelize');
const sequelize = require('../db');
const User = sequelize.define('user', {
login: Sequelize.STRING,
password: Sequelize.STRING,
});const Order = sequelize.define('order', {
title: Sequelize.STRING,
date: {
type: Sequelize.DATE,
defaultValue: Sequelize.NOW
},
user_id: {
type: Sequelize.INTEGER,
references: {
model: User,
key: 'id'
}
}
});User.hasMany(Order, {foreignKey: 'user_id'});module.exports = {
User,
Order
}This is how you start your multilayer Node.js project. At this point we have an entry point into our application (index.js), two DB models (models/index.js) and some basic configuration.
JWT Authentication
Before writing an actual API, let’s add authentication to our application. Create a services folder with files user.jsand auth.js inside. Like this:
/services/index.js
const sequelize = require('../db');
const Users = require('../models').User;
const addUser = user => Users.create(user);const getUserByLogin = login => Users.findOne({where: {login}});module.exports = {
addUser,
getUserByLogin
}Once a user is logged-in, each subsequent request will include a token (JWT), allowing the user to access routes, services and resources according to the permissions stored in the token.
/services/auth.js will handle JWT authentication:
const bcrypt = require('bcrypt');
const jwt = require('jsonwebtoken');
const Users = require('../models').User;
const config = require('../config');const authenticate = params => {
return Users.findOne({
where: {
login: params.login
},
raw: true
}).then(user => {
if (!user)
throw new Error('Authentication failed. User not found.');
if (!bcrypt.compareSync(params.password || '', user.password))
throw new Error('Authentication failed. Wrong password.');
const payload = {
login: user.login,
id: user.id,
time: new Date()
}; var token = jwt.sign(payload, config.jwtSecret, {
expiresIn: config.tokenExpireTime
});
return token;
});
}
module.exports = {
    authenticate
}
To handle requests for registration and authentication, our application should have a controller.
Let’s create a file auth.js and place it in the controllers folder.
/controllers/auth.js:
const config =  require('../config');
const jwt = require('jsonwebtoken');
const bcrypt = require('bcrypt');
const authService = require('../services/auth');
const userService = require('../services/user');function login(req, res){
return authService.authenticate(req.body)
.then(token => {
res.send({
success: true,
data: { token }
});
})
.catch(err => {
res.send({
success: false,
message: err.message //not the best error handling.
//for better error handling visit github repository, link provided below
});
})
};function register(req, res){
var login = req.body.login;
return userService.getUserByLogin(req.body.login || '')
.then(exists => { if (exists){
return res.send({
success: false,
message: 'Registration failed. User with this email already registered.'
});
} var user = {
login: req.body.login,
password: bcrypt.hashSync(req.body.password, config.saltRounds)
} return userService.addUser(user)
.then(() => res.send({success: true}));
});
};module.exports = {
login,
register
}After this, we need to add endpoints to our API.
You can do it in the router.js file:
const authController = require('./controllers/auth');module.exports.set = app => {
app.post('/login', authController.login);
app.post('/register', authController.register);
}Let’s start the server by running the command node index.js and test the login and register functionality.


Adding Layers
Now we have the Controller layer and the Data Access layer in our application. To link them together, we need the Service layer in between. Using layers is a good way to ensure separation of responsibilities, which allows making data, business logic and presentation code independent. The Presentational layer (user) interacts with the Controllers layer (API) that uses the Service layer (business rules) to access and modify data via the Data Access layer.
So, let’s start with our first service for the order model.
Create a file services/order.js
const Orders = require('../models').Order;const getAll = () => Orders.findAll();const getById = id => Orders.findById(id);const add = order => Orders.create(order);module.exports = {add, getAll, getById};Now, we can create a controller to work with that service.
controllers/order.js
const orderService = require('../services/order');function getOrders(req, res){
orderService.getAll()
.then(data => res.send(data));
};function getOrder(req, res){
orderService.getById(req.params.id)
.then(data => res.send(data));
}function addOrder(req, res){
orderService.add({
title: req.body.title,
user_id: 1
})
.then(data => res.send(data));
};module.exports = {
getOrders,
getOrder,
addOrder
}And one more thing we need to finish our orders part of RESTful API is to add endpoints to router.js:
const orderController = require('./controllers/order');
…
app.get('/orders', orderController.getOrders);
app.get('/orders/:id', orderController.getOrder);
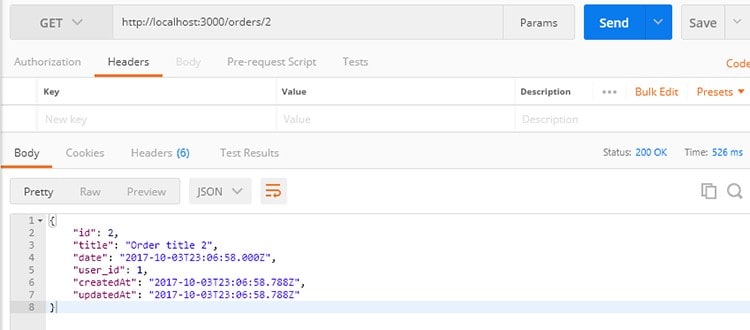
app.post('/orders', orderController.addOrder);Here’s some testing illustration of a working API:


The next thing we need is to allow access only to authenticated users. To do this, let’s add middleware that checks if the user is logged in:
middlewares/auth.js:
const jwt = require('jsonwebtoken');
const config =  require('../config');
const checkAuth = (req, res, next) => {
var token = req.headers['token'];
if (!token)
return res.status(403).send({ auth: false, message: 'No token provided.' });
jwt.verify(token, config.jwtSecret, (err, decoded) => {
if (err)
return res.status(500).send({ auth: false, message: 'Failed to authenticate token.' }); req.user = {
login: decoded.login,
id: decoded.id
}; next();
});
}module.exports = {
checkAuth
}After this, the authentication middleware should be used as the middleware argument (the second one) in endpoints functions. Now, the user can’t access data without providing a valid authentication token.
app.get('/orders', authMiddleware.checkAuth, orderController.getOrders);
app.get('/orders/:id', authMiddleware.checkAuth, orderController.getOrder);
app.post('/orders', authMiddleware.checkAuth, orderController.addOrder);
app.get('/user_orders', authMiddleware.checkAuth, userController.getUsersWithOrders)
As you can see it works :)


The final thing we need to do is define the addOrder function.
function addOrder(req, res){
    orderService.add({
         title: req.body.title,
         user_id: req.user.id
    })
    .then(data => res.send(data));
};
And that’s it! We’ve created a small app with RESTful API. According to the Multilayer Architecture concept, we have the Controllers layer, the Service layer and the Data Access layer. Our API with JWT authorization makes it easy to add the Presentational layer, e.g. web application or mobile application.
Feel free to check the code in the repository. Well, don’t just stand there — go ahead and try it yourself. Good luck from ElifTech!


Top comments (4)
Good job. You may want to use the async versions of compareSync and hashSync as you may block the event loop. See: npmjs.com/package/bcrypt#why-is-as...
Hello, thank you for a great tip! Totally agree with you, that using async methods is much better.
I knew about this but for some reason left it as it was.
Nice. I was writing most of this same code over and over for new projects so I wrote a little library to wrap it all up.
npmjs.com/package/nodeflare
Thank you for good article. It will be more helpful if you post DB structure as well.