
Hope this title makes some sense to you that what we are going to discuss.
In this article, we will going to see this from scratch. Here, we use Linux partition concepts for limiting the size of the contribution of the data node in HDFS Cluster. You may think Why we need to limit the size, because we can't shut down the data node when it is exhausted or run out of memory and also it will limits the dynamic storage.
Note:
In this task, the OS we used is Redhat Linux(RHEL8) and you can use any Linux OS and this RHEL8 is installed on top of Oracle Virtualbox.
Pre-requisites:
- Hadoop 1.2.1
- Java jdk-8u171 should be installed in your system
Contents:
- Hadoop
- Linux partitions
- Configuration of HDFS cluster
Hadoop

Apache Hadoop is an open-source framework which is used to store massive amount of data ranging from Kilobyte to Petabytes. It functions based on clustering of multiple computers by distributed storage instead of one single Large computer thus results in reduction of cost and time.
Linux partitions
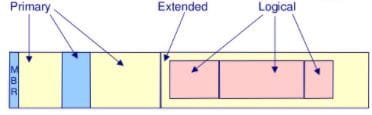
In RHEL8 Linux, there are three types of partition namely Primary, Extended and Logical partition. Normally only the four partitions can be done per hard disk. Because the metadata of each partitions stored in 64 bytes only and size of metadata for one partition is 16 bytes.
So we have to do some trick, we have to divide harddisk into two partitions namely three Primary partition and one Extended partition.
In Extended partition, partition is considered as one new Hard disk thus we can perform this trick again to get more partitions.
Totally, we can create three Primary partitions, one extended partitions and Sixty Logical partitions. Totally 64 partitions can create and we can use 63 partitions. since one Extended partition, we can't store any data in it.
Before creating partition, we required a raw hard disk. You can buy a new hard disk or create a Virtual hard disk in Oracle Virtualbox.
Please follow the below steps to create a Virtual hard disk in RHEL8 using Oracle virtual box.
Open Settings in Oracle VirtualBox

Select Add hard disk in Controller: SATA menu

Select Create Disk Image icon

Select Virtual Disk Image option

Then select Dynamically allocated option in order to make storage Dynamically filled.
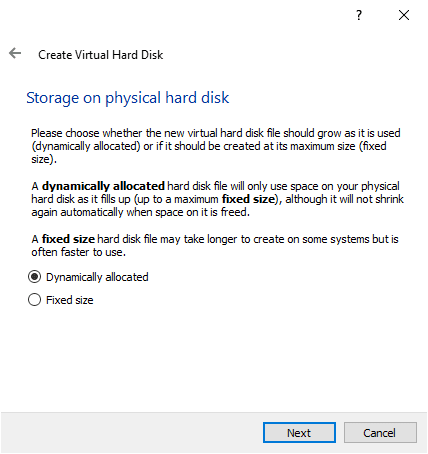
Give your required storage and then click Create button

Then attach the storage and click choose button
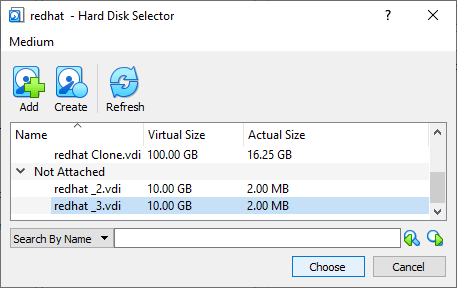
You can find your created storage details in your dashboard

Now we have a raw hard disk, in raw hard disk we can’t store any data. We have to do partition to utilize this hard disk.
Steps involved to create a partition:
- Physical partition
- Format
- Mount
Physical partition:
We have to decide how much space we required for our partition. After that run
fdisk -l
to find out details of hard disk details.
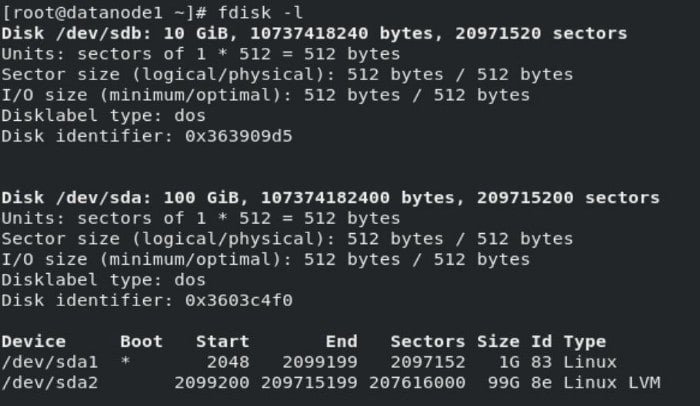
You can find the hard disk named /dev/sdb which we previously created. Then execute the following command
fdisk /dev/sdb
and enter n for new partitions and enter p for primary partitions and select how many sectors or GB according to your required size and enter “w” to save. You can found these in below image.
Enter below command to check whether the partition was created or not
fdisk -l /dev/sdb
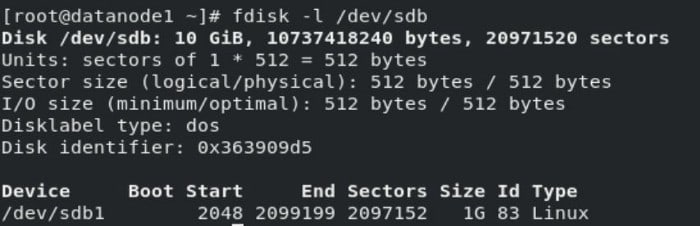
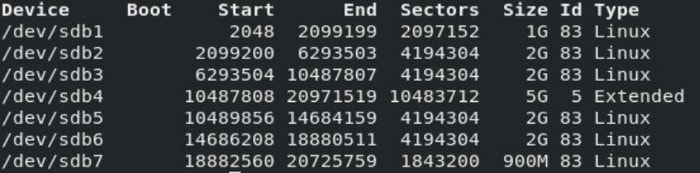
But we can create only 4 partitions, so we have to do some tricks. We can create 3 Primary partitions and create one Extended partition for remaining size.
Extended partition is treated like a raw Hard disk, We can create Logical partitions inside Extended partition and Logical partition sector’s range will be same as range of Extended partition. You can seen this in below image.
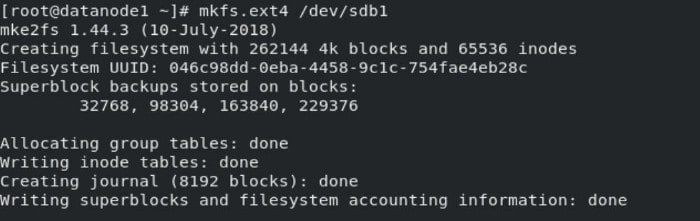
Format:
First step is done. Then we have to format the disk. Format process is like creating an index in hard disk which is used by OS for searching a file and displayed to us when we click to open a file. Enter the following command for formatting the hard disk in "ext4" format. You can use any format according to your requirements.
mkfs.ext4 /dev/sdb1
Mount:
Next step is to mount the hard disk in any of the folder/directory in OS. Because, we cant go inside or access the folder in hard disk, for this we have to link/mount this to OS folder.
For this, we have to enter the following commands in Linux terminal. We created drive1 folder in root directory and its size is 1GB.
mount /dev/sdb1 /drive1
Configuring HDFS cluster
Hadoop works based on multiple clusters which comprises of three types of nodes namely Master node, Client node and Data node.

Master node
It stores the metadata of files stored in data node. It is used to provide the metadata of datanodes to client and thereby it act as a connecting bridge between them.
Client node
This node is an End-user node that decides the number of replication blocks and block size. Risk factor plays a major role in deciding replication blocks. It is directly proportional to number of replication blocks. By default,the number of replication blocks is three which can be increased or decreased based on our applications.
Data node
It is also known as slave node which is used to store the data which is provided by client node.
These three nodes combined to form a Hadoop Distributed FileSystem (HDFS) cluster. But before configuring this cluster, we are going to see how to do partition in RHEL-8 Linux since it will help us to achieve our goal of limiting the size of contribution of data node to their master node.
Master node configuration:
This configuration involves two files namely hdfs-site.xml file which involves storage folder for metadata and core-site.xml for networking part. 
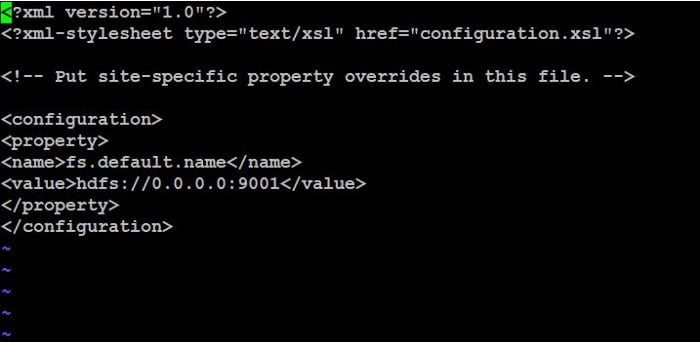
In core-site.xml file, we have to enter the IP as 0.0.0.0 in order to giving permissions to connect with any IP as a master node. we have to enter port number as 9001 since it is a default port number for Hadoop.The configuration of core-site.xml file is shown below.
Then enter "w" have to start namenode by using following command.
hadoop-daemon.sh start namenode
You can check whether the node is running or not by using Java Process(JPS)
Data node configuration:
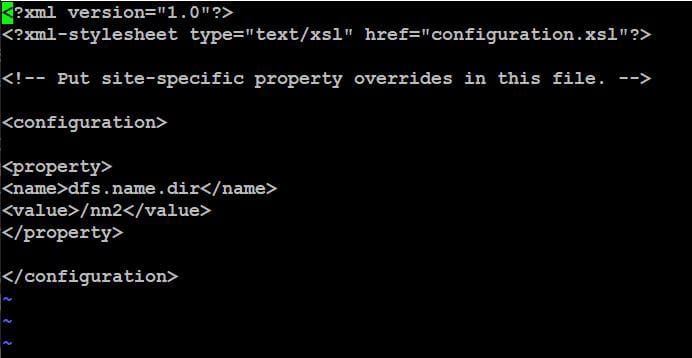
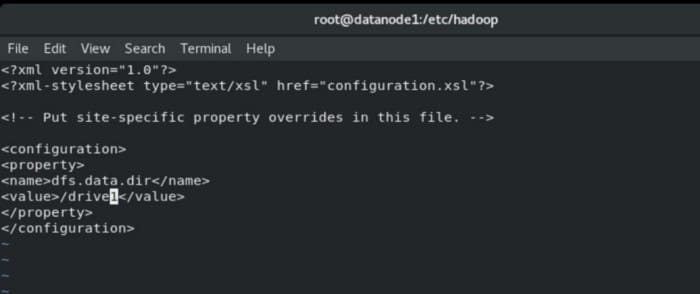
It also involves two files namely hdfs-site.xml file which involves storage folder for metadata and core-site.xml for networking part. The configuration of hdfs-site.xml is shown below.
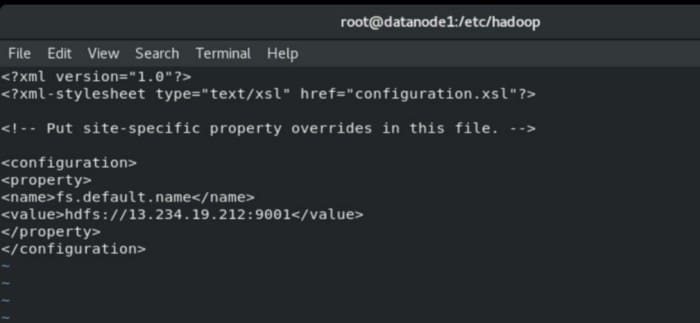
In core-site.xml file, we have to enter master IP in order to contribute your storage with it.
Then run the following commands to start a datanode
hadoop-daemon.sh start datanode
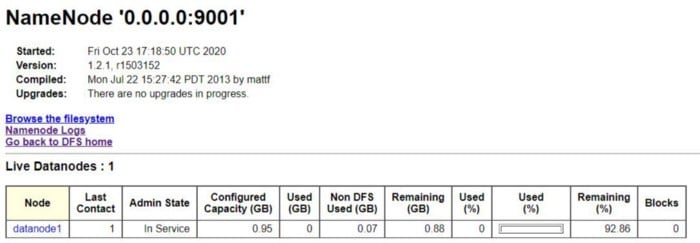
Finally, your data node is connected with master node and formed a HDFS-cluster and you can check this with a webGUI. For this you have to perform following commands in your browser.
Finally we limited our storage to 1 GiB for datanode to namenode. You can see this in following picture.
Thank you for reading this article. Hope you got a clarity about setting HDFS cluster and Linux partitions. Please kindly share your views as a comments so that I can improvise myself to give you all a quality content.


Top comments (0)