Recently, I came across PingIdentity's solution for authorization and authentication. There are multiple services provided by them, two of those are PingFederate and PingAccess. PingFederate, in simple terms, is the token provider. PingAccess is the gateway/proxy to your underlying services or APIs. More information on these two can be found here.
In this post, I will focus more on what needs to happen in the services right from configuration and any code changes.

Contents
PingAccess and PingFederate
First things first, you will need access to PingAccess and PingFederate. You can install them on your local machine as standalone services OR can have them running inside docker container. Ping provides pre-built docker images for each of their services. More info for the docker images can be found here.
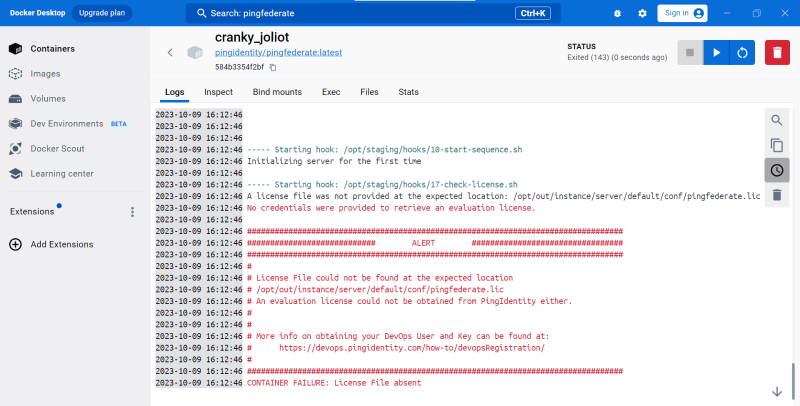
For this post, I have these running inside docker containers. These containers need ping credentials to fetch the license information. You can get the credentials by registering on devops.pingidentity.com. Once you have registered, ping will send you your credentials which then needs to be passed to PingAccess and PingFederate containers either via environment variables (PING_IDENTITY_DEVOPS_USER and PING_IDENTITY_DEVOPS_KEY). You can either add these to the docker-compose OR use a .env file which is passed to docker-compose up command OR use ping-devops utility. Sample .env file will look like this,
PING_IDENTITY_DEVOPS_USER=<user name>
PING_IDENTITY_DEVOPS_KEY=<user key>
and then you will start your containers like, docker-compose --env-file .env up -d.
Once the containers are started, you will need to orchestrate both PingAccess and PingFederate with the information related to your service including the host and port the services will be available, client-id/secret for token, signing certificate etc. All the setup required for this post can be found here.

Services
For this post, I am using 3 Spring Boot services but you are not restricted to using the same but can use services in other languages like nodeJS. The 3 services are,
- bff-service -- This service acts as a gateway to the other 2 API services by fetching and using the auth token from PingFederate.
- todo-service -- This is a simple service providing APIs to fetch and add todos. The service is behind the PingAccess proxy layer.
- tweet-service -- This is a simple service providing APIs to fetch and add tweets (not making call to twitter). The service is behind the PingAccess proxy layer.
Getting the Token
In order to make calls to any of todo-service or tweet-service, we will need to get the token from PingFederate. For that to happen, we will need to the following pieces, clientId, clientSecret, grantType and audience. PingFederate provides an API to get the token after providing the required parameters in the request body.
Let's setup bff-service to get the token. In application.yml,
auth:
  tokenEndpoint: https://pingfederate:9031/as/token.oauth2
  grantType: client_credentials

todo:
  serviceUrl: https://todo.pa.local:3000
  audience: https://todo.pa.local:3000
  clientId: todo_client
  clientSecret: toomanysecrets

tweet:
  serviceUrl: https://tweet.pa.local:3000
  audience: https://tweet.pa.local:3000
  clientId: tweet_client
  clientSecret: toomanysecrets
tokenEndpoint - This is the PingFederate API endpoint to get the JWT token.
serviceUrl - This is the base url for your API service. This should be of the pattern: <virtual-host-on-pingaccess>:<application-port-for-pingaccess>. This url is same as what you set under Applications on PingAccess.
The clientId and secret for individual services are the same ones you have setup on PingFederate, whereas the audience should match to what has been setup in the Access Token Manager on PingFederate.
To fetch the token, you will need to add something like this in your code, add a Token class,
public class Token {
    @JsonProperty(value = "access_token")
    private final String accessToken;

    @JsonProperty(value = "token_type")
    private final String tokenType;

    @JsonProperty(value = "expires_in")
    private final int expiresIn;
    private final long expireAt;
}
Then add this method somewhere in your code,
public String getToken(String clientId, String clientSecret, String audience, String grantType) {
    HttpHeaders httpHeaders = new HttpHeaders();
httpHeaders.setContentType(MediaType.APPLICATION_FORM_URLENCODED);
    MultiValueMap<String, String> map = new LinkedMultiValueMap<>();
    map.add("client_id", clientId);
    map.add("client_secret", clientSecret);
    map.add("audience", audience);
    map.add("grant_type", grantType);
    ResponseEntity<Token> response =
            restTemplate.postForEntity(tokenEndpoint, new HttpEntity<>(map, httpHeaders), Token.class);
    return response.getBody().getAccessToken();
}
Now before making any request to any of the todo or tweet service, we will first fetch the token and then pass it along.
Call the APIs
Now we have seen how we can get the token. Next we will see how to use the token to make the API requests. In your code, you can create your request like,
public HttpEntity<String> getRequest(String clientId, String clientSecret, String audience) {
    String accessToken = tokenUtil.getToken( clientId, clientSecret, audience, grantType);
    HttpHeaders httpHeaders = new HttpHeaders();
    httpHeaders.add(HttpHeaders.AUTHORIZATION, "Bearer " + accessToken);
    httpHeaders.setContentType(MediaType.APPLICATION_JSON);
    return new HttpEntity<>(httpHeaders);
}
That's it. Once you have this setup, you can pass the request to any GET API (for POST APIs you will need to add the request body as well) to get the requested data.
Decode the Token
Now, since the request has been made from bff-service to your API services via PingAccess using the token provided by PingFederate, there are 2 things you can do on the API Services.
- You can ignore the token altogether, given that the request is coming via PingAccess which has already established that the token is valid and only then it has let the request pass through. This is a BIG security loophole, as anyone who can get the knowledge of your API can exploit it by bypassing the PingAccess altogether by directly making the API requests.
- Check and verify the token. This will involve decoding the token and then performing any rule checks like audience matches, expiration and any other scope checks. Let's take a look at the config and code changes required on the individual service.
spring:
  security:
    oauth2:
      resourceserver:
        jwt:
          jwk-set-uri: https://pingfederate:9031/ext/todoauthtoken/jwks
          issuer-uri: https://pingfederate:9031

auth:
  audience: todo.pa.local:8082
jwk-set-uri - This is the jwks url where the keys for your token is published on PingFederate.
issuer-uri - This is the token issuer. In our case it is PingFederate
auth.audience - This is the audience we are expecting in the token payload.
@Override
protected void configure(HttpSecurity http) throws Exception {        http.authorizeRequests().mvcMatchers("/todos/**").authenticated().and().oauth2ResourceServer().jwt();
}

@Bean
public JwtDecoder jwtDecoder() {
    NimbusJwtDecoder jwtDecoder = NimbusJwtDecoder.withJwkSetUri(jwkSetUri).build();

    OAuth2TokenValidator<Jwt> audienceValidator = new AudienceValidator(audience);
    OAuth2TokenValidator<Jwt> withIssuer = JwtValidators.createDefaultWithIssuer(issuer);
    OAuth2TokenValidator<Jwt> withAudience = new DelegatingOAuth2TokenValidator<>(withIssuer, audienceValidator);

    jwtDecoder.setJwtValidator(withAudience);

    return jwtDecoder;
}
Add the above bean in your spring config. The configure method is telling Spring that the given APIs needs to be authenticated with a JWT else the request will be rejected. The jwtDecoder defined here will make use of the provided jwkSetUri, issuer and the custom validator (AudienceValidator) to validate the incoming token.
Doing just this will secure your APIs with JWT and will reject the requests with no Authorization or invalid JWTs.
Conclusion
Above approach is a sort of generic approach followed to secure your APIs using a Token Provider and Resource Server. Here I have used PingFederate but it can be replaced with any other available Token Providers like auth0, Okta etc.
The full working code used in this post can be found here:
 vikasgarghb
/
blog-ping-id
vikasgarghb
/
blog-ping-id
Application integration with PingAccess and PingFederate


Top comments (1)
is there and help with installing pingfederate locally to for purpose testing , I failed with docker image pulling due to this error , I need steps if possible to pull the image and working locally