Setup
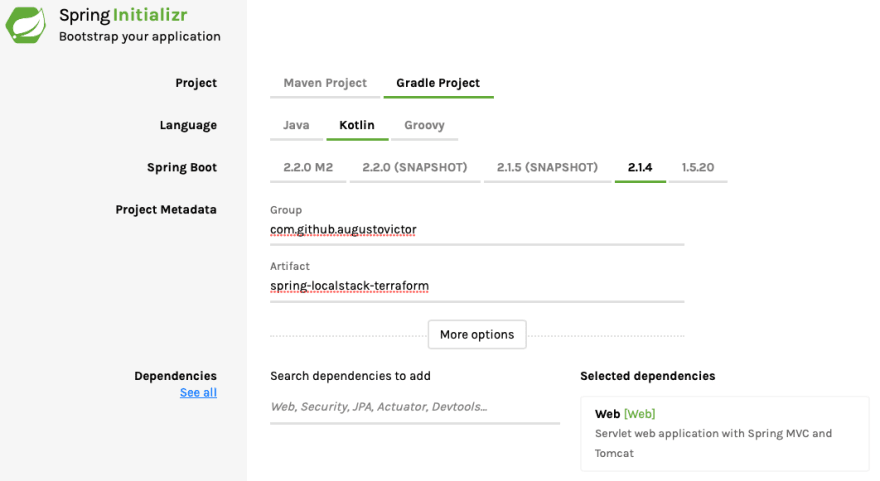
To download SpringBoot go to start.spring.io and make sure your config is as follows (remember to replace the Group description, and to add the Web dependency):
With Intellij
- File > New > Project from existing sources
- Select
Gradleoption (since we've chose it to be our build and dependencies manager) - Select the
Use auto-importoption so dependencies can be automatically downloaded Select the downloaded spring-boot folder- Wait until all dependencies are downloaded (This might take a few minutes)
With command-line
- Install Gradle (Install maven if you chose it as your build and dependencies manager
- Copy the downloaded folder to Intellij directory
- Enter the folder and run
gradle build(This command also run application tests)
Runing the project with Intellij
The right upper corner of your IDE there is this green play button. Just click on it and watch the IDE's terminal for a similar output:
2019-05-19 09:36:07.615  INFO 70436 --- [           main] o.s.s.concurrent.ThreadPoolTaskExecutor  : Initializing ExecutorService 'applicationTaskExecutor'
2019-05-19 09:36:07.751  INFO 70436 --- [           main] o.s.b.w.embedded.tomcat.TomcatWebServer  : Tomcat started on port(s): 8080 (http) with context path ''
2019-05-19 09:36:07.754  INFO 70436 --- [           main] com.example.demo.DemoApplicationKt       : Started DemoApplicationKt in 1.826 seconds (JVM running for 2.28)
2019-05-19 09:36:12.131  INFO 70436 --- [       Thread-4] o.s.s.concurrent.ThreadPoolTaskExecutor  : Shutting down ExecutorService 'applicationTaskExecutor'
Runing the project with command-line
- Inside the project's folder run
gradle bootRunand for an output as presented above.
Let me know if you had any issues in the commends below, or leave a reaction if everything worked as expected.


Top comments (0)