Mouse hover actions play a vital role in web automation testing, especially when dealing with interactive user interfaces. During web automation, you may encounter a situation where certain features or elements on the user interface only appear or respond when the user hovers the mouse over them. The hover effect is essential for providing interactive and dynamic website user experiences. You can hover over an element using the Actions Class of Selenium WebDriver API and its method. By doing so, you can automate the validation of hover-based functionalities and ensure that the web application behaves correctly when users interact with it.
In this article, we will explore the concept of mouse hover in Selenium and then discuss its importance in automation testing. After that, we will delve into the technical aspects of how to implement it using Selenium WebDriver followed by some best practices. We will use Python programming language to implement Mouse hover in Selenium.
Perform browser testing on the most powerful automation testing platform. Leverage LambdaTest automation testing for faster, reliable and scalable experience on cloud.
What is Mouse Hover in Selenium?
Mouse hover in Selenium means using Selenium WebDriver to simulate a mouse hover action on an element. This action triggers various UI effects, such as displaying tooltips, revealing hidden elements, or opening drop-down menus. Mouse hover in Selenium is important in automated testing as they help validate dynamic behaviors and hidden functionalities that may only become visible or accessible upon hovering over certain elements. By performing mouse hover actions in automation tests, testers can ensure the accuracy and reliability of web applications under test.
As you may see from the image attached below, the home page of Flipkart (as it looks while writing this blog), Electronics is one of the broad categories listed on this e-commerce website. It is only when you hover over this category or element it displays or renders the sub-category list on the DOM. Further, when you hover over the Gaming sub-category, it displays or renders the following list of items on the DOM.
This kind of use case is part of a UI that interacts well with the user.
Importance of Mouse Hover in Selenium
Mouse hover in Selenium is highly valuable for various scenarios in automation testing, as listed below:
It allows testers to ensure that dropdown menus work properly when the mouse hovers over them and that all menu options are functional.
Testers can also verify tooltips and information that appear when hovering over certain elements.
Mouse hover in Selenium enables the validation of hidden or dynamic elements, making sure they become visible and interactive when the mouse hovers over specific areas.
How to Perform Mouse Hover in Selenium?
To perform mouse hover in Selenium, we use the Actions Class from the Selenium WebDriver API. This Class provides various methods to simulate complex user interactions. By creating an instance of the Actions Class and using its method, you can move the mouse pointer to the desired element on the web page and trigger the hover effect.
Once the hover action is performed, you can further validate the web application’s behavior using assertions or other validation techniques. It ensures that the mouse hover interactions work as intended.
So, let’s first explore the Actions Class of Selenium WebDriver before we get into the practical example of implementing mouse hover in Selenium.
In this article, let us learn about the test cases for banking Applications that are used to test a banking application. Before that, let us understand the workings of the banking domain in brief.
Actions Class of Selenium WebDriver
The Actions Class in Selenium is part of the Selenium WebDriver API and can be found in the selenium.webdriver.common.action_chains module. This class offers a range of methods that enable the simulation of complex user interactions, including Mouse Hover Action, Clicking, Double-clicking, Dragging, Releasing, Holding an element, and many more.
You don’t need to install any additional libraries or packages to use the Actions Class in Selenium. The Actions Class is bundled in the Selenium WebDriver API and comes pre-installed with Selenium binding.
You may consider watching the below video from our Youtube channel to learn in detail how to handle Actions class in Selenium.
Follow the below steps to use the Actions Class:
Import the webdriver module from the Selenium package.
Import the ActionChains Class from the selenium.webdriver.common.action_chains module.
After importing, the code snippet looks like this.
from selenium import webdriver
from selenium.webdriver.common.action_chains import ActionChains
Implementing Mouse Hover in Selenium
Let’s take an example to understand mouse hover in Selenium using the Actions Class.
We are going to use automation demos, a demo website maintained by LambdaTest for illustrations.
To implement Mouse Hover in Selenium, we will use the Actions Class of Selenium WebDriver API.
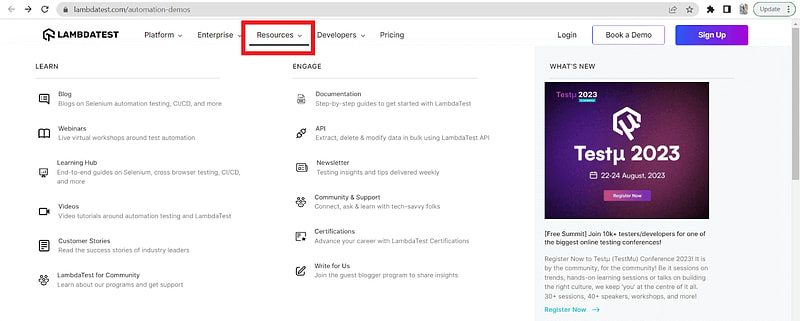
In the following example, we demonstrate how to use Selenium to perform a hover action over the “Resources” element and wait for up to 5 seconds and quit the browser session:
from selenium import webdriver
from selenium.webdriver.common.by import By
from selenium.webdriver.common.action_chains import ActionChains
import time

# Launch the Chrome browser
driver = webdriver.Chrome()

# Navigate to the website
driver.get("https://www.lambdatest.com/automation-demos")
driver.maximize_window()

# Locate the element to perform the hover action on
element_to_hover = driver.find_element(By.XPATH, '//*[@id="header"]/nav/div/div/div[2]/div/div/div[1]/div[3]/button')

# Create an instance of the ActionChains class
actions = ActionChains(driver)

# Perform the hover action
actions.move_to_element(element_to_hover).perform()
time.sleep(5)

# Close the browser
driver.quit()
As shown in the above example, we perform a mouse hover action over the “Resources” element and wait for 5 seconds and quit the browser.
Let’s take another example where we automate the mouse hover action over an element and perform the click() action.
from selenium import webdriver
from selenium.webdriver.common.by import By
from selenium.webdriver.common.action_chains import ActionChains
import time

# Launch the Chrome browser
driver = webdriver.Chrome()

# Navigate to the website
driver.get("https://www.lambdatest.com/automation-demos")
driver.maximize_window()

# Locate the element to perform the hover action on
element_to_hover = driver.find_element(By.XPATH, '//*[@id="header"]/nav/div/div/div[2]/div/div/div[1]/div[3]/button')

element_to_hover1=driver.find_element(By.XPATH, '//*[@id="header"]/nav/div/div/div[2]/div/div/div[1]/div[3]/div/div/div/div[1]/div/div[1]/ul/li[3]/a/div[2]/h3')
# Create an instance of the ActionChains class
actions = ActionChains(driver)

# Perform the hover action
actions.move_to_element(element_to_hover).perform()
time.sleep(5)
actions.move_to_element(element_to_hover1).perform()
time.sleep(5)
actions.click(element_to_hover1).perform()
time.sleep(5)

# Close the browser
driver.quit()
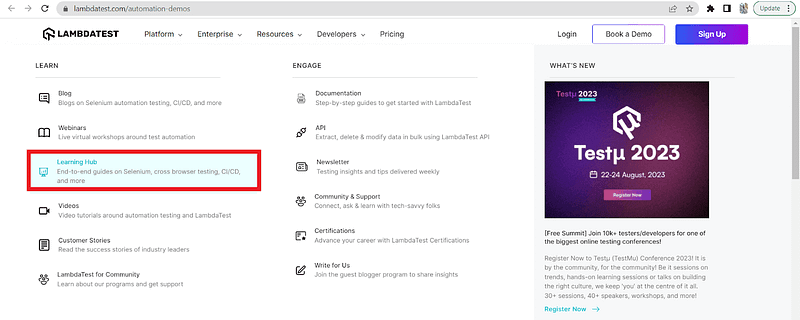
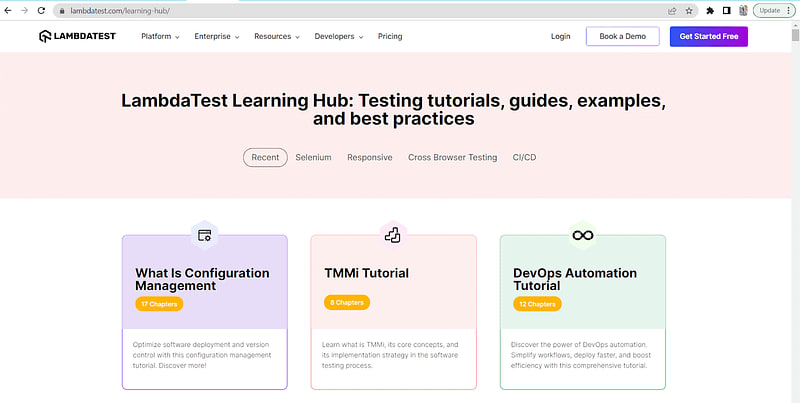
As shown in the above example, we first hover over the Resources using their XPath and wait for 5 seconds, then we hover over Learning Hub and again wait for 5 seconds. After that, we perform the click() action on Learning Hub and again wait for 5 seconds.
We have used the Actions Class from the Selenium WebDriver API. Now, let’s delve deeper into our comprehension by exploring the various methods and properties offered by the Actions Class in detail.
Run your Selenium Automation Testing scripts on the LambdaTest cloud grid. Test on 3000+ desktop & mobile environments. Try it for free.
Methods and Properties of Actions Class in Selenium
The Actions Class in Selenium has various methods and properties, which we will look at in this section with code examples.
move_to_element(WebElement element)
Moves the mouse cursor to the center of the specified web element.
Syntax:
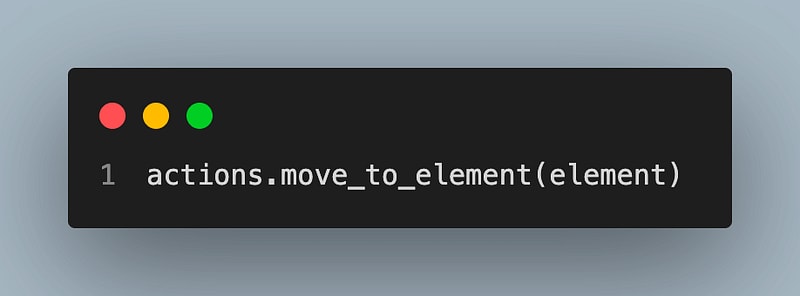
actions.move_to_element(element)
Let’s understand this through an example.
from selenium import webdriver
from selenium.webdriver.common.by import By
from selenium.webdriver.common.action_chains import ActionChains
import time

# Launch the Chrome browser
driver = webdriver.Chrome()

# Navigate to the website
driver.get("https://www.lambdatest.com/automation-demos")
driver.maximize_window()
time.sleep(3)

# Locate the element to perform the hover action on
main_element = driver.find_element(By.XPATH, '//*[@id="header"]/nav/div/div/div[2]/div/div/div[1]/div[1]/div[1]/a')
sub_element = driver.find_element(By.XPATH, '//*[@id="header"]/nav/div/div/div[2]/div/div/div[1]/div[1]/div[2]/div[1]/div/div[1]/div/div[1]/ul/li[2]/a/div[2]/p')
# Create an instance of the ActionChains class
actions = ActionChains(driver)

# Build the mouse hover action with multiple actions using build()
actions = actions.move_to_element(main_element)
actions = actions.move_to_element(sub_element)

# Perform the built actions using perform()
actions.perform()

# Wait for a few seconds to observe any effects
time.sleep(5)

# Close the browser
driver.quit()
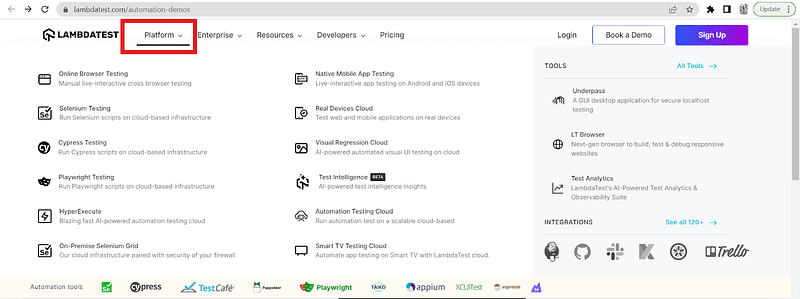
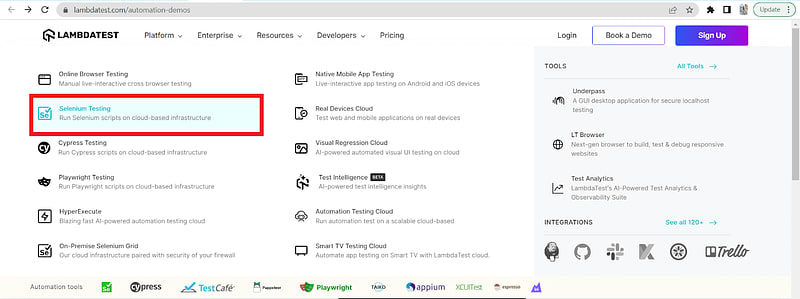
In the above example, we have used the move_to_element() method. Firstly, we hover over the Platform and then move to Selenium Testing, as shown below.
click(WebElement element):
Clicks the specified web element.
Syntax:
actions.click(element)
Let’s understand this through an example.
from selenium import webdriver
from selenium.webdriver.common.by import By
from selenium.webdriver.common.action_chains import ActionChains
import time

# Launch the Chrome browser
driver = webdriver.Chrome()

# Navigate to the website
driver.get("https://www.lambdatest.com/automation-demos")
driver.maximize_window()
time.sleep(3)

# Locate the element to perform the hover action on
main_element = driver.find_element(By.XPATH, '//*[@id="header"]/nav/div/div/div[2]/div/div/div[2]/a[2]')

# Create an instance of the ActionChains class
actions = ActionChains(driver)

# Build the mouse hover action with multiple actions using build()
actions = actions.click(main_element)

# Perform the built actions using perform()
actions.perform()

# Wait for a few seconds to observe any effects
time.sleep(5)

# Close the browser
driver.quit()
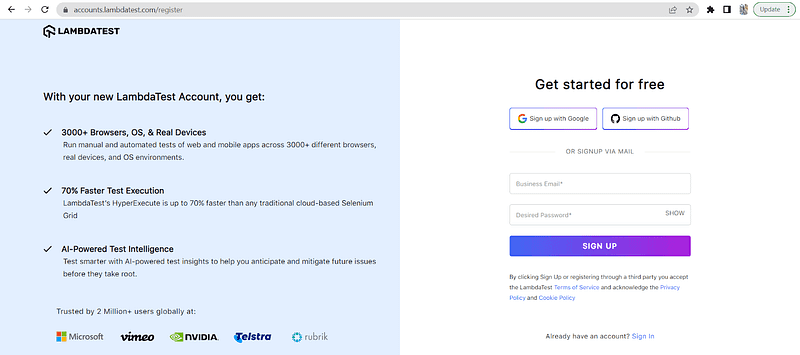
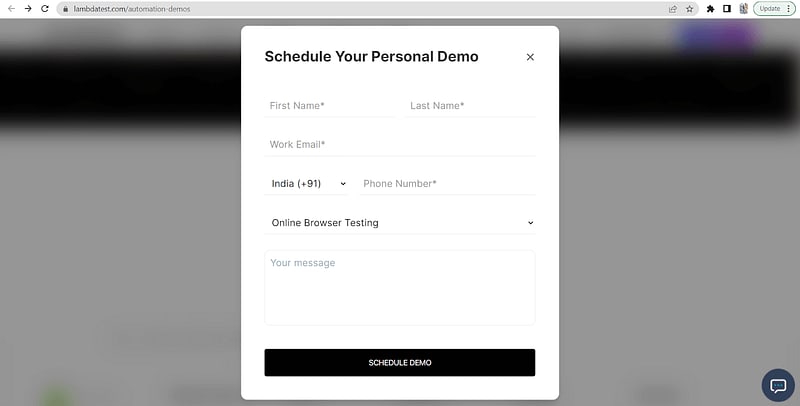
In the above example, we used the click() method where we first hover over the element Sign Up and then perform a click() action on it.
click_and_hold(WebElement element)
Clicks and holds the specified web element. This function also needs the release() method to get the desired functionality.
Syntax:
actions.click_and_hold(element)
release(WebElement element)
Releases the mouse button previously held on the specified web element.
Syntax:
actions.release(element)
Let’s take an example where we want to hover over an element (Book a Demo) and want to use click_and_hold() and release() methods.
from selenium import webdriver
from selenium.webdriver.common.by import By
from selenium.webdriver.common.action_chains import ActionChains
import time

# Launch the Chrome browser
driver = webdriver.Chrome()

# Navigate to the website
driver.get("https://www.lambdatest.com/automation-demos")
driver.maximize_window()

# Locate the "Resources" menu option to perform the hover action
Book_a_Demo = driver.find_element(By.XPATH, '//*[@id="header"]/nav/div/div/div[2]/div/div/div[2]/div[1]/button')

# Create an instance of the ActionChains class
actions = ActionChains(driver)
time.sleep(3)

# Perform the mouse hover action on the "Resources" menu option
actions.move_to_element(Book_a_Demo).perform()

# Click and hold the "Resources" menu option for 3 seconds
actions.click_and_hold().perform()
time.sleep(3)

# Release the click
actions.release().perform()

# Wait for a few seconds to observe any effects
time.sleep(5)

# Close the browser
driver.quit()
In the above example, we have performed a mouse hover over the “Book a Demo” element after 3 seconds of opening the page and used the click_and_hold() on the element for 3 seconds. Subsequently, we release the element using the release() method, maintaining the release for 5 seconds. This sequence of actions simulates user interaction and allows us to observe the effects on the “Book a Demo” element during the specified timeframes.
(You can see as we hover over the element “Book A Demo”, the border gets thicker.)
double_click(WebElement element)
Performs a double-click action on the specified web element.
Syntax:
actions.double_click(element)
Let’s understand this through an example.
from selenium import webdriver
from selenium.webdriver.common.by import By
from selenium.webdriver.common.action_chains import ActionChains
import time

# Launch the Chrome browser
driver = webdriver.Chrome()

# Navigate to the website
driver.get("https://www.lambdatest.com/selenium-playground/")
driver.maximize_window()
time.sleep(3)

# Locate the element to perform the hover action on
main_element = driver.find_element(By.XPATH, '//*[@id="__next"]/div/section[1]/div/h1')

# Create an instance of the ActionChains class
actions = ActionChains(driver)

# Build the mouse hover action with multiple actions using build()
actions = actions.double_click(main_element)

# Perform the built actions using perform()
actions.perform()

# Wait for a few seconds to observe any effects
time.sleep(5)

# Close the browser
driver.quit()
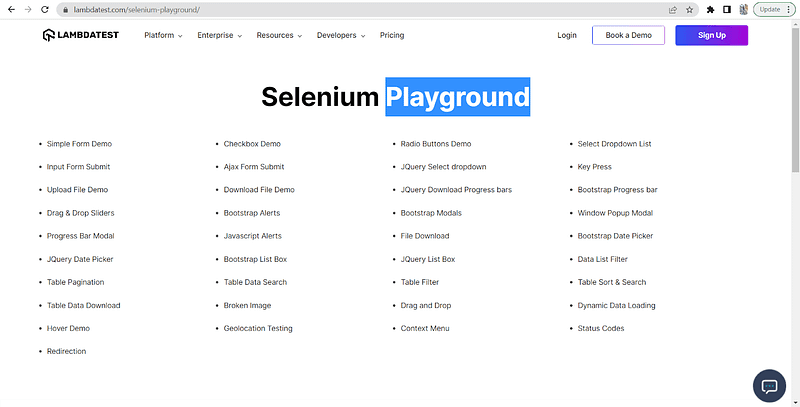
In the above example, we used the double_click() method where we perform a double-click on the text ‘Playground’, as you can see below.
Run your Selenium online Automation Testing scripts on the LambdaTest cloud grid. Test on 3000+ desktop & mobile environments. Try it for free.
context_click(WebElement element)
Performs a right-click (context-click) action on the specified web element.
Syntax:
actions.context_click(element)
Let’s take an example to understand the context_click() method.
from selenium import webdriver
from selenium.webdriver.common.by import By
from selenium.webdriver.common.action_chains import ActionChains
import time

# Launch the Chrome browser
driver = webdriver.Chrome()

# Navigate to the website
driver.get("https://www.lambdatest.com/automation-demos")
driver.maximize_window()

# Locate the "Resources" menu option to perform the hover action
context = driver.find_element(By.XPATH, '//*[@id="formcontent"]')

# Create an instance of the ActionChains class
actions = ActionChains(driver)
time.sleep(3)

# Perform the double click on the "Resources" menu option
actions.context_click(context).perform()

# Wait for a few seconds to observe any effects
time.sleep(5)

# Close the browser
driver.quit()
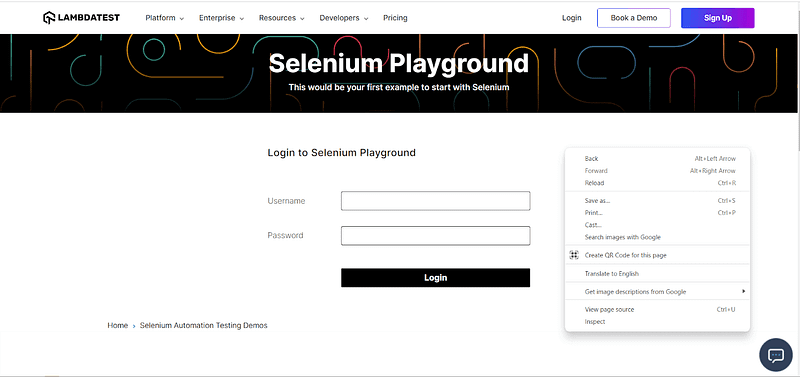
In the above program, we have performed the context_click() method. This method is nothing, but it is just like a right-click. We automate the process of right-clicking through the Actions Class, as you can show in this example.
drag_and_drop(WebElement source, WebElement target)
Drags the source element and drops it onto the target element.
Syntax:
actions.drag_and_drop(source, target)
Let’s take an example to understand the drag_and_drop() method.
from selenium import webdriver
from selenium.webdriver.common.by import By
from selenium.webdriver.common.action_chains import ActionChains
import time

driver = webdriver.Chrome()
driver.get("https://jqueryui.com/droppable/")
driver.maximize_window()

driver.switch_to.frame(driver.find_element("class name", "demo-frame"))

# get the source and destination
source = driver.find_element(By.ID, "draggable")
destination = driver.find_element(By.ID, "droppable")

actions = ActionChains(driver)
time.sleep(2)

# drag_and_drop() method
actions.drag_and_drop(source, destination).perform()

# Wait for a few seconds to observe any effects
time.sleep(5)
driver.quit()
In the above program, we have performed the drag_and_drop() method. This method drags an element and drops it to the desired location. We automate the drag-and-drop process through the Actions Class, as shown in this example.
pause(long duration)
Pauses the execution for the specified duration in milliseconds.
Syntax:
actions.pause(duration)
Let’s take an example to understand the pause() method.
from selenium import webdriver
from selenium.webdriver.common.by import By
from selenium.webdriver.common.action_chains import ActionChains
import time

# Launch the Chrome browser
driver = webdriver.Chrome()

# Navigate to the website
driver.get("https://www.lambdatest.com/automation-demos")
driver.maximize_window()

# Locate the element to perform the hover action on
element = driver.find_element(By.XPATH, '//*[@id="footer"]/div[1]/div/div/div[2]/div/div[2]/ul/li[1]/a')

actions = ActionChains(driver)

# Perform the hover action
actions.move_to_element(element)

# Introduce a pause of 3 seconds
actions.pause(3)

# Click on the element after the pause
actions.click(element)

# Perform the built actions using perform()
actions.perform()

# Wait for a few seconds to observe any effects
time.sleep(5)

# Close the browser
driver.quit()
In this example, we first hover over the Blogs and pause for 3 seconds, then perform the click() action on it.
build()
Create complex actions or perform multiple actions sequentially.
Syntax:
actions.build()
Let’s take an example to understand the build() method.
from selenium import webdriver
from selenium.webdriver.common.by import By
from selenium.webdriver.common.action_chains import ActionChains
import time

# Launch the Chrome browser
driver = webdriver.Chrome()

# Navigate to the website
driver.get("https://www.lambdatest.com/automation-demos")
driver.maximize_window()
time.sleep(3)

# Locate the element to perform the hover action on
main_element = driver.find_element(By.XPATH, '//*[@id="header"]/nav/div/div/div[2]/div/div/div[1]/div[3]/button')
sub_element = driver.find_element(By.XPATH, '//*[@id="header"]/nav/div/div/div[2]/div/div/div[1]/div[3]/div/div/div/div[1]/div/div[1]/ul/li[1]/a/div[2]/p')

# Create an instance of the ActionChains class
actions = ActionChains(driver)

# Build the mouse hover action with multiple actions using build()
hover_action = actions.move_to_element(main_element).move_to_element(sub_element).click(sub_element)

# Perform the built actions using perform()
hover_action.perform()

# Wait for a few seconds to observe any effects
time.sleep(5)

# Close the browser
driver.quit()
In the above example, we have used the build() method, which allows us to create a sequence of multiple actions more organized and concisely. This technique helps to perform complex interactions by chaining actions together. As shown in this example, we sequentially execute actions like move_to_element() and click() using the build() method.
First, we hover over the Resources. Then we hover over Blog using the move_to_element() method. At last, we performed the click() action. All the actions are performed sequentially
perform():
Executes the sequence of actions defined using the Actions Class.
Syntax:
actions.perform()
Get started with this complete Selenium automation testing tutorial. Learn what Selenium is, its architecture, advantages and more for automated cross browser testing. Read more.
Best Practices for Mouse Hover Actions in Selenium
It is essential to follow some best practices while performing mouse hover actions in Selenium to ensure reliable and effective test automation. The following are some best practices for mouse hover actions in Selenium.
Use the Actions Class: The Actions Class in Selenium provides a high-level interface for performing mouse and keyboard actions. It offers methods like move_to_element(), click_and_hold(), etc, that are specifically designed for mouse actions. You may use this class to perform mouse hover actions effectively.
Locate Elements Accurately: To accurately locate the elements, you must use reliable and unique locators such as ID, Class, XPath, or CSS Selectors to identify the elements.
Use Explicit Waits: In some cases, elements may become visible only after a certain action or delay. You can handle such dynamic elements by using explicit waits (WebDriverWait) and waiting for the element to be visible or clickable before performing the hover action.
For Example-
import time
from selenium import webdriver
from selenium.webdriver.common.by import By
from selenium.webdriver.support.ui import WebDriverWait
from selenium.webdriver.support import expected_conditions as EC
from selenium.webdriver.common.action_chains import ActionChains

driver = webdriver.Chrome()
driver.get("https://www.lambdatest.com/automation-demos")
driver.maximize_window()

wait = WebDriverWait(driver, 10)
element = wait.until(EC.visibility_of_element_located((By.XPATH, '//*[@id="__next"]/div[1]/section[1]/div')))
element1 = driver.find_element(By.XPATH, '//*[@id="header"]/nav/div/div/div[2]/div/div/div[1]/div[1]/div[1]/a')
actions = ActionChains(driver)
actions.move_to_element(element1).perform()
time.sleep(5)

driver.quit()
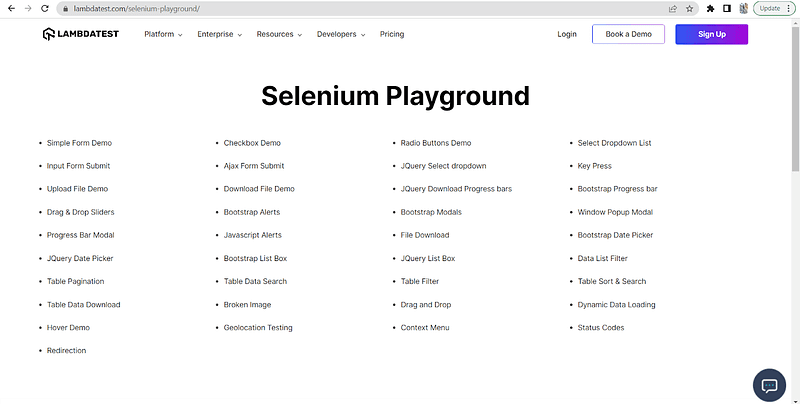
In this example, we use Selenium WebDriver to perform a mouse hover in Selenium by using explicit waits. After opening the website, we locate the element (Selenium Playground) using its XPath and wait for it for 10 seconds to become visible. Then, we find another element (Platform) to perform the hover action on it. After the hover action, we wait for 5 seconds to observe any effects.
This approach is particularly beneficial when dealing with dynamic elements that may take some time to load.
- Validate the Hover Effect: After performing the mouse hover action, verify that the expected changes or effects are reflected on the webpage. You can use assertions or other validation techniques to ensure the desired behavior.
Code Example:
import unittest
from selenium import webdriver
from selenium.webdriver.common.by import By
from selenium.webdriver.common.action_chains import ActionChains
import time

class TestHoverEffect(unittest.TestCase):
    def setUp(self):
        self.driver = webdriver.Chrome()
        self.driver.get("https://www.lambdatest.com/automation-demos")
        self.driver.maximize_window()

    def test_hover_effect(self):
        # Locate the element to perform the hover action on
        element_to_hover = self.driver.find_element(By.XPATH, '//*[@id="header"]/nav/div/div/div[2]/div/div/div[1]/div[3]/button')
        time.sleep(3)

        # Create an instance of the ActionChains class
        actions = ActionChains(self.driver)

        # Perform the hover action
        actions.move_to_element(element_to_hover).perform()

        # Wait for a few seconds to observe any effects
        time.sleep(3)

        # Validate the hover effect - Check if sub-menus becomes visible
        sub_menu = self.driver.find_element(By.XPATH, '//*[@id="header"]/nav/div/div/div[2]/div/div/div[1]/div[3]/div/div/div/div[1]/div/div[1]/ul')
        is_sub_menu_visible = sub_menu.is_displayed()

        # Print the result
        if is_sub_menu_visible:
            print("Sub-menu is visible after hover.")
        else:
            print("Sub-menu is not visible after hover.")


    def tearDown(self):
        self.driver.quit()

if __name__ == "__main__":
    unittest.main()
Output:
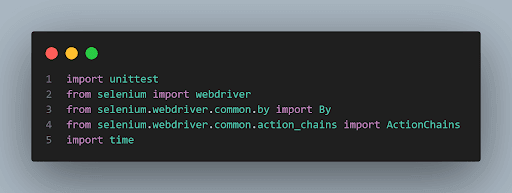
We started by importing all the necessary modules from Selenium, including unittest, webdriver, By, ActionChains, and time.
In the setUp method, we first created a WebDriver instance (ChromeDriver in our case) is created. The script then navigates to the automation-demos website and maximizes the browser window.
In the test_hover_effect method, the element to perform the hover action on is located using its XPath, and a 3-second pause is introduced to ensure that the page is fully loaded before performing the action. The after we created an instance of the Actions class as actions.
The move_to_element(element_to_hover) method is called on actions to perform the mouse hover action on the specified element.
Another 3-second pause is introduced to observe any effects of the hover action.
The sub-menu element is located using its XPath, and its visibility is checked using the is_displayed() method. Based on the visibility of the sub-menu, the script prints whether the sub-menu is visible or not after the hover action.
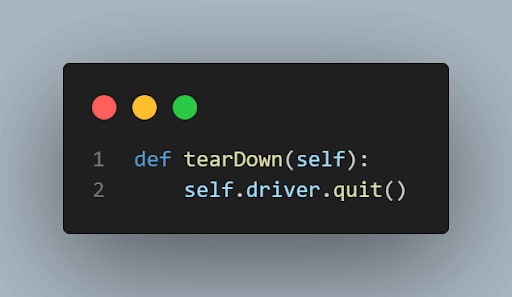
The tearDown method closes the browser and ends the test.
The program uses the Actions Class to perform the hover action, then checks if the sub-menu is displayed using the is_displayed() method. At last, we printed the result.
This helps validate the expected behavior of the hover effect on the dropdown menu during automation testing.
Automate Cypress cloud tests and perform browser automation testing with LambdaTest. Our cloud infrastructure has 3000+ desktop & mobile environments. Try for free.
Conclusion
This blog equipped you with the necessary knowledge to perform hover over an element or mouse hover using Selenium Python. We started by understanding the concept of mouse hover in Selenium and its significance in automation testing. Next, we delved into the Actions Class of Selenium WebDriver API, which plays a key role in achieving mouse hover actions, followed by practical examples.
After that, we explored the various methods and properties of the Actions Class through a detailed example. At last, we discussed essential best practices for executing mouse hover actions in Selenium.
If you would be interested in learning more about how to perform automated mouse and keyboard actions, consider checking out blogs on














Top comments (0)