
Hello Guys 👋,
I hope you enjoyed reading and learning from my previous article series where I walked you through how I built a real-time Forbes website with HTML, CSS, and Vanilla JavaScript, you can check it out HERE if you missed it.
In this article series, I will be walking you through the user journey of my customer self-service website which uses Flutterwave as the payment gateway.
Flutterwave provides the easiest and most reliable payment solution for businesses anywhere in the world.
This project idea is inspired by the Nigeria Telecommunication companies like MTN, AIRTEL, and GLO among others.
Firstly what is customer self-service 🤷♂️?
Self-service allows companies to provide online support to their customers without requiring any interaction with a representative from the company.
This is a common service among the telecommunication companies like your Internet Service Provider, which allows you to recharge or check your balance through a USSD code or an application.
The self-service in this project includes
- Purchase of data subscription and
- Airtime Top-up
This article will serve as a user guide on how to make use of the self-service website.
If you would like to check out the site before you continue reading, you can check it out HERE
1. The Landing Page
I ensure to make the landing page as simple as possible in order not to distract the users with content that won't be useful to them, as the main goal of this project is to enable them to make quick transactions on the go.

2. Beneficiary Phone Number
The next step is for the user to provide the beneficiary phone number, as the user might want to purchase a service for himself or another user. I keep track of the beneficiary phone number in the browsers' local storage in case the user decided to return back and change the number or refresh the page.

3. Select Network Provider
The next step is for the user to select their network provider in other to fetch the specific network service.

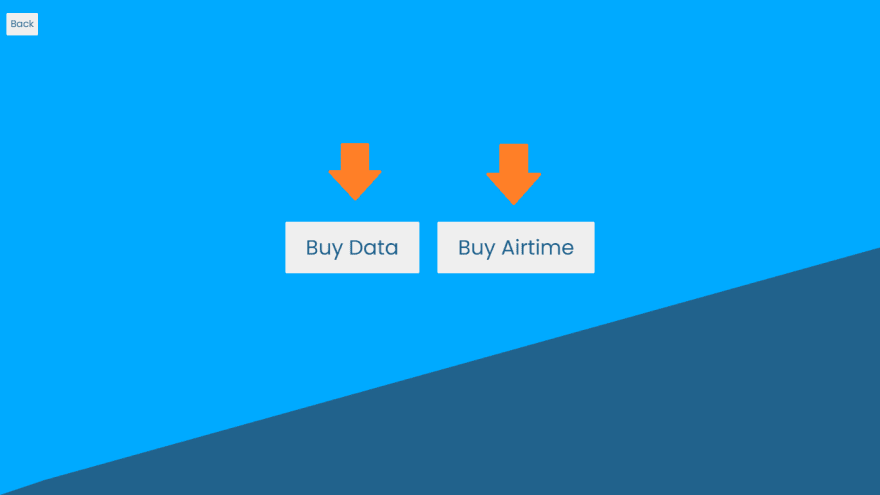
4. Choose Service
This step is where the user specifies the type of service they want to purchase, either data subscription service or to Top-up their airtime balance, this is the most popular service that I know of in Nigeria.
5. Airtime Service
In this article, I will only walk you through the airtime service as the data service includes a longer step, but you can check it out on the hosted site HERE.
The user is required to enter the amount of airtime Top-up they want to purchase for the beneficiary number and click proceed.

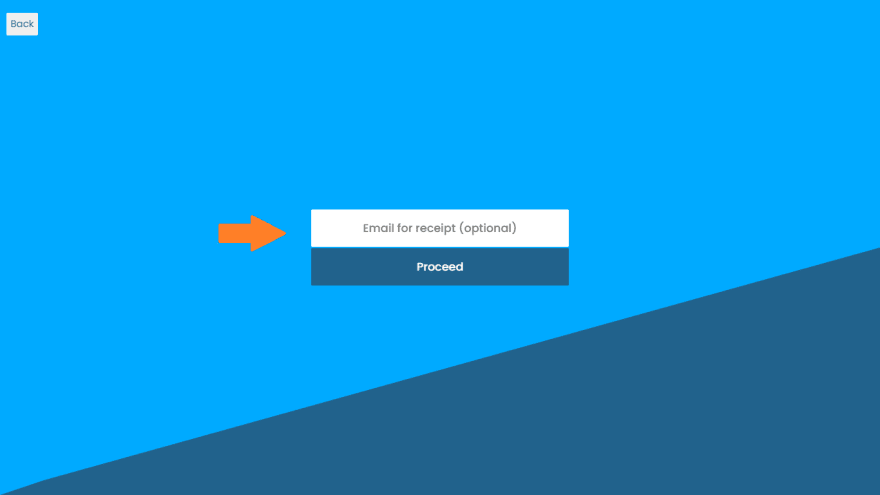
6. Email for Receipt
*
Flutterwave enables payment notification for both the merchant and their customer, provided the user enters a valid email.
*
For a user to receive an email receipt for their service payment from the website, the user is required to provide a valid email address where the receipt will be forwarded after a successful transaction.
I also keep track of the email address in the browsers' local storage in case the user names change it or the page got refreshed.
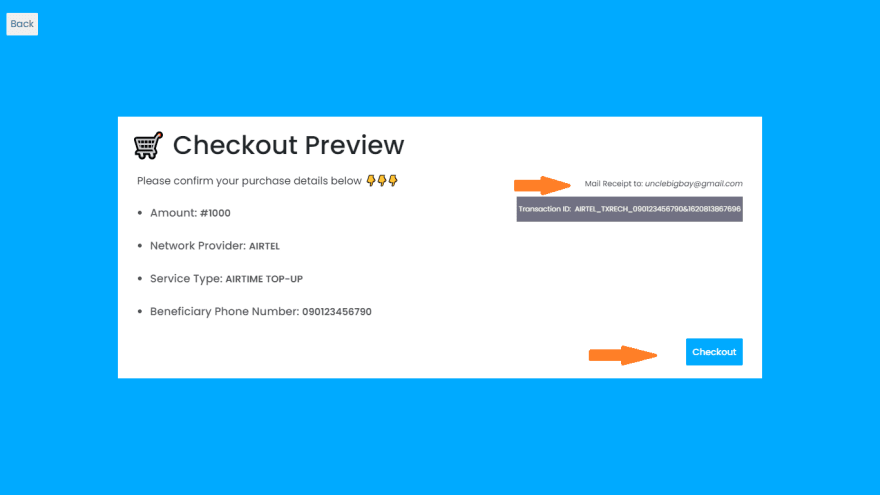
7. Checkout Preview
After the user has selected their self-service option and provided all required details, a checkout page is generated for confirmation of their provided purchase details, at this stage, the user can go back to make changes to their entries.
Flutterwave requires a custom transaction reference number, I included a function that generates a unique transaction id for every user payment based on their selected services.
The transaction reference number by the left is for the ** MTN DATA SUBSCRIPTION** while the other reference number by the right is for A PAYMENT OF MTN AIRTIME TOP-UP

If the user is satisfied with the preview information, they can proceed to click on the checkout button to initiate a payment through Flutterwave.
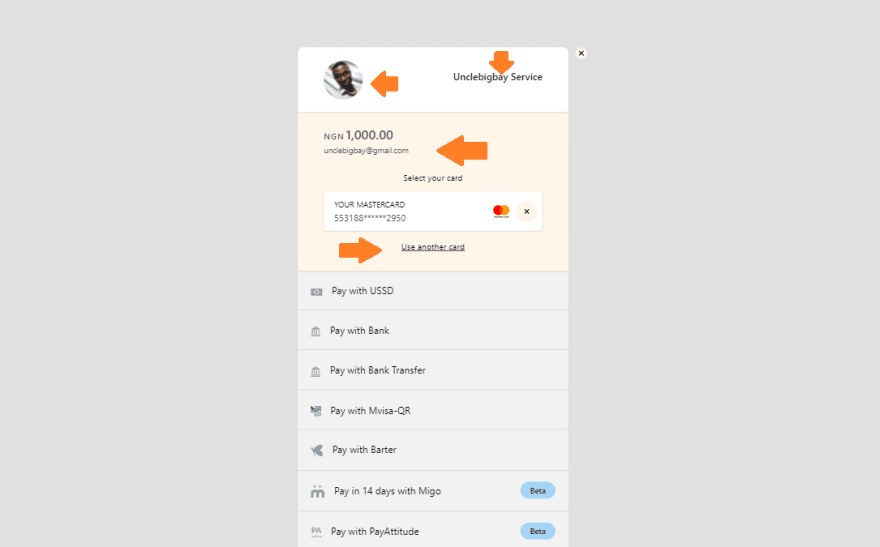
8. Flutterwave Payment Gateway
The checkout button triggers the Flutterwave payment function which displays a modal and every other process is securely handled by Flutterwave.
Proceed to select one of the available supported payment options and follow the instruction that follows.
Please note that the payment gateway is not fake, please be careful while testing with a real payment card a Test card from Flutterwave will be provided at the end of this article for testing.
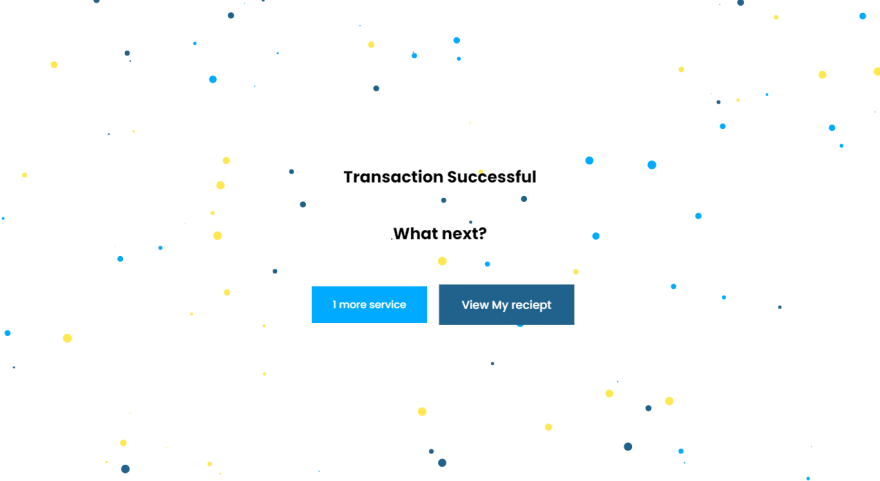
9. Success Page
After a successful payment on the Flutterwave payment gateway, an email will be sent to the customers' provided email and a protected successful page with raining bubble will be displayed.
A user can only access this page when there is a successful payment from Flutterwave and there are two options available for the user to select from, first is for the user to perform another service which redirects the user back to the landing page and clear all record from the local storage and the other is for the user to view their payment receipt.
10. View Payment Receipt from e-mail
I added a feature whereby the user can be redirected to their Gmail account and automatically perform a deep search for the payment receipt mail that has been sent by Flutterwave on behalf of the merchant website.

11. About Page
The project has an about page where the user can get a brief idea instruction concerning the project.

It will be nice to mention that this project is only made up of just two
.HTMLfiles which are the index.html and the success.html files, all other pages are rendered inside the index.html file, thanks to *DOM manipulation *
👇👇👇 Below is a Test Card Detail to be used for testing the site HERE
Card number: 5531 8866 5214 2950
cvv: 564
Expiry: 09/32
Pin: 3310
OTP: 12345

I hope you have learned one or two things from this project walk-through, and probably have an idea of what to work on this weekend.
If you're interested in contributing to this project, feel free to fork and send a pull request HERE
Feel free to also check out my other article series on project walk-through and my tutorial articles for Open source contribution.
If you found this helpful and would love to support my blog to purchase a custom domain name, you can buy me a coffee below 👇👇👇
Thanks and see you in the next article.

Top comments (1)
Hey it keeps asking for me to put the right format for the number and even when I put the number you used it still says the same