

This How-To describes how to generate C# or TypeScript client code for OpenAPI (Swagger) specification with Unchase OpenAPI (Swagger) Connected Service to Visual Studio 2017/2019 projects.
The Unchase OpenAPI (Swagger) Connected Service is a Visual Studio 2017/2019 extension to generate C# (TypeScript) HttpClient (or C# Controllers) code for OpenAPI (formerly Swagger) web services with NSwag. Simply put, it is like kind old Add Service Reference for WCF or Add Web Reference for WSDL, but for JSON (YAML) API with customization of code generation like in NSwagStudio.
Follow *4 steps below to achieve this:
Step 1. Install the Connected Service
Launch the installed Visual Studio 2017/2019. Open the menu to manage Visual Studio extensions:
- For Visual Studio 2017:
Tools -> Extensions and Updates...

- For Visual Studio 2019: Extensions -> Manage Extensions

Choose Online -> Visual Studio Marketplace tab. In search field type unchase, then install Unchase OpenAPI (Swagger) Connected Service (just click Download button):

After all, restart the Visual Studio to install the Connected Service.
Step 2. Open the Connected Service wizard for Visual Studio project
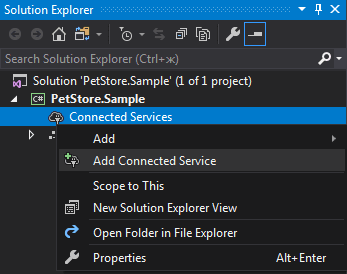
Open the Visual Studio solution with project to generate client code in. In Solution Explorer make right-click on Connected Services or Dependencies item in the project for which you need to generate client code, and click on Add Connected Service:

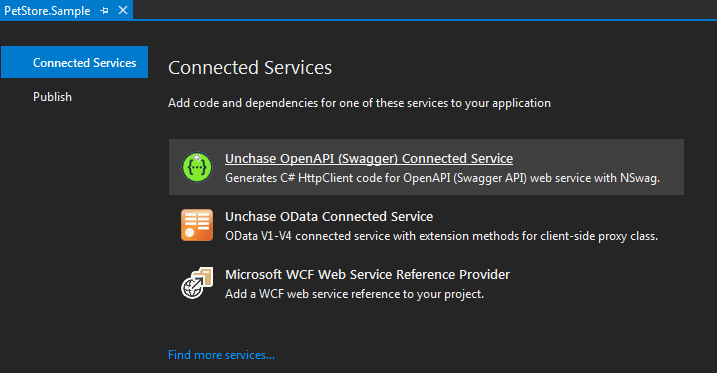
Then choose Unchase OpenAPI (Swagger) Connected Service to show the Connected Service wizard:

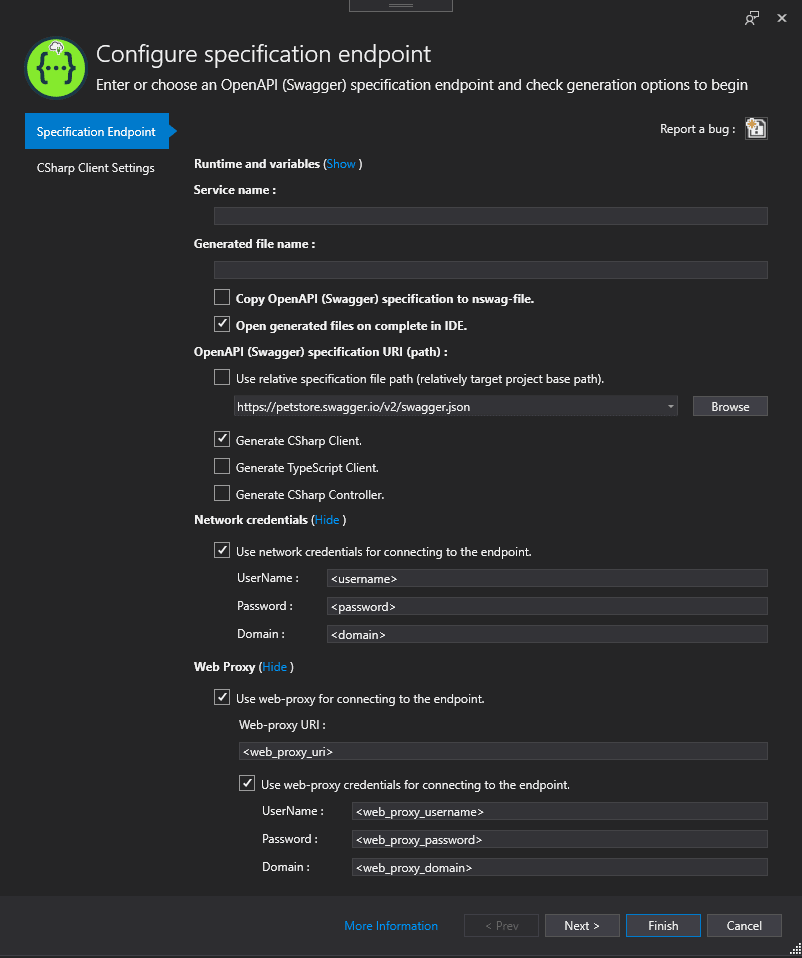
Step 3. Configure OpenAPI specification endpoint
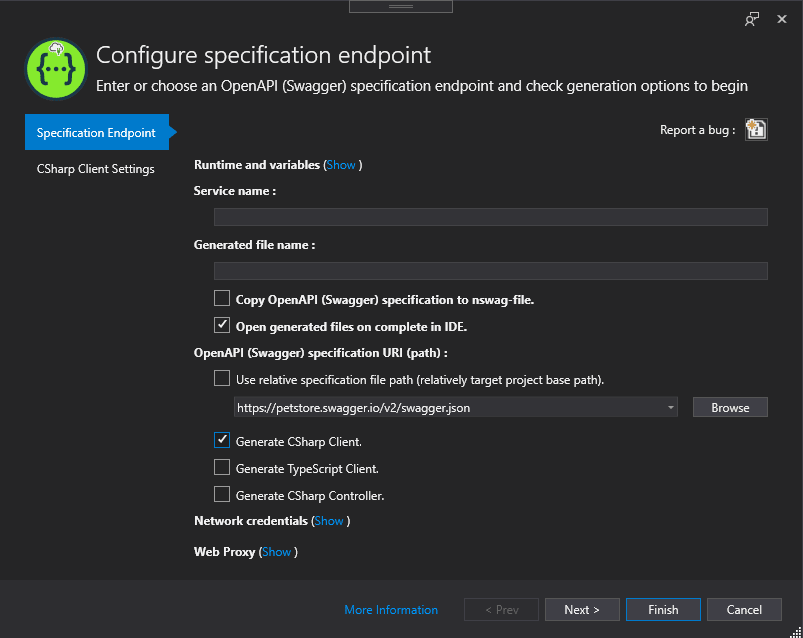
In the first page of the wizard you need to configure some necessary options:
Service name- the name of the folder for generated files (by default, if field is empty - OpenAPIService);Generated file name- the name of the generated files prefix (by default, if field is empty - OpenAPI);OpenAPI (Swagger) specification URI (path)- the specification URI (URL or local file);One or few of
Generate CSharp Client,Generate TypeScript Client,Generate CSharp Controller- to generate C# (TypeScript) client code or/and C# Controllers code file(s) for OpenAPI specification. When you check a checkbox, the corresponding tab item with additional generation settings is added to the wizard:
After setting the necessary options, you can immediately start generating the code files by clicking the Finish button. In this case, there will choose default code generation options.
There are a few optional options you can specify before start generation process:
- In the
Runtime and variablessection - the same options as in NSwagStudio:

-
Copy OpenAPI (Swagger) json-specification to nswag-filecheckbox - the same asCreate local Copybutton in NSwagStudio:

Open generated files on complete in IDEcheckbox - allows automatically open the generated files in IDE in generation process;If you need to set network credentials for connecting to the endpoint (specification file), you should specify options in the
Network Credentialssection. If your network used Proxy, you should specify options in theWeb Proxysection:
Step 4 (Optional). Configure code generation options
If you want to specify some options for generating code, just need to go to generation settings tab(s):

There are the same options like in NSwagStudio.
Enjoy programming with Unchase!

Top comments (0)