
Broken authentication is a common vulnerability in web applications that can allow attackers to gain access to the system without proper credentials. This type of vulnerability can occur when the authentication system is weak or poorly implemented, or when user credentials are not properly protected. As a result, attackers may be able to exploit the vulnerability to gain access to sensitive data or manipulate user information.
To prevent broken authentication, it is essential to implement strong and secure authentication measures in your web application. This may include using robust password policies, enabling two-factor authentication, and regularly monitoring and testing the authentication system to identify and fix any vulnerabilities. Additionally, it is important to protect user credentials by storing them securely and using secure protocols to transmit them. By taking these precautions, you can help protect your web application and its users from the risks of broken authentication.
Now, let us discuss the various authentication methods.
DIFFERENT AUTHENTICATION METHODS
PASSWORD-BASED AUTHENTICATION
This is the most common type of authentication. It requires the user to register with a username or email address and a password which will be required if they want to sign in to the application.
PASSWORDLESS AUTHENTICATION
This mode of authentication does not require a user to provide a username or a password. Instead, the user only needs to provide some other form of evidence, such as a fingerprint, physical token code, or a magic link sent to their email address. The user can also be authenticated using verified accounts like; Google, Facebook, or GitHub.
There are so many ways to authenticate users in your application. For the purpose of this article, I will focus on a third-party authentication system called Frontegg. Frontegg is a modern UI platform that enables developers to provide various user management features, such as secure authentication and login.
It also comes with the ability to change styles and utilize a variety of third-party logins, such as Github, Facebook, Google, and more. It also contains user management features such as profile management, roles, permissions setup, and more.
GETTING STARTED WITH FRONTEGG
Head over to their website at Frontegg and register as a new user.
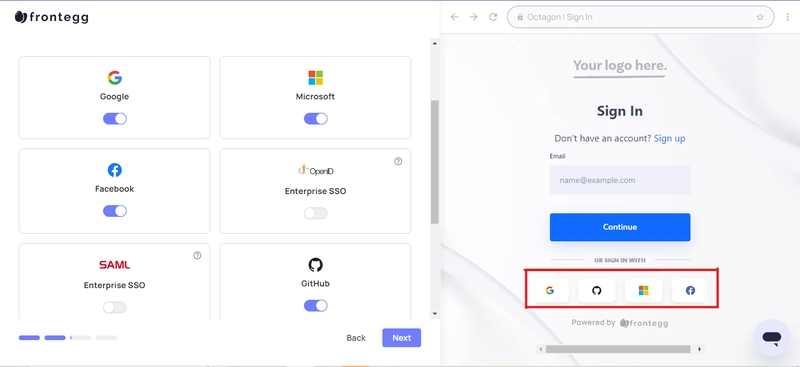
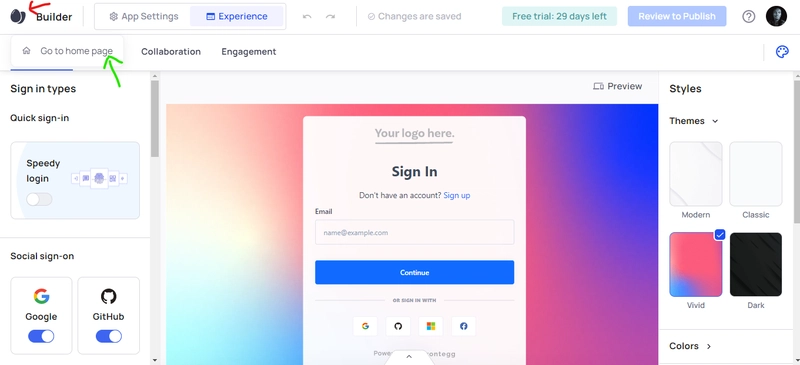
Once you sign up successfully, you will be taken through an onboarding process where you will select a custom logo for your login portal, a brand color, and a custom name.
When you are done, hit the 'Next' button to see the various login options you can enable for your app.
After you choose the login options, you want to implement in your application, hit the 'Next' button. Now, you come to enabling an extra layer of security. On this page, you will be able to enable device fingerprinting, captcha challenge, session management, and forced multi-factor authentication.
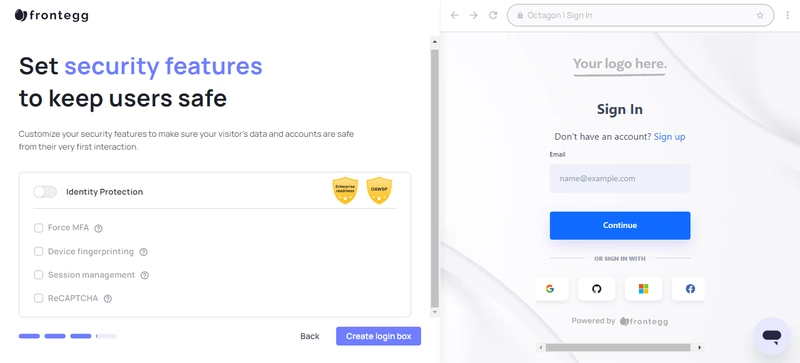
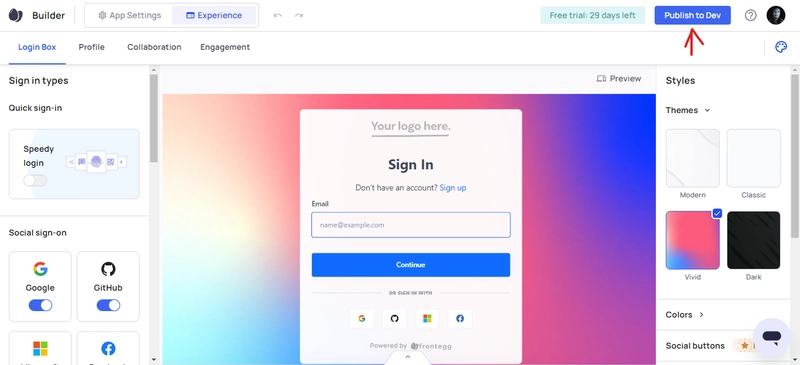
Once you have completed the onboarding process, click on the 'Create login box' button, and you will be redirected to your dashboard.
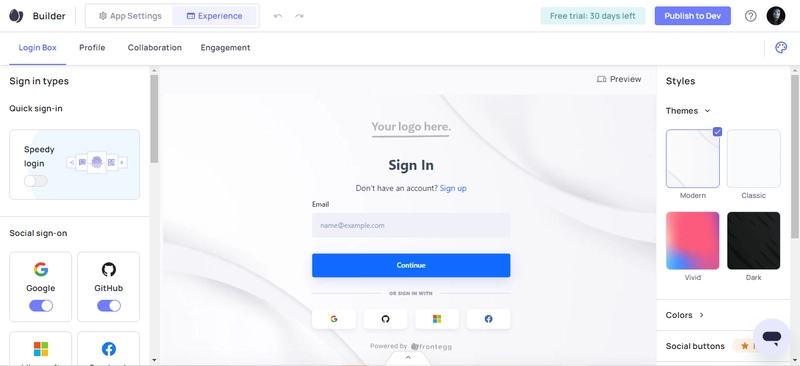
Now, we are ready to integrate authentication into our app.
INTEGRATING AUTHENTICATION INTO OUR APP
Click on the 'Publish to dev' button on your dashboard's top right.
Once you click on this button, you will be redirected to a page where you can choose a tech stack for your project and then configure your app's development environment URL.
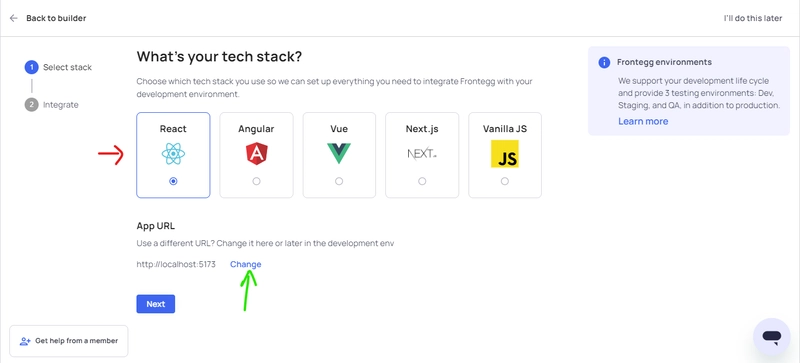
Now, click on the 'Next' button and follow the steps on the new page to integrate Frontegg into your project based on the tech stack you chose.
If you want to use React in your project, follow the process below to integrate Frontegg into your React project.
INTEGRATING FRONTEGG INTO A REACT PROJECT
If you don't have React installed, use the command below to install a new react project.
npx create-react-app app-with-frontegg
cd app-with-frontegg
Next, install Frontegg and react-router-dom libraries from NPM.
npm install @frontegg/react react-router-dom
Now, it is time to fire up your project. Run the following command on your terminal.
npm start
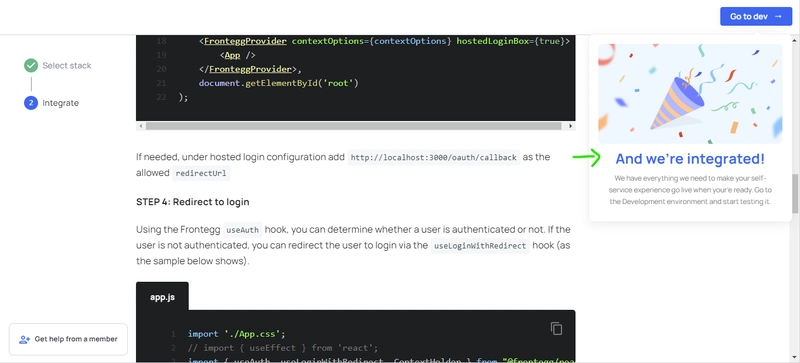
Next, we need to wrap our root component with FronteggProvider.
The code to achieve this is on the integration page. However, if you are using React 18, you may copy the code below but do well to replace the baseUrl and clientId with yours.
In your index.js or main.jsx, paste the code below:
import React from 'react';
import ReactDOM from 'react-dom/client';
import App from './App';
import './index.css';

import { FronteggProvider } from '@frontegg/react';

const contextOptions = {
  baseUrl: 'YOUR_BASE_URL',
  clientId: 'YOUR_CLIENT_ID'
};

const root = ReactDOM.createRoot(document.getElementById('root'));
root.render(
    <FronteggProvider contextOptions={contextOptions} hostedLoginBox={true}>
        <App />
    </FronteggProvider>
);
If you see this error on your terminal:
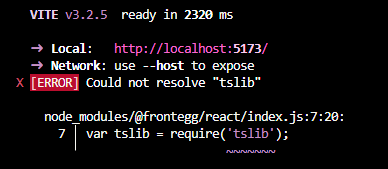
Stop the server and install the missing dependency with the command:
npm install tslib
After installing this package, restart your server, and you should be ready. At this point, Frontegg should be successfully integrated into our react project.
Now, it is time to authenticate users in our app.
AUTHENTICATING USERS IN OUR APP
In this section, we will use the Frontegg useAuth hook to check whether a user is logged in to our app. If the user is not authenticated, we will redirect the user to a login page using the useLoginWithRedirect hook.
If you need help with hooks in react, learn how to do so in free code camp.
In your app.js or App.jsx, paste this code:
import './App.css';
// import { useEffect } from 'react';
import { useAuth, useLoginWithRedirect, ContextHolder } from "@frontegg/react";

function App() {
  const { user, isAuthenticated } = useAuth();
  const loginWithRedirect = useLoginWithRedirect();

  // Uncomment this to redirect to log in automatically
  // useEffect(() => {
  //   if (!isAuthenticated) {
  // loginWithRedirect();
  //   }
  // }, [isAuthenticated, loginWithRedirect]);

  const logout = () => {
    const baseUrl = ContextHolder.getContext().baseUrl;
    window.location.href = `${baseUrl}/oauth/logout?post_logout_redirect_uri=${window.location}`;
  };

  return (
    <div className="App">
      { isAuthenticated ? (
        <div>
          <div>
            <img src={user?.profilePictureUrl} alt={user?.name}/>
          </div>
          <div>
            <span>Logged in as: {user?.name}</span>
          </div>
          <div>
            <button onClick={() => alert(user.accessToken)}>What is my access token?</button>
          </div>
          <div>
            <button onClick={() => logout()}>Click to logout</button>
          </div>
        </div>
      ) : (
        <div>
          <button onClick={() => loginWithRedirect()}>Click me to login</button>
        </div>
      )}
    </div>
  );
}

export default App;
If you want users of your application to be redirected to a login page automatically, uncomment the lines above.
If you go back to your browser, you should see a button prompting you to log in to the application.
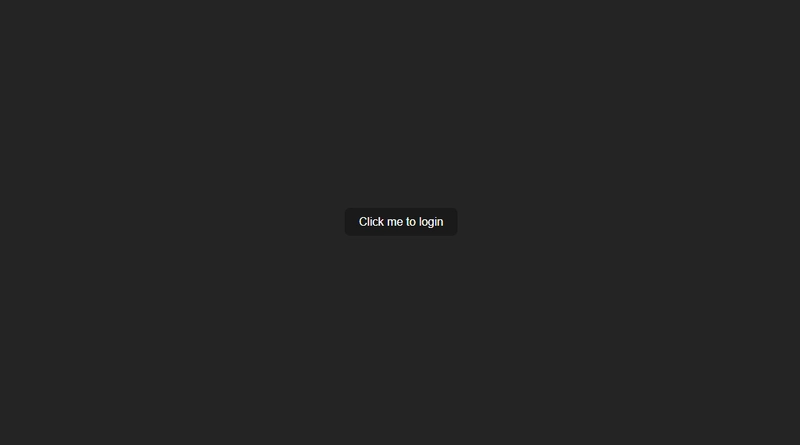
Click on this button, and you will be redirected to a page containing the login form with the authentication options you had built earlier.
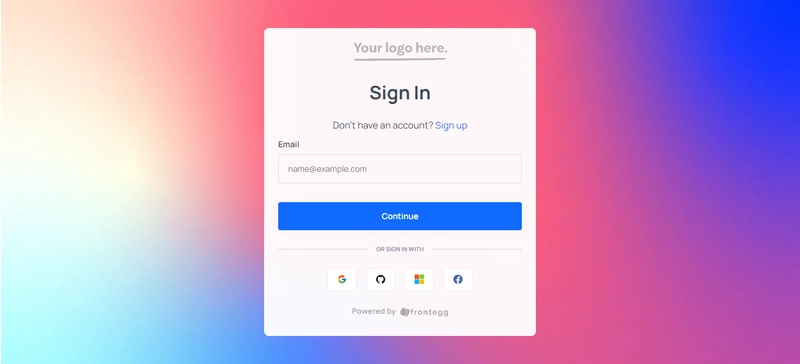
Now let us test the authentication by clicking on the link to sign up.
After you sign up, you should be automatically redirected back to your app.
Now, click on the button again to log into the application. You should see the screen below in your application.
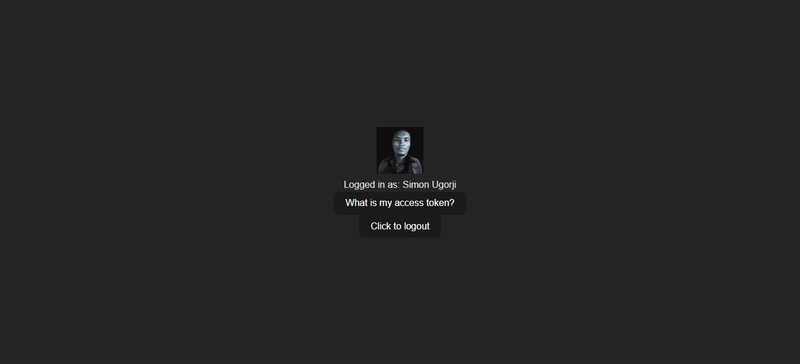
We have successfully implemented authentication in our react app!
Let us take things a bit further, shall we?
ADDING AN ADMIN PORTAL
The admin portal enables a user to add more information to his profile. This is more like a user updating their profile in your application.
In the app.js or App.jsx file, import the admin portal module into the project.
import { AdminPortal } from '@frontegg/react'
Now, let us add a button that will open the admin portal:
const handleClick = () => {
  AdminPortal.show();
};

<button onClick={handleClick}>Settings</button>
If you reload your browser and click on the settings button, you should see a similar screen.
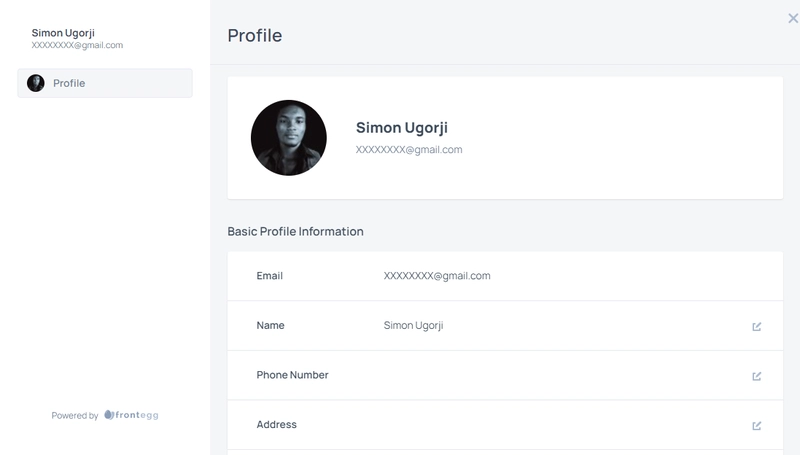
This will enable users in your application to update their profiles.
HOW TO LOCATE USER DATA IN FRONTEGG
Now, let's see where you can locate the profiles of people that have signed up on your application and assign roles to them.
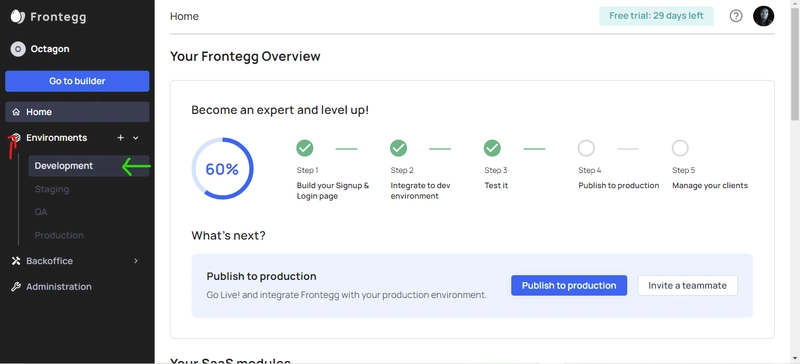
Go to 'Homepage' on your Frontegg portal by clicking the egg icon on the top left of your dashboard.
On the sidebar, click on the 'Environments' dropdown menu and then click on 'Development'. This will switch you to a development environment since we have not yet published our app.
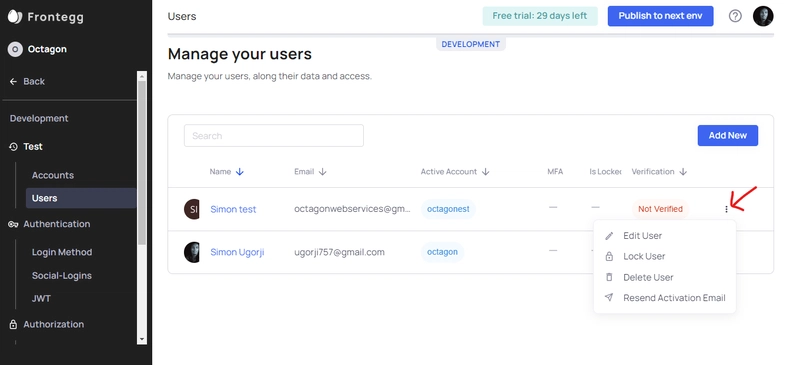
On the development environment, click on 'Users' in the sidebar.
This will take you to a page where you can manage the users of your application.
On this page, you will see all your application users, including those who have verified their accounts. You can also perform actions like editing a user's data, locking a user, deleting a user, and resending an activation email.
Now, let us set up roles for the users of our application.
HOW TO SET UP ROLES
In the sidebar, click on 'Roles' and a new page will be revealed. On this page, you will see the roles already created and a button to create a new role.
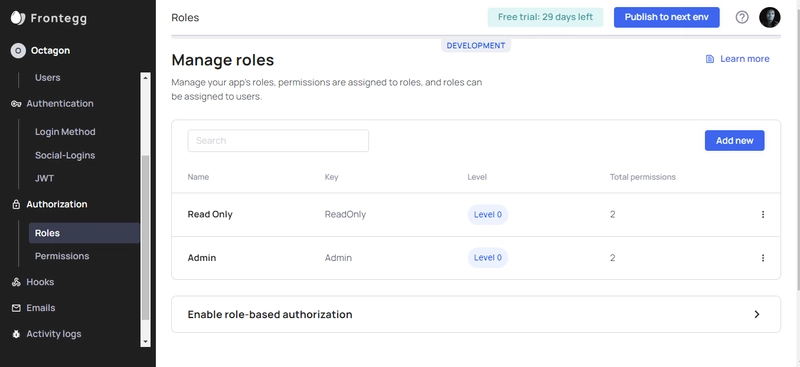
Click on the add new button and provide some information about the new role.
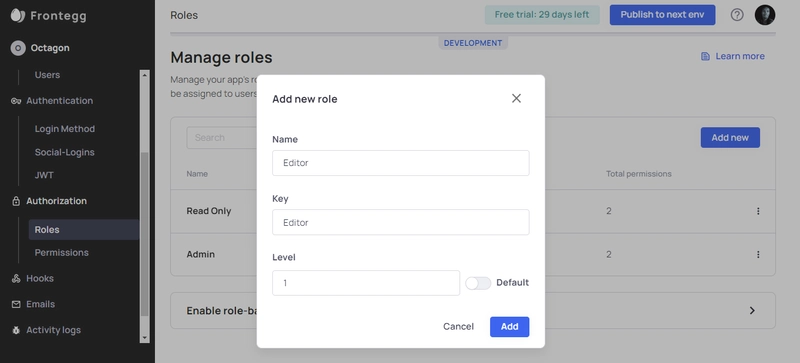
If you need help setting up roles, check the Frontegg documentation.
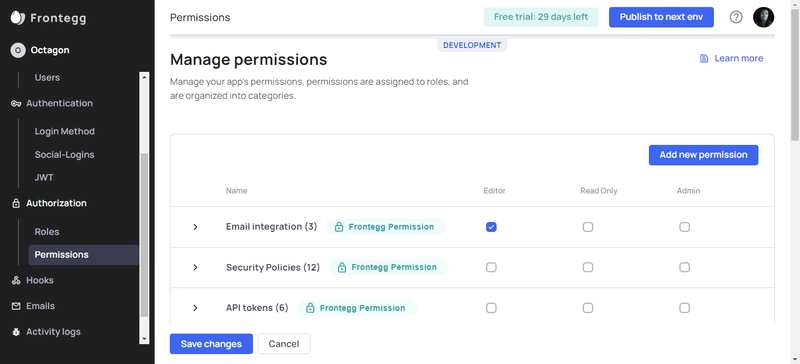
After creating a role, you need to add permissions to the role you created.
On the sidebar, click on 'Permissions' and select the permissions that are to be applied to the role. When you are done, click on the save changes button to save your changes.
Now that we have created roles and assigned permissions to them, let us assign these roles to our application users.
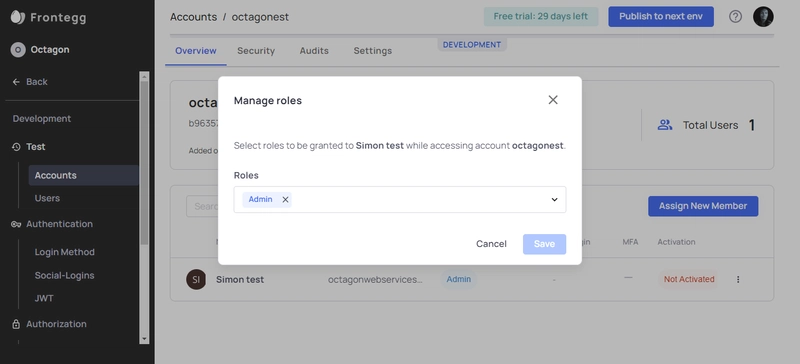
HOW TO ASSIGN ROLES TO USERS
On the sidebar of your Frontegg portal, click on 'Accounts'. On this page, you will see the list of organizations registered in your application.
Now, click on the organization you wish to manage and you will see the users attached to that organization. Click on the secondary menu of a particular user and you should be able to assign or remove the roles of that user.
We have successfully integrated authentication and strategically set up roles in our application with the help of Frontegg.
CONCLUSION
Today, we discussed authentication, the need to implement strong authentication in our application, and the various authentication methods.
I also showed you how to use Frontegg for implementing strong authentication and setting up user roles and permissions in your web application. I hope this article has helped you dip your toes in the authentication pool.
Thank you for reading.
Image Credit: Onur Binay On Unsplash

Top comments (0)