
The software development ecosystem is in a constant state of movement. This is especially true when it comes to building websites and other applications. Not only is the technology that you are using changing, but so are the requirements and acceptance criteria. This is where technologies like headless architecture can help with continuous integration and continuous delivery (CI/CD).
In this article, we will be going over website test automation. Specifically, we will be talking about UI automation testing using Puppeteer and Browserless. There are other libraries that you can use for website test automation alongside Browserless (i.e. Playwright), but for the sake of this article, we will be using Puppeteer. If you want more info on other browser automation tools check out this other article on the Browserless blog. Browserless and Puppeteer integrate seamlessly within your project and allow you to stay on top of testing as well as changing requirements. We'll go through what both tools are, and do some simple examples.
Headless Browser Testing
First, let's explain what headless browser testing is. Headless browser testing allows for automated control of a webpage without any graphical user interface (GUI). This allows a tester/user/QA/developer to do automated testing on a web application without having to manually test functionality on browsers that we visually see on our monitors. Imagine having a robot test your application for you! That's pretty much what headless browser testing is only often times it's a simple script. Headless browser testing speeds up the testing process while also providing quick feedback during development.
Puppeteer and Browserless
So, you may be thinking how do Puppeteer and Browserless fit into this equation?
Puppeteer provides a great high-level API to control Chrome (both headless and non-headless). Puppeteer is maintained by the Chrome DevTools team. Most things you can do manually in the browser can be accomplished using Puppeteer. This lets us easily perform actions to test our UI's functionality. Puppeteer also allows us to generate screenshots and PDFs of the pages while performing actions on the application for testing.
Puppeteer alone is a great tool to use for website test automation. However, Browserless can take your website test automation to the next level. Let's say you want to run tests in your production environment, but you don't want to add Puppeteer as an extra dependency. This is where Browserless comes to the rescue. With Browserless there is no need to install extra packages or dependencies, and it's compatible with Puppeteer. All you need to do is plug and play. This takes a huge load off your application. You can run your tests with Puppeteer in your dev environments, and meanwhile, run Browserless in your prod environments without having to worry about the extra baggage.
Setup
Before we get to the examples let's set up our environments. Luckily, there aren't many dependencies we need to install. There is only one ... Puppeteer.
npm i puppeteer
Once you have run that command you are good to go!
The great part about the other tool we're using, Browserless, is that there's not any setup involved other than creating an account. Let's go to www.browserless.io and create an account. Once you get your account set up you will be directed to your Browserless dashboard.
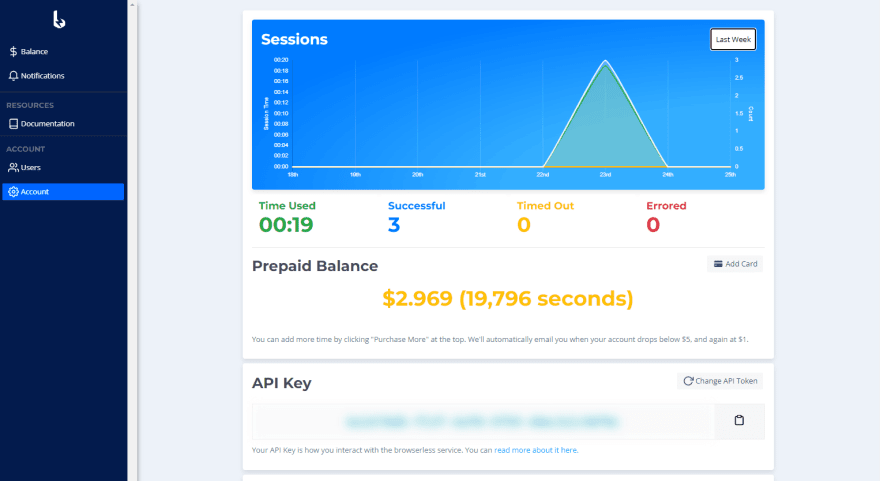
Here you can find your session usage chart, prepaid balance, API key, and all of the other account goodies. Keep your API key handy as we will use that for our examples.
I should also mention, Browserless provides a great online debugger tool that lets you test out your scripts to see how they work. If you don't want to go through the hassle of setting up your local machine, this is a great option to use.
Example 1:
In this example, we are going to test the functionality of a cool website created by Tim Holman (@twholman) and Tobias van Schneider (@vanschneider) called "The Passive Aggressive Password Machine". Their website asks you to enter a password, and it will tell you how good your password is. This test is going to be super simple. We are going to test the functionality of the website by using Puppeteer to type a password in the input area. We will then take a screenshot to verify the website gave the user feedback. Taking a screenshot is the simplest form of validation. If you wanted to make this test even more robust, you could programmatically check to make sure the website was giving updated feedback on the password that was entered.
See the code for example 1 below. Notice the commented section on line 5. This is where you would add in your Browserless API token to run in your Browserless environment.
const puppeteer = require("puppeteer");

const scrape = async () => {
    const browser = await puppeteer.launch({headless: false});
    // const browser = await puppeteer.connect({ browserWSEndpoint: 'wss://chrome.browserless.io?token=[ADD BROWSERLESS API TOKEN HERE]' })

    const page = await browser.newPage();

    await page.goto('https://trypap.com/');

    await page.setViewport({ width: 1920, height: 1080 });

    await page.type('input[placeholder="Please Enter a Password"]', 'BrowserlessIsCool1234');

    await page.waitForTimeout(2000);

    await page.screenshot({ path: "screenshot.png", fullPage: true });

    await browser.close();
};
scrape();
Once you have this script on your local machine, run node [title of your script] in your terminal and you should get a screenshot outputted into the root of your directory.
Here is what it looks like:
Congrats! You've officially done a simple UI test.
Example 2:
In this example, I want to show off the /stats API that Browserless provides to us. The /stats API is powered by Google's Lighthouse project and gives you metrics about performance, accessibility, size, and much more. As mentioned in the documentation, the /stats API is pretty simple to use. To gather this data, send a POST request to https://chrome.browserless.io/stats with a simple JSON payload containing a valid URL. This will output a large amount of data, about 370kb. You can narrow down what gets outputted by adding a config object with specific categories you want to see. This is similar to how you would use the Lighthouse node API. For our example, we will only be checking the performance category.
We are going to run a curl command to receive the output, but if you wanted to run this in JavaScript you could accomplish the same thing with the fetch API. For this example we'll run the Lighthouse tests on the Passive Aggressive Password Machine website we used in the first example. Below is the curl command.
curl -X POST \
  https://chrome.browserless.io/stats?token=[ADD BROWSERLESS API TOKEN HERE] \
  -H 'Cache-Control: no-cache' \
  -H 'Content-Type: application/json' \
  -d '
{
  "url": "https://trypap.com/",
    "config": {
        "extends": "lighthouse:default",
        "settings": {
            "onlyCategories": ["performance"]
        }
    }
}'
This should return a JSON object with the Lighthouse performance score. At the time of writing this, trypap.com received a 0.9 performance score (on a scale from 0-1). Pretty good!

I hope this article helped open up a whole new world of website test automation for you. As always, make sure to check out the Browserless blog and Browserless YouTube channel for more exciting web browser automation content! Happy coding!❤️

Top comments (0)