I bought a house on October 9, 2020. This house has a garage door, and like any normal person of course I had to automate it.
One of the first things I did when I moved into my house was research some automation. I initially bought a half dozen ESP8266 devices and tried to figure out what I could do with them. I found Home Assistant and set that up on my server computer, along with ZoneMinder for security cameras.
NodeMCU ESP8266 module
I knew I would need some sort of relay (domain purchased from is gone) and reed switches to trigger the door and sense its position, so I purchased some from the internet. But my friend Paul said all I needed was a MOSFET so I bought one of those too. I tried to figure out how to trigger the door with a mosfet, but I was never able to. I won't document those failures.
Magnetic Reed Switch
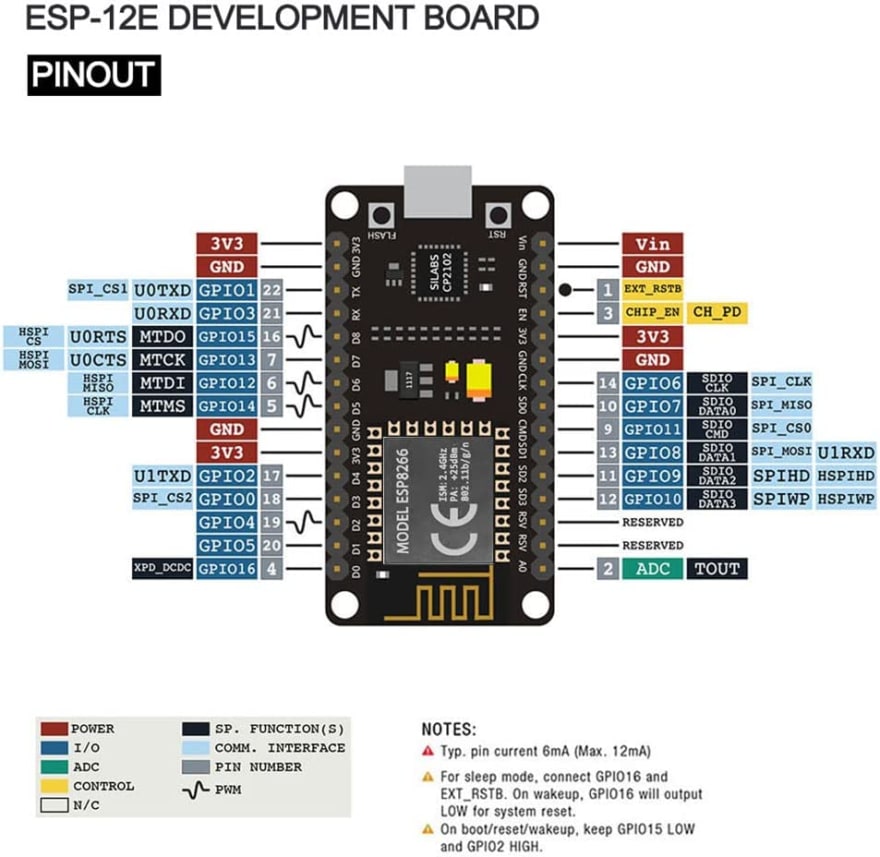
Home Assistant has a plugin called ESPHome where you can write yaml files to configure an esp8266 module. This then builds a binary which you need to flash onto the esp8266 at least once via usb. From then on you can then on you can upload from a web form and drop the bin file in manually, or just press the UPLOAD button from ESPHome. I set my relay up on pin 19/D1 for the digital pin, and 16/GND,10/3v3 for the power. The Reed switch I tossed on 15/D7 and 11/GND but that could have been anywhere. See Schematic below. It still doesn't have an enclosure.
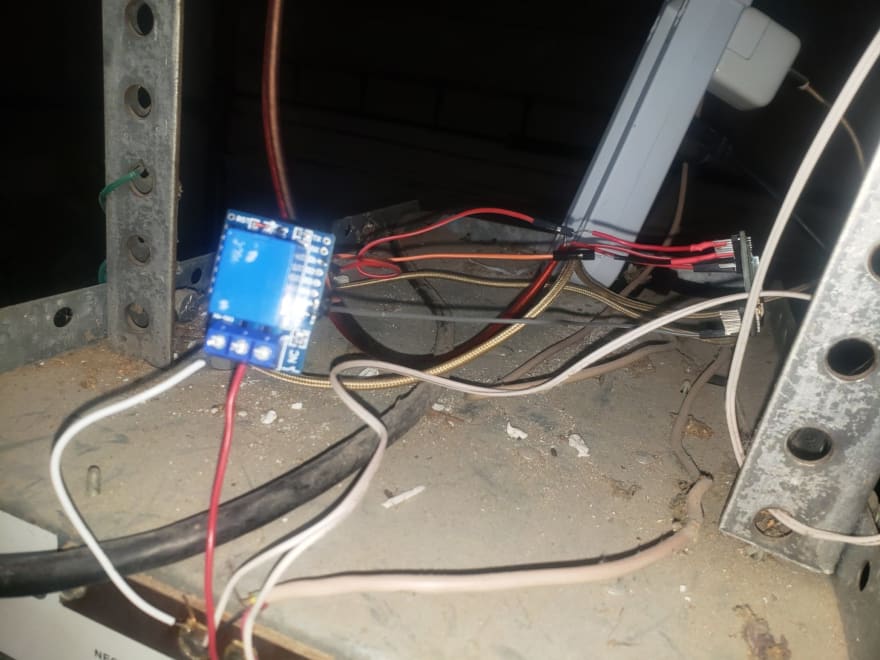
Relay in blue, and wires going to the NodeMCU
Schematic
With the relay triggering, I still had one problem - I'd trigger the door and it wouldn't do anything! Something else was a problem. The wiring for the garage door terminates in four screws, two of which are the door trigger. I tried poking it with a multimeter and having someone push the door button on the wall, but I was never successful that way, as any contact between the two poles would just open the door anyway.
After some unsuccessful thinking, I figured it was time to purchase an oscilloscope. I've always wanted one, in fact I bought an old Heathkit one once, but never got it working as I would have had to replace all the capacitors, and the insides is all perfboard - A NIGHTMARE.
I found this USB Logic Analyzer and Oscilloscope on amazon and figure I'd try it out. It came while my father was in town, so he was pretty interested in seeing it work as well. Of course I'm very fond of open source software so I downloaded PulseView and found out that the LHT00SU1 is a fx2lafw driver device. The interface to connect is really simple, you just look for your driver, and Scan for any usb devices that are using that driver and they show up to choose from.
I plugged the 1ACH and GND cables in and hooked them on the +/- wires where they attach to the door motor. Once you have a device connected, you then click Run on the top left, and trigger what ever mechanism (my garage door button) and see what happens.
I was very pleasantly surprised when I saw some movement on the A0 line!
Pulses of about 180ms and 140ms
I added some markers to figure out what I needed to imitate in ESPHome, and saw that it's about 150ms high with a 225ms low, then another 150ms high and then low again.
This looks like this in yaml:
switch:- platform: gpiopin: D1id: relay- platform: templatename: "Garage Remote"icon: "mdi:gate"turn\_on\_action:- switch.turn\_on: relay- delay: 150ms- switch.turn\_off: relay- delay: 225ms- switch.turn\_on: relay- delay: 150ms- switch.turn\_off: relay
I'm pretty sure I jumped and screamed with excitement when it opened!
Once the door was opening and closing, I was able to add more yaml to set another binary sensor to show whether it was open or closed (from the reed sensor):
binary\_sensor:- platform: gpiopin:number: D7inverted: truemode: INPUT\_PULLUPname: "Garage Door Closed"
All together this is shown on my Home Assistant Lovelace dashboard using two cards, one that shows a closed door, and one with an open door (both actual pictures of the door!) with a button to open it. Once it opens or closes the other card switches into place, Home Assistant at least at the time didn't have good conditional cards like I wanted.
type: conditionalconditions:- entity: binary\_sensor.garage\_door\_closedstate: 'on'card:type: picture-glancetitle: Garage (Closed)image: 'https://tyrel.dev/house/garage\_door.jpeg'entities:- entity: switch.garage\_remotehold\_action:action: none
Closed door state and button
Happy with the state of my Garage Door opening button, I can now yell at my phone to open the garage door (it's a "secure" switch so it requires the phone to to be open before OK Google will trigger the door).
There's a couple more pictures in my Instagram post about it.
I know I could have bought a device to do this myself, but this is fully mine, my code, and my experiment with learning how to automate things at home, I gained way more out of this project than I did if I just bought a MyQ or what ever is popular these days.
Bill of Materials
Notes
This is no longer in service, as I replaced the door and have a Chamberlain MyQ system now. Less fun, but at least it's serviceable.


Top comments (0)