
It happened! I've been waiting for the moment I needed to send a fax since Twilio launched the Programmable Fax API back in 2017 and this week it finally happened! I won't go into detail about what I needed to send, but it's safe to say the medical profession could consider their communication choices for the future.
I could have sent the fax by uploading a PDF to Twilio Assets and using the API explorer, but that wouldn't have been as fun as over-engineering an entire application to send and track the fax to make sure it arrived and be prepared for any future fax situations.
In this post I'll share how to build an application for sending and tracking faxes, but if you have faxes to send and want to jump straight into using it, you can find all the source code on GitHub.
Weapons of choice
When a fax is sent it is more similar to making a phone call than sending a message. For this reason it can fail the same way as a phone call, for example if it receives a busy tone. So, when building this app I wanted it to be simple enough to hack together quickly, but powerful enough to support sending and receiving status updates for faxes.
I decided on Ruby, with Sinatra. To get started with this you'll need:
- Ruby installed, I recommend the latest version, 2.6.5
- Bundler for installing dependencies
- ngrok so we can expose webhook endpoints in style
- A Twilio account with a fax capable number
That ought to be enough to get this app built, so let's get started.
The application shell
Let's get the application set up and make sure it's working before we implement the actual sending of faxes. Create a new directory to work in and change into that directory on the command line.
mkdir fax_app
cd fax_app
Initialise a new application by calling:
bundle init
Add the gems we will use to build this application:
- Sinatra, a simple web framework
- The twilio-ruby gem to interact with the Twilio Fax API
- shotgun so that the server reloads as we make changes
- Envyable to manage environment variables in the application
bundle add sinatra twilio-ruby shotgun envyable
Create the application structure:
mkdir views public config files
touch app.rb config.ru views/layout.erb views/index.erb public/style.css config/env.yml
config/env.yml will hold our application config. Open it up and add the following:
TWILIO_ACCOUNT_SID:
TWILIO_AUTH_TOKEN:
FROM_NUMBER:
URL_BASE:
Fill in the Account SID and Auth Token from your Twilio console. For the from number, add a Fax capable number from your Twilio account. We'll fill in the URL_BASE later.
config.ru is the file that will start up our application. We'll need to require the application dependencies, load environment variables from config/env.yml, load the app and then run it. Add the following code to do all of that:
require 'bundler'
Bundler.require

Envyable.load('./config/env.yml')

require './app.rb'
run FaxApp
To make sure things are working so far, we'll build a "Hello World!" endpoint as the starting point for our app. Open app.rb and add the following:
require 'sinatra/base'

class FaxApp < Sinatra::Base
  get '/' do
    "Hello World!"
  end
end
This creates an app that returns the text "Hello World!" in response to loading the root path. Run the application with:
bundle exec shotgun config.ru -p 3000
Open up localhost:3000, it should say "Hello World!" if so, then we're on the right track.

Next up, let's build the interface for the app.
Building the interface
In Sinatra the default is to render views with ERB, embedded Ruby. By default Sinatra looks for a layout in views/layout.erb. We've already created that file, let's add the following HTML structure:
<!DOCTYPE html>
<html lang="en">
<head>
  <meta charset="UTF-8">
  <meta name="viewport" content="width=device-width, initial-scale=1.0">
  <meta http-equiv="X-UA-Compatible" content="ie=edge">
  <link rel="stylesheet" href="/style.css">
  <title>FaxApp</title>
</head>
<body>
  <header>
    <h1>FaxApp</h1>
  </header>
  <main>
    <%= yield %>
  </main>
  <footer>
    <p>Built with 📠 by <a href="https://twitter.com/philnash">philnash</a></p>
  </footer>
</body>
</html>
The important part here is the <%= yield %> right in the middle. This is where individual view template will be inserted.
Let's add some style so that the app will look nice too. Open up public/style.css and copy in the CSS available in this file on GitHub.
Open views/index.erb. Now we need to build a form that will collect the number we are going to send the fax to and a PDF file that the Twilio API will turn into the fax. Add the following into views/index.erb:
<h2>Send a new Fax</h2>

<form method="POST" action="/faxes" enctype="multipart/form-data">
  <div>
    <label for="number">Fax number</label>
    <input type="tel" id="number" name="number" required />
  </div>
  <div>
    <label for="file">PDF file</label>
    <input type="file" id="file" name="file" required accept="application/pdf" />
  </div>
  <div>
    <button type="submit">Send</button>
  </div>
</form>
In this form we've set the method to POST and the enctype to multipart/form-data so that we can use it to upload a file to the server. We've set the action to /faxes which is an endpoint we will build soon. We've also used a bit of HTML form validation to make sure the values we enter are correct, both input fields are required, the fax number field is of type tel and the file input only accepts PDF files.
Open up app.rb again. We now want to change our "Hello World!" endpoint to render views/index.erb instead. We do that with the erb helper method.
class FaxApp < Sinatra::Base
  get '/' do
    erb :index
  end
end
If the app is still running, check it out again at localhost:3000. It should look like this:

That's the interface complete, now let's build the back-end and actually send some faxes!
Sending the fax
As we mentioned, we need to create the /faxes endpoint. It needs to do a few things:
- Respond to POST requests
- Store the PDF file we are uploading
- Make the request to the Twilio Fax API to create a fax
- Finally redirect back to the home page
To respond to POST requests, we use the Sinatra post method. In app.rb add this to the application class:
  post '/faxes' do

  end
We can get the file and the other parameters submitted to the endpoint using the params hash.
  post '/faxes' do
    filename = params[:file][:filename]
    file = params[:file][:tempfile]
    to = params[:number]
  end
If we have a file that has been uploaded, we'll write it into the files directory within the app:
  post '/faxes' do
    filename = params[:file][:filename]
    file = params[:file][:tempfile]
    to = params[:number]

    if file
      File.open("./files/#{filename}", 'wb') do |f|
        f.write(file.read)
      end
    end
  end
Next we'll create a Twilio API client, authorize it with our credentials and make the API call to send the Fax. We'll use the FROM_NUMBER we set in config/env.yml as the from number for the fax, the to number comes from the form parameters and we need to send a media_url which points to the fax.
When Twilio connects to the fax machine we are sending to, it makes a webhook request to retrieve the PDF file that we want to send as a fax. So we need to provide a URL to that PDF file. We haven't defined a way to serve the uploaded file yet, but that's next on our to do list. For now, use the following as the media_url: media_url: "#{ENV["URL_BASE"]}/faxes/files/#{ERB::Util.url_encode(filename)}". Finish up the endpoint with a redirect back to the root path.
post '/faxes' do
filename = params[:file][:filename]
file = params[:file][:tempfile]
to = params[:number]
if file
File.open("./files/#{filename}", 'wb') do |f|
f.write(file.read)
end
client = Twilio::REST::Client.new(ENV['TWILIO_ACCOUNT_SID'], ENV['TWILIO_AUTH_TOKEN'])
client.fax.faxes.create(
from: ENV['FROM_NUMBER'],
to: to,
media_url: "#{ENV["URL_BASE"]}/faxes/files/#{ERB::Util.url_encode(filename)}"
)
end
redirect '/'
end
```
Now, we need to build the `/faxes/files/:filename` endpoint to return the uploaded file. It is good practice to [protect this webhook endpoint to make sure it only responds to requests that originate from Twilio](https://www.twilio.com/docs/usage/webhooks/webhooks-security#validating-signatures-from-twilio). We can do this with [the rack middleware supplied by the twilio-ruby gem that checks the signature in the header from Twilio](https://www.twilio.com/blog/2014/09/securing-your-ruby-webhooks-with-rack-middleware.html).
Sinatra gives us a really easy way to send a file, the `send_file` method. So let's create a get endpoint to return the file. We'll pass the filename as the final part of the path (the path will look like `/faxes/files/nameOfFile.pdf`) so we can read it as a parameter by defining it in the route with a colon. Then we'll use the filename to find the file on the server and return it with `send_file`.
```ruby
get '/faxes/files/:filename' do
send_file "./files/#{params[:filename]}"
end
```
To protect this endpoint, add the `Rack::TwilioWebhookAuthentication` middleware. We pass two arguments to the middleware, your Twilio auth token so that it can sign and compare requests and a regular expression for a path that it will work on. Add this line to the top of the class.
```ruby
use Rack::TwilioWebhookAuthentication, ENV['TWILIO_AUTH_TOKEN'], /\/faxes\/files\/.*\z/
```
## Receiving status callbacks
We're ready to send a fax. But since this fax is important I wanted to know that it was delivered as well. Like with [calls](https://www.twilio.com/docs/voice/make-calls#monitor-outbound-call-events) and [messages](https://www.twilio.com/docs/sms/send-messages#monitor-the-status-of-your-message), we can register to receive a [`statusCallback` webhook](https://www.twilio.com/docs/fax/api/fax-resource#fax-status-callback) to track our fax.
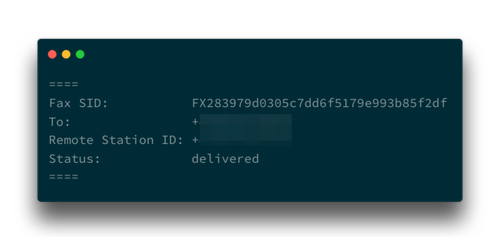
This application doesn't use a database or any other store, so logging the status will do for now. Create one more post endpoint to receive the statusCallback webhook and log the parameters that are important, making sure to return a 200 status and empty response body:
```ruby
post '/faxes/status' do
puts "===="
puts "Fax SID: #{params["FaxSid"]}"
puts "To: #{params["To"]}"
puts "Remote Station ID: #{params["RemoteStationId"]}" if params["RemoteStationId"]
puts "Status: #{params["FaxStatus"]}"
if params["ErrorCode"]
puts "Error: #{params["ErrorCode"]}"
puts params["ErrorMessage"]
end
puts "===="
200
end
```
We need to add this endpoint as the `status_callback` URL in the request to send the fax too.
```ruby
client.fax.faxes.create(
from: ENV['FROM_NUMBER'],
to: to,
media_url: "#{ENV["URL_BASE"]}/faxes/files/#{filename}",
status_callback: "#{ENV["URL_BASE"]}/faxes/status"
)
```
Now we're ready to send and track our fax!
## Tunnelling with ngrok
In order to open up our webhook endpoints to the Internet so that Twilio can reach them, we'll use [ngrok](https://ngrok.com/). We've been running the application on port 3000 locally, so start ngrok tunnelling HTTP traffic through to port 3000 with the following command:
```ruby
ngrok http 3000
```
Once ngrok shows you your tunnel URL, grab it and add it as the `URL_BASE` in your `config/env.yml` file. It should look like this:
```yaml
URL_BASE: 'https://YOUR_NGROK_SUBDOMAIN.ngrok.io'
```
Restart the application, or start it again with:
```bash
bundle exec shotgun config.ru -p 3000
```
## Send the fax
If you don't have anyone with a fax to test this out on, you can always use another Twilio number, but if you're like me you have your fax number and PDF to hand waiting to go. Open up [localhost:3000](http://localhost:3000), enter the fax number and choose your PDF file. Click send and watch the logs as Twilio requests the file, then a few minutes later ([we estimate a fax takes 30-60 seconds to send per page](https://support.twilio.com/hc/en-us/articles/360007629653-How-Does-Twilio-Programmable-Fax-Pricing-Work-)) check to see the status logs.
## Party like it's 1979
In this blog post you learned that certain industries still require faxes. And, if you're ever in a position where you need to send a fax, you can do so with the Twilio API and this Ruby project.
We've seen how to use Sinatra to upload files and the twilio-ruby library to send a fax. The entire application is available [to clone from GitHub here](https://github.com/philnash/twilio-fax-ruby-sinatra).
If you wanted to extend this, you could add a database and store the faxes, along with their status updates. For a similar idea, you can see how to [track emails in Rails with SendGrid](https://www.twilio.com/blog/track-email-status-ruby-on-rails-sendgrid). You could also look into storing the fax media in a static file store like [AWS's S3](https://aws.amazon.com/s3/) or [Google Cloud's Filestore](https://cloud.google.com/filestore/) and streaming it to Twilio.
Did you ever get asked to send a fax? What did you do? Share your fax stories with me in the comments below or on Twitter at [@philnash](https://twitter.com/philnash).

Top comments (2)
While exploring Twilio’s Fax API integration using Sinatra and Ruby, it’s clear how important structured, automated workflows are in modern development. From scheduling fax transmissions to handling delivery callbacks, efficiency is key. That same mindset carries over into personal health management, where an iphone fasting tracker app can bring similar structure. By automating fasting schedules, sending reminders, and tracking progress, these apps mirror the logic developers value: clear inputs, smart tracking, and clean output.
The Dev.to article demonstrates how to send and track faxes using the Twilio Fax API with Sinatra and Ruby, showcasing the power of integrating modern fax technology into applications. For developers and businesses looking for reliable solutions, choosing from the best fax services is crucial to ensure smooth, secure communication. Websites like comfax.com/reviews/best-online-fax... provide detailed comparisons and reviews of top online fax providers, helping users select the most efficient and cost-effective options. Leveraging these services simplifies faxing in the digital age, blending traditional communication with cutting-edge technology.